
Table of Contents >> Show >> Hide
- Before You Propagate: Set Yourself Up for Success
- Method 1: Separate a Nursery Clump (The Gentle Split)
- Method 2: Divide a Mature Areca Palm (The Confident Cut)
- Method 3: Grow Areca Palm From Seed (The Patience Project)
- Aftercare Starter Pack: Light, Water, Humidity, and Soil
- Troubleshooting: What Your Palm Is Trying to Tell You
- FAQ
- of Real-World Experience (So You Don’t Learn the Hard Way)
- Conclusion
Areca palm (Dypsis lutescens) is the houseplant equivalent of a friendly golden retriever: upbeat, a little dramatic when thirsty, and always
ready to fill a room with good vibes. If you’ve been eyeing your palm thinking, “One of you is not enough,” congratulationsyou’re about to start
your very own tiny tropical cloning program. (Don’t worry, it’s legal. Mostly.)
This guide breaks down three realistic, beginner-friendly ways to propagate areca palm: separating a nursery clump, dividing a mature plant,
and starting from seed. You’ll also get aftercare tips, troubleshooting, and a 500-word “things people learn the hard way” section at the end.
Before You Propagate: Set Yourself Up for Success
First, a quick name check: the common “areca palm” houseplant is usually Dypsis lutescens, also called golden cane palm,
butterfly palm, or bamboo palm. It’s a clumping palm with multiple canesgreat news, because clumping growth is what makes division possible.
Reality check: what works (and what doesn’t)
- Works: splitting clumps and separating individual canes that have their own roots; starting from seed.
- Doesn’t work: leaf cuttings or “stick a stem in water” tricks. Palms don’t propagate like pothos, and that’s okay.
Best time to propagate areca palm
Aim for spring through early summer, when the plant is actively growing and rebounds faster. You can do it other times, but you’ll be
asking your palm to run a marathon in flip-flops.
Propagation toolkit
- Clean pruning knife or serrated knife (for tougher root balls)
- Fresh potting mix that drains well
- Small to medium nursery pots with drainage holes
- Gloves (optional, but your hands will thank you)
- A shallow tray or tarp (because soil has dreams of being everywhere)
Two small “do this first” moves
- Water the plant the day before. Slightly moist roots separate with less damage and less drama.
- Plan a recovery zone. Bright, indirect light + warm temps + higher humidity for the first 2–4 weeks.
Method 1: Separate a Nursery Clump (The Gentle Split)
Many store-bought areca palms aren’t one plantthey’re a bundle of multiple young plants grown together so the pot looks instantly
lush. That means you can often “propagate” by carefully teasing that bundle into smaller groups.
When this method is perfect
- Your plant has lots of thin canes and looks like a “bouquet” coming out of the soil.
- It’s been in the same pot for 1–2 years and is ready for a refresh.
- You want more plants without slicing through a thick root brick.
Step-by-step: how to separate an areca palm clump
- Slide it out gently. Tip the pot sideways, support the base, and ease it out. Tap the pot if it’s stubborn.
- Loosen the outer roots. Shake off loose soil. If the mix is packed, rinse a bit to see where roots belong.
- Find natural “teams.” Look for small clusters (2–5 canes) that already share a root section.
- Tease, don’t yank. Use your fingers to wiggle sections apart. If roots are tightly tangled, use a clean knife to separate them with one decisive cut.
- Pot up right away. Place each new cluster in a pot only 1–2 inches wider than its root mass. Backfill with fresh mix and lightly firm the soil.
- Water to settle. Water until it drains, then let it drain fullyno soggy “spa soak” at the bottom.
Aftercare for the first 2–4 weeks
- Light: bright, indirect (avoid harsh midday sun indoors).
- Water: keep evenly moist but never waterlogged. If the top inch feels dry, it’s usually time.
- Humidity: higher is better. Group plants, use a pebble tray, or run a humidifier nearby.
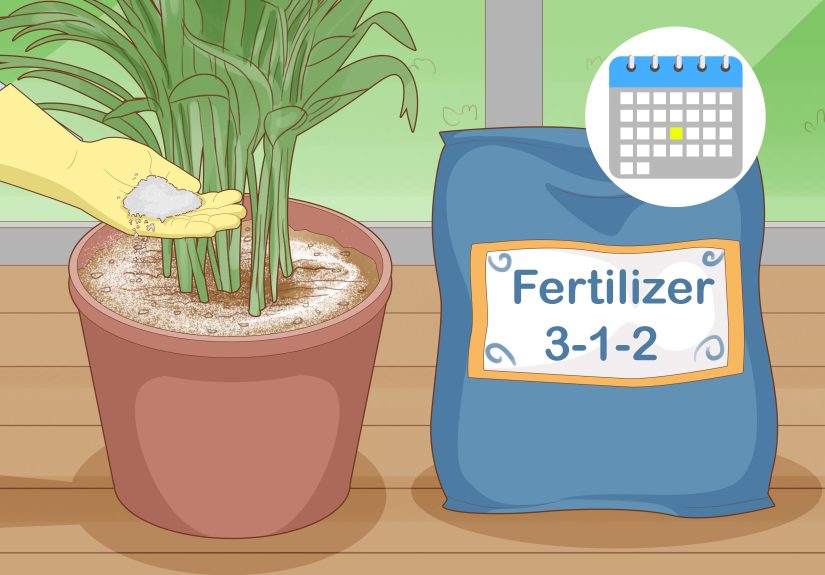
- Fertilizer: wait about 4–6 weeks. Fresh roots prefer calm, not a chemical pep rally.
Success sign: you’ll see new spear-like growth emerging from the center of canes within several weeks to a couple of months, depending
on season and indoor conditions.
Method 2: Divide a Mature Areca Palm (The Confident Cut)
If your areca palm has thick roots, heavier canes, and the pot feels like it’s filled with braided rope, you’re looking at a mature clump. This is where
division becomes “real propagation”and yes, it can be done at home.
What makes a good division?
- Each division should have multiple healthy canes (think: at least 3–5 for a fuller look).
- Each division must have its own root mass. Leaves without roots are just fancy green confetti.
- The parent plant should be healthyno active root rot, no severe pest problems.
Step-by-step: dividing an established areca palm
- Water the day before. This reduces root breakage and makes separation easier.
- Remove the plant and inspect. Once out of the pot, brush or rinse soil away so you can see natural separations.
- Choose your cut lines. Look for “valleys” between cane groups where roots are less dense.
- Make a clean cut. Use a sharp knife to slice through the root ball. For very dense roots, a serrated knife can help. One firm cut beats twenty nervous ones.
- Trim only what’s necessary. Remove obviously dead, mushy, or broken roots. Avoid heavy root pruning.
- Repot each section. Use fresh, well-draining mix. Keep the crown (where stems meet soil) at the same depth as beforeno burying the base.
- Water in and stabilize. Water thoroughly, then let it drain. If a division wobbles, stake it loosely for a week or two.
Post-division “don’t panic” notes
Areca palms can sulk after being divided. A little leaf tip browning or a few older fronds yellowing is common. What you don’t want is ongoing
collapse, sour-smelling soil, or constant wetnessthose point to overwatering or damaged roots that can’t breathe.
Make it easier on your palm
- Keep temps warm (many indoor arecas dislike chilling below about 60°F).
- Skip fertilizer for 4–6 weeks.
- Hold off on aggressive pruning. Let the plant keep as much photosynthetic “fuel” as it can.
Method 3: Grow Areca Palm From Seed (The Patience Project)
If division is a “same plant, new pots” move, seed starting is the full origin story. It’s slower, but it’s satisfyingand it’s the main way palms are
produced commercially. The catch: you need viable, fresh seed, and indoor arecas rarely produce seed unless grown outdoors in warm climates.
Seed basics (what to expect)
- Time: germination can take weeks to months; some seeds take longer depending on warmth and freshness.
- Warmth matters: consistent bottom heat dramatically improves germination for tropical palms.
- Freshness matters: areca-type palm seeds can lose viability if stored too cold.
Step-by-step: how to germinate areca palm seeds
- Start with clean seed. If you harvested it, remove fruit flesh completely (pulp can encourage rot).
- Soak the seeds. Soak in room-temperature water for 24–48 hours, changing the water daily if possible.
- Prep a light medium. Use a seed-starting mix that drains well (for example: a blend of peat or coco coir + perlite/sand). It should be moist, not soggy.
- Plant shallowly. Press seeds into the surface and cover lightlythink “tucked in,” not buried in a bunker.
- Heat + humidity. Use a heat mat if you can and keep the medium consistently warm. Covering the pot with a humidity dome or a loose plastic bag helps (add a few air holes).
- Bright, indirect light. No blazing sun. You’re growing roots, not baking cookies.
- Be boringly consistent. Keep moisture steady. Letting seeds dry out mid-process is the fastest route to disappointment.
When to transplant seedlings
Once seedlings have a couple of roots and a small leaf (or two), move them to individual pots. Keep them warm, slightly humid, and in bright indirect
light while they establish. Seedlings grow slowly at firstpalms are playing the long game.
Pro tip: don’t refrigerate tropical palm seeds
People store lots of garden seeds in cool places. Tropical palm seeds are not always fans of that plan. If you buy areca palm seeds, follow the seller’s
storage guidance and prioritize planting sooner rather than later.
Aftercare Starter Pack: Light, Water, Humidity, and Soil
Propagation success isn’t just about the splitit’s about what happens afterward. New divisions have fewer functional roots at first, so your job is to
reduce stress while encouraging steady growth.
Light
Indoors, areca palms do best in bright, indirect light. Too little light slows recovery; too much direct sun can scorch fronds. Think “near a
bright window,” not “pressed against the glass at noon.”
Water
Keep the soil evenly moist but not soggy. Overwatering is the #1 way new divisions fail because damaged roots can’t handle constant wetness.
Water thoroughly, let excess drain, then wait until the top inch begins to dry before watering again.
Humidity
Higher humidity helps reduce leaf tip browning and transplant stress. If your home is dry, a humidifier near the plant is the “easy button.” Grouping
plants also creates a small humidity pocket.
Potting mix that makes areca palms happy
Use a well-draining indoor potting mix and lighten it with perlite or pine bark fines if it holds too much water. You want moisture
retention plus air flowthink “moist chocolate cake,” not “mud pie.”
Fertilizer timing
Wait 4–6 weeks after dividing before fertilizing. When you do feed, start light. Too much fertilizer too soon can stress recovering roots.
Troubleshooting: What Your Palm Is Trying to Tell You
Yellowing fronds after propagation
- Normal (sometimes): older fronds may yellow as the plant reallocates energy.
- Not great: widespread yellowing + soggy soil can mean overwatering or root stress.
Brown tips
- Often caused by low humidity, inconsistent watering, or mineral-heavy water. Increase humidity and keep watering steady.
No new growth for weeks
- Common after division, especially in winter or low light. Improve light and warmth, and be patient.
Mushy stems or sour soil smell
- This can signal rot. Let soil dry slightly between waterings, ensure drainage, and remove severely rotted material if necessary.
Pests suddenly show up
Stress can make palms more appealing to pests like spider mites and scale. Inspect new divisions weekly. If you spot trouble, isolate the plant and treat
early (a simple shower rinse can help knock down mites).
FAQ
Can you propagate areca palm in water?
Not in the way people do with vine houseplants. Areca palms aren’t reliable “water-rooting” candidates. If you’re dividing, pot divisions in a well-draining
mix and use moisture + humidity for support.
Can I propagate areca palm from cuttings?
Nonot leaf cuttings or random stem sections. The dependable home methods are division/separation and seed.
How many canes should each new plant have?
For a full-looking plant, aim for at least 3–5 canes per pot. If you’re okay with a slimmer look (or you’re playing the long game),
smaller groups can work toojust expect a slower “lush” payoff.
Is areca palm safe around pets?
Areca palm is widely listed as non-toxic to cats and dogs. Still, discourage chewingpets can get mild stomach upset from any plant material,
and your palm did not sign up to be salad.
of Real-World Experience (So You Don’t Learn the Hard Way)
Here’s the part most propagation guides skip: areca palm propagation is less about “perfect technique” and more about managing the plant’s emotional
range afterward. If you’ve ever separated a clump and then stared at it for days like it’s a patient in recovery, you’re not alone.
The biggest surprise for most growers is how store-bought arecas are often multiple plants pretending to be one. The first time you slide
that root ball out, it can feel like you’ve discovered a secret meeting of canes down there. When you gently tease them apart, some roots will snap
it’s practically unavoidable. The goal isn’t “zero breakage.” The goal is “each new plant still has enough roots to drink water without hyperventilating.”
Another real-world lesson: smaller divisions don’t fail because they’re smallthey fail because we treat them like big plants. A tiny
division with limited roots can’t handle the same watering schedule as a mature palm. People often overwater to “help,” and the plant responds by
quietly rotting. The better move is steady moisture with plenty of air in the mix. If your soil stays wet for days, it’s not “hydrated,” it’s trapped.
Add perlite next time, choose a smaller pot, and let gravity do its job.
Light is another sneaky factor. After division, it’s tempting to hide your plant in a cozy corner like a wounded Victorian poet. But arecas recover
faster with bright, indirect light. Not blazing sun, but enough brightness that you could comfortably read a book nearby. If the room feels
dim to you, it’s dim to your palm, too.
If you want a “secret weapon,” it’s humidity. New divisions lose water through leaves faster than they can replace it until roots rebuild. That’s why
a humidifier, plant grouping, or even a loose clear bag (with holes) for a short time can make the difference between “crispy tips” and “steady rebound.”
Just don’t seal it airtightstagnant air is an invitation for fungus to RSVP.
And finally: resist the urge to overcorrect. When a divided areca drops an older frond or two, it doesn’t mean you failed. It means the plant is
reallocating resources, like someone canceling plans so they can finally clean the garage. Keep conditions stable, avoid fertilizing too soon, and give
it time. Most propagation wins aren’t dramaticthey’re quiet. One day you notice a new spear emerging, and suddenly you’re standing there like a proud
plant parent whispering, “Look at you go.”
Conclusion
If you remember nothing else, remember this: areca palm propagation is mostly root management. Separate or divide only where each new plant
keeps a solid root base, then give it warm temps, bright indirect light, steady moisture, and higher humidity while it reestablishes.
Whether you choose the gentle nursery split, the confident mature division, or the slow-and-steady seed route, you’ll end up with more palmsand a
stronger sense that you could probably survive a jungle-themed reality show.


