
Table of Contents >> Show >> Hide
- Why Mini Catapults Are Such a Great DIY STEM Project
- Safety First: Keep It Soft, Keep It Smart
- Way #1: The Classic Craft-Stick Mini Catapult
- Way #2: The Plastic Spoon and Cardboard Tube Catapult
- Way #3: The Desk Catapult Made from Office Supplies
- How to Make Your Mini Catapult Launch Better
- Mini Catapult Challenges to Try
- Which Mini Catapult Design Is Best?
- Hands-On Experiences and Lessons Learned from Making Mini Catapults
- Conclusion
- SEO Tags
If you have ever looked at a rubber band, a popsicle stick, and a bottle cap and thought, “Yes, I can absolutely turn this into tiny medieval chaos,” welcome home. A mini catapult is one of those rare DIY projects that checks every box at once: cheap, quick, fun, slightly ridiculous, and secretly educational. Better yet, it is a hands-on way to explore simple machines, energy, force, motion, and accuracy without needing a garage full of tools or a degree in engineering.
In this guide, you will learn three ways to make a mini catapult using everyday supplies. Each design has its own personality. One is the classic classroom favorite, one is a super-simple spoon launcher, and one turns desk supplies into a surprisingly clever little machine. Along the way, we will also cover safety, troubleshooting, launch tips, and the real-world lessons you pick up when you actually build and test these tiny contraptions.
Before we start, one important note: keep this project firmly in the fun-and-STEM category. Use only soft, lightweight items like pom-poms, cotton balls, mini marshmallows, or crumpled paper. In other words, think “science fair,” not “siege warfare.”
Why Mini Catapults Are Such a Great DIY STEM Project
A mini catapult may look like a toy, but it is also a compact physics lesson wearing a craft disguise. When you pull back the launching arm, you store energy in a bent stick, stretched rubber band, spoon, or springy clip. When you let go, that stored energy turns into motion. The arm swings forward, the object leaves the launcher, and gravity takes over.
That simple sequence lets you explore a surprising number of ideas: lever action, potential and kinetic energy, projectile motion, and design testing. Even better, a mini catapult rewards curiosity. Change the launch angle, adjust the tension, swap the projectile, or move the fulcrum, and the results change right away. It is basically instant feedback for anyone who likes building, tweaking, and saying, “Okay, but what happens if I do this?”
Safety First: Keep It Soft, Keep It Smart
Mini catapults are most fun when they stay harmless. Follow a few common-sense rules and your project stays in the sweet spot between entertaining and sensible.
- Launch only soft items such as pom-poms, cotton balls, mini marshmallows, or paper balls.
- Do not aim at people, pets, windows, lamps, or anything else that would make an awful sound if hit.
- Use a clear table or floor area so you can measure results without stepping on your “ammo.”
- If you are using scissors, strong glue, or hot glue, get adult supervision.
- Test gently at first. Tiny launcher, tiny pullback, tiny drama.
Way #1: The Classic Craft-Stick Mini Catapult
This is the most recognizable mini catapult design and for good reason. It is easy to build, easy to adjust, and excellent for testing distance and accuracy. If you want the version that screams “school STEM activity,” this is it.
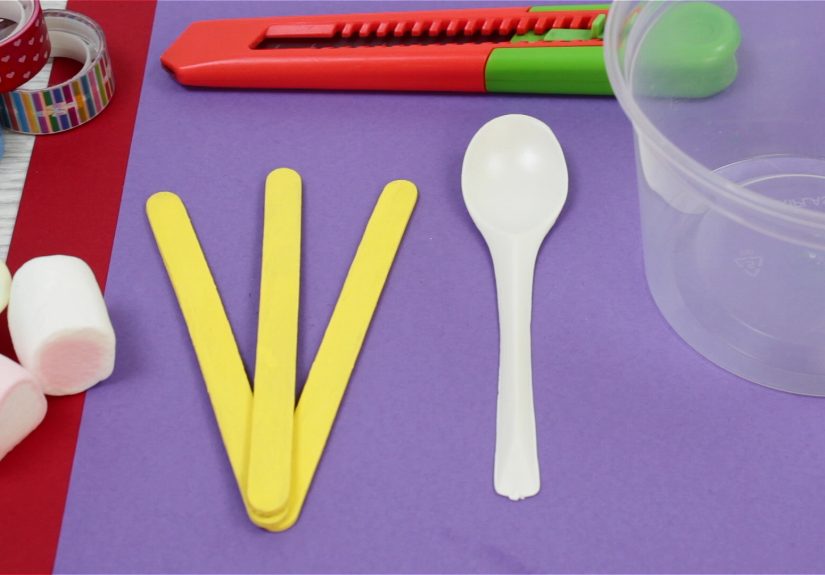
What You Need
- 8 to 10 jumbo craft sticks or popsicle sticks
- 3 to 5 rubber bands
- 1 bottle cap or plastic spoon
- Tape, sticky dots, or glue
- Soft projectiles like pom-poms or mini marshmallows
How to Build It
- Stack 6 to 8 craft sticks on top of each other and wrap a rubber band tightly around each end. This becomes your base.
- Take one more craft stick and slide it through the stack near one end so it wedges between the sticks. This creates lift and tension.
- Place another stick on top of the stack and connect the top stick to the bottom launching stick with a rubber band at one end. You should now have a little lever arm that can flex up and down.
- Attach a bottle cap or the bowl of a spoon to the free end of the top stick. That is your launch cup.
- Set your mini catapult on a flat surface, load a soft projectile, press down gently, and release.
Why This Design Works
The stacked sticks create a raised support, while the top stick acts like a lever arm. When you push the arm down, the materials bend and store elastic potential energy. Once released, that energy becomes kinetic energy, sending the projectile upward and forward. It is a small build, but the physics is doing real work.
Why You Might Love It
This version is excellent for repeat testing. It usually sits well on a table, launches consistently, and gives you room to experiment with different bottle caps, projectiles, and pullback distances. It is also the easiest one to turn into a data project. Measure ten launches, calculate an average, and suddenly your craft table has a tiny engineering lab vibe.
Common Problems
If your catapult barely launches anything, your rubber bands may be too loose or your stick stack may be too flat. If the arm twists sideways, the bottle cap or spoon may be attached off-center. If the launcher flips over, your base is too light or the pullback is too aggressive. Small fixes matter here.
Way #2: The Plastic Spoon and Cardboard Tube Catapult
This design is wonderfully simple. It uses a plastic spoon as the launching arm and a cardboard tube as the anchor. It is quick to assemble, easy for beginners, and ideal when you want a mini catapult without doing much stick stacking or rubber-band wrangling.
What You Need
- 1 plastic spoon
- 1 sturdy cardboard tube or rolled cardboard
- 2 to 4 rubber bands
- Tape if needed
- Soft projectiles like pom-poms or paper balls
How to Build It
- Place the handle of the spoon against the side of the cardboard tube.
- Wrap rubber bands tightly around the spoon handle and the tube until the spoon feels secure.
- Leave the bowl of the spoon sticking out like a launching arm.
- If the spoon slips, add a little tape for extra grip.
- Hold the tube firmly with one hand, place a soft projectile in the spoon, pull back, and release.
Why This Design Works
The spoon bends slightly and the rubber bands help hold the structure under tension. When released, the spoon snaps back toward its resting position, transferring stored energy into the projectile. This version is beautifully straightforward. There is not much mystery in the build, which makes it great for younger makers or anyone who wants quick results.
Why You Might Love It
The spoon-and-tube catapult is fast. It takes only a few materials, can be rebuilt in minutes, and makes it easy to change launch angle by adjusting how you hold it. It is also handy for simple target games. Set up cups, draw a landing zone with tape, and suddenly you have turned your kitchen table into a tiny carnival midway.
Common Problems
If the spoon rotates or slides, use tighter rubber bands or a thicker tube. If the launch feels weak, the spoon may be too flimsy. If accuracy is all over the place, make sure you are holding the tube the same way every time. Consistency matters more than people think.
Way #3: The Desk Catapult Made from Office Supplies
If you like DIY projects that look like they escaped from a supply closet with big ambitions, this one is for you. A jumbo binder clip, a pencil, a rubber band, and a bottle cap can become a clever little desk catapult that launches pom-poms with surprising style.
What You Need
- 1 jumbo binder clip
- 2 rubber bands
- 1 pencil
- 1 bottle cap
- Tape
- Optional sticky foam or glue
- Pom-poms or other very soft projectiles
How to Build It
- Open one arm of the binder clip.
- Wrap a rubber band around the middle of the binder clip so it is snug.
- Switch the clip arms so one is raised and one is lowered.
- Loop a second rubber band around the lowered arm and pull it through itself to secure it.
- Thread the other end of that rubber band through the raised arm and slip the pencil into the loop so the rubber band holds the pencil in place.
- Tape the pencil to the arm for stability.
- Attach the bottle cap to the free end of the pencil.
- Place a pom-pom in the cap, hold the binder clip down, pull the pencil back slightly, and release.
Why This Design Works
The binder clip and rubber band create tension, while the pencil acts as the launch arm. When you pull back and let go, the stored tension releases quickly, pushing the arm forward. It is a compact design that feels a little more mechanical than the spoon version and a little more inventive than the craft-stick version.
Why You Might Love It
This version is fantastic for small spaces and quick contests. It is also a fun reminder that engineering often starts with whatever is already on hand. A binder clip is not exactly born dreaming of becoming a mini catapult, but here we are, making office supplies live their best lives.
Common Problems
If the pencil shifts, add more tape. If the launch cap tilts, reattach it so the cup faces straight ahead. If the whole launcher skids across the table, hold the base down with one hand during launch. This design is compact, but it likes a steady hand.
How to Make Your Mini Catapult Launch Better
Once your mini catapult works, the real fun begins. Small design changes can produce dramatically different results. Here are the biggest variables to test:
1. Pullback Distance
Usually, pulling the arm back farther stores more energy. But go too far and your launcher may twist, tip, or lose control. There is a sweet spot between “nice launch” and “why is the pom-pom on the bookshelf?”
2. Projectile Weight
Light projectiles often fly higher, while slightly heavier ones may travel farther if the launcher can handle them. A mini marshmallow, pom-pom, and paper ball may all behave differently even when launched from the same build.
3. Launch Cup Shape
A bottle cap can hold a projectile more securely than a flat spoon, but a spoon may release more smoothly depending on the item. Try both if you can.
4. Base Stability
If the launcher moves during release, some energy is wasted. A stable base usually means a better launch and more reliable results.
5. Angle
A lower angle may help distance, while a higher angle may boost height. This is where measuring tape, masking tape targets, and nerdy joy all come together.
Mini Catapult Challenges to Try
Building is only half the fun. Testing is where the project really earns its keep. Try one of these:
- Distance challenge: Measure which design launches the farthest.
- Accuracy challenge: Aim at cups, taped boxes, or paper targets.
- Consistency challenge: Launch the same object five times and compare results.
- Design challenge: Change only one variable at a time and record what happens.
- Height challenge: See which catapult sends a pom-pom highest, not farthest.
These mini experiments make the project more than a one-and-done craft. They turn it into a repeatable activity with real analysis, which is exactly why mini catapults show up so often in STEM settings.
Which Mini Catapult Design Is Best?
That depends on what you want.
If you want the most classic and teachable design, go with the craft-stick mini catapult. If you want the fastest and easiest build, choose the spoon-and-tube catapult. If you want something compact, clever, and a little different, the desk catapult is the winner.
Personally, the best approach is not choosing one. It is building all three, testing them side by side, and pretending your dining table is a very serious research facility. Bonus points if you give each launcher a dramatic name.
Hands-On Experiences and Lessons Learned from Making Mini Catapults
One of the most interesting things about making a mini catapult is how quickly theory collides with reality. On paper, the project seems almost suspiciously simple: gather a few supplies, strap them together, launch a pom-pom, smile like a genius. In practice, the experience is a little messier and a lot more entertaining. The first launch is often weak, crooked, or hilariously off-target. That is not failure. That is the project doing what good hands-on projects do best: forcing you to notice details.
For example, many people assume more tension automatically means a better launch. Then they pull the arm back too far, the whole structure twists sideways, and the projectile flops two inches away like it has lost the will to travel. That moment is oddly valuable. You start realizing that power is only useful when the design is balanced. A stable base, a centered launch cup, and a repeatable pullback usually matter more than brute force.
Another common experience is discovering how much projectile choice changes everything. A pom-pom can float, a mini marshmallow can arc more smoothly, and a crumpled paper ball may surprise you by flying farther than expected. Even when the launcher stays the same, the results do not. That is where the activity stops feeling like a craft and starts feeling like an experiment. You begin asking better questions. Which shape is more aerodynamic? Which material is too light? Which one gives the most consistent flight path?
There is also something unexpectedly fun about the redesign stage. Very few mini catapults are perfect on the first try, and that is part of the charm. You tighten a rubber band, move a pencil, switch from spoon to bottle cap, or change the angle of the arm by a fraction, and suddenly the launcher behaves like a completely different machine. Those small improvements feel satisfying because you can see the result instantly. It is engineering in miniature, with less pressure and more marshmallows.
Mini catapults also tend to turn a quiet project into a social one. The moment one launcher works, somebody wants a target game. Somebody else wants to compare designs. Somebody inevitably announces that their catapult is “clearly the superior model,” which is how you know the competition phase has begun. That playful energy is part of why this topic works so well for families, classrooms, clubs, and rainy afternoons at home. It creates a natural mix of making, testing, laughing, and learning.
Maybe the biggest takeaway, though, is this: a mini catapult teaches patience without being boring about it. You adjust, test, measure, and try again. You learn that tiny changes can have big effects. You learn that consistency is a skill. And you learn that sometimes the smartest thing you can do is stop yanking the launcher like you are starting a lawn mower and instead make one careful design tweak. Not bad for a project built from supplies that probably live in a junk drawer.
Conclusion
If you want an easy, affordable, and genuinely fun build, learning how to make a mini catapult is a fantastic place to start. The craft-stick version is a classic, the spoon version is quick and beginner-friendly, and the desk version proves that even office supplies are secretly waiting for a second career in STEM. Best of all, these projects are not just about launching soft objects across a table. They are about experimenting, improving, measuring, and seeing science work right in front of you.
So gather your supplies, clear a launch zone, and start testing. Just remember: when a tiny pom-pom sails perfectly into a paper cup from six feet away, you are allowed to celebrate like you have achieved something historic. Because honestly, you kind of have.


