
Table of Contents >> Show >> Hide
- Quick Jump
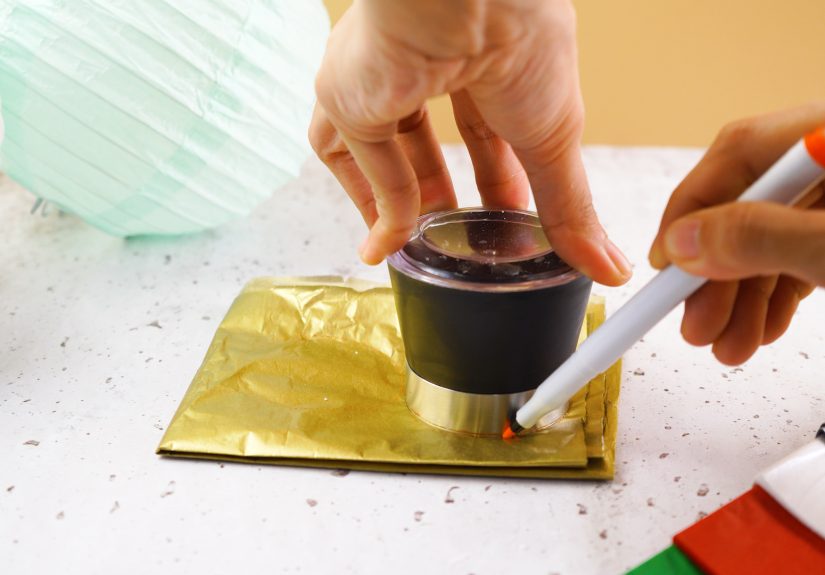
- Before You Start: The 60-Second Setup That Saves Your Sanity
- Way 1: Classic Hanging Paper Lantern (The Cut-and-Roll Crowd-Pleaser)
- Way 2: Paper Bag Luminary Lantern (Walkway Magic, Minimal Effort)
- Way 3: Stained-Glass Wax Paper Lantern (Crayon Magic, Seriously Pretty)
- Decorating & Styling Ideas (Because Plain Is Fine, but Fun Is Better)
- Common Mistakes (and Easy Fixes)
- FAQ
- Conclusion
- Real-Life Paper Lantern Experiences: What I’d Tell a Friend Before They Start
- SEO Tags
Want instant cozy vibes without buying yet another “aesthetic” thing that will live in a closet after two weekends? Learn how to make a paper lantern three different wayseach one beginner-friendly, budget-friendly, and delightfully forgiving if your scissors skills are… aspirational.
Paper lanterns are the ultimate DIY lantern craft: they work for backyard parties, Lunar New Year decorations, Halloween mood lighting, holiday walkways, and “I just want my living room to feel less like a spreadsheet.” Grab some paper, a light source (LED, please), and let’s get glowing.
Before You Start: The 60-Second Setup That Saves Your Sanity
A great DIY paper lantern isn’t about fancy toolsit’s about choosing the right paper and the right “light.” Here’s the quick cheat sheet:
- Paper choice: Construction paper is sturdy and easy to cut. Copy paper bends easily but can flop. Cardstock holds shape best (and also has the attitude of “I’m not tearing today”).
- Light choice: Use LED tea lights or battery fairy lights. Paper and real flame are a chaotic duo.
- Cutting tip: If kids are helping, slide cardboard inside bags/paper pockets before cutting so you don’t accidentally create “two-sided modern art.”
- Hanging tip: If it hangs, reinforce where the handle attaches with a small strip of tape before stapling.
Way 1: Classic Hanging Paper Lantern (The Cut-and-Roll Crowd-Pleaser)
This is the classic “how to make a paper lantern” most of us remember from schoolfold, cut slits, roll into a cylinder, add a handle, and suddenly you’re a décor wizard.
Materials
- 1 sheet construction paper (8.5″ x 11″ works great)
- Scissors
- Ruler + pencil (optional, but makes you look professional)
- Glue, tape, or a stapler
- Extra strip of paper for the handle
- LED tea light or mini string lights (optional)
Steps
- Fold: Fold the paper in half lengthwise (hot-dog style).
- Mark a “no-cut zone”: On the open side, draw a line about 1 inch from the edge. This keeps the top of your lantern intact.
- Cut slits: From the folded edge, cut evenly spaced slits up to (but not past) your line. Think “fringe,” but with better posture.
- Unfold and roll: Open the paper. Bring the short ends together to form a cylinder and secure with glue/tape/staples.
- Add a handle: Cut a 1-inch wide strip of paper, curve it, and attach it to the top edges.
- Optional glow: Place an LED tea light inside, or drop in a short strand of battery fairy lights.
Pro Tips
- Make it sturdier: Use cardstock or double up construction paper if you’re hanging outdoors.
- Make it fancier: Use two sheets: a shorter inner sheet as a smooth “liner,” plus a taller slit sheet for the outer look.
- Make it themed: Red-and-gold for Lunar New Year, orange-and-black for Halloween, or pastels for spring parties.
Way 2: Paper Bag Luminary Lantern (Walkway Magic, Minimal Effort)
If you’ve ever seen glowing bags lining a porch or walkway, you’ve met the paper bag luminary. It’s the easiest paper lantern DIY for big visual payoffespecially if you’re decorating for holidays, events, or “I want my driveway to look like a movie scene.”
Materials
- Paper lunch bags (white or brown)
- Sand, dirt, or small rocks (for weight)
- LED tea lights (strongly recommended)
- Hole punch (easy mode) or craft knife/scissors (art mode)
- Cardboard scrap (to protect the back when cutting)
- Optional: stencil, marker, stickers, or a second white bag to line the inside
Steps
- Plan your design: Keep it simplestars, dots, trees, hearts. Trace a stencil if freehand makes you nervous.
- Protect the inside: Slide cardboard into the bag so you only cut the front layer.
- Punch or cut: Use a hole punch for neat dots, or cut shapes carefully with scissors.
- Weight it: Add 2–3 inches of sand/rocks in the bottom so the bag stands and won’t blow away.
- Light it safely: Turn on an LED tea light and set it into the sand bed. (Real candles look romantic until they look like a fire report.)
- Line and fold (optional): For a softer glow, slip a white bag inside a brown bag. Fold the top inch inward to create a clean “rim.”
Pro Tips
- Windy night? Heavier sand, closer spacing, and tuck bags near a wall or step edge.
- Want a “designer” look? Stick to one motif (all stars, all dots) and keep spacing consistent.
- Kids involved? Let them decorate with markers and stickers, then you handle the cutting.
Way 3: Stained-Glass Wax Paper Lantern (Crayon Magic, Seriously Pretty)
This one gives “handmade stained glass” energy with materials you probably already own. The trick: melt crayon shavings between wax paper sheets, then turn that colorful panel into a lantern. It’s a top-tier DIY lantern craft for kids and adultsjust add grown-up supervision if heat is involved.
Materials
- Wax paper
- Crayons + a sharpener or peeler (to make shavings)
- Iron on low heat or a hair dryer (adult help recommended)
- Scrap paper or paper towels (to protect surfaces)
- Option A: glass jar or vase
- Option B: popsicle sticks + glue/tape (for a cube lantern)
- LED tea light
Steps (Jar Version: The Easy “Wow”)
- Make a sandwich: Lay down wax paper, sprinkle crayon shavings, then cover with a second wax paper sheet.
- Protect your iron/surface: Place scrap paper above and below the wax paper sandwich.
- Melt: Use an iron on low (or a hair dryer) until the shavings melt and fuse the wax paper sheets.
- Trim: Cut the finished sheet to fit the height of your jar and long enough to wrap inside.
- Insert: Roll and place it inside the jar like a colorful liner.
- Light it: Add an LED tea light and enjoy the glow like you totally planned this for a magazine shoot.
Steps (Popsicle Stick Cube: More Crafty, More Fun)
- Build 4 frames: Glue popsicle sticks into 4 squares and let them dry.
- Attach panels: Tape or glue wax paper “stained glass” squares onto each frame.
- Assemble: Tape the frames together edge-to-edge, fold into a cube, then tape the final seam.
- Light safely: Place an LED tea light inside (no real flame, ever).
Decorating & Styling Ideas (Because Plain Is Fine, but Fun Is Better)
- Party-ready: Make 5–10 classic hanging lanterns and string them at different heights for instant “event planner” vibes.
- Seasonal switch-ups: Autumn leaf cutouts for bags, pastel slits for spring, metallic paper accents for New Year’s.
- Texture trick: Layer tissue paper shapes on the classic lantern for a soft, dimensional look.
- Color rule that never fails: Pick 2 main colors + 1 accent. Anything else is how you end up with “confetti feelings.”
Common Mistakes (and Easy Fixes)
- Lantern collapses: Use thicker paper, add a second inner sheet, or reinforce the top rim with tape.
- Slits look uneven: Mark guide lines with a ruler firstor lean in and call it “handcrafted charm.”
- Paper bag falls over: More sand, flatter ground, and keep bags out of heavy wind lanes.
- Wax paper colors turned muddy: Use fewer shavings and leave more “clear” space for light to shine through.
FAQ
What’s the best paper for a DIY paper lantern?
Construction paper is the easiest all-around choice. If you want a sturdier lantern (especially for hanging), use cardstock or add a second inner layer.
Can I use a real candle inside a paper lantern?
It’s not recommended. Paper lanterns and open flame don’t “take risks together” in a cute rom-com waythey do it in a “call the fire department” way. LED tea lights are bright, safe, and reusable.
How do I hang paper lanterns outdoors?
Use a strong handle (double-layer strip), staple through reinforced tape, and hang from string, fishing line, or hooks. If it’s breezy, keep lanterns closer to walls or under a covered area.
How long do paper lanterns last?
Indoors, they can last for months (or years if you store them flat). Outdoors, it depends on humidity and windtreat them like party guests: they do best when sheltered.
Conclusion
Now you’ve got three reliable ways to make a paper lantern: the classic hanging cut-and-roll, the cozy paper bag luminary, and the stained-glass wax paper lantern that looks way fancier than it is. Pick one style, or mix all three for a layered glow that makes your space feel warm, festive, and just a little magicalwithout spending your whole Saturday at a craft store.
Real-Life Paper Lantern Experiences: What I’d Tell a Friend Before They Start
The first time I tried making classic hanging lanterns, I confidently folded my paper… the wrong way. I didn’t realize it until I cut the slits and opened it up to reveal what looked like a paper comb having a bad hair day. The good news? It still worked. The better news? That’s when I learned the biggest paper lantern truth: perfection is optional, glow is mandatory.
My favorite “beginner win” is the paper bag luminary. The first time I lined a walkway with them, I used about two tablespoons of sand per bag because I was being “efficient.” A light breeze rolled through, and my luminaries started drifting like they were auditioning for a slow-motion music video. Adding more sand fixed everything instantlyand made me realize that sometimes the real DIY skill is accepting gravity as your project partner.
Wax paper lanterns taught me restraint. On my earliest attempt, I sprinkled crayon shavings like I was salting fries. The melt looked exciting… for about three seconds. Then the colors blended into a brownish “mystery stew” shade. Attempt two: fewer shavings, more open space, and suddenly the lantern looked like a tiny stained-glass window. Lesson learned: light needs room to travel. (And so do crayons, apparently.)
I’ve also learned that lantern-making is oddly social. If you set out paper, scissors, and a few colors, people wander over. Kids want to cut; adults pretend they’re “just watching” and then get extremely invested in whether their star cutouts are symmetrical. Someone will inevitably suggest glitter. Someone else will wisely hide the glitter.
The most useful trick I’ve picked up is designing for the light source, not the daylight. A lantern can look plain on the table and still glow beautifully once lit. Hole punches become constellations. Slits cast striped shadows. Wax paper panels turn into soft, dreamy color. It’s like your craft has a “night mode,” and night mode is where it shines.
Finally: storage. The classic hanging lanterns can flatten if you gently press them and remove the handle, then you can restaple later. Paper bag luminaries stack easily. Wax paper panels store best flat between books or in a folder. Basically, treat them like important papersexcept these are actually fun.
If you’re on the fence, start with one lantern. Make it imperfect. Turn on an LED tea light. Watch the glow. And enjoy that tiny, satisfying moment where your room looks warmer because you made something with your hands. That’s the whole pointand it’s surprisingly addictive.


