
Table of Contents >> Show >> Hide
- Before You Start: Know What Kind of Pond You Actually Want
- Way #1: Make a Pond With a Preformed Shell
- Way #2: Make a Pond With a Flexible Liner
- Way #3: Make a Small Pond in a Box, Barrel, or Container
- Which Pond Type Should You Choose?
- Pond Plants, Pumps, and Fish: Keep the Setup Balanced
- Common Pond Mistakes to Avoid
- What Building a Pond Actually Feels Like: Real-World Experience and Lessons
- Conclusion
If your backyard has been feeling a little too dry, too flat, or too “something’s missing but I can’t quite name it,” a pond might be the answer. A good pond adds movement, reflection, sound, wildlife, and just enough drama to make the rest of the yard step up its game. Even better, you do not need a country estate, a team of landscapers, or a wallet that cries when opened.
There are several practical ways to make a pond, and the best one depends on your space, budget, patience, and tolerance for digging holes on a Saturday. In general, most homeowners land in one of three camps: the preformed shell pond crowd, the flexible liner crowd, or the small-space pond-in-a-box crowd. Each option works. Each has quirks. And each can look fantastic when planned well instead of assembled in a rush like a last-minute science fair volcano.
This guide breaks down the three best ways to make a pond, explains who each method suits, and shows you how to avoid the classic mistakes that turn “peaceful backyard water feature” into “muddy mosquito audition room.”
Before You Start: Know What Kind of Pond You Actually Want
Before you grab a shovel and develop sudden confidence, pause for a little pond honesty. Do you want a decorative water garden? A fish pond? A wildlife-friendly feature? A tiny container pond on a patio? Or are you really trying to solve drainage problems and accidentally shopping for a pond when you need a rain garden instead?
A pond is meant to hold water consistently. A rain garden, by contrast, is designed to collect runoff and let it soak into the ground over time. If your main goal is stormwater control, erosion reduction, or managing roof and driveway runoff, that is a different project. A lot of people learn this after digging a “pond” that disappears every sunny week or floods every rainy one. Nature has a wicked sense of humor.
Smart planning checklist
- Choose a site with a fairly level surface or only a minimal slope.
- Pick a spot with enough sunlight for aquatic plants, but not an all-day oven.
- Stay away from trees that drop leaves, needles, and root trouble.
- Make sure you can reach the area with water and, if needed, electricity for a pump.
- Think about safety if kids or pets use the yard.
- Check local rules, HOA restrictions, and utility locations before any excavation.
- Be realistic about maintenance. Every pond needs some.
One more important point: call 811 before you dig. Yes, even for a “small little pond.” Underground utilities do not care that your project is charming.
Way #1: Make a Pond With a Preformed Shell
A preformed shell pond is the easiest in-ground option for beginners. Think of it as pond building with training wheels, except the result can still look polished and expensive if you edge it well and plant it thoughtfully.
Why this method works
A shell liner gives you a fixed shape and depth, which removes a lot of guesswork. You do not have to calculate complex folds, stretch a floppy liner into place, or debate whether that weird side bulge is “organic design” or just bad digging. Preformed ponds are especially good for small to medium backyard ponds where you want a fast build and predictable result.
Best for
- First-time DIY pond builders
- Small backyards
- Homeowners who want a neat, controlled shape
- People who want a pond this season, not a three-month identity journey
How to build a shell pond
- Set the shell in place and mark the outline. Put the shell where you want it, then trace around it with marking paint or a hose.
- Dig wider and deeper than the shell. You usually need extra width around the sides and several extra inches below for leveling material such as sand.
- Remove rocks and roots. Anything sharp or uneven can make the shell sit badly or create pressure points.
- Level the hole carefully. This is the part people rush, and then the water line tattles forever. Use a straight board and level to check opposite sides.
- Set the shell and backfill around it. Once level, add backfill around the outside to support the shell evenly.
- Add pump, rock, and edging. Decorative stones, gravel, and plants help the pond look natural instead of like a plastic bathtub escaped into the yard.
- Fill slowly and adjust as needed. Watch how the shell settles as water goes in.
Pros
The biggest advantage is simplicity. A shell liner keeps the project manageable, especially if you are building a modest water garden with a pump, some edging stone, and a few aquatic plants. It is also easier to visualize from day one because the shape already exists.
Cons
The fixed shape is also the limitation. If your dream pond looks like a natural woodland pool or a curved stream-fed oasis, a rigid shell may feel too structured. Shells can also be awkward to transport and position, and if your site is irregular, you may spend extra time fussing to make everything sit level.
Pro tip
If you want fish, do not assume every shell pond is deep enough. Some decorative shells are better suited to plants and moving water than fish that need a more stable, deeper environment. Always match the shell depth to the living things you plan to keep.
Way #2: Make a Pond With a Flexible Liner
If the preformed shell is pond building with a map, the flexible liner is pond building with creative freedom. It is the best choice when you want a custom shape, plant shelves, curved edges, or a more natural look that feels like it belongs in the landscape.
Why this method works
A flexible liner lets you shape the pond around your yard instead of forcing your yard to accept one plastic silhouette. You can create a kidney shape, a long narrow pond, a wider basin with shallow shelves, or a pond that connects visually with a waterfall or stream. It is more customizable, more natural-looking, and more forgiving in design terms, even if the install takes a bit more care.
Best for
- Homeowners who want a custom pond shape
- Ponds with plant shelves, waterfalls, or natural rock edging
- Yards where a shell liner shape would look too stiff
- DIYers who do not mind a slightly more involved build
How to build a flexible liner pond
- Mark the layout. Use paint or a hose to create the exact pond shape.
- Dig the pond and create shelves. A shallow shelf around the edge is useful for marginal plants, while the center can be deeper for water volume, pumps, or fish.
- Angle the sides and smooth the base. Remove rocks, roots, and debris, and keep the excavation as even as possible.
- Check for level across the edges. A pond can be artistically irregular, but the water line cannot be. Water is brutally honest.
- Install underlayment if needed. This protects the liner from roots and sharp material beneath it.
- Drape the liner loosely into the hole. Do not stretch it tight. Let the liner settle naturally as water is added.
- Fill slowly. As the water rises, smooth folds, ease wrinkles into corners, and adjust the liner so it conforms to the pond shape.
- Trim and hide the edges. Leave enough liner under the edging stones, and bring the edge slightly above grade so runoff does not wash into the pond.
Why plant shelves matter
One of the smartest features in a flexible liner pond is the shallow perimeter shelf. It gives you a place for marginal plants, helps soften the visual edge, and creates a more layered look. A deeper interior zone is helpful for pumps and, if you choose to keep fish, a more stable habitat. A two-tier pond generally looks better and works better than one giant bowl-shaped hole.
Pros
You get freedom, flexibility, and a more upscale finished appearance. A liner pond can be small and simple or elaborate enough to make visitors suspicious that you suddenly hired a landscape architect.
Cons
The build takes more finesse. You need to size the liner properly, prepare the base carefully, and take your time during filling. There is also more room for rookie mistakes, such as uneven edges, exposed liner, or a shape that looked graceful on paper but turns out to resemble a deflated potato chip.
Pro tip
Install the liner on a warm day if possible. Warm liner material is easier to handle, easier to settle into the excavation, and less likely to fight you like a giant sheet of stubborn licorice.
Way #3: Make a Small Pond in a Box, Barrel, or Container
Not every pond needs excavation, pumps, and a weekend of dirt under your fingernails. If you have a patio, balcony, deck, courtyard, or just a very sensible aversion to digging, a container pond is the sleeper hit of water gardening.
Why this method works
A small pond in a box, barrel, stock tank, ceramic pot, or watertight container gives you the beauty of water, reflection, and aquatic plants without the full-scale construction project. It is compact, affordable, and ideal for small-space gardening. It also lets nervous beginners test the waters before committing to a larger pond. Yes, that pun was legally required.
Best for
- Patios, decks, and small urban yards
- Renters who need a less permanent setup
- Gardeners who want water plants without digging
- Anyone who wants a weekend project with a high charm-to-effort ratio
How to build a container pond
- Choose a watertight or lined container. Wood pond boxes can be sealed and lined, while tubs, bowls, barrels, and stock tanks can work as ready-made vessels.
- Add structure inside. Bricks, inverted pots, or shelves can raise plant containers to different heights.
- Use aquatic-safe materials only. If you seal or line the container, make sure the product is safe for aquatic life.
- Place potted aquatic plants. Use a mix of floaters, marginals, and perhaps a dwarf water lily if the container is large enough.
- Fill with water and finish the edges. River rock, pea gravel, and decorative stone give the setup a finished look.
- Put it in the right spot. Keep it near a water source, avoid heavy leaf drop, and make sure you can enjoy it from a window, chair, or dining area.
Pros
This is the easiest pond to start, the cheapest to experiment with, and the least intimidating overall. It is also perfect for people who want the look and feel of a pond without taking on a full landscape renovation. A well-designed container pond can look surprisingly upscale.
Cons
Small ponds heat up faster, lose water faster, and require more topping off in summer. They also freeze more easily in winter. In colder climates, depth matters, and tiny decorative ponds are better for plants than fish. If your dream includes koi the size of baguettes, a ceramic bowl is not the answer.
Pro tip
Container ponds work best when they look intentional, not improvised. Pick a good vessel, keep the plant palette simple, and place it where people can actually see it. Hidden beauty is lovely in theory, but in practice it mostly means you are the only one admiring your own excellent taste.
Which Pond Type Should You Choose?
Choose a preformed shell pond if you want the easiest in-ground build and a straightforward project.
Choose a flexible liner pond if you want a natural look, custom shape, or room for shelves and waterfalls.
Choose a container pond if you want a small-space water feature, minimal digging, and a budget-friendly start.
And if you are dreaming of a much larger earthen pond, that is usually a different category altogether. Bigger ponds often rely on compacted soil, clay-rich construction, or even bentonite-type sealing where native soil has excessive seepage. That work can be excellent, but it is far less casual than building a backyard water garden beside the hydrangeas.
Pond Plants, Pumps, and Fish: Keep the Setup Balanced
A pond does not stay attractive by magic. It stays attractive by balance. In practical terms, that means circulation, filtration, plant cover, and a sane number of fish if you decide to add them.
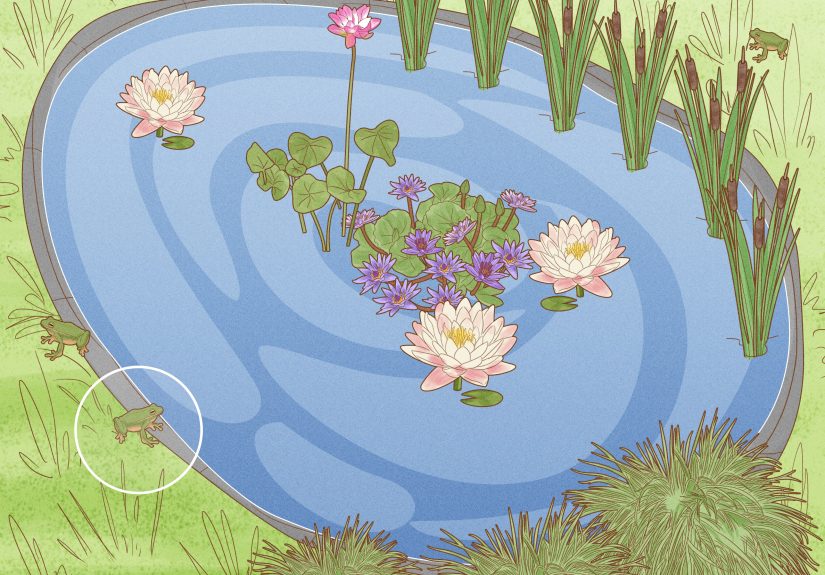
Plants
Aquatic plants are not just decoration. Water lilies provide shade and help limit algae growth. Marginal plants soften the edge and create habitat. Floating plants can help cover the surface in summer. If you want a pond that looks alive instead of merely wet, plants do a lot of the heavy lifting.
Pumps and filtration
Moving water is usually healthier and cleaner-looking than stagnant water. A pump paired with appropriate filtration helps remove debris, improve oxygen levels, and keep the pond from developing that “ancient soup” vibe. In larger backyard ponds, good circulation across the whole pond matters more than people think.
Fish
Fish are wonderful, but they raise the maintenance stakes. They need appropriate depth, stable water conditions, and reasonable stocking levels. If this is your first pond, consider starting with plants and circulation first. Then add fish once the pond is functioning well. This is less exciting than buying fish on day one, but also much less heartbreaking.
Common Pond Mistakes to Avoid
- Building directly under trees: leaves, roots, and debris will make you regret your life choices.
- Ignoring the water source: ponds need topping off, especially in hot weather.
- Skipping level checks: a crooked water line never becomes invisible. Ever.
- Going too shallow: shallow ponds heat quickly, evaporate faster, and limit plant and fish options.
- Overdoing fish too soon: more fish means more waste, more algae pressure, and more management.
- Hiding the pond in an unusable corner: if you never see it, you will not enjoy it or maintain it as well.
- Treating the pond like a one-time project: even the best pond needs routine attention through the year.
What Building a Pond Actually Feels Like: Real-World Experience and Lessons
Here is the part most how-to articles skip: making a pond changes how you use your yard. At first, it feels like a construction project. You are measuring, digging, hauling soil, adjusting levels, rinsing gravel, and wondering why landscape stone weighs approximately the same as a compact car. Then the water goes in, the first plant settles, and the whole project suddenly shifts from “outdoor labor” to “small private escape.”
For most people, the first real surprise is how much placement matters. A pond tucked where you can see it from the kitchen window or patio gets noticed every day. A pond hidden behind a shed becomes a very expensive secret. Homeowners often say they spend more time outside once a pond is built, not because the pond demands it, but because moving water naturally pulls you outdoors. It becomes the place where morning coffee tastes better, where the dog stares dramatically at dragonflies, and where guests mysteriously wander while saying, “Wow, this is nice.”
The second surprise is that pond building teaches patience in a way few other yard projects do. You can build the structure in a weekend, but the pond does not truly become itself that fast. Water clears. Plants settle in. Edging softens. Gravel stops looking freshly dumped. Frogs, birds, and beneficial insects eventually show up like they heard there was an opening night. The first month is construction. The months after that are transformation.
Another common experience is learning that “natural-looking” takes more intention than people expect. The best ponds rarely look perfect in a geometric sense. They look balanced. Stones are placed in a way that feels unforced. Plants are repeated without becoming rigid. The liner edge disappears. The pond belongs to the yard instead of looking like it was dropped in from orbit. That part usually comes from slowing down and making small adjustments, not buying fancier materials.
People also discover that maintenance feels different when the pond is designed well from the start. A poorly placed pond feels like a chore factory. A well-placed pond with decent filtration, plant cover, and accessible edges feels manageable. You skim a few leaves, top off water, trim plants now and then, and mostly enjoy it. The difference between the two experiences often comes down to early choices: location, depth, balance, and not trying to cram too much into too little water.
Finally, there is the emotional side. A pond slows a space down. It adds reflection in the literal sense, but also in the mental one. The sound of a small waterfall or bubbler can soften road noise, mask neighborhood commotion, and make a modest yard feel more complete. People who build ponds often start for the look, but end up loving the atmosphere most. The visual appeal brings you over. The calm keeps you there.
So yes, a pond can add beauty and even value to a property. But the more memorable value is everyday use. It becomes part of your routine. You check the water while carrying groceries in. You notice the lilies opening before work. You sit outside five minutes longer than planned. That is when you know the project succeeded. Not when the shovel goes away, but when the pond quietly earns a place in your life.
Conclusion
If you want the easiest in-ground route, go with a preformed shell pond. If you want the best custom look, choose a flexible liner pond. If you want beauty without a major dig, build a container pond. All three methods can create a backyard feature that feels peaceful, polished, and genuinely useful to the space.
The trick is not choosing the fanciest method. It is choosing the right one for your yard, your budget, and the amount of maintenance you will actually do once the novelty wears off and summer gets busy. Build the right pond, in the right place, with the right expectations, and you will end up with one of the few landscape projects that can be both practical and quietly magical.


