
Table of Contents >> Show >> Hide
- Why Silicone Molds Are So Popular
- Before You Start: A Few Smart Mold-Making Basics
- Method 1: Make a One-Piece Block Mold
- Method 2: Make a Two-Part Silicone Mold
- Method 3: Make a Brush-On or Putty Silicone Mold
- Common Mistakes to Avoid
- Which Silicone Mold Method Is Best?
- Hands-On Experiences and Lessons From Making Silicone Molds
- Final Thoughts
Silicone mold making looks a little intimidating at first. There are cups, stir sticks, mystery liquids labeled “Part A” and “Part B,” and at least one moment where you wonder whether you’re crafting or auditioning for a low-budget science show. The good news is that making a silicone mold is absolutely doable at home if you choose the right method for your project.
Whether you want to cast resin jewelry, duplicate a candle shape, make custom soap molds, or create a food-safe mold for chocolate or fondant, silicone is popular for a reason. It captures fine detail, bends without breaking, and releases many cast materials more easily than rigid molds. In plain English: it is the overachiever of the mold-making world.
In this guide, you’ll learn three practical ways to make a silicone mold: a one-piece block mold, a two-part mold, and a brush-on or putty mold. Each method has its own strengths, weaknesses, and ideal uses. Pick the right one, and your project gets dramatically easier. Pick the wrong one, and your mold may behave like a tiny rubber gremlin. Let’s avoid that.
Why Silicone Molds Are So Popular
A well-made silicone mold can reproduce texture, edges, lettering, and tiny design details with impressive accuracy. That makes silicone a favorite for artists, crafters, bakers, prop makers, and small-batch product creators. It also works with a wide range of casting materials, including resin, wax, soap, plaster, and some food applications when you use a certified food-safe silicone intended only for culinary use.
Another reason people love silicone mold making is flexibility. A rigid plastic mold may trap the finished piece, especially if your original has curves or undercuts. Silicone stretches and peels away, which reduces the wrestling match at demolding time. Your future self will appreciate that.
Before You Start: A Few Smart Mold-Making Basics
1. Choose the right original object
Your original object is often called the master. The cleaner and smoother it is, the cleaner your silicone mold will be. Dust, fingerprints, scratches, and little dents all tend to show up in the final mold. Silicone is loyal like that.
2. Know whether the surface is porous
Wood, plaster, unsealed clay, concrete, and some 3D-printed pieces may need sealing before silicone is applied. If the surface is porous, trapped air and bonding issues can cause trouble. Sealing first helps the silicone cure cleanly and release more easily.
3. Watch for cure inhibition
This is the phrase mold makers use for “Why is my silicone still sticky and making me sad?” Some materials can interfere with the curing of platinum silicone, including sulfur-containing clay, latex, some paints, some resins, and certain 3D-print materials. When in doubt, do a small test before pouring a full mold.
4. Use the right mold hardness
Softer silicone is usually better for deep undercuts and easy release. Firmer silicone is better when you need more stability and shape retention. If your model is delicate or highly detailed, the silicone’s flexibility matters more than most beginners expect.
5. Work clean and follow product directions
Some silicones mix 1:1 by volume, others by weight, and some industrial formulas have very specific ratios. Always follow the manufacturer’s instructions for the exact product you’re using. “Close enough” is a charming phrase in life, but not in chemistry.
Method 1: Make a One-Piece Block Mold
Best for
This is the easiest method for beginners and one of the most common ways to make a silicone mold. A one-piece block mold works best for simple shapes, flat-backed objects, and pieces that can be removed without trapping them inside the mold.
Good examples
- Pendants and charms
- Small figurines with one open side
- Candle shapes with a simple outline
- Soap embeds
- Decorative craft pieces
What you need
- Your master object
- Pourable silicone rubber
- A mold box or leak-proof container
- Mixing cups and stir sticks
- Hot glue, clay, or adhesive to secure the object
- Optional release agent or sealer, depending on the surface
How to make it
- Build or choose a mold box. Leave enough space around the object for silicone walls. Too thin, and the mold may tear. Too thick, and you waste silicone.
- Secure the master to the base. This keeps it from floating when the silicone is poured.
- Seal edges and gaps. If the box leaks, the silicone will find the leak. Silicone is excellent at discovering your optimism.
- Mix the silicone carefully. Scrape the sides and bottom of the container while mixing so you do not end up with uncured streaks.
- Pour from one corner in a slow stream. Let the silicone rise around the object instead of dumping it directly on top. This helps reduce trapped air.
- Let it cure fully. Then remove the box, flex the mold, and take out the master.
Pros
A one-piece silicone mold is simple, beginner-friendly, and excellent for capturing detail. It is a great first project if you are learning how to make a silicone mold for resin, wax, plaster, or soap.
Cons
It is not ideal for fully enclosed 3D shapes or objects with complex undercuts. If the object cannot come straight out, this method can become frustrating fast.
Method 2: Make a Two-Part Silicone Mold
Best for
A two-part silicone mold is the right choice when your object needs detail on all sides or has a shape that would get trapped in a one-piece mold. This method creates two matching halves that come together around the casting material.
Good examples
- Full figurines and statues
- Round objects
- Ornaments and sculptures
- Complex product prototypes
- Replacement parts with full 3D detail
What you need
- Your master object
- Pourable silicone rubber
- A mold box
- Sulfur-free clay for the parting line
- Mixing tools
- Registration keys or key impressions
- Release agent for silicone-to-silicone separation
How to make it
- Embed half of the object in clay. This creates the first side of the mold and defines the parting line.
- Add registration keys. These little notches or rounded impressions help the two halves line up properly later.
- Build the mold box around the setup. Seal any gaps so silicone cannot escape.
- Mix and pour the first half. Allow it to cure completely.
- Remove the clay. Leave the original object in position, clean the surface, and prepare for the second half.
- Apply release agent. This is critical so the second pour does not bond to the first half of cured silicone.
- Pour the second half. Let it cure, then separate the mold halves and remove the master.
Pros
This method gives excellent all-around detail and is one of the best ways to make a reusable silicone mold for more complex shapes. It also creates a cleaner casting setup for symmetrical or fully dimensional objects.
Cons
It takes longer, uses more materials, and requires more precision. A sloppy parting line can leave visible seams on your castings. Not the end of the world, but definitely annoying.
Method 3: Make a Brush-On or Putty Silicone Mold
Best for
This category covers two related approaches: brush-on silicone and silicone putty. Both use less material than a full block mold and are especially useful when you do not want to bury the entire object in liquid silicone.
Brush-on silicone is great for larger models or vertical surfaces. Silicone putty is fantastic for small objects, quick push molds, and simple detail work.
Good examples
- Large sculptures or textured surfaces
- Wall details and decorative trim
- Miniatures and tiny embellishments
- Jewelry shapes
- Quick custom molds for crafts
How to make a brush-on mold
- Prepare the object. Clean it and seal it if necessary.
- Mix the brush-on silicone. These formulas are thicker and made to cling to surfaces.
- Apply a detail coat first. Work the silicone into grooves and textures.
- Add more coats. Build thickness gradually so the finished mold has strength.
- Create a support shell. Many brush-on molds need a rigid outer shell, often called a mother mold, so the flexible silicone keeps its shape during casting.
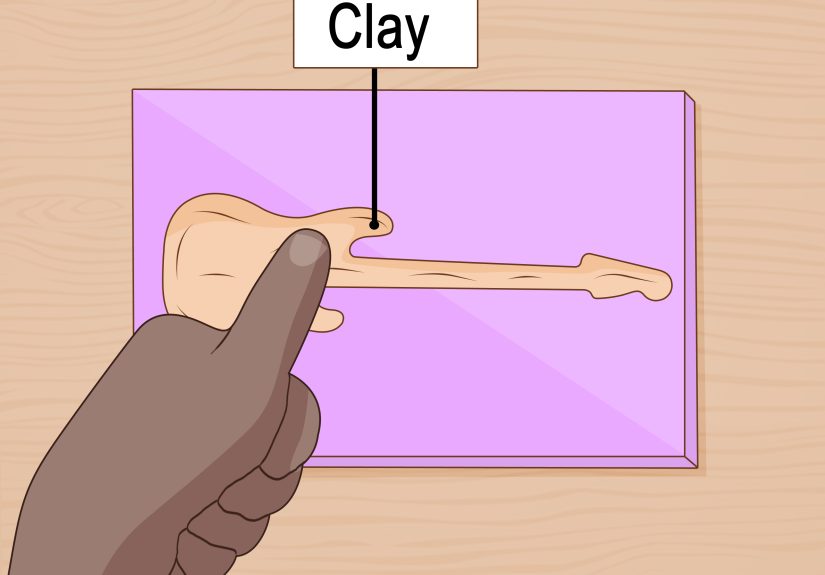
How to make a putty mold
- Measure equal parts of the putty components.
- Knead until uniform in color. Work quickly because putty usually has a short working time.
- Press the object into the putty. Or form the putty around it, depending on the shape.
- Flatten the base and let it cure.
- Remove the original and test the mold.
Pros
These methods are efficient, flexible, and often more economical than large block molds. Putty molds are especially beginner-friendly for small projects because you do not need a mold box.
Cons
Putty may miss ultra-fine detail if you rush it, and brush-on molds usually need more skill and a support shell. Still, both are excellent methods when used in the right situation.
Common Mistakes to Avoid
- Skipping a test cure: especially with unfamiliar materials or 3D-printed masters.
- Using sulfur clay with platinum silicone: this is a classic beginner mistake.
- Not sealing porous surfaces: wood, plaster, and unsealed clay can cause issues.
- Pouring too aggressively: fast pouring can trap bubbles.
- Forgetting release agent in a two-part mold: silicone can bond to silicone if you use the wrong release strategy.
- Using one mold for food and non-food materials: keep culinary molds separate and dedicated.
- Choosing the wrong method: the mold should fit the shape, not just your mood.
Which Silicone Mold Method Is Best?
If you are brand new to mold making, start with a one-piece block mold. It teaches the basics of setup, mixing, pouring, and demolding without overwhelming you.
If your object has detail on every side, choose a two-part silicone mold. It takes more effort, but it is worth it for full 3D reproduction.
If you need a fast solution for small objects or a lighter solution for larger surfaces, go with silicone putty or brush-on silicone. These methods are efficient and versatile, especially when you do not want to build a large mold box.
In other words, there is no single “best” way to make a silicone mold. The best method is the one that matches the size, shape, detail, and final use of your project.
Hands-On Experiences and Lessons From Making Silicone Molds
The most memorable thing about learning how to make a silicone mold is that success rarely comes from being fancy. It comes from being patient. Many first-time makers assume the magic is in the silicone itself, but the real secret is preparation. A clean master, a leak-proof box, the correct release method, and a calm pour do more for a project than any expensive tool ever will.
One common experience beginners talk about is the surprise of how fast some products move. Putty, especially, does not wait for anyone. You start out casually kneading it like pizza dough, and about thirty seconds later you are in a respectful sprint. That is why it helps to rehearse the move before mixing anything. Know where the object will go, where the mold will sit, and what direction you want the opening to face. Silicone is much more fun when you are not making decisions mid-panic.
Another big lesson is that mold boxes matter more than people think. A rushed container can leak from a corner you did not even notice, and once liquid silicone starts escaping, it turns into a tiny, expensive river. Many experienced makers eventually become weirdly obsessed with sealing edges because they have all paid the tuition on that mistake. The good news is that after one leak, you become the kind of person who inspects corners like a detective in a crime show.
Air bubbles are another rite of passage. People often blame the silicone brand, but bubbles usually come down to technique. Pouring in one corner in a thin stream, rather than dumping silicone directly over the object, gives the material time to rise and flow around detail. It feels slower, but it often saves the mold. For textured masters, brushing a thin first coat over the details before a full pour can also help. Think of it as introducing the silicone politely before asking it to take over the room.
Then there is the emotional roller coaster of demolding. You wait, you poke the edge, you tell yourself it is probably cured, then you wait a little longer because “probably” is not a great project plan. When the mold finally peels back cleanly and reveals crisp detail, it is deeply satisfying. It feels like pulling off a magic trick that happened to involve stir sticks and nitrile gloves.
Over time, most makers learn that different projects deserve different methods. Small charms and craft pieces are wonderfully suited to putty molds. Decorative objects with a stable flat side love a one-piece block mold. Full sculptures and complicated shapes practically beg for a two-part mold. Once you stop trying to force every object into the same process, mold making becomes less frustrating and far more creative.
Perhaps the best experience-related advice is simple: treat your first silicone mold as practice, not as a final exam. Even imperfect molds teach you something valuable about setup, material behavior, and release. And once you make one good mold, your brain immediately starts looking around the room thinking, “Interesting. I could duplicate that.” That is when you know the hobby has officially entered the building.
Final Thoughts
Learning three ways to make a silicone mold gives you a strong foundation for all kinds of projects, from resin art and candles to soap, miniatures, and custom edible designs. Start with the shape of your object, choose the method that matches it, and pay attention to the prep work. Silicone mold making rewards care, not chaos.
If you want the easiest starting point, make a one-piece block mold. If you need full detail around the entire object, build a two-part silicone mold. If you want speed, flexibility, or a way to mold larger or awkward surfaces, use brush-on silicone or mold-making putty.
Once you understand these three methods, you are no longer just following instructions. You are making informed decisions, avoiding common mistakes, and creating molds that are cleaner, stronger, and more reusable. That is when silicone mold making stops feeling mysterious and starts feeling like a superpower with mixing cups.


