
Table of Contents >> Show >> Hide
- Before You Start: Prep Like a Denim Surgeon
- Way #1: The Sandpaper Fade Method (Subtle, Vintage Distress)
- Way #2: The Slash-and-Pull Method (Classic Ripped Jeans)
- Way #3: The Raw-Hem + Fray Method (Modern, Easy, and Very Wearable)
- How to Make DIY Distressed Jeans Look Expensive
- How to Wash Distressed Jeans Without Wrecking Them
- Quick FAQ: DIY Distressed Jeans
- Conclusion
- Experience Section (500+ Words): Real-World Lessons from DIY Distressed Denim Projects
Distressed jeans are one of those fashion miracles that can look either effortlessly cool or like your pants lost a fight with a lawn mower. The difference is technique. If you’ve ever looked at a pair of ripped denim in a store and thought, “I can do that myself… and maybe keep my rent money,” you’re absolutely right.
In this guide, you’ll learn 3 ways to make distressed jeans at home: a subtle sanded fade, the classic ripped-and-threaded knee, and a raw hem that looks intentionally undone in the best possible way. We’ll also cover how to pick the right denim, where to place distressing so it flatters your body, how to avoid beginner mistakes, and how to wash distressed denim without accidentally turning your masterpiece into denim confetti.
Whether you’re customizing old jeans from your closet, upgrading thrift-store finds, or rescuing a pair with an awkward stain, this DIY process is practical, fun, and very customizable. By the end, you’ll have a pair of jeans that looks personalnot mass-producedand a skill you can reuse every season.
Before You Start: Prep Like a Denim Surgeon
1) Pick the right jeans
If you want clean-looking distress details, start with denim that has structure. Heavier cotton denim (or denim with minimal stretch) usually frays better and keeps shape longer. Super-stretch jeans can distort at ripped areas over time, especially around knees and thighs.
2) Choose your distress map
Don’t cut first and hope for the best. Put the jeans on and mark where you want distressing with tailor’s chalk or a washable pencil. Common spots:
- Front knees (most popular)
- Upper thigh (small, controlled distressing only)
- Pocket edges
- Hem and ankle area
- Back pocket corners (light abrasion)
3) Build your toolkit
For all three methods, keep these handy:
- Tailor’s chalk or fabric pencil
- Sharp fabric scissors or utility blade
- Tweezers
- Sandpaper (fine to medium grit)
- Cardboard or cutting mat (place inside jean leg)
- Lint roller (trust me)
- Optional: seam ripper, razor, measuring tape
4) Safety and setup
Work on a flat, stable surface with good light. Slide cardboard into the leg so you don’t cut through both layers. Cut slowly and check both sides before every slice. You’re styling denim, not speedrunning chaos.
Way #1: The Sandpaper Fade Method (Subtle, Vintage Distress)
This method is ideal if you want your jeans to look naturally worn instead of heavily ripped. Think “lived-in cool” instead of “my jeans survived a bear encounter.”
Best for
- First-time DIYers
- Light distressing around pockets, hems, knees
- Vintage-style fading and soft texture
How to do it
- Mark your zones: Circle or stripe the areas you want to age naturally.
- Insert cardboard: Protect the back layer of fabric.
- Rub with sandpaper: Use short, controlled strokes in one small area at a time.
- Rotate pressure: Start gently, then build intensity only where needed.
- Check every 20–30 seconds: Denim changes fast once fibers begin to thin.
- Shake and inspect: Remove dust and compare both legs for balance.
- Wash once: A single wash helps the abrasion bloom into a more natural finish.
Pro tips
- Use finer grit for subtle fading, medium grit for stronger wear marks.
- Keep movement horizontal around knees for believable wear patterns.
- Do both legs in stages to avoid one side looking dramatically older than the other.
Common mistakes to avoid
- Over-sanding one tiny spot until it becomes an accidental hole
- Ignoring symmetry entirely (unless asymmetry is your intentional aesthetic)
- Distressing only one area without supporting details elsewhere
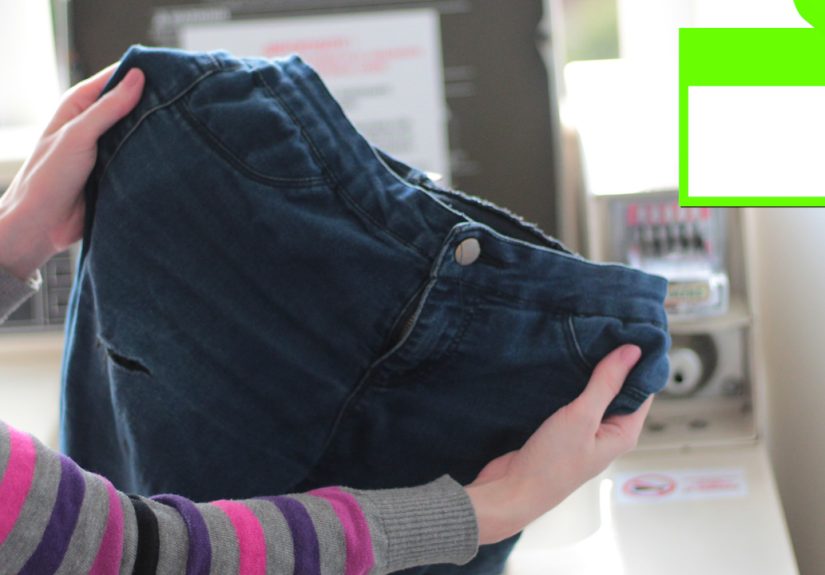
Way #2: The Slash-and-Pull Method (Classic Ripped Jeans)
This is the iconic distressed-jeans look: horizontal rips with visible white cross threads. The key is controlled cutting plus patience with tweezers.
Best for
- Knee rips
- Mid-thigh slashes
- Statement distressed denim looks
How to do it
- Try jeans on and mark placement: Mark while standing and bending your knees.
- Lay flat and insert cardboard: Keep the leg stable and protected.
- Make 2–4 horizontal cuts: Keep cuts parallel, about 0.5–1 inch apart.
- Start small: You can always enlarge, but you can’t un-cut denim.
- Use tweezers to pull vertical blue threads: Remove some of the blue fibers and leave white horizontal threads visible.
- Refine edges: Lightly rub edges with sandpaper or a seam ripper for softer fray.
- Wash and air dry: Washing naturally opens the fibers and softens the look.
Placement strategy by body area
- At knee center: Bold, casual, universally recognizable distressed look.
- Above knee: More fashion-forward, less “hole directly on joint.”
- Mid-thigh: Keep small and sparse for durability and comfort.
How to keep it from over-ripping
- Leave enough white threads intact to stabilize the opening.
- Avoid giant slashes on ultra-tight jeans (stress points expand quickly).
- Consider tiny reinforcing stitches at outer edges if you want longevity.
Styling note
If your jeans are aggressively distressed, keep the rest of your outfit cleaner: a structured blazer, fitted tee, crisp shirt, or sleek boots. Let one item be dramatic and let the others behave.
Way #3: The Raw-Hem + Fray Method (Modern, Easy, and Very Wearable)
If you want a modern, editorial look without huge rips, raw hems are your best friend. This method works especially well for jeans that are slightly too long.
Best for
- Petite-friendly length adjustments
- Straight-leg and wide-leg jeans
- Clean outfits with subtle edge
How to do it
- Wear the jeans and mark desired length: Mark both legs with shoes on.
- Measure and level the marks: Use a ruler or measuring tape for even hems.
- Cut off original hem: Cut in a straight line across each leg.
- Rough up the edge: Use sandpaper or a seam ripper to loosen fibers.
- Pull a few threads by hand: This creates natural fringe.
- Optional shape tweak: Slightly shorter front hem can elongate legs visually.
- Wash once and tumble low or air dry: Fray becomes softer and more realistic.
Optional upgrade: mini side slit
Add a tiny side slit (about 1 inch) at the outer seam before fraying. It improves movement and gives a custom-tailored vibe without requiring advanced sewing skills.
Mistakes to avoid
- Cutting too short on first try
- Skipping measurement and ending up with uneven hems
- Fraying too aggressively until the hem loses structure
How to Make DIY Distressed Jeans Look Expensive
1) Distress with intention, not randomness
Natural wear appears in logical zones: knees, hems, pockets, and seams. If you place damage in random spots, the jeans can look fake. Keep a visual rhythm between both legs.
2) Mix distress levels
Pair one bolder feature (like knee rips) with subtle abrasion at pockets or hem. Layered distress depth looks more believable than one giant cut.
3) Respect proportion
Wide-leg jeans handle larger distressed areas better. Skinny jeans usually look better with fewer, smaller openings to avoid distortion.
4) Color matters
Mid- and light-wash denim tends to reveal distress texture clearly. Very dark denim can still work, but subtle abrasion may be less visible unless you lighten or fade targeted areas.
5) Stop early
The most common DIY regret is overdoing it. Distressing continues to evolve with wear and washing, so leave room for natural aging.
How to Wash Distressed Jeans Without Wrecking Them
- Turn jeans inside out before washing.
- Use cold water and gentle cycle.
- Wash with similar fabrics; avoid rough zippers and heavy hardware items.
- Use a mesh laundry bag for heavily ripped pairs.
- Skip high heat drying when possible; air dry helps preserve shape.
- Spot-clean between wears to reduce full wash frequency.
Pro move: if a rip grows faster than expected, add a lightweight patch on the inside or do a tiny reinforcement stitch at the outer corners. You keep the style while extending the life of the jeans.
Quick FAQ: DIY Distressed Jeans
Can I distress stretch jeans?
Yes, but carefully. Stretch denim can warp around cuts over time. If possible, choose denim with less elastane for cleaner, longer-lasting distress details.
What tool makes the cleanest rip?
A sharp utility-style blade gives precise starter cuts. Scissors are useful for hems and larger openings, but they can look blunt for fine distress work.
How do I keep white threads instead of a giant hole?
Cut horizontal slits first, then remove select vertical blue threads with tweezers. Go slowly and stop often to preserve structure.
Do distressed jeans get more ripped over time?
Usually yesand that can be part of the charm. Thoughtful placement and gentle laundering help control how fast they evolve.
Conclusion
Mastering how to make distressed jeans is really about control: where you distress, how much you remove, and how you care for the result. Start with a plan, work in small stages, and let the denim do what denim does bestage beautifully.
If you want quick wins, begin with the sandpaper fade. If you want bold street-style character, try slash-and-pull rips. If you want wearable, modern edge for everyday outfits, go with the raw-hem method. Each technique gives a different personality to your jeans, and once you learn all three, you can combine them for custom looks that no store rack can copy.
Translation: your old jeans are not “old.” They’re just pre-production samples waiting for your creative direction.
Experience Section (500+ Words): Real-World Lessons from DIY Distressed Denim Projects
The most useful way to understand distressed denim is through practical, real-life outcomes, so here’s a composite experience narrative based on common DIY results and repeated workshop-style testing with different jean types.
Project One started with a mid-wash straight-leg pair that had no stretch and a slightly stiff hand feel. The goal was subtle distressing: faded pocket edges, lightly worn knees, and a soft raw hem. The sanding phase was surprisingly meditative. The first pass did almost nothing, which was honestly reassuringdenim is tougher than it looks. By minute five, the color started lifting around the pocket seams and the texture softened. The biggest surprise was how quickly “just one more rub” can become “why is this now a hole?” The lesson: stop, brush off lint, and step back every 30 seconds. Once washed, the jeans looked naturally aged, like they’d been worn for years instead of attacked in one afternoon.
Project Two was the classic ripped-knee experiment on a slim pair. This one taught the most about placement. Marking rips while standing looked great, but after sitting down, one cut shifted off-center and sat awkwardly on the kneecap. On the second leg, marking while standing and bending fixed that issue. A utility blade made cleaner starter cuts than scissors, but tweezers did the real magic. Pulling vertical blue threads was slow, slightly tedious, and absolutely worth it. The rip transformed from “fresh cut fabric” to “authentic distressed panel.” After one wash, the threads relaxed and looked store-finished. After three wears, one rip expanded more than expected at the outer edge, which became an unexpected but helpful durability lesson: tiny reinforcement stitches at the corners can prevent a dramatic growth spurt.
Project Three focused on a wide-leg jean that was too long. Instead of tailoring, a raw hem was used to shorten and style at the same time. This was the easiest method by far, but also the one where measuring mattered most. A 0.5-inch difference between left and right hem is more visible than people thinkespecially with flat shoes. After re-leveling and cutting carefully, light seam-ripper fraying plus one wash created that effortless “fashion person who knows exactly what they’re doing” look. Bonus: the cropped length made the jeans feel more modern instantly.
Across all three projects, care routine was the hidden hero. Distressed denim behaves best when washed cold, inside out, and with low agitation. A mesh bag made a visible difference for pairs with larger rips; threads came out less tangled and fewer fibers were lost. Air drying also kept the shape more predictable. One pair put through high heat ended up with tighter, curlier fraysstill wearable, but not as controlled.
The biggest mindset shift from these experiences was this: distressing isn’t destruction; it’s editing. Great results come from restraint, not force. Small abrasions in logical places read as premium. Huge random tears read as accidental. If you treat each stage like a design decisionplacement, pressure, thread removal, wash finishyou get jeans that feel custom, flattering, and genuinely yours.
Final takeaway: keep a “test denim” pair. Try tools and pressure there first. Once you understand how your specific denim reacts, your real pair becomes much easier to nail. Distressed jeans may look rebellious, but the best ones are made with surprisingly disciplined choices.


