
Table of Contents >> Show >> Hide
- Table of Contents
- Before You Start: Materials, Safety, and Design
- Way 1: Classic Cast-Concrete Stepping Stones (Mold Method)
- Way 2: Mosaic & Tile-Topped Stepping Stones (Two Options)
- Way 3: Leaf-Imprint “Botanical Fossil” Stepping Stones
- How to Install Stepping Stones So They Don’t Wobble
- Finishing Touches: Color, Texture, and Sealing
- Troubleshooting: Common Mistakes (and Fixes)
- FAQ
- Conclusion
- Extra: of Real-World “I Wish Someone Told Me” Lessons
Want a garden path that says, “Welcome!” instead of “Watch your step… and also your dignity”? DIY stepping stones are one of the fastest ways to make a yard feel
intentionallike you planned the vibe instead of accidentally inventing it by mowing around random patches of mud.
Below are three reliable, beginner-friendly methods for making stepping stones that actually hold up outdoors: a classic concrete mold pour,
a colorful mosaic/tile approach, and a leaf-imprint technique that looks like botanical fossils (in the best way). We’ll also cover the boring-but-important stuff
(curing, installation, sealing) so your stones don’t crack, wobble, or become a surprise slip-n-slide after the first rain.
Before You Start: Materials, Safety, and Design
Quick safety note (because concrete is not salad dressing)
Concrete dust is nasty in your lungs, and wet concrete can irritate skinso treat this like a DIY project, not a cooking show. Wear gloves, eye protection,
and a dust mask when mixing. If kids are helping with handprints, keep them in gloves too. (Tiny hands + wet concrete = big “why is it burning?” energy.)
Pick the right size and thickness
A good stepping stone is big enough for a normal stride and thick enough to survive real foot traffic. For poured concrete stones, a common sweet spot is
roughly 16–18 inches wide and about 2 inches thick. If you’re using store-bought pavers or natural stone, aim for pieces at least
about 1.5 inches thick to reduce cracking risk.
Tools and supplies checklist
- Concrete mix (standard or sand-topping mix for smoother detail)
- Water + mixing tub/bucket + hoe or sturdy stick
- Molds (plastic stepping stone molds, cake pans, or DIY forms)
- Release agent (cooking spray, petroleum jelly, or light oil)
- Optional reinforcement (chicken wire / fiberglass mesh)
- Trowel/putty knife + scrap wood for screeding the top
- Plastic sheeting (for curing) + a level surface to work on
- Decor (tile pieces, sea glass, pebbles, leaves, letter stamps, etc.)
Design tip: plan the path before you pour anything
Lay out your path firsteither with your actual stones/pavers or by placing cardboard “stand-ins” on the ground. Walk it like a normal human (not a runway model)
and make sure your feet land naturally. A path that forces weird stutter-steps is how ankles file formal complaints.
Way 1: Classic Cast-Concrete Stepping Stones (Mold Method)
This is the classic DIY concrete stepping stone method: mix, pour, level, decorate, cure. It’s dependable, budget-friendly, and wildly customizable
from modern minimalist circles to “my kids immortalized their tiny handprints and now I’m emotional” vibes.
Best for
- Beginner-friendly projects
- Custom shapes (round, square, irregular)
- Adding names, dates, handprints, pressed objects, or simple mosaics
Step-by-step
-
Prep the mold. Set molds on a flat, stable surface. Coat the inside with a release agent (cooking spray or petroleum jelly) so the stone
actually comes out laterlike a cake that respects you. -
Mix the concrete to the right consistency. Add water gradually. You want it workable but not soupythink thick batter that holds shape.
Mix until the texture is uniform (no dry pockets). -
Pour and compact. Fill the mold about halfway, then tamp to remove air bubbles. If using reinforcement, press chicken wire or mesh into the middle,
then add the remaining mix. This helps reduce cracking. -
Screed and smooth. Drag a straight board across the top to level it. Smooth edges with a trowel if you care about that kind of thing
(and you probably will once you see jagged edges). -
Decorate at the right moment. Wait a short whileuntil the surface begins to firm upthen press in decorative elements (glass gems, pebbles,
shells, letter stamps). Press gently so they embed without disappearing into the abyss. -
Cure slowly. Cover with plastic sheeting to slow moisture loss and reduce cracking. Let it harden undisturbed, then demold carefully.
After demolding, give it extra cure time before installing outdoors.
Pro tips for better results
- Tap the mold (or gently vibrate it) to bring bubbles up for a smoother face.
- Add texture for traction: a light broom finish, pressed leaves, or a textured stamp keeps stones less slippery.
- Don’t rush curing: fast drying can mean cracking. Plastic sheeting helps keep moisture in.
SEO keywords you just used naturally: make stepping stones, DIY stepping stones, concrete stepping stones, stepping stone mold.
Way 2: Mosaic & Tile-Topped Stepping Stones (Two Options)
If you want your path to look like it belongs in a magazine spread called “Whimsy, But Make It Durable,” mosaic stepping stones are the move. You’ve got two main routes:
embed pieces into wet concrete (fast), or build a tile mosaic on top of a cured paver using mortar and grout (cleaner detail and easier to redo).
Option A: Press tiles/glass into wet concrete (fast + fun)
- Make a basic poured stone (Way 1) and level the surface.
- Wait until the surface starts to firm so pieces don’t sink too deep.
- Press in mosaic elements (tile, sea glass, small stones). Keep edges slightly rounded to reduce future chipping.
- Let it cure, then seal to protect both concrete and decorative inserts.
Option B: Tile-topped stepping stones (sharp detail, repair-friendly)
This method is especially nice if you’re using ready-made concrete pavers or stepping stones and want a crisp tile surface. The basic idea:
wet the stone, apply thin-set mortar, place tile pieces, then grout and seal.
- Choose a base. Use a concrete stepping stone/paver that’s thick and stable.
- Pre-fit your design. Dry-lay the tiles first (like a puzzle) so you’re not improvising with wet mortar and panic.
- Apply thin-set mortar. Work in sections. Use a notched trowel for even thickness and strong bonding.
- Set the tile. Press pieces in with consistent spacing. Wipe excess mortar before it cures.
- Grout for outdoors. Use grout rated for exterior use. Push grout into joints, then sponge off haze as it begins to set.
- Seal it. Sealing helps reduce staining and weather wear, especially in freeze-thaw climates.
Mosaic material tips (so your art doesn’t become gravel)
- Use durable pieces: ceramic tile, tumbled glass, and smooth pebbles tend to hold up better than brittle “mystery glass.”
- Avoid sharp edges on walking surfaces unless you enjoy surprise foot drama.
- Think traction: glossy tile can be slick. Mix in pebbles or choose textured tile for better grip.
Related keywords: mosaic stepping stones, tile stepping stones, garden path ideas, outdoor grout, thin-set mortar.
Way 3: Leaf-Imprint “Botanical Fossil” Stepping Stones
Leaf-imprint stones look fancy, but the process is basically: “borrow a giant leaf, feed it concrete, and peel it off later.” The result captures veins and texture
in a way that reads high-endlike you commissioned a garden artisan instead of you and a bucket on a Saturday.
Best for
- Decorative garden paths
- Organic, nature-forward landscaping styles
- Making each stone unique without learning a new craft hobby
Step-by-step
-
Pick a leaf with bold veins. Big leaves (like elephant ear, rhubarb, or hosta-sized leaves) create better detail.
Choose one without tears or holes. -
Create a sand “nest.” Make a shallow mound of damp sand on a tarp or in a tray. This supports the leaf and gives your stone a slightly domed,
water-shedding shape. - Oil the leaf. Lightly coat the leaf (the side you want textured) with cooking spray or oil so it releases later.
-
Use a finer mix for detail. A sand-topping mix (less chunky aggregate) usually captures veins better than a super-rocky mix.
Mix to a thick, packable consistency. - Pack on the concrete. Build up about 2 inches of thickness, patting firmly to reduce bubbles. Add a piece of mesh in the middle if you want extra strength.
- Cure and peel. Cover with plastic and let it cure fully. Once hard, peel off the leaf. Trim rough edges if needed.
Make the veins pop (optional but satisfying)
After curing, you can highlight the texture with a light stain wash or thinned outdoor paint, then wipe back the high spots. It’s like contouring… for concrete.
Related keywords: leaf imprint stepping stones, concrete leaf cast, garden stepping stones DIY, outdoor concrete craft.
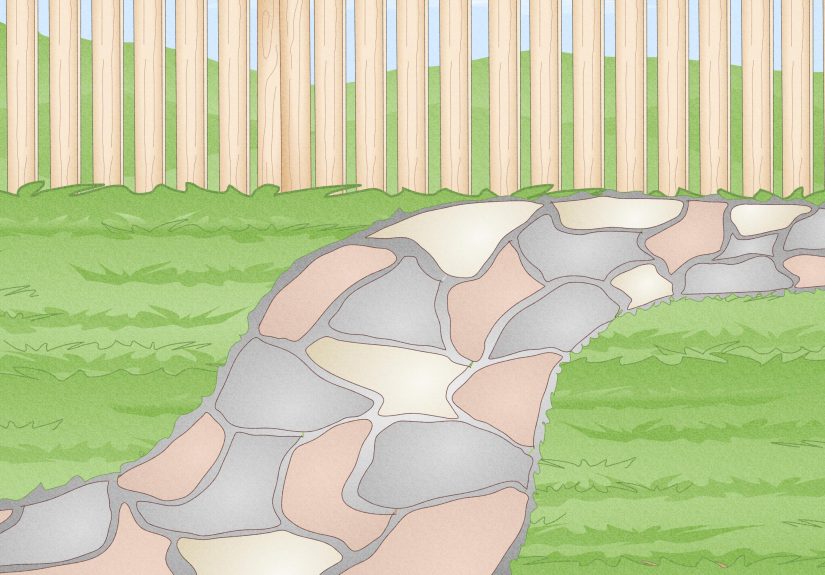
How to Install Stepping Stones So They Don’t Wobble
Even the prettiest stepping stone becomes a villain if it rocks underfoot. The goal: a stable base, good drainage, and a top surface that sits close to flush
with the surrounding ground so you’re not “stepping up” like you’re entering a tiny amphitheater.
A simple, solid installation method
- Lay out the stones in the order you want and walk the path to confirm spacing.
- Trace each stone onto the ground.
- Cut and remove sod/soil to the depth of the stone plus a sand layer.
- Add bedding sand (commonly around a couple inches), level it, then set the stone. Use a level and adjust by adding/removing sand.
- Backfill edges with soil, mulch, or gravel, then tamp gently so everything locks in.
Spacing that feels natural
A “comfortable stride” varies by person, but the easiest trick is to place stones, walk normally, and adjust until it feels effortless.
Tighter spacing slows people down (nice for garden wandering); wider spacing speeds them up (good for getting to the hose before your plants faint).
Finishing Touches: Color, Texture, and Sealing
Color options that look intentional (not accidental)
- Integral color: add liquid or powder colorant to mixing water for a consistent tone.
- Top color wash: apply stain or diluted outdoor paint after curing for a layered look.
- Exposed aggregate: lightly wash the surface near set-time to reveal pebbles for texture and traction.
Do you need to seal stepping stones?
Not alwaysbut sealing can help reduce staining, moisture intrusion, and surface wear, especially for decorative stones or freeze-thaw climates.
If you do seal, use a product intended for exterior concrete/pavers, follow label directions, and give it proper dry time before heavy use.
Make it less slippery
Smooth concrete + rain = a chemistry experiment called “Why did I trust this path?” Add texture with a broom finish, pebble insets, or a subtle stamp pattern.
Traction is a feature, not a buzzkill.
Troubleshooting: Common Mistakes (and Fixes)
Problem: Cracks
- Likely causes: too thin, moved too soon, dried too fast, weak base, no reinforcement.
- Fix: aim for ~2 inches thick, keep stones covered while curing, and consider mesh in the middle.
Problem: Stone won’t release from the mold
- Likely causes: no release agent, too early demolding, intricate mold details.
- Fix: use cooking spray/petroleum jelly, wait longer, and flex the mold gently while tapping.
Problem: Pitted surface / air bubbles
- Likely causes: dry mix, poor compaction, trapped air.
- Fix: tamp as you fill, tap the mold sides, and mix thoroughly.
Problem: Mosaic pieces pop out later
- Likely causes: pieces weren’t embedded enough, mortar/grout not rated for outdoors, freeze-thaw stress.
- Fix: embed deeper, use exterior-rated products, and seal to reduce water intrusion.
FAQ
How long does it take to make stepping stones?
The hands-on part is usually short (mixing and pouring), but curing takes time. Plan on at least a day or two before demolding and longer before heavy use outdoors.
If you want strong stones, patience is part of the recipe.
What concrete mix is best for stepping stones?
For standard stones, regular concrete mix works well. For leaf-imprint detail or smoother finishes, a sand-topping mix (with smaller aggregate) is often easier to finesse.
Can I make stepping stones in place (right on the ground)?
Yesespecially with reusable walkway forms. Just prep a level base first, and be extra careful with curing (covering with plastic helps).
Conclusion
If you want a simple win, start with classic cast-concrete stepping stones. If you want color and personality, go mosaiceither pressed-in (fast) or tile-topped (crisp and repairable).
And if you want “my garden is secretly an art gallery,” leaf-imprint stones bring the wow without requiring fancy tools.
The real difference between stepping stones that last and stepping stones that crumble into “sad gravel” is the unglamorous trio:
proper thickness, careful curing, and stable installation. Do those well, and your path will look great for seasons to come.
Extra: of Real-World “I Wish Someone Told Me” Lessons
People underestimate stepping stones because they’re small. That’s the trap. Small projects have a special talent for turning into “How did I spend my whole Saturday on this?”
and then, somehow, “Why do I love it so much?” Here are the field-tested lessons DIYers tend to learn the hard wayso you can learn them the easy way (by reading this in comfy socks).
1) Your first batch will be wrong. Not disastrously wrong. Just… educational. Concrete mixing is less like baking and more like babysitting a moody toddler:
add water slowly, watch the texture, and don’t assume it’ll behave because you politely asked. If you pour too soupy, your decorative pieces sink like they’re trying to escape.
If it’s too dry, you’ll trap air and get a pockmarked surface that looks like the moon (cool for sci-fi gardens, less cool for “cute backyard path”).
2) “Level” is not a vibe; it’s a measurement. When stones wobble, everyone blames the stone. It’s usually the base. Sand bedding is forgiving and easy to adjust,
but only if you actually use it and actually tamp it. If you skip that step, your stone will rock forever, reminding you of your choices each time you carry a coffee across the yard.
The good news: resetting a stone is usually easy. The bad news: you’ll absolutely do it at least once.
3) Texture matters more than you think. A smooth stone looks sleek… until it rains. Then it becomes a trust exercise with gravity.
The best-looking paths are often slightly textured: a broom finish, pebbles, or leaf veins that naturally add grip. If you’re doing mosaic tile, mix in matte pieces or pebbles
so the surface isn’t a glossy skating rink.
4) Curing is where the magic happens (and where impatience ruins things). Most “mystery cracks” come from moving stones too early or letting them dry too fast.
Covering with plastic feels like an unnecessary stepuntil you compare a covered stone (smooth, strong) to an uncovered one (hairline cracks and regret).
A slow cure is a stronger cure, and your future self will thank you.
5) The best stepping stones aren’t perfectthey’re personal. A slightly crooked handprint, a lopsided leaf edge, a mosaic pattern that looks like you got inspired mid-project
these are features. They make the path feel handmade instead of mass-produced. The goal isn’t factory perfection; it’s a yard that feels like yours.
And if a stone comes out truly awful? Congratulations: you’ve made a dedicated “don’t step here” marker for that one spot you always forget is muddy.


