
Table of Contents >> Show >> Hide
- Before You Remove Dye from Leather: Know What You Are Cleaning
- Method 1: Use a Leather-Safe Cleaner for Fresh Dye Transfer
- Method 2: Use a Dedicated Leather Dye-Transfer Remover
- Method 3: Restore or Recolor the Leather When Dye Has Set In
- How to Prevent Dye Transfer on Leather
- What Not to Use When Removing Dye from Leather
- Frequently Asked Questions About Removing Dye from Leather
- Real-World Experiences: What Dye Transfer on Leather Usually Teaches You
- SEO Tags
Few household surprises are as rude as discovering that your favorite dark jeans have “signed” your cream leather sofa. One minute, everything looks polished and expensive. The next, there is a blue-gray smudge where absolutely no blue-gray smudge was invited.
Dye transfer on leather is common, especially on white, beige, tan, and light-gray leather furniture, handbags, car seats, shoes, and jackets. Denim dye, colorful throw blankets, dark purses, printed fabrics, and even a new pair of leggings can leave behind a stain that looks alarming. The good news is that many dye-transfer marks can be reduced or removed when treated carefully.
The important word is carefully. Leather is not a countertop, and aggressive scrubbing can remove more than the stain. The goal is to lift the transferred dye without stripping the leather’s protective coating, changing its color, or creating a shiny bald patch that makes the original stain look nostalgic.
This guide explains three practical ways to remove dye from leather, when each method makes sense, what to avoid, and how to prevent another denim disaster in the future.
Before You Remove Dye from Leather: Know What You Are Cleaning
Not all leather reacts the same way. Most modern leather furniture and car seats are finished or protected leather, meaning they have a colored surface and a clear topcoat. These surfaces are generally more stain-resistant and are the safest candidates for careful cleaning.
Suede, nubuck, unfinished leather, aniline leather, pull-up leather, distressed leather, and vintage leather are different stories. They are more porous, more absorbent, and much easier to damage. If your item has a soft, velvety surface or darkens immediately when touched by water, treat it as delicate leather and contact a leather-care professional before trying stain-removal products.
Gather These Supplies First
- White microfiber cloths or soft white cotton cloths
- A leather-safe cleaner
- A dedicated leather dye-transfer or ink-and-dye remover
- Cotton swabs for seams and small areas
- A dry towel
- A leather conditioner compatible with your item, if needed
Always use white cloths. A colorful rag may decide to contribute its own dye to the situation, which is not the kind of teamwork anyone needs.
Always Perform a Hidden Spot Test
Before applying any cleaner, test it in an inconspicuous area such as under a cushion, behind a flap, inside a hem, or near the bottom of a seat. Apply a tiny amount to a cloth, use gentle pressure, let the area dry, and check for color loss, streaking, stiffness, or a change in shine.
If the leather’s own color transfers onto your cloth, stop immediately. That usually means the finish is unstable, worn, or more delicate than expected.
Method 1: Use a Leather-Safe Cleaner for Fresh Dye Transfer
The first and safest method is also the least dramatic: use a high-quality leather cleaner made for finished leather. This works best on fresh dye transfer from denim, dark clothing, pillows, bags, or fabrics that have rubbed against the leather surface.
Fresh stains are often sitting on or near the protective topcoat. If you act quickly, a gentle leather cleaner may lift much of the color before it settles deeper into the finish.
How to Clean Dye Transfer with a Leather Cleaner
- Remove loose dust or debris with a dry microfiber cloth.
- Apply the leather cleaner to a clean white cloth, not directly onto the leather.
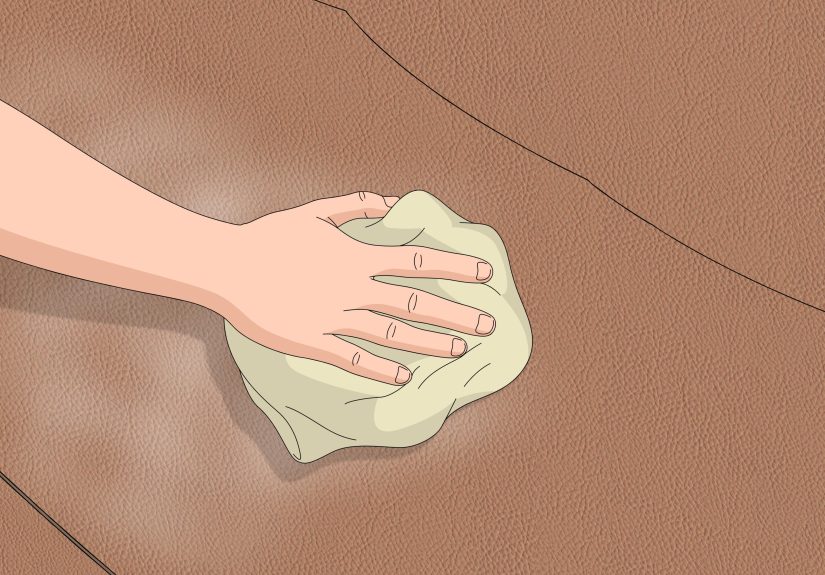
- Gently blot or wipe the stained area using light circular motions.
- Work from the outside edge of the stain toward the center.
- Flip to a clean section of cloth often so you do not rub the lifted dye back onto the leather.
- Wipe away residue with a separate lightly damp cloth, then dry with a clean towel.
- Allow the leather to air-dry completely away from direct heat or sunlight.
Use minimal moisture. Leather does not appreciate being soaked, steamed, blasted with a hair dryer, or treated like a cast-iron pan after taco night. Too much water can leave rings, cause stiffness, or interfere with the finish.
For a light denim mark on a leather couch, purse, or car seat, two or three gentle passes may noticeably reduce the stain. If there is no improvement after a couple of careful attempts, move on to a dedicated dye-transfer remover rather than increasing pressure.
When This Method Works Best
This method is ideal for:
- Fresh blue-jean dye transfer on leather car seats
- Light marks from dark handbags or belts
- New stains on finished leather furniture
- Minor color transfer from pillows, blankets, or clothing
- Routine cleaning before trying a stronger leather stain remover
After cleaning, use a leather conditioner only if the manufacturer recommends it for your leather type. Conditioner can restore softness to natural leather, but it is not a stain remover. Applying conditioner over an active dye stain may simply give the stain a spa day.
Method 2: Use a Dedicated Leather Dye-Transfer Remover
If a standard leather cleaner does not remove the stain, the next step is a product specifically labeled for dye transfer, ink, or color transfer on leather. These products are designed to lift transferred pigments more effectively than a general leather cleaner while reducing the risk of damaging the topcoat.
Look for a remover that clearly states it is suitable for finished leather, leather upholstery, automotive leather, vinyl, or faux leather, depending on your item. Follow the label instructions exactly because dwell times, application methods, and safety warnings vary by product.
How to Use a Leather Dye Remover Safely
- Clean the area first with a gentle leather cleaner and let it dry.
- Test the dye remover in a hidden spot.
- Apply a small amount of remover to a white cloth or cotton swab.
- Work on a small section at a time instead of attacking the entire stain at once.
- Use gentle dabbing or light circular motions with almost no pressure.
- Replace the cloth or cotton swab as soon as it picks up color.
- Wipe the area with a clean cloth after treatment, following the product directions.
- Let the leather dry naturally before deciding whether another application is needed.
Patience matters here. Dye transfer usually responds better to several gentle attempts than one heroic scrub session. When leather becomes tacky, dull, sticky, unusually shiny, or lighter than the surrounding surface, stop. Those are warning signs that the protective finish may be softening or lifting.
Why You Should Be Careful with Alcohol and Household Solvents
You may find online advice recommending rubbing alcohol, nail-polish remover, acetone, bleach, ammonia, vinegar, or window cleaner. Some of these substances can remove color transfer, but they can also remove the leather’s finish, alter its sheen, dry it out, or pull up the original color.
In other words, they may solve the dye stain by creating a new problem with better lighting.
A purpose-made leather dye remover is usually the safer choice because it is formulated for the surface you are trying to save. Even then, treat it as a targeted stain treatment, not an all-over cleaner.
Method 3: Restore or Recolor the Leather When Dye Has Set In
Sometimes the dye transfer is no longer sitting on the surface. It has penetrated the clear protective layer or become embedded in worn leather. At that point, cleaning may fade the stain but not erase it completely.
When this happens, the third method is restoration: professional cleaning, color matching, refinishing, or recoloring the affected area. This is often the best solution for expensive handbags, light-colored leather sofas, luxury car interiors, designer shoes, or heavily stained furniture.
Signs You May Need Leather Restoration
- The stain is old and has not improved after careful cleaning.
- The dye transfer covers a large area.
- The leather has become lighter, uneven, sticky, or dull after cleaning.
- The stain is on suede, nubuck, unfinished leather, or aniline leather.
- The original leather color is rubbing off onto your cleaning cloth.
- The item is valuable, sentimental, rare, or expensive to replace.
A leather-restoration professional can clean the surface, prepare the damaged area, match the original color, feather the pigment into surrounding leather, and apply a new protective finish. This is more precise than trying to repaint a white leather purse at your kitchen table while hoping optimism counts as a color-matching technique.
DIY recoloring kits can work for small scuffs or faded areas, but they require careful preparation and accurate color matching. On a visible surface, especially white, cream, or pale gray leather, professional restoration is usually worth considering.
How to Prevent Dye Transfer on Leather
The easiest dye stain to remove is the one that never lands on the leather in the first place. That sounds obvious, but prevention is especially useful for white leather furniture and light-colored car interiors.
Simple Ways to Protect Leather from Dye Transfer
- Wash new dark jeans, leggings, and brightly colored fabrics before using them around light leather.
- Be extra cautious with raw denim and dark indigo clothing.
- Use washable throws or seat covers on pale leather furniture.
- Keep dark purses, belts, and printed accessories from rubbing against light leather.
- Clean light-colored leather regularly with a suitable leather cleaner.
- Use a leather protectant designed to reduce dye transfer and friction, when appropriate for your leather type.
- Address fresh marks quickly instead of waiting until the stain becomes a long-term tenant.
Regular care also helps. Dust, body oils, sunscreen, makeup, and general grime can make leather more difficult to clean. A lightly maintained surface gives dye less opportunity to settle into the grain and become stubborn.
What Not to Use When Removing Dye from Leather
Leather can be surprisingly durable, but its finish can be fragile. Avoid these common stain-removal mistakes:
- Bleach: It can discolor and weaken leather.
- Acetone or nail-polish remover: It may strip color and damage the protective coating.
- Ammonia-based cleaners: They can dry and dull leather.
- Magic Erasers: Their abrasive action may remove the finish along with the stain.
- Steel wool, rough sponges, or scouring pads: These can scratch and permanently alter the surface.
- Heavy furniture polish, oils, or silicone sprays: They can create buildup and complicate later repairs.
- Excessive water: Saturating leather can leave water marks and stiffness.
- Hard scrubbing: Friction is often more damaging than the original dye transfer.
Think of leather stain removal as a negotiation, not a wrestling match. Gentle, gradual progress is a win.
Frequently Asked Questions About Removing Dye from Leather
Can you remove denim dye from leather?
Yes, fresh denim dye transfer can often be reduced or removed from finished leather with a leather-safe cleaner or dedicated dye-transfer remover. Older stains may require multiple treatments or professional restoration.
Will leather conditioner remove dye stains?
No. Leather conditioner helps maintain softness and flexibility, but it is not designed to lift dye transfer. Clean the stain first, let the leather dry, and then condition only when suitable for your leather type.
Can I use dish soap on leather?
A tiny amount of mild soap diluted in water may be used in an emergency on some finished leather, but a pH-balanced leather cleaner is generally the safer option for routine care. Avoid saturating the leather and always test first.
Can dye transfer become permanent?
It can become much harder to remove when it remains on the leather for a long time or penetrates a worn protective coating. Prompt, gentle treatment gives you the best chance of success.
Should I use the same method on faux leather?
Not necessarily. Faux leather, PU, PVC, and bonded leather have different surface coatings. Use a cleaner and dye remover specifically labeled as safe for the material, and always test a hidden area first.
Real-World Experiences: What Dye Transfer on Leather Usually Teaches You
Real-life dye-transfer situations tend to follow a familiar pattern. Someone buys a beautiful light leather item because it looks clean, modern, luxurious, and just a little bit dramatic. Then a pair of dark jeans, a navy throw pillow, a red tote bag, or a black jacket decides to test the relationship.
One of the most common experiences involves white or beige leather car seats and new dark denim. The stain often appears first on the outer edge of the driver’s seat, where jeans repeatedly rub against the leather while getting in and out of the car. At first, it may look like dust or road grime. A quick wipe reveals that it is blue dye, and suddenly the vehicle interior feels like it has been tagged by a tiny fashion criminal.
In these cases, the people who have the best results tend to act quickly. They use a leather-safe cleaner, work gently, and stop once the transfer starts lifting. The people who struggle most often wait for weeks, then attack the stain with whatever is under the kitchen sink. That is when a small denim mark can turn into a pale patch, shiny streak, or rough spot that requires recoloring.
Another common experience involves leather furniture and decorative textiles. A deep red throw blanket, dark blue pillowcase, or black-and-white printed cushion can transfer dye after sitting on a warm leather sofa for hours. Heat, pressure, humidity, and friction all make the situation more likely. The stain often appears where the fabric edge touches the seat cushion, leaving a sharp line that looks suspiciously like the sofa has been wearing eyeliner.
People often assume the leather itself is defective, but many dye-transfer problems start with excess color in the fabric. New dark denim, inexpensive printed textiles, and richly dyed accessories are especially common culprits. Washing the fabric before placing it on light leather can prevent a surprising number of headaches.
There is also the classic handbag experience: a light leather purse rubs against dark jeans, and a soft blue shadow appears on the back panel. The temptation is to scrub harder because the bag is small and the stain is obvious. That is exactly where restraint matters. Handbags often have delicate finishes, edge paint, stitching, and decorative coatings that can react badly to strong solvents. Gentle cleaning, careful testing, and professional help for expensive bags are usually smarter than trying five viral cleaning hacks in a row.
Perhaps the most useful lesson from real-world leather cleaning is that “cleaner” does not always mean “better.” More product, more water, more pressure, and more scrubbing do not automatically create better results. With leather, the safest approach is usually slow, controlled, and boring. Boring is underrated when the alternative is accidentally stripping the finish off a cream leather sofa.
Another lesson is to judge progress after the leather has dried. Wet leather can look darker, cleaner, or temporarily different in sheen. Give the area time to air-dry before deciding whether the stain is gone, reduced, or still needs more attention. Rushing into another treatment while the surface is damp can make it harder to see what is really happening.
Finally, successful stain removal is not always about making the leather look factory-new in one session. Sometimes the best result is reducing a dark dye transfer until it is no longer noticeable in normal lighting. A small, faint mark is often preferable to a larger area of damaged finish. Leather develops character over time, but there is a difference between “beautifully lived-in” and “I used acetone because a social-media video told me to.”
Note: This guide is intended for smooth, finished leather and general leather-care situations. Always follow the manufacturer’s care instructions for your specific item. For suede, nubuck, aniline leather, vintage leather, expensive designer items, or stains that cause the leather’s original color to lift, stop cleaning and consult a qualified leather-restoration professional.




 Close
Close