
Table of Contents >> Show >> Hide
- Why Clothing Measurements Matter More Than Tag Sizes
- What You Need Before You Start
- Way 1: Measure Yourself Directly on the Body
- Way 2: Measure Clothing That Already Fits You Well
- Way 3: Get Help From Another Person for Full Accuracy
- Common Clothing Measurements Explained
- Common Mistakes That Ruin Good Measurements
- Practical Example: Measuring for Different Types of Clothing
- Experience and Real-Life Lessons From Measuring Clothing
- Final Thoughts
Buying clothes should be fun. In theory, you spot a jacket, add it to cart, and wait for greatness to arrive. In practice, you order a “perfect fit,” open the package, and somehow end up with sleeves made for an orangutan and a waist built on optimism. That is exactly why knowing how to take clothing measurements matters.
Whether you are shopping online, sewing your own clothes, ordering custom garments, or trying to decode a size chart that looks like it was written by a committee of raccoons, accurate body measurements can save time, money, and your relationship with return labels. The good news is that you do not need a fashion degree or a glamorous fitting room. You just need a flexible tape measure, a mirror, a notebook or phone, and a little patience.
In this guide, you will learn three practical ways to take clothing measurements, plus the specific points that matter most for tops, bottoms, dresses, and tailored pieces. We will also cover common mistakes, smart measuring tips, and real-world examples so your numbers actually help you get a better fit.
Why Clothing Measurements Matter More Than Tag Sizes
Before jumping into the how-to, let us say this clearly: clothing sizes are not universal. A medium in one brand may fit like a small in another, while a size 10 in jeans can act very different depending on the rise, cut, stretch, and the brand’s secret feelings about vanity sizing.
That is why body measurements matter more than the label. When you know your chest, bust, waist, hips, inseam, sleeve length, and shoulder width, you can compare your numbers to a brand’s size chart instead of making dramatic guesses based on hope and caffeine.
Accurate measurements are especially helpful for:
Online clothing shopping
Instead of trusting “model is wearing size small,” you can compare your real body dimensions to the posted chart and choose the size that makes sense.
Sewing and pattern making
If you sew, measurements are the difference between “custom fit” and “why is this zipper fighting for its life?” Patterns rely on body dimensions, not your usual ready-to-wear size.
Tailoring and alterations
A tailor can work magic, but clear measurements make the magic faster, cheaper, and less likely to involve a second appointment with awkward pinning.
What You Need Before You Start
To take clothing measurements the right way, gather a few basics:
Flexible measuring tape
A soft tape measure is the star of the show. A metal construction tape is great for drywall, less great for your rib cage.
Close-fitting clothing or undergarments
Bulky sweaters add extra inches you did not earn. Measure over undergarments or fitted clothing for better accuracy.
Mirror or helper
A mirror helps keep the tape level. A friend helps with hard-to-reach spots like back width or full sleeve length. Choose a patient friend, not one who gets bored halfway through and starts rounding numbers creatively.
Notebook or phone
Write measurements down immediately. Trusting memory is bold, but not advisable.
Way 1: Measure Yourself Directly on the Body
This is the most common method and usually the best starting point. You wrap the tape around or along the body at specific measurement points. It works well for everyday shopping, made-to-measure orders, and home sewing.
How to do it properly
Stand naturally with good posture. Do not suck in your stomach, puff out your chest, or stand like a wax statue auditioning for a museum. Keep the tape measure level, flat against the body, and comfortably snug, not tight enough to leave a mark.
Key measurements for tops and dresses
Bust or chest: Measure around the fullest part of the bust or chest, keeping the tape parallel to the floor. For tops, dresses, blazers, and coats, this number is usually essential.
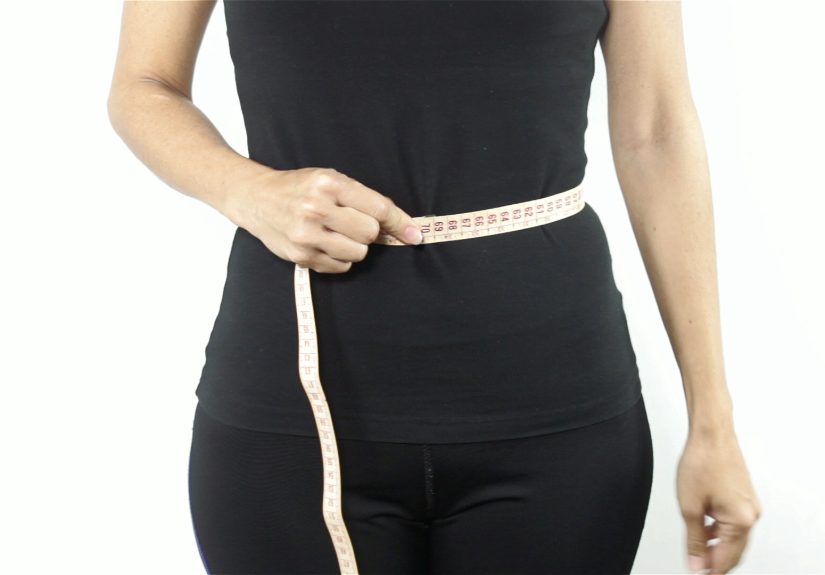
Waist: Find your natural waist by bending to one side. The crease that forms is usually the correct spot. Measure around that area without pulling the tape too tight.
Hips: Measure around the fullest part of the hips and seat. Keep your feet together for the most accurate reading.
Shoulder width: Measure from one shoulder point to the other across your upper back. This is helpful for jackets, tailored shirts, and structured dresses.
Sleeve length: Start at the shoulder point and measure down to the wrist with the arm slightly bent. For some garments, sleeve measurements may begin at the center back of the neck and continue over the shoulder and down the arm.
Key measurements for pants and skirts
Waist: Again, use the natural waist unless the brand specifically says low-rise or mid-rise.
Hips: Measure the fullest part. This often determines fit more reliably than waist size in skirts and fitted pants.
Inseam: Measure from the crotch down the inside leg to the ankle or desired hem length.
Outseam: Measure from the waist down the outside of the leg. Helpful for trousers and full-length skirts.
Rise: For pants, rise can matter a lot. Front rise usually runs from the crotch seam to the top front waistband. If you have ever worn jeans that seemed determined to become low-rise against your will, rise was part of the problem.
Best use for this method
Use direct body measurements when you want the most accurate picture of your current size, especially for custom clothing, fitted garments, or sewing projects.
Way 2: Measure Clothing That Already Fits You Well
If measuring your own body feels awkward, or if you are buying from a brand that lists garment measurements instead of body measurements, measuring a favorite item can be incredibly useful.
This method works especially well for shirts, jackets, jeans, trousers, and skirts that already fit you the way you like. Not “technically wearable.” Actually fit.
How to do it
Lay the garment flat on a smooth surface. Button, zip, or fasten it as needed. Smooth it out gently, but do not stretch it. Then measure key points and double the flat widths where appropriate.
Examples of flat garment measurements
Chest or bust: Measure across the garment from armpit to armpit, then double that number if the seller provides full circumference.
Waist: Measure straight across the waist area of the garment and double it if needed.
Hip: Measure across the widest part of pants, skirts, or fitted dresses, then double.
Shoulders: Measure seam to seam across the back.
Sleeves: Measure from shoulder seam to cuff, or from center back if that matches the brand’s chart.
Inseam: On pants that fit well, measure from the crotch seam to the bottom hem along the inside leg.
Length: For shirts and jackets, measure from the highest shoulder point to the hem. For skirts, measure from waistband to hem.
Why this method is helpful
Sometimes your body measurements say one thing, but your fit preference says another. Maybe you like wide-leg pants with extra room, or maybe you prefer shirts that skim instead of cling. Measuring clothes you already love gives you a realistic benchmark for the silhouette you want.
Best use for this method
Use garment measurements when comparing secondhand listings, resale items, vintage clothing, or brand charts that describe the product rather than the person.
Way 3: Get Help From Another Person for Full Accuracy
The third method is the team sport version of measuring. If you want the most reliable numbers for sewing, formalwear, costumes, or tailored pieces, ask someone to help you measure.
Why? Because some measurements are just hard to take on yourself without twisting, leaning, or turning into a suspicious pretzel.
Measurements that are easier with help
Back width: Measured across the upper back from arm crease to arm crease.
Shoulder to waist: Helpful for dresses, bodices, and jackets.
Nape to hem: Used for coats, dresses, and long tops.
Full sleeve length: Especially accurate when someone else follows the curve of your bent arm.
Torso and rise measurements: These can be tricky solo and are easier when another person can keep the tape straight and aligned.
How to make helper measurements more accurate
Stand naturally and look straight ahead. Let the helper read the tape at eye level. Do not hold your breath. Do not pull the tape tighter because you think a smaller number will somehow inspire the fabric. Fabric respects math, not wishful thinking.
Best use for this method
Use assisted measuring for wedding wear, suits, performance clothing, fitted dresses, and advanced sewing projects where precision matters more than convenience.
Common Clothing Measurements Explained
Neck
Measure around the base of the neck with room for comfort. Important for dress shirts and collars.
Chest vs. bust
These are measured around the fullest area of the upper torso. The term often depends on the garment category, but the measuring idea is similar.
Natural waist
This is the body’s natural bend point, not always where you wear jeans. Those are two very different neighborhoods.
Hip or seat
This is the fullest area around the lower body. Keep the tape parallel to the floor for an honest number.
Inseam
This is the inner leg measurement from crotch to hem. It helps determine pant length and can be checked on the body or from pants that already fit.
Common Mistakes That Ruin Good Measurements
Measuring over bulky clothes
A hoodie under your tape measure is basically giving your future shirt a fake body.
Pulling the tape too tight
You want a snug measurement, not a compression experiment.
Letting the tape droop or tilt
If the tape is not level, the number is not trustworthy. Use a mirror whenever possible.
Using old measurements forever
Bodies change. Brands change. Life includes laundry, holidays, stress, workouts, and pizza. Update your measurements every few months if fit really matters.
Ignoring the brand’s measuring instructions
Some charts are based on body measurements, while others are based on garment measurements. Read the fine print before comparing numbers.
Practical Example: Measuring for Different Types of Clothing
For a T-shirt
Focus on chest or bust, shoulder width, and length. If you hate tight sleeves, check sleeve opening too.
For jeans
Check waist, hips, rise, and inseam. Stretch denim may forgive a little. Rigid denim will remember everything.
For a blazer
Take chest or bust, waist, shoulder width, and sleeve length. Tailored garments need more precision than casual knits.
For a dress
Measure bust, waist, hips, shoulder-to-waist, and total length. If the dress is fitted through the torso, accuracy matters a lot.
Experience and Real-Life Lessons From Measuring Clothing
One of the funniest things about learning how to take clothing measurements is realizing how long many people shop without ever knowing their actual numbers. They know their “usual size,” their “sometimes size,” and their “I refuse to discuss that brand’s size chart” size, but not their measurements. The first time many people use a tape measure correctly, it feels a bit like turning on the lights in a room they have been walking through in the dark.
A common real-life experience happens during online shopping. Someone orders pants in the same size from three brands, and somehow one pair fits perfectly, one pair fits like borrowed clothing from a taller cousin, and one pair cannot get past the hips. That is usually the moment body measurements become less of a boring task and more of a survival skill. Once shoppers start comparing their waist, hip, and inseam numbers with individual brand charts, the mystery gets smaller and the success rate gets a lot better.
Another experience comes from sewing. Beginners often assume pattern sizes match store sizes, which is a truly rude surprise waiting to happen. They cut a pattern based on the number they usually buy at the mall, sew for hours, and then discover the garment fits like an emotional support pillowcase. Measuring the body correctly changes everything. It gives sewists a more reliable starting point and helps them understand where they may need fitting adjustments instead of blaming themselves or the fabric.
People also learn quickly that measuring is as much about honesty as technique. The tape measure does not care about your favorite jeans from five years ago. It does not care that a certain brand once called you a smaller size and you have treasured that memory ever since. Accurate clothing measurements work best when you stand naturally, breathe normally, and let the number be the number. Strangely enough, that honesty is freeing. It is much easier to buy clothes that fit the body you actually have than the body imagined by old labels.
There is also the helper experience. Many people discover that a spouse, sibling, roommate, or friend becomes unexpectedly important when it is time to measure shoulder width, back length, or sleeve length. Of course, not every helper is equally gifted. Some are careful and precise. Others read the tape upside down, announce the wrong number with great confidence, and then wander off halfway through the inseam. If you can find a detail-oriented helper, keep them close. Offer snacks.
Over time, experienced shoppers and sewists often build their own mini fit records. They keep a note in their phone with current measurements, favorite garment measurements, and brand-specific observations. For example: “Brand A jeans run tight in hips,” or “Brand B shirts need one extra inch in sleeve length.” This kind of real-world measuring habit saves money and makes shopping far less random. It also turns returns from a regular hobby back into the rare inconvenience they were meant to be.
The biggest lesson people tend to share is simple: clothing measurements are not about judgment. They are about information. They help you choose better clothes, improve comfort, and get closer to the fit you want. Once you treat measurements as practical tools instead of emotional trivia, shopping and sewing both become easier, smarter, and much less dramatic.
Final Thoughts
If you want clothes that fit better, shopping that feels less like gambling, and sewing projects that do not end in confusion, learning to take clothing measurements is worth the effort. The three best methods are simple: measure your body directly, measure clothes that already fit you well, and get help when precision matters most.
Start with the basics: bust or chest, waist, hips, and inseam. Then add other measurements like shoulders, sleeves, rise, and length depending on the garment. Keep your tape level, write numbers down right away, and always compare them to the brand’s chart before ordering.
In other words, trust the tape measure more than the tag. The tag has opinions. The tape has receipts.


