Table of Contents >> Show >> Hide
- Before You Clean: A 3-Minute Plaster Wall Reality Check
- Way #1: Dry Dusting + Vacuuming (The “Plaster’s Love Language”)
- Way #2: Gentle Spot-Cleaning for Scuffs and Fingerprints (No Buckets Required)
- Way #3: Wash Painted Plaster Walls with a Mild Soap Solution (The Safe, Classic Method)
- Way #4: Tackle Tough Stains the Smart Way (Soot, Grease, Crayon, and “Life”)
- Way #5: When Cleaning Isn’t EnoughRefresh, Repair, or Call a Pro
- Quick “Don’t Do This” List (Because I Want Your Walls to Survive)
- Conclusion: Clean Plaster Walls Without Turning It Into a Renovation
- Real-Life Lessons: of Plaster Wall Cleaning Experience (So You Don’t Learn the Hard Way)
Plaster walls are the old souls of home interiors. They’ve survived decades of fashion crimes (orange shag carpet, anyone?),
multiple paint colors, and the occasional “creative” toddler mural. The downside of being durable is that plaster walls also
tend to collect dust, fingerprints, soot, and mysterious smudges that appear the moment you host guests.
The trick to cleaning plaster walls is remembering what plaster is: a porous, sometimes delicate surface that
doesn’t love being soaked. If you treat it like a tile backsplash and go full “power scrub,” you can end up with streaks,
burnished patches, or even softened plaster. But if you clean it with a little strategy and a lot less water than your
instincts suggest, you can get walls looking fresh without damaging the finish.
Before You Clean: A 3-Minute Plaster Wall Reality Check
Before you grab a bucket and start washing like you’re auditioning for a cleaning commercial, do a quick check. This saves
you from turning a small smudge into a big repair.
1) Identify what’s on top of the plaster
- Painted plaster (most common): Usually safe for gentle cleaning.
- Limewash or mineral coatings: More delicate and can rub off when wet. Proceed extra gently.
- Wallpaper: You’re cleaning wallpaper, not plasterdifferent rules.
- Unsealed/unfinished plaster: Treat like a sponge with feelings. Dry methods only unless a pro advises otherwise.
2) Test a small spot first
Pick an inconspicuous area (behind a door, near baseboards). Try your gentlest method and let it dry. If paint dulls,
color lifts, or the surface gets fuzzy/chalky, scale back to a drier approach.
3) If your home is older, think about lead paint
Many U.S. homes built before 1978 may have lead-based paint under newer layers. Cleaning isn’t automatically dangerous,
but aggressive scrubbing, sanding, or scraping can create hazardous dust. If your plaster walls are old and paint is
peeling, chipping, or chalking, use extra caution and consider a professional assessment before doing anything that
disturbs the surface.
4) Gather the right tools (aka: the “no drama” cleaning kit)
- Microfiber cloths (clean onesdirty microfiber is basically sandpaper with confidence)
- A vacuum with a soft brush attachment
- Soft sponge (non-abrasive) and two buckets (wash + rinse)
- Mild dish soap or a pH-neutral cleaner
- White art eraser or gentle wall-cleaning sponge
- Optional: dry chemical sponge (for soot/smoke film)
- Optional: baking soda (for mild stain-lifting paste)
Way #1: Dry Dusting + Vacuuming (The “Plaster’s Love Language”)
If you want the safest, most plaster-friendly method, start dry. Most walls look “dirty” because dust and cobwebs have
been quietly building a second ecosystem overhead. Dry cleaning removes the film that can turn into streaky mud the moment
water shows up.
How to do it
- Work top to bottom: Ceiling line → corners → wall faces → baseboards.
- Vacuum with a soft brush: Use light pressure so you don’t scuff the paint or scrape texture.
- Microfiber wipe: For stubborn dust, wipe gently with a dry microfiber cloth (no spraying).
Where it shines
- Textured plaster (dust hides in bumps like it pays rent)
- Older or fragile paint
- Routine maintenance: monthly or seasonally
Pro tip: If you only do one thing, do this. Dry dusting prevents you from smearing grime into the surface
when you eventually move to damp cleaning.
Way #2: Gentle Spot-Cleaning for Scuffs and Fingerprints (No Buckets Required)
Plaster walls collect “touch evidence” near light switches, stair rails, hallways, and anywhere people lean while talking
like they’re in a kitchen makeover show. For small marks, spot-cleaning is often better than washing the entire wall.
Less moisture, less risk, less regret.
Option A: Warm water on a barely damp cloth
Start with plain warm water. Lightly dampen a soft cloth or non-abrasive sponge and wring it out until it’s just shy of
“this could count as dry.” Gently rub the mark in small circles.
Option B: White eraser (for pencil marks and light scuffs)
A clean white art eraser can lift pencil marks without introducing water. Use gentle strokes and stop once the mark fades.
If you go too hard, you can burnish flat paint or create a clean “halo” that looks like a spotlight on your mistake.
Option C: Melamine “magic” spongeonly with caution
Melamine sponges can erase scuffs fast, but they’re mildly abrasive. On plaster walls (especially matte paint), they can
dull the finish or remove a tiny layer of paint. If you use one, choose a small test area and use feather-light pressure.
Where it shines
- Fingerprints around switches
- Hallway scuffs
- Pencil marks, light grime, “how did that get there?” mystery smudges
Way #3: Wash Painted Plaster Walls with a Mild Soap Solution (The Safe, Classic Method)
When plaster walls are painted and in good condition, a gentle wash can remove built-up grime. The key phrase is
gentle wash. You want “spa day,” not “pressure washer.”
The mild cleaning solution
Mix warm water with a small amount of mild dish soap (just a few drops per bowl/bucket of water). Strong cleaners and
heavy-duty sprays can damage paint finishesespecially on older walls.
Step-by-step wall washing (without streaks)
- Dust first (see Way #1). Skipping this is how you create gray streaks that look like modern art.
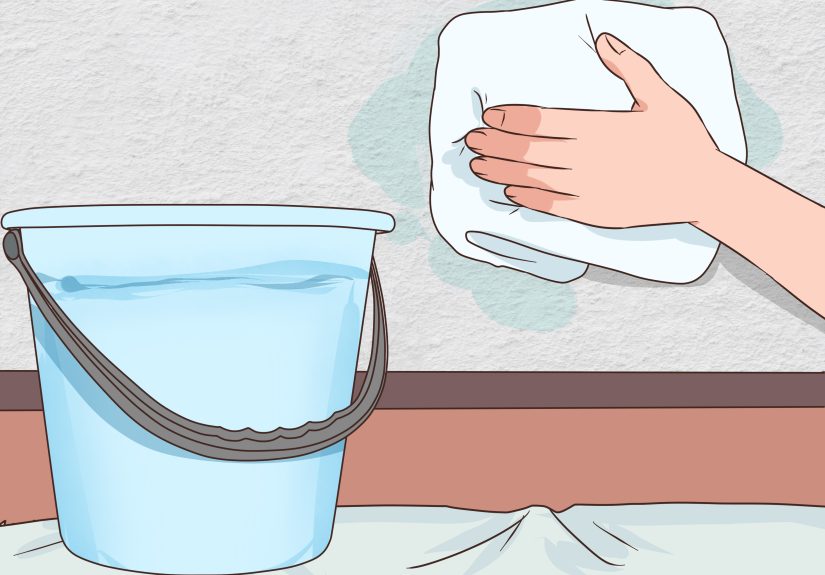
- Use two buckets: one with the soapy solution, one with clean rinse water.
- Wring thoroughly: your sponge/cloth should be damp, not dripping.
- Work in small sections (about 3 ft x 3 ft).
- Consider bottom-up washing: it can help reduce streaks on dirtier walls because drips over clean areas are easier to manage.
- Rinse as you go: wipe with a cloth dampened in clean water.
- Dry immediately: buff gently with a dry microfiber cloth to prevent water marks.
Extra tips for different paint finishes
- Flat/matte paint: Use the lightest pressure and the least water. Matte finishes can burnish (get shiny) when rubbed too hard.
- Eggshell/satin: More forgiving, but still keep moisture minimal.
- Gloss/semi-gloss: Easiest to clean, but common in kitchens/baths where grease and humidity complicate things.
What to avoid: glass cleaners, solvent-heavy sprays, and harsh disinfectants can discolor or degrade paint.
If you need disinfecting for a specific reason (like illness in the home), spot-test and keep it minimal.
Way #4: Tackle Tough Stains the Smart Way (Soot, Grease, Crayon, and “Life”)
If mild soap won’t cut it, don’t jump straight to the nuclear options. Plaster walls reward patience and targeted tactics.
Choose the method based on the stain type, not your mood.
For smoke/soot film: use a dry chemical sponge
If you’ve had a fireplace, candles, or a minor smoke event, walls can get a dull gray film. A dry chemical sponge (often
used in restoration work) can lift soot without smearing it into wet streaks. You use it dryno waterlike blotting and
wiping lightly. Replace or clean the sponge surface as it loads up.
For kitchen grease: degrease gently
Grease likes to cling near stoves and dining areas. Start with dish soap solution. If that’s not enough, use a mild
degreaser labeled safe for painted surfaces. Apply to a cloth (not directly to the wall), wipe, then rinse with clean
water and dry. Don’t oversaturategrease plus too much water equals streak city.
For crayons, lipstick, and sticky marks: go stepwise
- Try warm water + mild soap first.
- If needed, try a small amount of baking soda paste (baking soda + water). Rub very gently, then rinse and dry.
- For persistent waxy marks, a tiny amount of mineral spirits on a cloth may helpbut only if you spot-test and only on durable paint. Keep ventilation good and avoid soaking the surface.
For mildew or mold-looking spots: prioritize safety and moisture control
Small surface spots sometimes clean up, but plaster is porous, and mold can hide beneath paint films if moisture is ongoing.
If you see repeated spots, bubbling paint, or a musty smell, treat it as a moisture problem first (leaks, humidity,
condensation). For small areas, a detergent-and-water wipe and thorough drying is often recommended. If the area is large,
keeps returning, or you suspect hidden growth, consider professional remediation.
For heavy grime on durable painted plaster: consider a TSP substitute
Some old-school cleaning guidance uses TSP (trisodium phosphate) for deep cleaning walls. It’s effective, but it’s also
a strong chemical, can be restricted in certain places, and requires careful handling. Many homeowners instead choose a
TSP substitute or a paint-prep cleaner designed for walls. If you go this route, follow the product
instructions closely, wear gloves, and rinse thoroughly.
Way #5: When Cleaning Isn’t EnoughRefresh, Repair, or Call a Pro
Sometimes plaster walls don’t look dirtythey look tired. That’s different. If you’ve cleaned correctly and the wall still
looks blotchy, stained, or chalky, you may be dealing with underlying issues that soap can’t solve.
Common “it’s not just dirt” scenarios
- Chalking paint: Older paint can powder as it breaks down. Over-washing can make it worse.
- Water stains: Brown/yellow stains often indicate past or current moisture. Fix the source first.
- Cracks and loose plaster: Cleaning won’t fix movement. Stabilize and repair before repainting.
- Historic finishes: Limewash, decorative coatings, or fragile plaster may require conservation-friendly methods.
What to do instead of scrubbing harder
- Address moisture: Fix leaks, improve ventilation, reduce humidity.
- Repair plaster: Patch cracks/holes with appropriate materials for your wall type.
- Prime and repaint: After cleaning and drying fully, a quality primer can even out blotchy areas.
- Hire help when needed: If plaster is loose, historic, or repeatedly stained, a skilled plasterer or preservation pro is worth it.
Quick “Don’t Do This” List (Because I Want Your Walls to Survive)
- Don’t soak plaster: Too much water can soften plaster and cause paint to lift or bubble.
- Don’t use abrasive scrub pads: They can scratch paint and raise texture unevenly.
- Don’t mix cleaning chemicals: Especially anything involving bleachdangerous fumes are not a personality trait.
- Don’t paint over mold: Clean and dry first, or the paint is likely to peel and the problem will return.
- Don’t skip spot-testing: One test patch can save you from a whole-wall redo.
Conclusion: Clean Plaster Walls Without Turning It Into a Renovation
The best approach to how to clean plaster walls is simple: start dry, stay gentle, and add moisture only
when you have to. Dust and vacuuming handle most of the problem. Spot-cleaning keeps small marks from becoming big jobs.
A mild soap wash works for painted plaster when you use a damp (not wet) cloth and dry as you go. For tougher stains,
match the method to the messdry sponges for soot, degreasers for kitchens, and cautious, tested stain-lifting for the
weird stuff.
And when walls still look rough after cleaning? That’s not failurethat’s a clue. Plaster walls can be telling you about
moisture issues, aging paint, or repairs they’ve been politely requesting since 1997. Listen to them. They’ve seen things.
Real-Life Lessons: of Plaster Wall Cleaning Experience (So You Don’t Learn the Hard Way)
If plaster walls could talk, they’d say: “Please stop treating me like a countertop.” Most people (understandably) assume
that cleaning a wall is just cleaning, but plaster walls have two modes: “totally fine” and “why is that patch darker now?”
The difference is usually water.
One of the most common real-world scenarios is the hallway scuff parade. You know the one: shoe rubs near the stairs,
shoulder marks at the turn, fingerprints around every switch plate. The first time you notice it, you think, “I’ll wash the
whole wall and be done.” That’s how you end up with a clean wall… and a few shiny streaks where matte paint got rubbed too
enthusiastically. The better approach (the one people eventually learn after one minor meltdown) is spot-cleaning. Hit the
high-touch zones first. Nine times out of ten, the wall doesn’t need a full spa packagejust a targeted intervention.
Another experience: the “I lit three candles, now my walls look haunted” moment. Candle soot is sneaky. It doesn’t always
look like obvious black streaks; sometimes it’s a gray film that makes white paint look tired. If you try to wash soot with
water right away, you can smear it and create shadowy streaks that are harder to remove. This is where dry methods save
your sanity. A dry chemical sponge (the kind restoration folks use) can feel like sorcery: you wipe, the soot lifts, and
you don’t create a muddy mess. It’s one of those tools you don’t appreciate until you really, really need it.
Kitchens bring their own drama. Grease doesn’t sit politely on the surfaceit clings. The lesson here is patience and
layering: start with a mild dish soap solution, rinse, dry, repeat. If you jump straight to harsh cleaners, you might cut
through grime but also dull the finish, leaving a “clean patch” that looks different from the rest of the wall. And yes,
it will catch the light at exactly the wrong angle every time you have company. (Walls are comedians like that.)
The biggest practical takeaway from years of plaster-wall reality is this: cleaning is a process, not a single swing.
Start with dry dusting. Move to gentle spot-cleaning. Wash only if needed and only with a wrung-out cloth. Dry as you go.
If you treat plaster walls with respectand keep water on a short leashyou can get them clean without accidentally
scheduling yourself a weekend of patching and repainting.