
Table of Contents >> Show >> Hide
- Before You Cut: The 60-Second Setup That Makes Straight Cuts Actually Straight
- Way 1: Score-and-Snap (Straightedge + Utility Knife)
- Way 2: The Speed Square Trick (Quick, Straight Crosscuts)
- Way 3: Clamp a Straight Board as a Circular Saw Guide
- Way 4: Use a Shop-Made “Zero-Clearance” Saw Guide (DIY Track)
- Way 5: Track Saw + Guide Rail (The “Luxury Sedan” of Straight Cuts)
- Way 6: Table Saw + Rip Fence (And a Straight-Line Jig for Crooked Boards)
- Quick Decision Guide: Which Straight-Cut Method Should You Use?
- Common Straight-Cut Problems (And the Fast Fixes)
- Experience Section: What Straight Cuts Teach You (The Hard Way)
- Conclusion
Cutting a straight line sounds like the kind of basic life skill everyone magically downloads at birthright next to “fold fitted sheets” and “open a tape measure without it snapping back like an angry snake.”
In real life, straight cuts can turn into wavy “abstract art” fast, especially when you’re wrestling a full sheet of plywood on two sawhorses that are definitely not the same height.
The good news: you don’t need Jedi powers. You need the right setup, the right guide, and a method that matches your tool and material.
Below are six reliable ways to cut a straight linewhether you’re working with drywall, plywood, boards, or anything that’s currently testing your patience.
Before You Cut: The 60-Second Setup That Makes Straight Cuts Actually Straight
1) Mark smarter (not harder)
Straight cuts start before the tool turns on. Measure, mark, and define the “waste side” (the part you’re removing) so you don’t accidentally cut your project piece short.
For long cuts, a chalk line is fast and easy to see. For fine work, a sharp pencil line (or even a light score line with a utility knife) gives you a clean reference.
2) Support the work so it can’t pinch your blade
Most “my saw wandered” stories are secretly “my sheet sagged mid-cut” stories. Support sheet goods so the offcut can’t drop and pinch the blade.
If you’re cutting a full panel, consider laying rigid foam insulation underneath it on the flooryour saw can cut slightly into the foam while the whole sheet stays supported.
3) Set the blade depth and use the right blade
A deeper blade isn’t “more powerful.” It’s usually rougher and sometimes less safe. Set blade depth so the teeth clear the material by a small amount.
Use a blade designed for the job: framing blades for rough cuts, plywood/fine-finish blades for clean edges, and the correct blade type for non-wood materials.
4) Don’t skip safety because “it’s just one cut”
Wear eye protection. Keep hands out of the cut line. Clamp the work when you can. And if something feels sketchylike the sheet is rocking, the fence is crooked, or your “helper” is a golden retrieverpause and reset.
Straight lines are great. Keeping your fingers is better.
Way 1: Score-and-Snap (Straightedge + Utility Knife)
If you’re cutting drywall, foam board, laminate sheet goods, or materials designed to break cleanly, the straightest cut often comes from not using a saw at all.
Score-and-snap is clean, fast, and doesn’t fill the room with dust like a power tool auditioning for a sandstorm.
Best for
- Drywall and gypsum board
- Foam insulation board
- Some thin panel products or plastics (check manufacturer guidance)
How to do it
- Mark your cut line clearly.
- Align a drywall square or long straightedge on the line and hold it firmly.
- Score through the face paper (and slightly into the core for drywall) with a sharp utility knife.
- Move the sheet so the score line sits over an edge, then snap along the line with firm, even pressure.
- Cut the back paper to separate the pieces, then clean the edge with a rasp if needed.
Pro tips
- Change blades often. Dull blades tear paper and make jagged edges.
- Use a chalk line for long runs. It’s faster than measuring fifteen points and hoping they’re friends.
- Cut the waste side. If your line is thick, your “exact cut” can drift by a surprising amount.
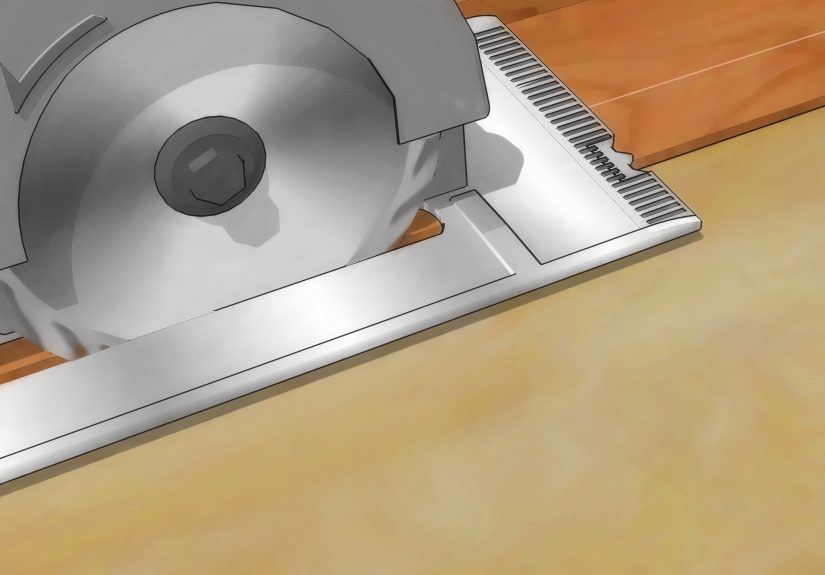
Way 2: The Speed Square Trick (Quick, Straight Crosscuts)
For short, straight cuts across a boardthink 2x4s, trim stock, shelving piecesa speed square can act like a mini fence.
It’s simple: you register the square’s lip against the board edge, then guide your saw along the square for a crisp, straight crosscut.
Best for
- Short crosscuts on framing lumber and boards
- Fast repeat cuts (when paired with stop blocks or consistent measuring)
- Jobsite work where you want speed and decent accuracy
How to do it
- Mark your cut line.
- Place the speed square with the lip tight against the board edge.
- Line up your saw blade with the mark, then hold the square firmly.
- Run the saw base plate along the square to complete the cut.
Pro tips
- Watch clamp clearance. If you clamp the square, keep the clamp out of the saw motor’s path.
- Let the saw do the work. Pushing hard invites drift.
- Use the right tool size. A small speed square is great for 2x stock; longer guides work better for wide boards.
Way 3: Clamp a Straight Board as a Circular Saw Guide
This is the classic “straight cut” upgrade for a circular saw: clamp a straight board (or a level, or a manufactured straightedge) to your workpiece and run the saw base against it.
It’s simple, repeatable, and miles better than freehanding a 6-foot line while whispering encouragement to yourself.
Best for
- Breaking down plywood and sheet goods
- Long rip cuts and long crosscuts
- DIY projects where you want better-than-basic accuracy without buying a track saw
How to do it (the part most people mess up)
- Mark the cut line on both ends of the material.
- Measure the offset: the distance from your saw blade to the edge of the saw’s base plate that will ride the guide.
- Clamp your straight board on the waste side, positioned exactly that offset away from your cut line.
- Make sure clamps won’t interfere with the saw body or cord.
- Start the saw, reach full speed, then guide the base plate firmly against the straightedge.
Pro tips
- Verify your guide is truly straight. “Looks straight” can be a lie told by warped scrap.
- Support the offcut. If the waste piece drops, it can pinch the blade and ruin the cut.
- Use painter’s tape for clean plywood cuts. It can help reduce splintering on the top veneer (especially with a fine blade).
Way 4: Use a Shop-Made “Zero-Clearance” Saw Guide (DIY Track)
If you like the straightedge method but hate measuring offsets every time, make (or buy) a saw guide that shows you the cut line automatically.
The idea is simple: build a base and a fence, then run your saw along it once. That first cut trims the base to the exact blade lineso later you just align the guide’s edge to your marks and cut.
Best for
- Repeatable cuts on plywood, MDF, and panel goods
- Projects like shelving, cabinet parts, and workbench tops
- Anyone who’s tired of “offset math” before coffee
How it works
- Fasten a straight fence board onto a wider base board (plywood works well).
- Run your circular saw along the fence once to trim the base to the blade line.
- For future cuts, line the trimmed edge up with your cut marks and clamp the guide down.
- Cut while keeping the saw snug to the fence.
Pro tips
- Make two guides. One for your left-blade saw setup and one for right-blade (or different saws/blades).
- Label them. “PLYWOOD GUIDE” beats “Why is this off by 1/8 inch?” later.
- Keep the base clean. Sawdust under the guide can lift it slightly and tilt your cut.
Way 5: Track Saw + Guide Rail (The “Luxury Sedan” of Straight Cuts)
If you regularly cut sheet goods and want clean, straight, near-factory edges, a track saw system is the gold standard.
The saw rides a guide rail, and many rails include a sacrificial edge strip that helps reduce tear-out while also showing exactly where the blade will cut.
Translation: you align the rail to your mark and go.
Best for
- Cabinet-grade plywood cuts
- Long, straight cuts where accuracy matters
- Breaking down full sheets more safely than wrestling them onto a table saw
How to get the cleanest, straightest result
- Place the sheet on solid support (foam board or well-placed sawhorses).
- Mark your cut line and align the rail edge to the mark.
- Clamp the rail if needed (especially for narrow pieces or slick surfaces).
- Set depth properly and make a steady pass without forcing the saw.
Pro tips
- Trim the rail’s edge strip correctly. The first cut “registers” the strip to your blade line.
- Mind the cord and dust hose. If they snag mid-cut, your line will show it.
- Use the right blade. Track saws can give stunning cutsbut only if the blade matches the material.
Way 6: Table Saw + Rip Fence (And a Straight-Line Jig for Crooked Boards)
For long, straight rips in boards and panels, a table saw with a properly aligned rip fence is a straight-line machine.
You set the fence width, keep the work tight to the fence, and feed consistently. When everything is tuned, the results are reliably straight and repeatable.
Best for
- Repeat rips to the same width
- Workshop furniture, trim, and cabinetry parts
- Producing straight edges quickly (once the saw is set up)
How to do it safely and accurately
- Set the fence to your desired width and confirm with an actual measurement (not just the scale).
- Use a sharp blade appropriate for ripping.
- Keep the board flat on the table and snug to the fence through the entire cut.
- Use push sticks or push blocks as the cut narrows.
- Support long stock infeed and outfeed so it doesn’t tip or twist.
When your board edge is crooked (straight-line ripping jig)
If the board edge is wavy or live-edge, you can’t just press it to the fence and expect a straight cutbecause the fence will faithfully follow the crooked edge.
A straight-line jig (sometimes a carrier board/sled approach) lets you clamp the wonky board to a straight reference, cut one straight edge, then flip and rip the other edge using the fence.
Pro tips
- Don’t use the rip fence for typical crosscuts. Use a miter gauge or crosscut sled to reduce binding and kickback risk.
- Keep the fence and table clean. Pitch buildup can cause inconsistent feeding.
- Use anti-kickback and guarding features. Straight cuts should not come with surprise projectiles.
Quick Decision Guide: Which Straight-Cut Method Should You Use?
- Drywall or foam board: Score-and-snap with a square/straightedge.
- Short crosscuts on boards: Speed square + circular saw (or a miter saw).
- Long cuts with a circular saw: Clamp a straightedge, or use a zero-clearance DIY guide.
- Clean, cabinet-style sheet cuts: Track saw + guide rail.
- Repeat rips in the shop: Table saw + rip fence.
- Crooked lumber needs one straight edge first: Straight-line ripping jig/sled, then fence.
Common Straight-Cut Problems (And the Fast Fixes)
“My cut drifts away from the line.”
Usually caused by pushing too hard, a dull blade, inadequate support, or not keeping the saw base tight to the guide.
Slow down, support better, and focus on steady pressure against the guidenot speed.
“The edge is straight… but it’s splintered.”
Use a fine-tooth blade for plywood, consider painter’s tape on the cut line, and cut with the “good face” oriented correctly (depending on the tool’s tooth direction).
Track saws and zero-clearance guides also help reduce tear-out.
“My cut is straight, but the piece isn’t the right size.”
That’s an offset/measurement issue. Double-check the blade-to-base offset (for circular saw guides), mark the waste side, and measure twiceespecially before cutting expensive sheet goods.
Experience Section: What Straight Cuts Teach You (The Hard Way)
Most people don’t struggle with straight cuts because they lack talent. They struggle because the first few projects reveal the truth: materials move, tools have opinions, and gravity is not your coworker.
In workshops and job sites, the same “straight line” lessons come up again and againusually right after someone says, “I can probably just freehand it.”
One of the most common experiences is discovering how much support matters. You can mark the cleanest line on Earth, but if the sheet sags halfway through the cut, the kerf pinches, the saw slows, and your “straight” edge suddenly looks like it had a stressful week.
The fix often feels almost too simple: fully support the panel (foam board on the floor is a classic), and plan where the offcut will go as the cut finishes.
When the work stays stable, your hands relaxand your cut magically improves.
Another classic moment: the first time you realize the blade doesn’t cut where your saw body is pointing. With a circular saw guide, you must account for the offset from the blade to the edge of the base plate.
People learn this by confidently clamping a straight board exactly on the cut line… and then making a beautiful, perfectly straight cut that is also perfectly wrong.
After that, many DIYers become passionate believers in zero-clearance guides or track saw railsanything that eliminates “offset math” when you’re tired, rushed, or both.
There’s also the emotional journey of tear-out. You’ll do a cut that’s dead straightthen flip the board and see splintering that looks like your plywood got into a fight with a badger.
That experience usually pushes folks to try a finer blade, adjust which face is up, use painter’s tape, or slow the feed rate.
Over time, you learn that a straight line isn’t only about directionit’s also about how the fibers behave as the teeth exit the material.
People who switch from “guide board + circular saw” to a track saw often describe it as going from “driving on a gravel road” to “cruising on fresh pavement.”
The rail keeps the saw honest, the cut line is easier to align, and the results feel more predictableespecially on big sheet goods where awkward body positions can cause drift.
It’s not that you can’t get excellent results with a standard circular sawyou canbut the track system removes several variables that normally sabotage consistency.
Finally, there’s the safety wake-up call: straight cuts and safe cuts are tied together. A workpiece that’s clamped, supported, and guided doesn’t just cut straighterit’s less likely to bind, kick back, or surprise you.
The “best” straight-line method is often the one that keeps your hands farther from the blade and your attention focused on control instead of wrestling.
The irony is that the calmer you feel during the cut, the straighter it getsso the real secret might be this: your setup is the therapy, and your cut is the receipt.
Conclusion
Cutting a straight line isn’t about having perfect handsit’s about choosing a method that forces the tool to behave.
If you’re cutting drywall, score-and-snap is clean and accurate. If you’re using a circular saw, a guide (straightedge or zero-clearance jig) changes everything.
If you want the cleanest sheet-goods cuts, a track saw is tough to beat. And if you’re in the shop making repeat rips, a tuned table saw fence (plus the right jigs when lumber gets weird) is still the workhorse.
Pick one method, practice it on scrap, and you’ll go from “wobbly mystery lines” to “did I just do that?” pretty quickly.
Your tape measure may still bite you occasionallybut your cuts will be straight.


