Table of Contents >> Show >> Hide
- Why Plaster Walls Need a Different Approach
- What You’ll Need
- How to Hang Pictures on Plaster Walls in 13 Steps
- Step 1: Inspect the wall before you do anything heroic
- Step 2: Weigh the picture or check the frame hardware
- Step 3: Decide whether you need a stud, anchor, or simple picture hanger
- Step 4: Plan the height using the 57-inch rule
- Step 5: Make a template or mark the wall with painter’s tape
- Step 6: Measure from the frame to the hanging point
- Step 7: Transfer the measurement to the wall
- Step 8: Use a stud finder carefully on plaster walls
- Step 9: Drill a pilot hole instead of forcing the issue
- Step 10: Install the hardware that matches the picture’s weight
- Step 11: Hang the picture and level it
- Step 12: Add felt pads to protect the plaster
- Step 13: Test the hold and leave it alone for a bit
- Best Hardware Options for Plaster Walls
- Common Mistakes to Avoid
- Quick Example: Choosing the Right Method
- Conclusion
- Experience: What Hanging Pictures on Plaster Walls Actually Feels Like
- SEO Tags
Hanging pictures on plaster walls sounds easy right up until the wall reminds you it was built in another century and has opinions. Unlike drywall, plaster is dense, stubborn, and a little dramatic. Treat it gently, though, and it can hold artwork beautifully for years. Treat it like a modern apartment wall, and you may end up with a crack, a crooked frame, and a sudden interest in patching compound.
The good news is that hanging artwork on plaster walls is absolutely doable. You just need the right hardware, a little patience, and a plan that involves more measuring and less “that looks about right.” In this guide, you’ll learn how to hang pictures on plaster walls safely, neatly, and without turning your living room into a tiny renovation show.
Why Plaster Walls Need a Different Approach
Plaster walls are common in older homes, especially houses built before the mid-20th century. They are harder and more brittle than drywall, which means they do not love random hammering, oversized nails, or last-minute decision-making. A lightweight frame might do fine with a plaster-friendly picture hanger, but heavier wall art usually needs more support, such as a stud, an anchor, or a toggle-style fastener.
That is the real secret: the wall is not the enemy. Guesswork is. Once you know the weight of your frame, the condition of the plaster, and the right hanging method, the project becomes much simpler.
What You’ll Need
- Tape measure
- Pencil or painter’s tape
- Level
- Stud finder
- Drill and appropriate drill bit
- Plaster picture hangers, screws, wall anchors, or toggle bolts
- Hammer
- Felt pads or bumper tabs
- Your picture frame and hanging hardware
How to Hang Pictures on Plaster Walls in 13 Steps
Step 1: Inspect the wall before you do anything heroic
Look closely at the plaster. If you see existing cracks, loose spots, crumbling areas, or patches that feel soft, do not hang your frame there. Even a lightweight picture can make a weak area worse. Choose a more solid section of wall or repair the damaged plaster first. This step is boring, yes, but it is much less boring than watching your favorite framed print slide off the wall at 2 a.m.
Step 2: Weigh the picture or check the frame hardware
The weight of the picture determines everything: the type of hanger, whether you need a stud, and whether adhesive methods are realistic. A small family photo in a thin frame is a very different project from a large vintage mirror-sized landscape. If the frame came with packaging, check the listed weight. If not, weigh it yourself. Never choose hardware first and ask questions later. That is how “decorating” turns into “gravity testing.”
Step 3: Decide whether you need a stud, anchor, or simple picture hanger
For lightweight pictures, plaster-friendly picture hangers often work well. For medium or heavy framed art, a stud is the safest bet. If a stud is not where you want the picture to go, use the proper anchor rated for the load and suited to plaster walls. For especially heavy pieces, a toggle-style fastener may be the better choice. Always follow the manufacturer’s weight guidance, and be conservative rather than optimistic. Optimism is wonderful in life, but it is not a hanging system.
Step 4: Plan the height using the 57-inch rule
A common design rule is to hang art so the center of the piece lands around 57 inches from the floor, which is roughly eye level for many adults. That rule is a starting point, not a law carved into marble. If you are hanging art above a sofa, console, or headboard, the picture usually needs to sit lower so it feels connected to the furniture instead of floating like it lost its map.
For example, if you are hanging a framed print above a couch, leave enough breathing room so it looks intentional, but not so much that the art feels like it belongs to the ceiling fan.
Step 5: Make a template or mark the wall with painter’s tape
Before you drill or hammer, test the placement. Cut a paper template the size of your frame, or use painter’s tape to outline the picture on the wall. This is especially helpful for gallery walls, where one wrong hole can set off a whole chain of “Well, maybe it should all move three inches to the left.” Templates let you experiment without damaging the wall, and they help you check scale, spacing, and symmetry.
Step 6: Measure from the frame to the hanging point
Flip the frame over and find the exact point where it will rest on the wall hardware. If the frame uses wire, pull the wire tight upward as if it is already hanging, then measure from the top of the frame to the taut wire at the hanging point. If it uses D-rings or a sawtooth hanger, measure from the top of the frame to the hanger itself.
This measurement matters more than people think. Many crooked picture problems are not actually level problems; they are measuring problems wearing a level problem costume.
Step 7: Transfer the measurement to the wall
Mark the wall where the hook, screw, or anchor will go based on your chosen height. If you want the center of the frame at eye level, work backward from that center point using the frame’s dimensions and the distance from the top of the frame to the hanging hardware. Double-check your math. Then check it again, because plaster only gives out so many free mistakes.
Step 8: Use a stud finder carefully on plaster walls
Stud finders can work on plaster, but they are not always as straightforward as they are on drywall because plaster is thicker and may sit over wood lath. Move slowly and verify the stud location if possible. If your finder seems confused, welcome to the club. In older homes, combining a stud finder with a little detective work usually gives the best results.
If you find a stud where you need one, great. Use it. A stud can make hanging heavier art much more secure.
Step 9: Drill a pilot hole instead of forcing the issue
If you are using screws, anchors, or toggle fasteners, drill a pilot hole first. This is one of the most important steps when hanging pictures on plaster walls. A pilot hole reduces the chance of cracking and gives you a cleaner, more controlled installation. Choose the bit size recommended by the hardware manufacturer. Do not oversize the hole, and do not rush. Plaster rewards patience and punishes overconfidence with tiny flakes on the floor.
Step 10: Install the hardware that matches the picture’s weight
For a light frame, install the picture hanger at the correct angle and secure it gently. For a stud-based installation, drive the screw into the stud. For an anchor, insert it according to the product directions and tighten carefully. For a toggle fastener, make sure the mechanism opens behind the wall and seats securely before you hang the frame.
This is not the moment to improvise with a leftover nail from your junk drawer. The right hardware is cheaper than repairing plaster and replacing broken glass.
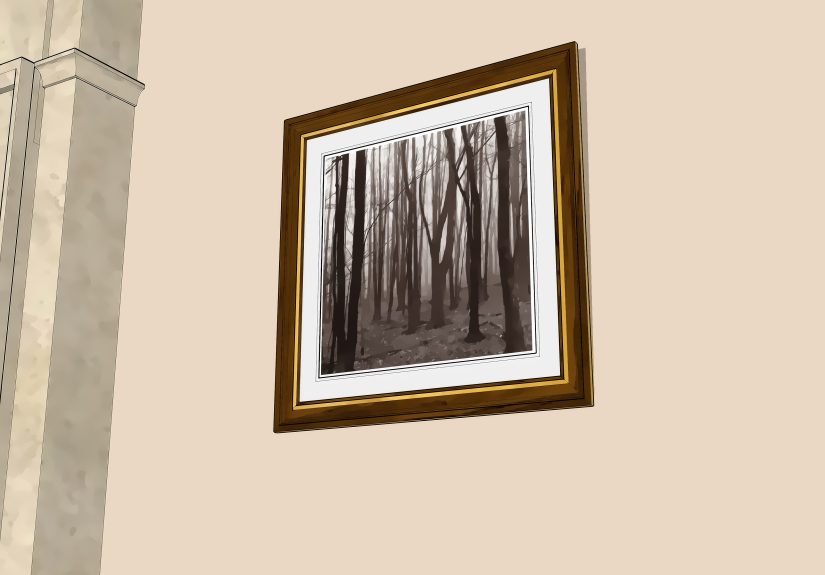
Step 11: Hang the picture and level it
Set the frame on the hanger or hook and step back. Then use a level to confirm it is straight. Even if it looks level, check anyway. Human eyes are wonderfully creative and occasionally terrible at judging straight lines. If you are hanging a set of pictures, level each piece and then check the group as a whole. A gallery wall can have excellent individual frames and still look slightly off if the spacing wanders.
Step 12: Add felt pads to protect the plaster
Place felt pads or bumper tabs on the lower corners of the frame. This small detail helps keep the frame from scuffing the wall, reduces shifting, and can keep the picture from tilting every time someone walks by or closes a nearby door with unnecessary enthusiasm. It is a tiny finishing touch that makes the whole installation feel more professional.
Step 13: Test the hold and leave it alone for a bit
Give the frame a very gentle test to make sure it feels stable, then stop touching it. No extra wiggling. No “let me just adjust it one more time” six times in a row. If the frame stays put, you are done. If it shifts, reassess the hardware before it becomes a problem. The goal is secure and calm, not secure-ish and suspenseful.
Best Hardware Options for Plaster Walls
If you are wondering what actually works best, here is the practical breakdown:
Lightweight pictures
Use plaster-compatible picture hangers or small hooks designed for harder wall surfaces. These are ideal for small framed photos, lightweight prints, and modest wall decor.
Medium-weight framed art
Use a screw with an appropriate anchor if you cannot hit a stud. This works well for medium-size frames, especially in hallways, stairwells, and dining rooms where placement matters more than stud location.
Heavy pictures
Use a stud whenever possible. If that is not possible, use a heavy-duty anchor or toggle-style fastener rated for the load. If the frame is especially wide or valuable, a more robust hanging system may be worth considering.
Older homes with picture rails
If your home already has picture rail molding, congratulations: the house has already solved this problem for you with Victorian flair. A picture rail lets you hang art without making new holes in the plaster, and it is especially useful if you like to rotate artwork often.
Common Mistakes to Avoid
- Hammering directly into plaster without checking the wall condition
- Using generic nails for frames that need actual hanging hardware
- Skipping the pilot hole when using screws or anchors
- Ignoring the picture’s weight and hoping for the best
- Forgetting to measure the wire or hanger placement on the back of the frame
- Hanging art too high above furniture
- Leaving off felt pads and wondering why the frame keeps shifting
Quick Example: Choosing the Right Method
Say you have a 10-pound framed botanical print for a plaster wall in a 1930s dining room. A quality picture hanger designed for plaster may be enough, especially if the wall is in good shape. Now imagine a 22-pound oversized black-and-white photo in a thick wood frame. That is the moment to look for a stud or use a stronger anchor system with a pilot hole. Same room, same wall material, completely different strategy.
Conclusion
Learning how to hang pictures on plaster walls is less about brute force and more about reading the room, literally. Plaster rewards a careful approach: inspect first, measure twice, choose hardware based on weight, drill a pilot hole when needed, and protect the wall with felt pads and thoughtful placement. Do that, and your art will look polished instead of precarious.
In other words, plaster walls are not difficult. They are just old-school. They appreciate manners.
Experience: What Hanging Pictures on Plaster Walls Actually Feels Like
The first time I hung pictures on plaster walls, I made the classic mistake of assuming the wall would behave like drywall. It did not. Drywall is forgiving. Plaster is more like that one very elegant relative who will absolutely remember if you used the wrong fork. I tapped in a nail too casually, heard a tiny crack, and immediately understood that older homes demand respect.
After that, I slowed down and started treating the process like a small craft project instead of a race. The biggest lesson was that measuring saves everything. Once I began using painter’s tape, paper templates, and actual tape-measure math instead of “that looks centered enough,” my results improved dramatically. The frames looked better, the spacing looked intentional, and I stopped creating accidental extra holes that had to be explained away later.
I also learned that the back of the frame matters just as much as the wall. Cheap wire, loose D-rings, or flimsy sawtooth hangers can make even a perfect wall installation feel unstable. A good frame with solid hanging hardware is half the battle. On one project, I was convinced the wall hook was wrong because the picture kept leaning. It turned out the wire on the back had too much slack. Once I tightened that up and added felt pads, the frame sat like it had finally found inner peace.
Another real-world lesson is that plaster walls often vary from room to room. In one older house, the hallway walls were solid and easy to work with, but a bedroom wall had patches from earlier repairs and felt less reliable. That meant I could not use the exact same method everywhere. It was annoying at first, but it taught me to inspect each spot before deciding on hardware. Old houses are full of character, which is a charming way of saying they do not always believe in consistency.
Gallery walls on plaster are possible, but they require restraint. Laying everything out on the floor first helped a lot. So did taping paper templates to the wall and living with the arrangement for a day before committing. That pause saved me from several bad layout ideas that felt brilliant for about six minutes. It is amazing how often a “perfect” plan looks too cramped, too high, or weirdly off-balance after dinner.
My favorite trick, though, is using felt pads on the bottom corners of frames. They are inexpensive, easy to forget, and surprisingly effective. They keep frames from rubbing against the wall, minimize little marks, and help art stay level longer. They are the quiet overachievers of picture hanging.
If I had to sum up the experience in one sentence, it would be this: hanging pictures on plaster walls is not harder because the walls are impossible; it is harder because the walls expect you to care. Once you do, the results are worth it. Art looks beautiful on plaster. The walls feel substantial, the rooms feel warm, and the finished setup has a kind of old-house confidence that modern drywall just cannot fake.