
Table of Contents >> Show >> Hide
- Why You’ll Love These Chocolate Oatmeal Bars
- Chocolate Oatmeal Bars: The “Why” Behind the Ingredients
- Equipment You’ll Need
- The Best Chocolate Oatmeal Bars Recipe (Chewy + Fudgy)
- Pro Tips for Bakery-Style Results
- Flavor Variations (So You Never Get Bored)
- Serving Ideas (Because “Just a Bar” Is Underselling It)
- Troubleshooting + FAQs
- Storage + Make-Ahead
- Nutrition Notes (Realistic, Not Judgy)
- Extra: of Real-World Baking “Experiences” With Chocolate Oatmeal Bars
- Neat Conclusion: Your New Go-To Chocolate Oatmeal Bars
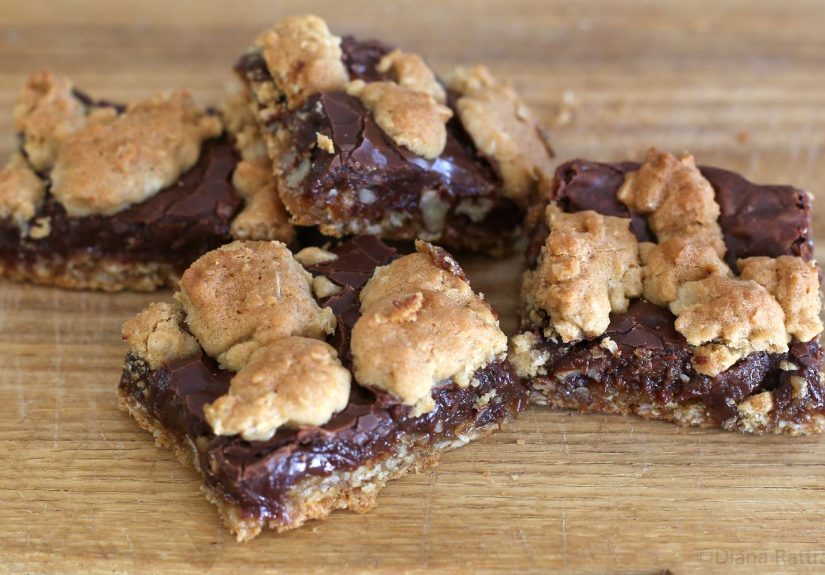
Chocolate oatmeal bars are what happen when a chewy oatmeal cookie and a fudgy brownie decide to share a zip code. They’re sturdy enough for lunchboxes, indulgent enough for dessert, and forgiving enough for “I forgot to soften the butter” days (we’ve all been there). This recipe gives you a buttery oat crust, a rich chocolate layer, and a crumbly oat toppingaka the triple-threat of snackability.
Whether you call them oatmeal chocolate bars, chocolate revel bars, or “please don’t cut them yet, they’re still warm,” this is the kind of bake-once, snack-all-week treat that earns a permanent spot in your recipe rotation.
Why You’ll Love These Chocolate Oatmeal Bars
- Chewy-meets-fudgy texture: oats bring chew; the chocolate layer brings drama.
- One pan, big payoff: a classic 9×13 makes a crowd (or a very happy you).
- Customizable: nuts, espresso, peanut butter swirl, dried cherrieschoose your adventure.
- Make-ahead friendly: they cut cleaner the next day (patience, rewarded).
Chocolate Oatmeal Bars: The “Why” Behind the Ingredients
Great bars aren’t just “throw stuff in a bowl” (though we respect the vibe). Here’s what each key ingredient does, so you can bake with confidence and improvise without chaos.
Oats: Chew, Structure, and That Cozy Flavor
Old-fashioned rolled oats give the best hearty chew. Quick oats will work in a pinch, but the texture skews softer and more cake-y. Steel-cut oats? Save those for breakfastyour teeth will file a complaint.
Brown Sugar: Moisture + Caramel Notes
Brown sugar keeps bars chewy and adds a subtle molasses warmth that plays beautifully with chocolate. If you only use granulated sugar, you’ll still get sweetness, but you lose some of that soft-baked vibe.
Sweetened Condensed Milk: The Shortcut to Silky Fudge
This is the secret to a glossy, rich middle layer that sets up without turning gritty. It’s the difference between “nice chocolate layer” and “why did I just eat three squares?”
Butter + Flour: The Bar Cookie Backbone
Butter delivers flavor and tenderness; flour provides structure so the bars don’t collapse into delicious rubble (delicious, yesportable, no).
Equipment You’ll Need
- 9×13-inch baking pan
- Parchment paper (strongly recommended for easy lifting)
- Mixing bowl + sturdy spoon or mixer
- Medium saucepan (for the chocolate layer)
- Offset spatula (nice-to-have, not mandatory)
The Best Chocolate Oatmeal Bars Recipe (Chewy + Fudgy)
Yield: About 24 bars (depending on how generous your “square” is)
Prep: ~20 minutes
Bake: ~30–35 minutes
Cool time: 1–2 hours (yes, it matters)
Ingredients
- 2 1/2 cups old-fashioned rolled oats
- 2 cups all-purpose flour
- 1 teaspoon baking soda
- 1/2 teaspoon fine salt
- 1 1/4 cups packed light brown sugar
- 1/2 cup granulated sugar
- 1 cup (2 sticks) unsalted butter, softened
- 2 large eggs
- 2 teaspoons vanilla extract
Chocolate layer:
- 1 (14 oz) can sweetened condensed milk
- 2 cups semi-sweet chocolate chips (or chopped chocolate)
- 2 tablespoons butter
- Pinch of salt
- Optional: 1/2 cup chopped walnuts or pecans
- Optional: 1/2 teaspoon espresso powder (makes chocolate taste “louder”)
Step-by-Step Instructions
-
Prep the pan and oven.
Heat oven to 350°F. Line a 9×13-inch pan with parchment paper, leaving overhang on two sides (this is your “lift-out handle” later). Lightly grease the parchment.
-
Mix the dry ingredients.
In a bowl, whisk together oats, flour, baking soda, and salt. Set aside.
-
Cream butter and sugars (the chew-maker step).
In a large bowl, beat softened butter with brown sugar and granulated sugar until fluffy-ish and combined. You’re not auditioning for a cooking showjust get it creamy.
-
Add eggs and vanilla.
Beat in eggs one at a time, then add vanilla. The batter should look smooth and glossy.
-
Combine wet + dry.
Add the dry mixture and stir until you get a thick, sturdy dough. If your spoon stands up on its own, you’re doing great.
-
Press in the bottom layer.
Press about two-thirds of the dough firmly into the pan in an even layer. A flat spatula or lightly greased hands help. This is your oat “crust.”
-
Make the chocolate layer.
In a saucepan over low heat, stir together sweetened condensed milk, chocolate chips, butter, and a pinch of salt until smooth and shiny. Keep the heat low and stir frequentlychocolate is sensitive and will absolutely hold a grudge if scorched. Stir in nuts and espresso powder (if using).
-
Assemble.
Pour and spread the chocolate layer evenly over the crust. Then crumble or dollop the remaining oat dough over the top. Don’t aim for full coveragethose little gaps are how you get pretty chocolate peeks after baking.
-
Bake.
Bake for 30–35 minutes, until the top is lightly golden and the edges look set. The center may still look slightly softgood. Overbaking is how bars become “oatmeal bricks.”
-
Cool completely (seriously).
Let bars cool in the pan on a rack for at least 1 hour. For ultra-clean slices, chill for 30 minutes after cooling. Then lift out using parchment and slice.
Pro Tips for Bakery-Style Results
1) Press the base firmly
Loose base = crumbly cuts. Firm base = neat squares that travel well (and look like you planned ahead).
2) Low heat for the chocolate layer
Chocolate + condensed milk can seize or scorch if rushed. Low and slow keeps it glossy and smooth.
3) Cool before slicing
Warm bars are delicious but messy. If you want clean edges, let the chocolate set. This is the difference between “Pinterest-worthy” and “still tasty, but looks like modern art.”
Flavor Variations (So You Never Get Bored)
Peanut Butter Chocolate Oatmeal Bars
Swirl 1/2 cup warmed peanut butter into the chocolate layer before topping with the remaining dough. It turns into a chocolate-peanut butter situation that disappears fast.
Dark Chocolate + Sea Salt
Use dark chocolate chips and sprinkle flaky salt on top right after baking. Sweet + salty = instant upgrade.
Trail Mix Bars
Add chopped nuts, dried cherries, or raisins to the oat dough. It’s like a granola bar went to dessert school and graduated with honors.
Gluten-Free Option
Use a reliable 1:1 gluten-free flour blend and make sure your oats are labeled gluten-free. Texture will be slightly more tender, but still excellent.
Serving Ideas (Because “Just a Bar” Is Underselling It)
- Warm a square for 10 seconds and top with vanilla ice cream.
- Serve with coffee for a “breakfast bar” moment (no one has to know).
- Pack for road tripsless mess than frosted desserts, more joy than plain snacks.
- Crumble over yogurt for a “look at me, I meal-prep” vibe.
Troubleshooting + FAQs
Why are my bars crumbly?
Usually one of three things: (1) base not pressed firmly enough, (2) too much flour (spoon-and-level your measuring), or (3) cut too soon. Let them cool fully and consider a short chill before slicing.
Why is the chocolate layer runny?
Most often, it just needs more cooling time. If it stays loose even after cooling, your chocolate-to-condensed-milk ratio may have been off (or the bars were cut while still warm).
Can I use cocoa powder instead of chocolate chips for the filling?
You can, but it becomes more like a brownie batter layer and less like silky fudge. If you want a cocoa-forward bar, add 2–3 tablespoons cocoa powder to the oat dough and keep the chip-based filling.
Can I make these without condensed milk?
Yesmake a thick ganache (chocolate + warm heavy cream) instead. The flavor is fantastic, but the set can be slightly softer unless you adjust ratios carefully.
Storage + Make-Ahead
Room temperature
Store in an airtight container in a cool, dry place for up to 3–4 days. If your kitchen runs warm, keep them out of direct sunlight (yes, chocolate will absolutely melt like it’s on vacation).
Refrigerator
Chilling makes the bars extra firm and gives you clean slices. Let them sit 10 minutes at room temp before serving for the best chew.
Freezer
Freeze sliced bars between layers of parchment in an airtight container. Thaw at room temperature for about 30–60 minutes. Great for future-you, who deserves treats.
Nutrition Notes (Realistic, Not Judgy)
These are dessert bars: oats add some fiber, but chocolate is here to have fun, not to file taxes. If you want a lighter version, reduce chips slightly and add chopped nuts for more satietystill delicious, just a bit more “snack” than “sugar sprint.”
Extra: of Real-World Baking “Experiences” With Chocolate Oatmeal Bars
Chocolate oatmeal bars have a funny way of becoming everyone’s “favorite thing you make,” even if you didn’t mean for that to happen. One day you bake them because you want something easy that doesn’t require frosting, piping, or emotional resilience. The next day, someone is asking if you can bring “those oat-chocolate bars” to every gathering until the end of time.
What usually hooks people is the texture contrast. In real kitchens, the first batch often teaches the biggest lesson: these bars are at their best when you don’t overbake them. A lot of bakers pull them only when the top looks fully “done,” but oatmeal cookie bars continue to set as they cool. So if you’ve ever taken a pan out and thought, “Hmm… the middle looks a little soft,” congratulationsyou are standing at the doorway of perfect chewiness. The edges will be set, the top will be lightly golden, and the center will firm up into that brownie-cookie hybrid that feels oddly professional.
Another common experience: the cooling time becomes a test of character. Warm, the bars smell like toasted oats and melted chocolate, and the temptation to slice early is powerful. If you cut too soon, you’ll get gooey chocolate smears and crumbly edges. Still tasty, but not the neat squares you pictured. Most people learn the “chill trick” the hard way: once the pan has cooled, a short refrigeration break makes the chocolate layer slice like a dream. It’s the difference between “party tray ready” and “I swear this looked nicer in my head.”
Then there’s the customization spiral. The first time, you follow the recipe. The second time, you add walnuts because someone said they like crunch. The third time, you toss in espresso powder and suddenly everyone says, “What is that flavor? It’s amazing.” (Spoiler: it’s chocolate, but louder.) Eventually you’ll try a peanut butter swirl, then a sprinkle of flaky salt, and before you know it you’ve got a “signature bar” and people are asking for the recipe. You can choose to share it… or you can vaguely say, “Oh, it’s just something I throw together,” like a mysterious dessert wizard.
In potlucks and bake sales, chocolate oatmeal bars are also the low-drama MVP. They travel well, they don’t require refrigeration in most normal situations, and they can be cut big for dessert or small for coffee breaks. They’re also a sneaky solution to the “I need a dessert tonight” moment: you probably have oats, flour, sugar, and chocolate chips already. Condensed milk is the only wildcardonce you keep a can in the pantry, these bars go from “special bake” to “emergency happiness plan.”
And finally: the crumbs. With oatmeal bars, there are always crumbson the cutting board, on the plate, and mysteriously on the counter even if you swear you cleaned. The good news is that those crumbs are basically a chef’s snack. Sprinkle them over ice cream, stir into yogurt, or just eat them standing over the sink like a normal person who totally has their life together.
Neat Conclusion: Your New Go-To Chocolate Oatmeal Bars
If you want a dessert that’s easy, crowd-friendly, and consistently delicious, these chocolate oatmeal bars are it. The oat dough is straightforward, the chocolate layer feels fancy without the fuss, and the final result delivers that perfect “chewy cookie meets fudgy chocolate” bite. Make them once, and you’ll understand why they’re the kind of recipe people text you about later.


