Table of Contents >> Show >> Hide
Introduction: Crafting your own storage solutions is not only a rewarding activity, but it also helps you personalize your space in a way that suits both style and function. One such DIY project that combines elegance and practicality is creating a storage tray from a single piece of leather. This project, which may sound intimidating at first, is surprisingly simple and can add a touch of sophistication to any desk, bedside table, or kitchen counter. In this article, we’ll guide you through the steps of crafting your very own leather storage tray, perfect for organizing your everyday essentials while also elevating your décor.
Why Leather?
Leather is a durable, versatile material that can add a sense of luxury and timeless appeal to any space. Its natural texture, along with its ability to age gracefully, makes it an ideal choice for DIY projects like this storage tray. Not only is leather functional, but it also becomes more beautiful over time, developing a rich patina that adds character to the piece. Plus, the process of working with leather can be therapeutic and satisfying, allowing you to connect with the material in a way that mass-produced items simply can’t match.
Materials Needed
- 1 square foot of vegetable-tanned leather (or a similar type)
- Sharp utility knife or rotary cutter
- Cutting mat
- Ruler and pencil
- Leather glue or double-sided tape
- Rivets or snaps (optional)
- Edge finishing tools (burnisher or sandpaper)
- Leather conditioner (optional, for finishing)
Step-by-Step Guide
Step 1: Measure and Cut the Leather
The first step in making a leather storage tray is measuring and cutting your leather. Start by determining the size of your tray. For a simple tray, a square or rectangular shape works best. A 10” x 10” square or 12” x 8” rectangle is a good starting point for everyday items like keys, coins, and phone accessories. Use a ruler to draw the shape of your tray onto the leather, then use a sharp utility knife or rotary cutter to cut along the lines. Be sure to cut slowly and carefully, as leather can be tough to cut through cleanly.
Step 2: Score the Edges
Next, you’ll want to score the edges where the tray will fold. Using a ruler and pencil, mark where the edges will be folded, and lightly score the leather along these lines. A tool like a bone folder or an X-acto knife works well for this, but be gentle so you don’t cut all the way through the leather. The goal is to create a shallow groove to help the leather bend more easily. Make sure the lines are even and symmetrical to keep the tray looking neat.
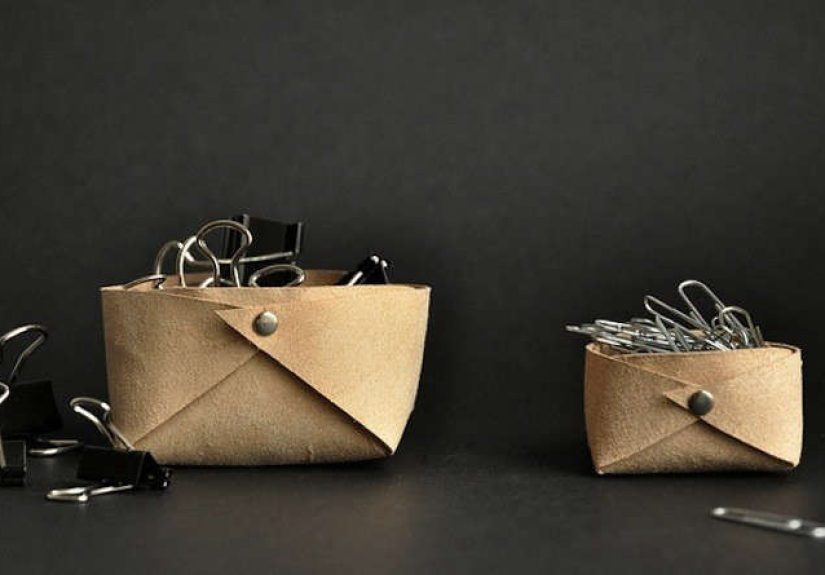
Step 3: Fold the Tray
Once your leather is scored, gently fold the edges of the tray along the grooves. Take your time with this step to ensure that the folds are crisp and neat. If needed, use a bone folder or even a flat tool to reinforce the folds. Depending on your design, you can either glue the corners or secure them with rivets or snaps for extra stability. A bit of leather glue on each fold will help keep it in place. Make sure to press the folds firmly until the glue dries or the rivets are set.
Step 4: Finishing the Edges
To give the tray a professional and polished look, you’ll need to finish the edges. This can be done with a burnisher or sandpaper. A burnisher helps smooth and round the edges, while sandpaper can be used to refine the finish. Once the edges are smooth, you can apply a leather conditioner to keep the leather soft and supple. This step not only enhances the look of the tray but also ensures that the leather remains durable and resistant to wear and tear over time.
Step 5: Optional Customization
If you want to add a bit of personality to your storage tray, consider adding custom touches. You could stamp a design into the leather using leather stamps, or even add initials or a monogram for a personalized touch. Additionally, you can experiment with different leather colors or finishes to suit your style. Whether you opt for a natural tan finish or a rich, dark brown, the choice is yours to make your tray uniquely yours.
Conclusion
Creating a storage tray from a single piece of leather is a satisfying and functional DIY project that combines craft and practicality. Whether you’re using it for everyday essentials or as a decorative piece on your desk or table, this tray will serve as a lasting addition to your home décor. Leather’s durability and aesthetic appeal ensure that this project will stand the test of time, adding both style and utility to your living space. Take the plunge, and get creative with this DIY projectthe result will be a beautiful, handcrafted piece that showcases your skills and enhances your home.
DIY Experience: My Journey with Leather Crafting
When I first embarked on the journey of making my own leather storage tray, I was nervous. Leather crafting seemed like a daunting task, reserved only for experienced artisans. But as I started researching and experimenting, I quickly realized that with the right tools and a bit of patience, anyone could create something beautiful. The first tray I made was a simple design, yet the process itself was incredibly rewarding. Watching the leather transform from a raw material into a refined, functional piece gave me a sense of accomplishment that store-bought trays could never offer.
One thing I learned along the way was that leather requires a bit of respect. It’s a natural material with its own quirks and characteristics. For example, when cutting the leather, I learned that it’s important to go slow. If you rush through the cutting process, you risk leaving jagged edges, which can affect the final look of your project. Also, the folding part was more challenging than I expected, especially when trying to keep the folds sharp and even. But with practice, I got better at it, and the end result was well worth the effort.
Another valuable takeaway was the importance of finishing. It might be tempting to skip over smoothing the edges, but taking the time to burnish and condition the leather gives the project a professional touch. I was amazed at how much of a difference it made. The tray looked like something you could buy in a high-end store, and I couldn’t help but feel proud of my work.
What I enjoy most about DIY leather projects like this one is the versatility. Once I made my first storage tray, I began experimenting with other designs. Leather coasters, phone holders, and even wallets soon followed. Each project allowed me to learn something new, and each item became a unique piece of craftsmanship that felt personal and special. If you’re new to leather crafting, don’t be afraid to start simplethere are plenty of tutorials and resources available to help guide you along the way. And with every project, you’ll become more confident in your skills, creating beautiful pieces that are both functional and stylish.
Ultimately, working with leather is more than just a hobby; it’s a way to create lasting, beautiful items that can elevate your home or wardrobe. Whether you’re looking to add a personal touch to your décor or start a new creative pursuit, crafting with leather is a fantastic way to do it.