Table of Contents >> Show >> Hide
- Why Build a DIY Headboard Instead of Buying One?
- Choose Your DIY Headboard Style
- Tools and Materials You Will Need
- Step-by-Step: How to Build a DIY Headboard From Start to Finish
- Design Tips for a Better-Looking DIY Headboard
- Budget-Friendly DIY Headboard Ideas
- Common Mistakes to Avoid
- DIY Headboard Finish Options
- Experience Notes: What Building a DIY Headboard Teaches You
- Conclusion
- SEO Tags
A DIY headbord projectyes, the internet often spells it that way, but your bedroom will know we mean “headboard”is one of the most satisfying upgrades you can make without needing a contractor, a furniture showroom, or a dramatic home-renovation montage. A headboard frames the bed, adds comfort, protects the wall, and makes the whole room look more intentional. In other words, it is the bedroom’s way of saying, “I have my life together,” even if there is still a laundry chair quietly holding half your wardrobe.
The best part? Building a DIY headboard from start to finish is very doable for beginners. Whether you want a rustic wood headboard, a soft upholstered headboard, a modern wall-mounted design, or a budget-friendly plywood project, the process follows the same basic rhythm: plan, measure, cut, assemble, finish, mount, and enjoy. This guide walks you through the complete build-to-finish project with practical steps, design ideas, material choices, finishing tips, and real-world lessons that help your project look less “garage experiment” and more “custom bedroom feature.”
Why Build a DIY Headboard Instead of Buying One?
Store-bought headboards can be beautiful, but they can also be expensive, limited in size, or oddly determined to come in exactly the wrong shade of beige. A DIY headboard gives you control over the height, width, fabric, stain, shape, and budget. You can build a queen headboard that reaches wall-to-wall, a small twin headboard for a guest room, or a tall upholstered headboard that makes reading in bed feel luxurious.
Another advantage is customization. If your bedroom is small, you can make a slim wall-mounted headboard that does not steal floor space. If your room needs warmth, you can use natural wood boards, reclaimed planks, or a warm stain. If comfort is the priority, upholstery foam and durable fabric can turn a simple plywood panel into a padded backrest for late-night reading, laptop scrolling, or pretending you will go to sleep early.
A DIY headboard also lets you reuse materials. Old doors, leftover lumber, plywood scraps, fabric remnants, peel-and-stick planks, shutters, or even a decorative wall panel can become the foundation of a stylish headboard. That makes this project budget-friendly and more personal than ordering a generic piece online.
Choose Your DIY Headboard Style
1. Simple Wood Headboard
A wooden DIY headboard is sturdy, timeless, and beginner-friendly. You can build it with plywood, 1x boards, shiplap, tongue-and-groove planks, or common lumber. The finished look can be farmhouse, modern, rustic, coastal, or minimalist depending on the layout and finish. Straight vertical boards feel classic, horizontal boards make the bed look wider, and a chevron or geometric pattern adds a custom touch.
2. Upholstered Headboard
An upholstered DIY headboard uses a plywood or MDF base, upholstery foam, batting, and fabric. It is ideal if you want softness, color, pattern, or a hotel-style bedroom look. The project usually requires a staple gun, scissors, spray adhesive, and patience while folding corners. The payoff is huge: a padded headboard instantly makes the bed feel cozier and more expensive.
3. Wall-Mounted Headboard
A wall-mounted headboard is great for renters, small rooms, and beds without a traditional frame. You can mount a wood panel, upholstered board, slatted design, or reclaimed door directly to the wall. A French cleat is one of the strongest and cleanest ways to hang a heavy headboard because it spreads the weight across the wall and keeps the panel secure.
4. Repurposed Headboard
Repurposed headboards are perfect for anyone who enjoys the thrill of saying, “Actually, I made that from an old door.” Shutters, barn boards, interior doors, woven panels, window frames, or room dividers can all become headboards with cleaning, sanding, sealing, and safe mounting. This route often gives the most character for the least money.
Tools and Materials You Will Need
Your exact shopping list depends on the style you choose, but most DIY headboard builds use a few common supplies. For a wood headboard, you may need plywood, 1x boards, 2×4 supports, wood glue, screws, sandpaper, stain or paint, and mounting hardware. For an upholstered headboard, you will need plywood or MDF, foam, batting, upholstery fabric, staples, spray adhesive, and possibly decorative trim or buttons.
Essential tools include a measuring tape, pencil, square, saw, drill, screwdriver bit, staple gun, clamps, sanding block or orbital sander, and a level. A brad nailer can speed up a wood build, but it is not required. Many beginner headboard projects can be completed with a circular saw, drill, and basic hand tools. Your headboard does not care whether your tool collection looks professional. It only cares that your cuts are measured correctly and your screws are not wandering around like lost tourists.
Safety matters. Wear eye protection when cutting or sanding. Use hearing protection with loud tools. Work on a stable surface. If you are cutting large sheets of plywood, support the sheet properly so the material does not pinch the blade or fall. A DIY project should end with a finished headboard, not a dramatic retelling at urgent care.
Step-by-Step: How to Build a DIY Headboard From Start to Finish
Step 1: Measure Your Bed and Wall
Start by measuring the mattress width and the wall space behind the bed. Standard mattress widths are roughly 38 inches for twin, 54 inches for full, 60 inches for queen, 76 inches for king, and 72 inches for California king. Many DIY builders make the headboard slightly wider than the mattress for a balanced look. For example, a queen headboard might be 64 to 68 inches wide.
Height depends on style and function. A low headboard may rise 24 to 36 inches above the mattress. A dramatic statement headboard may reach 48 to 60 inches or more. Before cutting anything, use painter’s tape on the wall to outline the size. Step back and look at it from the doorway. If it feels too small, too tall, or weirdly throne-like, adjust before the sawdust begins.
Step 2: Pick a Build Method
For beginners, the easiest method is a plywood panel with trim, planks, or upholstery added to the front. Plywood provides a flat, stable base and keeps the project simple. A wood-plank headboard can be built by attaching boards to a plywood backer or by building a frame with rails and stiles. An upholstered headboard starts with plywood, then adds foam, batting, and fabric.
If you want a freestanding headboard, add legs made from 2×4 boards or sturdy 1x lumber. If you prefer a floating look, plan for wall mounting. For heavy designs, use wall studs whenever possible. Drywall anchors may work for lighter pieces, but they are not magic. Heavy wood headboards need real support.
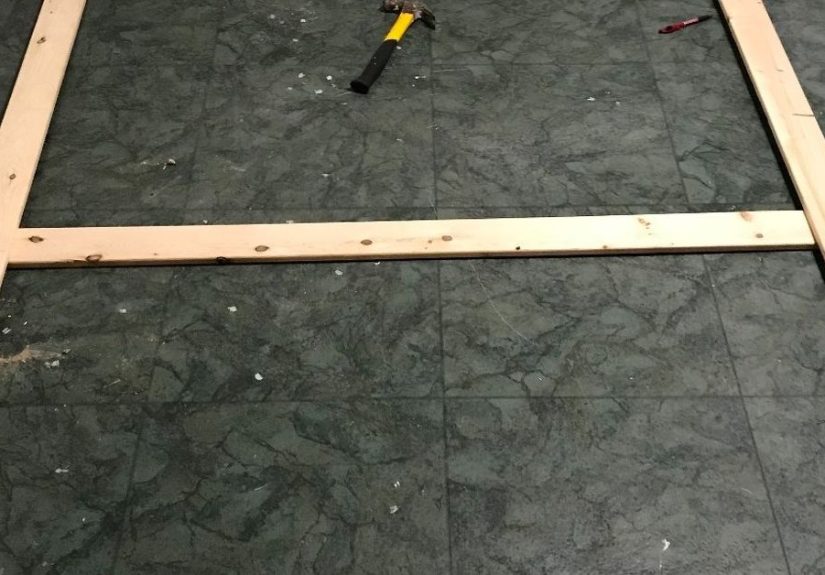
Step 3: Cut the Base Panel
Cut your plywood or MDF panel to the planned width and height. Smooth plywood is a smart choice because it holds staples, screws, and adhesive well. If you are building a wood headboard with visible boards, the plywood backer does not need to be fancy. If the panel edges will show, choose a cleaner grade or add edge trim.
After cutting, sand the edges to remove splinters. Check the panel against the bed and wall before moving forward. This is the “measure twice, avoid emotional damage later” stage. Small adjustments are easier now than after you have glued, stapled, stained, or proudly announced the project is almost done.
Step 4: Build the Frame or Add Face Boards
For a wood headboard, attach face boards to the plywood using wood glue and brad nails or screws from the back. You can install boards horizontally, vertically, diagonally, or in a geometric pattern. Dry-fit the boards first so you can balance color variations and avoid awkward slivers at the edge.
If you are building a framed design, cut top, bottom, and side trim pieces to create a finished border. A simple frame hides raw plywood edges and gives the project a polished furniture look. Fill nail holes with wood filler, let it dry, then sand smooth.
Step 5: Upholster the Panel
For an upholstered DIY headboard, lay the foam on a clean surface and place the plywood panel on top as a template. Cut the foam to match the board. Spray adhesive can help keep the foam in place. Next, cover the foam with batting, pulling it around the back and stapling it securely. Batting softens the edges and gives the final fabric a smoother appearance.
Place the fabric face down, then position the padded board on top. Pull the fabric tight and staple along the back, working from the center outward. Alternate sides as you go so the tension stays even. Corners are the only mildly dramatic part. Fold them neatly like wrapping a gift, except the gift is large, stubborn, and made of plywood.
Step 6: Sand, Stain, Paint, or Seal
If your headboard is wood, finishing makes a major difference. Sand the surface thoroughly, moving from medium-grit to fine-grit sandpaper. Remove dust with a tack cloth or damp cloth. Apply stain if you want to enhance the grain, or paint if you want a solid color. For a natural look, use a clear protective finish.
Test stain or paint on a scrap piece first. Wood can surprise you. A color that looks “warm walnut” on the label may look “orange pancake syrup” on your actual boards. Apply thin coats, let each coat dry, and sand lightly between coats if the product instructions recommend it. Patience here creates a smoother, more durable result.
Step 7: Mount the Headboard Securely
There are three common ways to install a DIY headboard: attach it to the bed frame, mount it to the wall, or make it freestanding with legs. Bed-frame mounting works well if your frame has headboard brackets. Wall mounting is often cleaner and more stable, especially for wide or tall designs. Freestanding legs are simple but should be strong enough to prevent wobbling.
A French cleat is a smart option for wall-mounted headboards. One angled piece attaches to the wall, preferably into studs, and the matching angled piece attaches to the back of the headboard. The pieces lock together and distribute weight. Always use a level, because a crooked headboard will quietly annoy you every morning until the end of time.
Design Tips for a Better-Looking DIY Headboard
Scale is everything. A headboard that is too narrow can make the bed feel unfinished, while one that is too tall may overpower a small room. For a designer look, consider extending the headboard a few inches beyond each side of the mattress. In a small bedroom, a wall-to-wall headboard can visually widen the space and make the room feel more custom.
Texture also matters. Wood adds warmth, fabric adds softness, cane and rattan add casual charm, and painted panels add clean modern style. If the bedroom already has a lot of wood furniture, an upholstered headboard can break up the matching-set effect. If the room feels flat, a slatted or paneled wood design can add depth without clutter.
Keep maintenance in mind. Upholstered headboards should be vacuumed regularly because fabric can collect dust, pet hair, and skin oils. Choose durable upholstery fabric instead of delicate fabric that stains easily. For wood, a sealed finish protects against fingerprints, moisture, and everyday wear.
Budget-Friendly DIY Headboard Ideas
You do not need a luxury budget to build a headboard that looks expensive. A single plywood panel covered in batting and fabric can create a clean upholstered look. Peel-and-stick wood planks can mimic a rustic board headboard without requiring advanced woodworking. An old interior door can become a charming cottage-style headboard when cleaned, painted, and mounted horizontally.
For a modern look, paint a plywood panel in a bold color and add simple trim. For a farmhouse look, use horizontal boards and a warm stain. For a bohemian look, hang a woven textile or attach cane webbing inside a wood frame. For a renter-friendly approach, create a lightweight panel that rests behind the bed or hangs with removable-friendly planning, depending on wall rules.
The secret to a budget headboard is not using the cheapest materials everywhere. It is choosing where the eye goes. Spend a little more on fabric, stain, or trim, and save on the hidden structure. Nobody will compliment the back side of your plywood unless your bedroom has become a very strange museum.
Common Mistakes to Avoid
The first mistake is skipping the planning stage. A headboard needs to relate to the mattress, nightstands, ceiling height, and wall width. Measure everything before buying materials. The second mistake is using weak mounting hardware. A headboard should not rattle, shift, or make mystery noises every time you sit down.
Another mistake is ignoring fabric direction. If your upholstery fabric has a pattern, center it carefully before stapling. Stripes, florals, checks, and geometric prints can look crooked fast. For wood projects, avoid rushing the sanding process. Paint and stain do not hide rough sanding; they often highlight it, like a tiny spotlight for every shortcut.
Finally, do not forget comfort. A beautiful headboard that hits your back at an awkward angle may look great in photos but feel like leaning against a stylish fence. If you read or watch TV in bed, consider padding, height, and pillow placement before finalizing the design.
DIY Headboard Finish Options
Paint is the most flexible finish. White, black, navy, sage green, warm beige, and charcoal are popular choices because they work with many bedding styles. Stain is better if you want the natural wood grain to show. Light oak tones feel airy and modern, while darker walnut shades create richness and contrast.
For rustic character, consider a weathered finish, but use restraint. A little distressing looks charming; too much can make the headboard look like it lost a fight with a garden shed. For upholstered designs, the finish comes from the fabric itself. Linen blends, velvet, boucle, canvas, denim, and performance fabrics all create different moods.
Nailhead trim, welting, channel tufting, buttons, or decorative molding can elevate the design. Keep details consistent with the room. A minimal bedroom may only need a clean panel. A traditional room may welcome trim and soft curves. A playful guest room can handle pattern, color, and a little personality.
Experience Notes: What Building a DIY Headboard Teaches You
The first experience most people have during a DIY headboard project is discovering that measuring a bed is weirdly personal. You think you know the size of your bed until you stand there with a tape measure, questioning the mattress, the frame, the baseboard, the outlets, and your own judgment. The lesson is simple: measure the real space, not the label on the mattress. A queen mattress may be standard, but the bed frame, bedding bulk, and nightstand placement can change what looks right.
Another lesson is that simple designs often look the most professional. Beginners sometimes want to add every idea at once: curves, trim, shelves, fabric, stain, lights, secret storage, and possibly a cup holder. But a clean rectangular upholstered headboard or a neatly framed wood panel can look more expensive than a complicated design with uneven details. Good DIY is not about proving you used every tool. It is about making something that fits the room and feels intentional.
The finishing stage is where patience becomes a superpower. Sanding feels boring until you skip it and see rough patches under paint. Fabric stapling feels repetitive until you rush a corner and it puckers. Stain drying time feels unreasonable until you touch it too early and leave a fingerprint that appears to have archaeological importance. The experience teaches you that the final 20 percent of the project often creates 80 percent of the polished look.
Mounting the headboard is another real-world moment. A headboard can look perfect on the floor, then suddenly feel heavy, awkward, and suspiciously larger when you lift it toward the wall. Having a helper makes a big difference. So does marking studs, using a level, and dry-fitting the mounting hardware before committing. If you use a French cleat, you may feel like a genius when the headboard slides into place. That feeling is allowed. Enjoy it.
A DIY headboard also teaches you how much texture changes a room. A plain bedroom can feel unfinished even with nice bedding. Add a wood headboard, and the room gains warmth. Add an upholstered panel, and the room feels softer and quieter. Add a tall statement headboard, and the ceiling seems higher. This is why headboards are such powerful beginner projects: they affect the whole room without requiring a full remodel.
Finally, the best experience is the first night after the project is finished. You walk into the room and see something you built with your own hands. It may not be perfect. Maybe one corner is slightly more enthusiastic than the others. Maybe the back side has a staple pattern only a raccoon could understand. But the front looks good, the bed feels complete, and the room has a custom feature that did not come flat-packed with confusing instructions. That is the real win.
Conclusion
Building a DIY headboard from start to finish is one of the smartest bedroom upgrades for beginners and experienced makers alike. It is affordable, customizable, practical, and surprisingly fun once you get past the “where did I put the pencil?” phase. With the right measurements, sturdy materials, careful finishing, and secure mounting, your headboard can look custom without the custom furniture price.
Whether you choose a rustic wood headboard, a soft upholstered design, a wall-mounted panel, or a repurposed statement piece, the key is to build for your room, your habits, and your style. A good DIY headboard should look great, feel comfortable, and stay firmly in place. Do that, and your bedroom gets an instant upgradeno reality-show renovation crew required.
Note: This HTML body is written for direct web publishing and contains no external source links or citation placeholders.