
Table of Contents >> Show >> Hide
- Why DIY shiplap placemats are worth making
- What makes a placemat look like shiplap?
- Materials and tools you will need
- How to make DIY shiplap placemats step by step
- Easy ways to style DIY shiplap placemats
- Common mistakes to avoid
- How to clean and care for wooden placemats
- Final thoughts
- What I learned from making DIY shiplap placemats myself
If your dining table has been begging for a little personality, but you are not quite ready to build a barn door in the breakfast nook, DIY shiplap placemats are a wonderfully low-commitment way to bring that cozy farmhouse charm home. They have the clean lined look of shiplap, the practicality of a placemat, and the smug satisfaction that comes from saying, “Oh these? I made them,” while everyone else suddenly studies them like they are museum pieces.
What makes this project so appealing is that it feels custom without being complicated. You do not need a workshop the size of a hardware store, and you do not need to be the sort of person who casually says things like “rabbet joint” at brunch. You just need a handful of wood slats, a little patience, and a willingness to embrace some light sawdust. The result is a set of placemats that can dress up a weeknight dinner, anchor a holiday table, or make takeout tacos look suspiciously intentional.
In this guide, you will learn how to make DIY shiplap placemats step by step, how to style them, what mistakes to avoid, and how to finish them so they look polished instead of looking like a seventh-grade shop project that peaked too early. If you love rustic decor, modern farmhouse style, or simple wood crafts that actually get used, this project checks every box.
Why DIY shiplap placemats are worth making
Placemats do more than sit there looking decorative while your pasta sauce plots a crime scene. They help define each place setting, protect the table from light wear, and add texture to the overall tablescape. A good placemat creates a visual foundation for plates, flatware, and napkins, which is part of why table settings look more layered and finished when one is in place.
Shiplap-inspired placemats add another layer of charm because they combine that plank-lined, slightly rustic look with a tidy rectangular shape. They feel right at home in farmhouse kitchens, cottage-style dining rooms, modern rustic spaces, and even minimalist homes that need one warm, natural element to keep things from feeling too precious. In other words, they are decorative without being fussy. They are the denim jacket of table decor.
They are also refreshingly customizable. Paint them white for a classic coastal farmhouse vibe, stain them dark walnut for something moodier, or go with a soft weathered oak tone for everyday use. You can make a matching set, mix finishes, add stenciled initials, or leave them plain and let the wood grain do the talking.
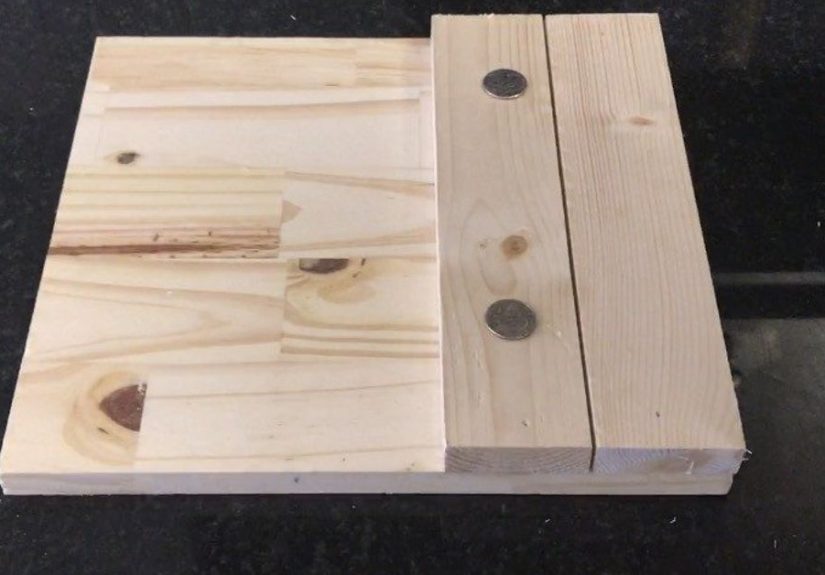
What makes a placemat look like shiplap?
Traditional shiplap gets its signature look from wooden planks fitted side by side with a visible groove between them. On a wall, that groove creates dimension and rhythm. On a placemat, you are borrowing the style rather than literally building a tiny wall for your plate, which is probably for the best.
For this project, the “shiplap” effect usually comes from arranging narrow wood slats next to each other so you see subtle seams running lengthwise. The finished look should feel clean, planky, and intentional. You want “modern farmhouse table accent,” not “I dismantled a crate and hoped for the best.”
The trick is keeping the boards evenly spaced or tightly aligned so the grooves look uniform. A little sanding softens the edges, and the right finish pulls the whole thing together. Once done, the placemat gives off that familiar shiplap energy without requiring nails, wall studs, or an entire home renovation show.
Materials and tools you will need
- Thin unfinished wood craft boards, basswood slats, or narrow wood strips
- Two thin support strips for the back of each placemat
- Wood glue suitable for craft wood
- Fine-grit sandpaper, plus medium grit if edges are rough
- Wood stain, paint, or whitewash finish
- Clear protective topcoat
- Soft cloth or foam brush for stain application
- Paintbrush if painting or sealing
- Measuring tape or ruler
- Pencil
- Small saw or miter shears if your boards are not pre-cut
- Cork or felt backing pads to protect the table
- Optional: stencil, painter’s tape, wood filler, and corner rounder or sanding block
If you want the easiest version of this project, buy pre-cut craft boards in matching widths. That cuts down on measuring mistakes and saves you from discovering that one of your “identical” wood strips is, in fact, living a completely different life from the others.
How to make DIY shiplap placemats step by step
1. Choose your size
A standard placemat shape is rectangular and large enough to hold a dinner plate, utensils, and maybe a folded napkin without looking cramped. A size around 12 by 18 inches usually works well for everyday dining. If your table is smaller, scale down slightly. If you love dramatic place settings and own more serving pieces than a small restaurant, go a bit larger.
Before cutting anything, lay a plate, fork, knife, and glass on the table and test the footprint. This is the kind of glamorous design move no one talks about, but it prevents the heartbreak of making gorgeous placemats that are only big enough for a bread plate and a dream.
2. Plan your slat layout
Arrange your wood slats side by side until they reach your desired width. Five to seven narrow boards often create a nice shiplap-like look. Decide whether you want them tightly butted together or separated by tiny uniform gaps. Tight spacing reads cleaner and more polished. Small gaps create stronger “plank lines” and a more obvious shiplap effect.
Once you like the arrangement, measure the total width and mark the final length on each slat. Double-check your measurements before cutting. This is the DIY equivalent of reading the recipe twice before realizing you do not actually have sour cream.
3. Cut the boards
Cut each slat to the same length. Precision matters here because uneven ends will make the finished placemat look sloppy. If your cuts are slightly off, do not panic. Sanding can help even things out, and a rustic project is more forgiving than a sleek contemporary one. Still, aim for neatness. Rustic is a style, not an excuse.
4. Sand everything well
Sanding is the unglamorous hero of wood projects. Smooth the face, edges, and corners of each slat. Pay special attention to splintery edges because placemats are handled often and should feel comfortable to pick up. Sand in the direction of the grain for the cleanest result.
If you want a softer, more finished feel, lightly round the corners. That small detail makes the placemats feel more store-bought in the best possible way. Wipe away every trace of dust before moving on. Dust under stain or paint is like glitter in a greeting card: once it is there, it has opinions.
5. Assemble the placemat
Lay your slats face down in the final arrangement. Place two thin support strips across the back, one near each short end, but not so close to the edge that they show from the front. Glue the support strips in place to hold all the slats together. Keep the front side facing down on a flat surface so the placemat dries evenly.
You can use a straightedge or spacer to keep the slats aligned as the glue sets. If you are leaving tiny gaps between the boards, use a consistent spacer such as a craft stick or thick cardstock. Let the adhesive cure fully before handling. Rushing this step is how you end up with a placemat that flexes like it has trust issues.
6. Fill, touch up, and sand again if needed
After the glue dries, inspect the surface. If there are rough patches, visible glue squeeze-out, or uneven corners, fix them now. A quick round of touch-up sanding makes a huge difference. If you accidentally nicked an edge or have a small crack, a dab of wood filler can help, followed by another light sanding once dry.
7. Test your finish first
Whether you are staining, painting, or whitewashing, test on a scrap piece first. Wood species absorb color differently, and the shade on the can is often more of a suggestion than a promise. Testing first prevents surprises, especially if you are trying to match other farmhouse decor in your kitchen or dining room.
8. Apply paint, stain, or whitewash
For a classic farmhouse look, white paint or a soft whitewash is hard to beat. If you want warmth and visible grain, use stain. Apply in thin, even coats, wipe off excess stain as directed, and let everything dry thoroughly. For a timeworn look, apply paint and lightly distress the edges after drying.
Good color ideas include:
- Matte white for clean farmhouse style
- Greige or warm taupe for subtle modern rustic decor
- Natural oak for an airy, organic look
- Dark walnut for a moodier, more formal table
- Black for a dramatic contrast on white dishes
9. Seal the placemats
A protective topcoat helps the placemats handle regular use and light cleanup. Choose a finish that dries smooth and durable. Apply thin coats, allow proper dry time, and lightly sand between coats if the finish directions call for it. Two coats are usually a good starting point for small tabletop projects, and a third can add extra durability.
Remember that these are placemats, not cutting boards or hot pads for screaming-hot cookware. They are ideal for plates, bowls, mugs, and everyday serving pieces, but if you are setting down a blazing skillet straight from the oven, bring in a trivet like the responsible adult you are trying to become.
10. Add backing to protect your table
Once the finish is fully cured, add small felt or cork pads to the back. This helps prevent scratches and makes the placemats slide less. It also keeps your beautiful wood project from bullying your beautiful wood table, which would be an awkward family conflict.
Easy ways to style DIY shiplap placemats
One of the best things about these placemats is how flexible they are. They can lean casual, seasonal, elegant, or downright festive depending on what you pair with them.
For everyday farmhouse style
Pair natural or whitewashed placemats with simple white dishes, linen napkins, and a small vase of greenery. It looks fresh, relaxed, and expensive in the way that says, “I definitely have my life together,” even if there is a laundry mountain just out of frame.
For holiday tables
Layer them with plaid napkins, metallic flatware, mini wreath place cards, or seasonal greenery. Because the base is neutral wood, almost any holiday accent works well on top.
For summer or coastal decor
Use pale finishes with blue napkins, woven chargers, or citrus-inspired centerpieces. The slatted wood look fits right in with breezy, casual dining.
For modern rustic tablescapes
Try dark-stained placemats with matte black flatware, stoneware dishes, and a simple candle centerpiece. The linear texture adds interest without cluttering the table.
Common mistakes to avoid
- Skipping the sanding: Rough edges instantly make a project feel unfinished.
- Not testing the stain: Wood loves to surprise people, and not always in a good way.
- Using too much glue: Excess glue can squeeze through the seams and interfere with stain.
- Ignoring the backing: The placemat may be pretty, but your table deserves protection too.
- Rushing the topcoat: If the finish is not fully cured, the surface can feel tacky or mark easily.
- Making them too heavy: Thick boards can look clunky and feel awkward for everyday use.
How to clean and care for wooden placemats
To keep DIY shiplap placemats looking their best, wipe them with a barely damp cloth and dry them right away. Do not soak them, and do not toss them into water like they are waterproof superheroes. Wood is charming, but it also has boundaries.
If the finish starts to dull over time, you can lightly clean, scuff-sand, and add a fresh coat of sealer. Store them flat when possible so they do not warp. With basic care, they can last through everyday meals, holiday gatherings, and the occasional dinner party where someone asks if you bought them from a boutique.
Final thoughts
DIY shiplap placemats are the kind of project that hits the sweet spot between easy and impressive. They are simple enough for a relaxed weekend craft session, but stylish enough to make your table look thoughtfully designed. That is a rare and beautiful thing in the DIY world.
If you want a wood craft that is practical, customizable, and genuinely good-looking, this is one worth making. Start with basic slats, finish them in a way that suits your home, and let the shiplap-inspired lines do the rest. Your dining table gets a style upgrade, your place settings get a stronger foundation, and you get the satisfaction of making something useful with your own two hands. Not bad for a project built from little wooden strips and a dream.
What I learned from making DIY shiplap placemats myself
The first time I made DIY shiplap placemats, I expected a quick afternoon craft and a cinematic ending where I casually placed them on the table and admired my own brilliance. What I actually got was a tiny pile of wood dust, one crooked cut, and the sudden realization that “measure twice, cut once” is less of a slogan and more of a survival strategy. Still, that first attempt taught me exactly why this project is so satisfying: it is simple enough to be approachable, but detailed enough that every small improvement feels like a victory.
My biggest lesson was that the finish changes everything. Before stain or paint, the placemats looked a little plain, like they were still deciding what they wanted to be when they grew up. The moment I added color, the whole project came to life. A soft whitewash made the grooves stand out and gave the boards that breezy farmhouse look I was after. On another set, I used a warm medium stain, and suddenly they felt less “cute craft” and more “small-batch boutique home decor.” It was the same basic design, just wearing a different outfit.
I also learned that scale matters more than people think. My first set was slightly too narrow, and even though they were technically usable, the table setting looked cramped. Once I adjusted the size to better fit a dinner plate, flatware, and napkin, the whole table looked more balanced. It reminded me that a project can be pretty and still not function well if the proportions are off. Beauty is lovely, but beauty that leaves your fork hanging halfway off the edge is just being dramatic.
Another surprise was how much texture these placemats add to a table. I assumed they would mostly serve as a cute backdrop, but the shiplap-style lines ended up doing a lot of visual heavy lifting. On a plain table, they instantly made the setting feel more layered. On a dressed-up holiday table, they gave the dishes something warm and grounded to sit on. They work especially well if your dinnerware is simple, because the slatted pattern adds interest without fighting for attention.
From a practical standpoint, adding backing was one of the smartest choices I made. The first unfinished sample slid a little too easily and felt harsher against the table surface. Once I added felt pads, it sat better, felt more polished, and seemed much kinder to the tabletop. That tiny detail made the finished placemat feel intentional, not improvised. It is one of those boring decisions that ends up being oddly heroic.
I found that these placemats also invite experimentation. After making a basic set, I started imagining seasonal versions: one with a lightly weathered finish for fall, one painted black for a more modern table, one with stenciled initials for a dinner party, and one with a subtle distressed edge for a cottage-style kitchen. The base design is so flexible that it never really feels one-and-done. Once you make one set, your brain immediately starts redecorating for every month of the year.
Most of all, the experience reminded me why small DIY projects can be so rewarding. You do not need to renovate a room to feel creative. Sometimes all it takes is a manageable project with a clear payoff. DIY shiplap placemats are useful, attractive, and personal. They turn a regular meal into something that feels a little more considered, and they carry that quiet little thrill that only handmade things have. Every time I set the table with them, I remember the process, the tweaks, the funny mistakes, and the final moment when the project clicked. That makes them more than decor. It makes them part of the story of the home.


