
Table of Contents >> Show >> Hide
- Why Air Plants and Washi Tape Are a Perfect Match
- Supplies You’ll Need
- Design Ideas for Washi Tape Air Plant Holders
- Step-by-Step: DIY Washi Tape Air Plant Holders
- How to Keep Your Air Plants Happy in Their New Holders
- Styling Ideas for Your Washi Tape Air Plant Holders
- Troubleshooting Common Issues
- Real-Life Experiences With DIY Washi Tape Air Plant Holders
If you’ve ever looked at an empty corner of a shelf and thought, “Wow, this space has the personality of plain toast,”
air plants and washi tape are here to save the day. These little Tillandsia beauties don’t need soil, barely take up
any room, and look like sculptural art when you display them right. Add a few rolls of colorful washi tape, and you’ve
got an easy DIY project that feels custom, artsy, and way more expensive than it actually is.
Inspired by the fun, crafty spirit of Hometalk-style projects, this guide walks you through how to make DIY washi tape
air plant holders from start to finish: what supplies to use, how to design and build them, and how to keep your air
plants happy in their new “tape couture” homes. We’ll also cover styling ideas, troubleshooting tips, and real-life
lessons learned from playing with air plants and washi tape (a lot).
Why Air Plants and Washi Tape Are a Perfect Match
Air plants (a.k.a. Tillandsia) are natural minimalists. They don’t grow in soil and instead absorb water and nutrients
through special cells on their leaves. That means you’re free to display them in ways that would never work for most
houseplantson wood, on magnets, in shells, on walls, hanging in the air, you name it. They’re like the freelancers of
the plant world: low-commitment, highly flexible, and surprisingly resilient with the right care.
Washi tape, on the other hand, is the crafty overachiever. Originally from Japan, it’s a decorative paper tape that
tears easily by hand, sticks well to smooth surfaces, and comes in endless patterns: stripes, florals, geometrics,
metallics, watercolor textures, and more. It doesn’t require special tools, which makes it ideal for renters, busy
parents, or anyone who wants a quick style upgrade with zero power tools.
Put the two together and you get:
- Lightweight holders that won’t crush delicate air plants.
- Customizable designs that you can change in minutes if your decor mood shifts.
- Budget-friendly decor that looks boutique but costs closer to coffee money.
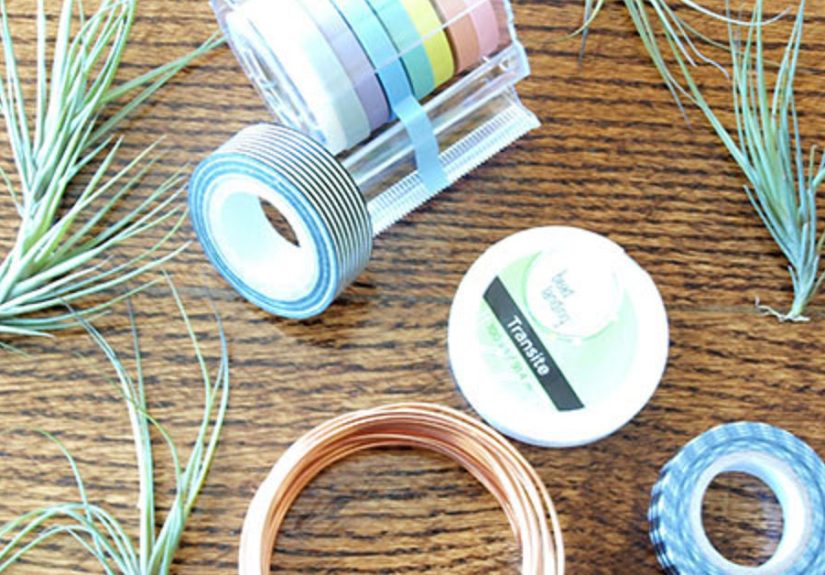
Supplies You’ll Need
Core Materials
- Washi tape in a few coordinating colors or patterns.
- Air plants (small to medium Tillandsia like ionantha, caput-medusae, or similar).
- Sturdy base material:
- Wood scraps, popsicle sticks, or balsa wood strips, or
- Thick cardstock, cardboard, or chipboard, or
- Simple glass or ceramic containers you can wrap or accent with tape.
- Clear-drying craft glue or a hot glue gun (low-temp is safest).
- Scissors or a craft knife and cutting mat.
- Ruler or measuring tape.
Optional Extras
- Small magnets (for fridge or memo board holders).
- Command strips or removable wall hooks (for wall-mounted displays).
- Thin wire or clear fishing line (for hanging designs).
- Small hooks, eye screws, or jump rings.
- Mod Podge or clear sealer (to protect washi tape in humid rooms).
Design Ideas for Washi Tape Air Plant Holders
Before you start taping everything in sight, it helps to pick a basic holder style. Here are a few easy designs that
work especially well:
1. Geometric Wall Diamonds
Create flat diamond or triangle shapes out of wood strips or thick cardstock, reinforce the joints with glue, and then
wrap each side with coordinating washi tape. Add a small loop or hook at the top, and use a dab of glue or a tiny wire
cradle inside the shape to nestle the air plant. These look gorgeous in sets of three or five on a wall.
2. Minimalist Standing Frames
Cut a rectangle from chipboard or balsa wood and cut out the center to make a frame. Decorate the edges with striped or
metallic washi tape, then stretch a thin strip of clear fishing line or wire across the opening. The air plant can rest
right on that line, turning the frame into a little plant spotlight for desks or shelves.
3. Magnet Mini Holders
For tiny air plants, wrap small wood blocks or sturdy cardboard shapes in washi tape, then glue a magnet to the back.
Add a small tape-wrapped “shelf” or a curved strip of cardboard on the front to hold the plant. These are perfect for
refrigerators, home offices, or even metal front doors.
4. Wrapped Containers and Cups
If you have small glass votive holders, mini ceramic cups, or even shot glasses, you can simply wrap them with bands
of washi tape to dress them up. Fill the bottom with decorative pebbles or sand (for looks only, not soil), and rest
the air plant on top. It’s the easiest version and ideal for beginners.
Step-by-Step: DIY Washi Tape Air Plant Holders
Step 1: Choose the Right Air Plants
Look for healthy plants with firm leaves, no mushy spots at the base, and a good overall color (green, silver, or
slightly blushed depending on the variety). Smaller plants work better for lightweight holders, while larger
sculptural types look amazing in standing frames or wrapped containers.
Step 2: Cut and Prep Your Base
- Measure and mark your shapes on wood or cardstock (diamonds, triangles, rectangles, or simple strips).
- Cut carefully with scissors or a craft knife.
- Lightly sand rough wood edges so the tape sticks smoothly.
- Test-fit your air plant to be sure the shape is proportionate.
Step 3: Apply the Washi Tape
- Start at one edge of your base and run a strip of washi tape along it, smoothing as you go to avoid wrinkles.
-
Wrap the tape around to the back side if you want a super clean edge, or trim it at the edge for a sharp front-only
look. - Mix patterns and widths: for example, a wide solid tape with a skinny metallic stripe layered over it.
- Press down firmly so the tape fully adheres, especially on corners.
If the holder will live in a humid room like a bathroom, consider brushing a thin coat of Mod Podge or clear sealer
over the washi tape to keep it from lifting over time.
Step 4: Create the Plant Cradle
Air plants should never be glued directly along their whole basethey need airflow. Instead, build a small cradle or
support:
-
Bend a short length of thin wire into a shallow “U” shape and glue the ends to your holder so the plant can sit in
the curve. - For wall diamonds, glue a narrow strip of tape-reinforced cardstock across the back opening to act as a ledge.
- In wrapped containers, just add your decorative filler and nestle the plant on top.
The goal is to keep the plant secure but not strangled. You should be able to lift it out easily for watering.
Step 5: Add Hanging or Mounting Hardware
Depending on the style:
- Attach eye screws or small hooks to wood pieces for hanging by string or fishing line.
- Glue magnets to the backs of small holders for fridge or metal board displays.
- Use Command strips to mount lightweight holders directly to the wall.
Step 6: Place the Air Plant
Once everything is dry and stable, tuck your air plant into its cradle. Rotate it until it looks balanced and the
leaves are faced outward. Step back, admire, then move it again because now you see an even cuter anglecompletely
normal.
How to Keep Your Air Plants Happy in Their New Holders
Stylish holders are only half the storyair plants still need proper care to thrive. Fortunately, they’re among the
easiest plants to keep alive if you follow a few simple guidelines.
Light Requirements
Air plants prefer bright, indirect light. A spot near an east- or west-facing window, or a few feet back from a sunny
window, usually works well. Direct, scorching midday sun can burn their leaves, but dim corners will slowly weaken
them. If you’d be comfortable reading a book in the light where your plant sits, it’s probably happy there too.
Watering Routine
Despite the “air” in their name, these plants do need regular watering. The most common and beginner-friendly method is:
- Once or twice a week, soak the plant in room-temperature water for about 15–30 minutes.
- After soaking, gently shake off extra water and place the plant upside down on a towel to dry for a few hours.
- Return it to the holder only when it’s fully dry, especially at the base, to avoid rot.
In very dry homes, you can also lightly mist the leaves between soakings. In very humid homes, you may need shorter or
less frequent soaks. Watch the leaves: curling, crispy tips often mean they’re thirsty; mushy or brown bases usually
mean overwatering or poor drying.
Airflow and Placement
Good air circulation is crucial. Don’t keep your air plant sealed in a glass container with no openings. Within a
washi-tape holder, make sure there’s space around the leaves and that the plant isn’t wedged into a tight pocket of
still air. Avoid spots right above heaters or AC vents, which can dry them out too fast.
Fertilizing for Extra Glow
You don’t have to fertilize air plants, but a monthly soak with a diluted bromeliad, orchid, or all-purpose houseplant
fertilizer can help them grow and encourage blooming. Use about half the recommended strength, and don’t fertilize
stressed or newly purchased plants until they’ve settled in.
Styling Ideas for Your Washi Tape Air Plant Holders
Color Palettes That Work
- Scandi calm: Soft grays, pale pinks, and white washi tape paired with silver-leafed air plants.
- Boho bright: Bold patterns, geometrics, and metallic gold mixed together for a playful gallery wall.
- Modern minimal: Black-and-white stripes with one accent color like mustard or teal.
Where to Display Them
- On a kitchen backsplash or fridge using magnet holders.
- In a home office near your desk for a little green eye break.
- On a bathroom wall, as long as there’s enough light and you let plants dry fully after watering.
- In a hallway gallery wall, mixed with framed art and photos for texture.
Kid-Friendly and Rental-Friendly
This project is great for kids (with supervision on cutting and glue) because washi tape is forgiving and repositionable.
It’s also ideal for renters who want personality without holes or major installationsCommand strips, magnets, and
lightweight materials make your holders totally removable and wall-safe.
Troubleshooting Common Issues
The Tape Is Peeling Off
Make sure your base surface is clean and dry before applying tape. For tricky surfaces or humid rooms, use a thin layer
of clear-drying glue under the tape or seal over it with Mod Podge. Press along the edges firmly as you apply.
The Air Plant Looks Unhappy
- Crispy tips: It’s likely too dry. Increase soaking time slightly or add a second weekly soak.
-
Mushy base: That often means water sat in the crown too long. Let it dry upside down after watering
and make sure your holder doesn’t trap moisture. -
Faded or dull color: It may not be getting enough light. Move it closer to a bright window without
harsh direct sun.
Real-Life Experiences With DIY Washi Tape Air Plant Holders
After a few rounds of making washi tape air plant holders, some patterns definitely emergeboth in design wins and in
“okay, let’s never do that again” moments. Think of this section as the advice a fellow crafter would give you over
coffee while you both peel tape off your fingers.
The first big lesson: test your tape before committing. Different brands of washi tape behave a little
differently. Some are more opaque, some more translucent, some stick like a dream, and others act like they’ve already
given up on life. Before you wrap an entire set of holders, experiment on a small scrap of the same base material.
Check how it looks, how well it sticks, and whether the pattern still pops once it’s applied.
Another useful discovery is that layering tape creates a more “finished” look. Single strips can look
cute, but when you overlap a solid color with a narrow metallic or patterned tape, the design suddenly looks intentional
and custom. For example, a wide white tape with a thin gold stripe down the center instantly elevates a simple wood
diamond into something that could easily sit in a boutique shop display.
In terms of plant care, it doesn’t take long to realize that convenience wins. Holders that make it easy to remove the
air plant for watering are the ones you keep using. Anything that requires wrestling the plant in and out tends to get
ignored once life gets busy, and that’s when plants start suffering. Designs with open cradles or loose wire supports
get watered more regularly than holders where the plant is wedged tightly into a pocket.
A surprisingly big factor is where you place your holders. The same project will behave very
differently in a bright living room versus a dim hallway. Air plants in low-light spots usually end up getting moved or
forgotten. Placing your washi tape holders in “high-traffic” visual areaslike near a coffee station, on a fridge, or
by your deskworks as a built-in reminder to check on them. You see them, you remember, “Oh right, soak day.”
Humidity also plays a role. In bathrooms, the air plants often love the extra moisture, but the tape can complain,
especially if the room gets steamy. Sealed tape and smooth, non-porous surfaces (like sealed wood or painted boards)
do better in humid spaces. Raw cardboard next to a shower? That’s a short, tragic story. For drier homes, the opposite
is true: plants may need more frequent soaks, but the tape stays crisp and happy.
Over time, you might notice that your style evolves. Many people start with loud, playful patterns,
then slowly edit down to coordinated color palettes that match their room decorthink all neutrals with one accent
color, or all geometrics in black, white, and gold. The beauty of washi tape is that you can rewrap or recover an
existing holder instead of starting from scratch. Peel, re-tape, and your “old” holder has a new life.
Finally, the best part of these DIY projects is how easy they are to share. Once friends see your washi tape air plant
holders, they usually want oneor three. They make wonderful housewarming, thank-you, or teacher gifts: lightweight,
affordable, and personal. Customize the tape colors to match someone’s kitchen or office, include a simple care card,
and you’ve just gifted decor that’s both pretty and low-maintenance. That’s a win in any busy person’s book.
In short, DIY washi tape air plant holders are forgiving projects. Even if your lines aren’t perfectly straight or your
first design feels a little “craft night,” they still add charm and greenery to your space. As you play, you’ll find
your rhythm: favorite tape combos, holder shapes that work best in your home, and watering routines that keep your
plants thriving. And the next time your shelf looks boring, you’ll know exactly what to make.


