Table of Contents >> Show >> Hide
- What Is a DIY Winter Marquee?
- Why a Winter Marquee Works So Well
- Pick Your DIY Winter Marquee Style
- Materials You’ll Likely Need
- How to Make a DIY Winter Marquee
- Design Tips That Make It Look More Expensive
- Weatherproofing and Safety Tips
- Common DIY Winter Marquee Mistakes to Avoid
- Final Thoughts
- The DIY Winter Marquee Experience: What It Really Feels Like
- SEO Tags
If your front porch feels a little too “November leftovers” and not quite “cozy winter magic,” a DIY winter marquee can fix that faster than you can say where did I put the extension cord? A winter marquee is part sign, part light feature, part personality test. It tells the world that yes, you do enjoy a little seasonal sparkle, but you also appreciate a project that looks custom without requiring a reality-show renovation budget.
The beauty of a DIY winter marquee is that it can be whatever your home needs most. Want a glowing porch statement that says WINTER, JOY, or LET IT SNOW? Great. Want a rustic wood sign with a few warm lights, fresh greenery, and enough charm to make your entryway look like it drinks hot cocoa on purpose? Also great. This project works for farmhouse homes, modern homes, apartments with covered balconies, and anyone who has ever looked at a plain entryway and thought, “You know what this needs? A little drama. But in a tasteful way.”
In this guide, you’ll learn how to plan, build, style, and protect a DIY winter marquee so it looks polished, lasts through the season, and does not become a sad, soggy sign by the second cold snap. We’ll cover design ideas, materials, step-by-step building tips, styling tricks, weather-friendly choices, and the real-life lessons that make the finished piece look intentional instead of “assembled under emotional pressure on a Saturday afternoon.”
What Is a DIY Winter Marquee?
A DIY winter marquee is a decorative sign or letter display designed for the winter season and usually paired with lighting. Think oversized letters, a framed wooden sign, or a layered porch display that combines words, bulbs, greenery, lanterns, and a winter color palette. It borrows the glow of vintage marquee letters and mixes it with the texture and coziness of cold-weather decor.
The project can be as simple as a painted wood board with battery-operated fairy lights, or as detailed as custom-cut marquee letters with drilled bulb holes and a weather-ready finish. The point is not perfection. The point is creating something that feels warm, welcoming, and a little bit magical when the sky gets dark at what feels like 4:17 in the afternoon.
Why a Winter Marquee Works So Well
Winter decorating has a unique challenge: after the holidays, many homes suddenly look a little bare. A DIY winter marquee fills that gap beautifully. It gives you a focal point that still feels seasonal without relying entirely on red-and-green Christmas decor. That means your display can transition from early holiday decorating into January and even February with only a few styling changes.
It also solves a design problem that many porches and entryways have in winter: darkness. A lighted marquee adds warmth, depth, and visibility. It creates a layered look when paired with lanterns, potted evergreens, birch branches, or a wreath. Even a small sign can make a doorway look more finished and intentional.
And let’s be honest, a marquee has personality. A wreath says, “Welcome.” A winter marquee says, “Welcome, but make it cinematic.”
Pick Your DIY Winter Marquee Style
1. Classic Lighted Word Sign
This is the most recognizable version: a word or short phrase cut from wood and fitted with bulbs or small lights. Popular choices include JOY, SNOW, NOEL, COZY, and WINTER. This style looks especially good on a covered porch, mantel, entry console, or bench.
2. Vertical Porch Board Marquee
If you love porch signs, try a tall vertical board with painted lettering and lights wrapped around the frame. This option is easier for beginners because you do not have to cut separate letters. It gives you the marquee effect while keeping construction simpler.
3. Rustic Framed Marquee
A framed sign with a weathered finish, soft white lights, and natural greenery feels more sophisticated than flashy. This version works well if your home leans farmhouse, cottage, or traditional.
4. After-Christmas Winter Marquee
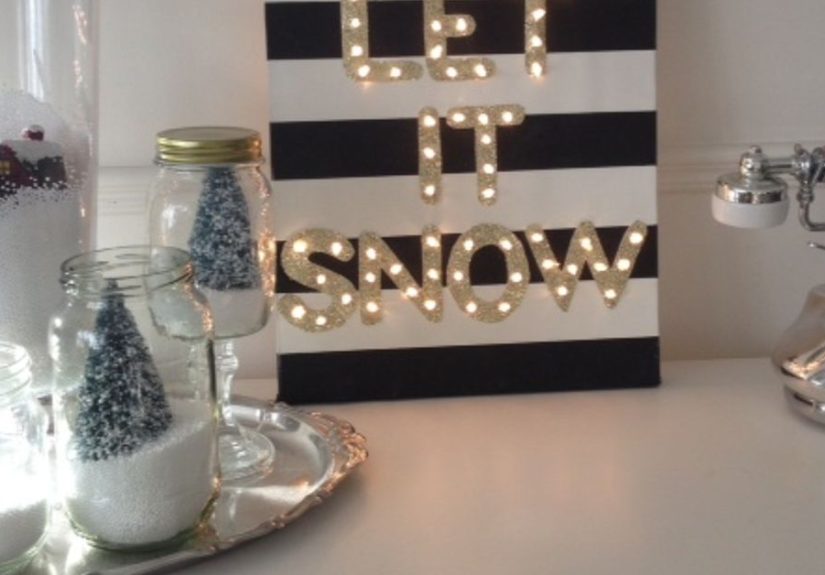
Want something that lasts beyond December? Skip overt holiday phrases and use words like HELLO WINTER, STAY COZY, or LET IT SNOW. Pair them with white, evergreen, silver, black, or natural wood tones instead of holiday brights.
Materials You’ll Likely Need
- Plywood, MDF, or a solid wood board
- Printed letter templates or stencils
- Pencil, ruler, and measuring tape
- Jigsaw for cutting shapes or a saw for straight boards
- Drill and hole saw if you want classic bulb openings
- Sandpaper or a sanding block
- Exterior primer and exterior paint or sealer
- Outdoor-safe LED string lights or other low-heat decorative lighting
- Plastic light clips, cable ties, hooks, or mounting hardware
- Greenery, ribbon, pinecones, lanterns, or winter stems for styling
If your marquee will live outside, choose finishes and lighting designed for outdoor use. If it will sit in a protected entryway or indoors, you have more flexibility, but durability still matters. Winter is not the season for flimsy choices or glue that gives up emotionally at the first cold breeze.
How to Make a DIY Winter Marquee
Step 1: Choose the Word, Size, and Placement
Start with where the marquee will go. A porch corner can handle something tall and bold. A mantel calls for a smaller sign or a few individual letters. A tabletop display needs a more compact footprint. Once you know the location, choose a phrase that fits the scale. Shorter words usually look better because they are easier to read from a distance and easier to build.
Sketch the layout before touching any tools. This saves time, helps you balance letter size, and prevents the classic DIY heartbreak of realizing your final letter does not fit the board.
Step 2: Create Your Template
Print letters from a computer, trace stencils, or hand-draw a simple font. Block letters usually work best because they are easier to cut and more readable once lights are added. If you want a vintage marquee vibe, slightly rounded or serif-inspired letters can look charming, but keep the shapes clean and bold.
Step 3: Cut the Base or Letters
You can go one of two directions here. For a porch board, cut a rectangular base and paint the lettering onto it. For a true marquee-letter look, trace individual letters onto plywood and cut each one out with a jigsaw. Sand all edges well so the finished piece looks intentional and feels smooth.
Even if your style is rustic, “splinter chic” is not the goal.
Step 4: Mark the Light Placement
If you are using exposed bulbs, lightly mark where each light will go before drilling. Aim for consistent spacing so the marquee glows evenly. The lights should emphasize the shape of the letters, not crowd them. Step back and look at the layout before drilling anything. A sign can recover from a paint mishap. Random bulb placement is harder to forgive.
Step 5: Drill, Sand, and Prep
Drill the bulb holes, then sand again to remove rough edges. Wipe away dust before priming. For outdoor use, a quality primer and exterior-grade topcoat matter a lot. They help the finish last longer and protect the sign from moisture, temperature swings, and that mysterious kind of winter grime that appears on everything outside.
Step 6: Paint Your Winter Palette
For a classic winter look, try combinations like white and natural wood, black and evergreen, navy and gold, or soft gray with warm metallic accents. Matte finishes feel modern and cozy. Slight distressing can work for rustic signs, but do it with purpose. There is a difference between “beautifully aged” and “this accidentally got sanded by a panicked beginner.”
Step 7: Add the Lights
Insert the lights from the back if you drilled bulb openings. Keep the wiring tidy and hidden as much as possible. If you are wrapping lights around a framed sign, keep the line neat and consistent. Warm white lighting tends to give the most flexible winter look because it works both during the holidays and after them.
Step 8: Style the Surrounding Display
This is where a nice project becomes a genuinely pretty one. Add lanterns, faux snow accents, birch branches, potted evergreens, pinecones, ribbon, bells, baskets, or a winter wreath nearby. If your sign is simple, the styling can bring it to life. If your sign is dramatic, keep the accessories quieter so the whole display does not start shouting.
Design Tips That Make It Look More Expensive
Layer Materials
The best winter marquee displays mix textures. Wood, metal, greenery, woven baskets, and glass lanterns create a richer look than one material alone. Even a simple sign feels more custom when paired with natural elements.
Use Light With Restraint
You do not need a runway-level light show. A few thoughtfully placed lights are often more elegant than maximum brightness. The goal is a welcoming glow, not an interrogation room for snowflakes.
Think Beyond Christmas
If you want the display to last through the season, remove strongly Christmas-coded accents after the holidays and keep the winter-forward elements: greenery, neutral ribbon, white lights, branches, lanterns, and soft metallics.
Match the Architecture
A modern home looks best with clean lines, limited color, and minimal decor. A farmhouse or traditional home can handle more layering, texture, and rustic detail. Let the house guide the styling so the marquee feels like part of the entryway instead of a temporary guest star.
Weatherproofing and Safety Tips
If your DIY winter marquee will be used outdoors, safety is not optional. Use lighting and extension cords labeled for outdoor use. Plug into a protected outlet, inspect cords before decorating, and avoid damaged strands or cracked insulation. Do not cut light cords to make them “fit better.” That shortcut belongs in the hall of fame for bad seasonal decisions.
Use clips, hooks, or hardware that secure lights without crushing wires. Keep cords out of walkways so the display does not become a winter obstacle course. If live greenery is part of your display, place it where it is protected from harsh direct sun and give it occasional moisture so it does not dry out too quickly.
LED lighting is often the smartest choice for a DIY winter marquee because it stays cooler, lasts longer, and keeps the project more energy-conscious. If the sign is exposed to moisture, seal wood thoroughly and keep electrical connections protected. And when the day is done, turn the lights off before bed or before leaving the house. Your marquee should glow warmly, not inspire a call to your insurance company.
Common DIY Winter Marquee Mistakes to Avoid
- Choosing a phrase that is too long for the space
- Using indoor lights outside
- Skipping primer or sealer on wood
- Overcrowding the sign with too many decorations
- Ignoring scale and making letters too small to read
- Using a color palette that clashes with the home exterior
- Letting wires become part of the decor for all the wrong reasons
The strongest projects usually feel edited. You want charm, not clutter. Glow, not chaos. Winter magic, not “yard sale met a snowstorm.”
Final Thoughts
A DIY winter marquee is one of those rare seasonal projects that feels both fun and useful. It brightens dark afternoons, makes your home look more welcoming, and gives you a custom decor piece that can evolve from holiday sparkle to full winter coziness. Whether you build a bold lighted word sign or a simple porch board with soft white lights and greenery, the end result can look stylish, personal, and surprisingly high-end.
The secret is balancing creativity with restraint. Good materials, good placement, and a thoughtful winter palette will take you much farther than simply adding more lights. Build for your space, style for the season, and protect the finish well enough that your hard work survives more than one dramatic weather mood swing. Do that, and your DIY winter marquee will become the kind of project people notice immediately, compliment shamelessly, and then try to recreate after pretending they were not taking mental notes.
The DIY Winter Marquee Experience: What It Really Feels Like
Making a DIY winter marquee is one of those projects that sounds adorable in theory and mildly chaotic in practice. At first, it feels simple. You pick a word, gather materials, and tell yourself this will be a calm, cozy weekend craft. Then you realize you have somehow spent twenty minutes debating whether your sign should say JOY or COZY, because apparently your winter identity now hinges on typography.
Once the building starts, the experience becomes part creativity, part problem-solving, and part comedy. You trace your letters with confidence, only to second-guess every line the moment the saw comes out. You drill one perfectly centered light hole and suddenly feel like a home-improvement genius. Then you drill the next one slightly off and begin negotiating with yourself about whether “handmade character” can cover a multitude of small crimes. Good news: it usually can.
The painting stage is where the project starts feeling real. Before paint, it looks like scrap wood with ambition. After paint, it begins to resemble something you might proudly display instead of quietly hiding behind a planter. This is also the moment many people get overly brave and decide to add one more flourish: maybe gold edging, maybe faux snow, maybe ribbon, maybe all three. This is where restraint becomes your best friend. A winter marquee should whisper cozy elegance, not yell craft-store avalanche.
Then comes the lighting, which is both the most satisfying and most revealing step. The second those lights turn on, the whole project transforms. Tiny spacing decisions suddenly matter. Crooked wiring becomes visible. The good news is that warm lighting is generous. It softens flaws, adds depth, and makes even a beginner project feel intentional. It is basically mood lighting for your handiwork.
What surprises many people is how much the styling around the marquee matters. A sign leaning by itself can look nice. The same sign paired with lanterns, evergreen branches, a basket, and a simple wreath suddenly looks like a curated winter vignette. The experience teaches you that decor is rarely about one hero item. It is about the supporting cast. A marquee becomes more convincing when it has company.
There is also an emotional arc to this project that deserves respect. Early enthusiasm becomes mild confusion. Mild confusion becomes stubborn determination. Stubborn determination becomes triumph the moment you step back at dusk, see the lights glow, and realize your porch now looks like it has opinions and excellent taste. That reveal is the reward. It is cozy, a little theatrical, and weirdly satisfying.
By the end, most people walk away with more than a sign. They get a better eye for scale, color balance, and outdoor styling. They learn that weatherproofing matters, that fewer decorations often look better, and that every project needs one practical voice saying, “Maybe test the lights before attaching everything.” Most of all, they get the pleasure of making something seasonal that feels personal. Not store-bought. Not generic. Yours.
And that is the real charm of a DIY winter marquee. It is not just a decoration. It is an experience with sawdust, second guesses, glowing bulbs, and a final result that makes cold weather feel a little warmer. Which is honestly a pretty strong return for a project that begins with a piece of wood and an unreasonable amount of confidence.