Table of Contents >> Show >> Hide
- Before You Build: Design, Safety, and Sanity Checks
- Tools and Materials (The “Don’t Panic at the Store” List)
- Step-by-Step: Building DIY Fireplace Built-Ins That Look Legit
- Step 1: Draw it (yes, even if you “see it in your head”)
- Step 2: Build (or install) the base
- Step 3: Build your “carcasses” (the boxy skeleton that does the heavy lifting)
- Step 4: Dry fit, level, shim, and anchor (the “make it behave” phase)
- Step 5: Add shelves (fixed, adjustable, or “a mix so you don’t regret everything later”)
- Step 6: Face frames and trim (where “DIY” turns into “Did you hire someone?”)
- Step 7: Blend the fireplace surround (and respect heat)
- Step 8: Fill, sand, caulk, prime, paint (the finish that forgives everything)
- Step 9: Add the “built-in glow” (optional, but extremely satisfying)
- Design Choices That Make Fireplace Built-Ins Look Custom
- Budget and Timeline Example (Because Reality Has a Calendar)
- FAQ: Quick Answers Before You Start Cutting
- Conclusion
- What You’ll Experience While Building Fireplace Built-Ins (About of Real-World “Oh, That’s Normal”)
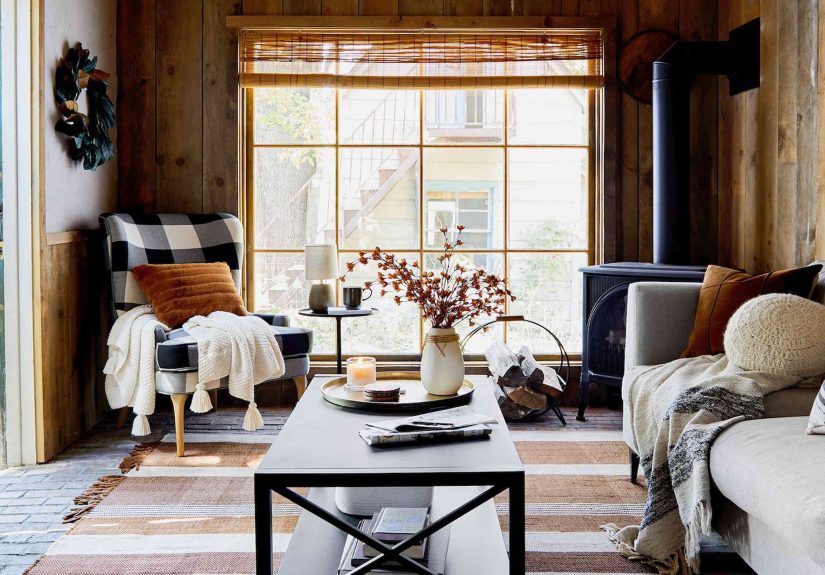
Fireplace walls are like the prom kings of living rooms: everyone’s already looking at them, so you might as well dress them up. Adding DIY built-in shelves (and optional base cabinets) around your fireplace creates storage, symmetry, and that “custom home” vibe without the “custom invoice” trauma.
This guide walks through the most common, proven approaches used by U.S. DIYerscustom plywood/MDF cases, base cabinets with open shelving, and the popular “bookcase hack” routeplus the big safety note: fireplaces have heat, and heat has opinions. We’ll cover planning, clearances to discuss with your local inspector or manufacturer manual, and the build steps that make the end result look like it grew there.
Before You Build: Design, Safety, and Sanity Checks
1) Identify your fireplace situation (because not all fireplaces behave the same)
Start by figuring out what you’re building around: a masonry wood-burning fireplace, a gas insert, or a factory-built “zero-clearance” unit. Why it matters: clearance rules and “non-combustible zones” can differ by unit type and manufacturer. Your built-ins may be fine 18 inches away on one setup and a hard “nope” on another.
- Read the fireplace manual (or look up the model plate). It often specifies clearances to combustibles and finishing materials.
- Check local building code requirements (or ask your inspector). Some codes limit combustible trim projections near the firebox opening.
- Plan a heat-smart buffer: even if code allows something, keep finishes from cooking over timepaint discoloration is not a “patina,” it’s a cry for help.
2) Pick the build style that matches your budget, tools, and patience level
There are three mainstream paths. None is “the one true way”they’re just different levels of woodworking commitment.
- Fully custom built-ins (best fit, most flexible): build cabinet “carcasses” from 3/4-inch plywood or MDF, then add shelves, face frames, and trim.
- Base cabinets + open shelves (favorite for living rooms): install stock base cabinets (kitchen cabinets work great), then build open shelves above. You get hidden storage below and display space up top.
- Bookcase hack (fastest “looks custom” shortcut): use ready-made bookcases (common choice: IKEA-style tall cases), then build a base/platform and trim everything out so it reads as one built-in unit.
3) Measure like you’re getting paid per accurate inch
Fireplace walls are famously “not square” (translation: your house has character, and that character is trying to ruin your weekend). Measure at multiple points: left, center, right; floor and ceiling; front and back. Then plan for scribing/trim to hide the truth.
- Width: total wall width minus fireplace width gives you your side zones.
- Depth: decide how deep shelves should be (10–12 inches is typical for books; deeper if you want baskets).
- Height: consider ceiling height, crown molding, and whether you want built-ins to run to the ceiling (most “custom” look).
Tools and Materials (The “Don’t Panic at the Store” List)
Common tools
- Tape measure, pencil, and a level (a laser level if you like easy mode)
- Stud finder (because drywall lies)
- Miter saw for trim, circular saw or table saw for sheet goods
- Drill/driver, countersink bit, clamps
- Brad nailer (optional but very helpful), plus wood glue
- Random orbital sander, sanding sponges, caulk gun
Common materials
- 3/4-inch plywood (strong and stable) or 3/4-inch MDF (smooth for paint-grade; heavier and hates water)
- 1/4-inch plywood for backs (optional, but it stiffens cases and looks finished)
- 1×2 or 1×3 cleats/supports for shelves and wall anchoring
- Face-frame material: poplar or pine (paint-grade), or hardwood if staining
- Trim: baseboard, crown, casing, and panel molding (your “custom” secret sauce)
- Wood filler, paintable caulk, primer, and paint (semi-gloss or satin is common for shelves)
- Fasteners: cabinet screws (for studs), wood screws, brad nails
Step-by-Step: Building DIY Fireplace Built-Ins That Look Legit
Step 1: Draw it (yes, even if you “see it in your head”)
Sketch a simple elevation view: fireplace in the center, built-ins on both sides. Decide: base cabinets or all open shelving? Symmetry or slightly different left/right layouts? A spot for a TV? Add real dimensions, not vibes.
Pro move: make a “story pole” from scrap woodmark shelf heights, mantel height, and trim breaks. Hold it against the wall to preview proportions before you cut expensive things into smaller expensive things.
Step 2: Build (or install) the base
For the most built-in look, start with a level base. Floors are rarely level; your job is to pretend they are.
- Option A: Platform base (plinth) Build a 2×4 or plywood ladder base, anchor to studs, then shim until level. This is common for bookcase hacks and for custom cases.
- Option B: Base cabinets Set stock base cabinets in place, shim level, and screw through the back into studs. Use filler strips at walls if needed.
If you’re doing base cabinets, consider a toe-kick. If you’re doing a plinth, you can add toe-kick trim later so it looks intentional.
Step 3: Build your “carcasses” (the boxy skeleton that does the heavy lifting)
Carcasses are the tall side units. If you’re building from scratch, rip 3/4-inch sheet goods into sides, tops, bottoms, and fixed shelves. Pocket-hole joinery is popular because it’s strong and beginner-friendly. Glue + screws = furniture-grade confidence.
- Depth tip: 11 inches deep is a sweet spot for most books and decor without making the room feel tighter.
- Strength tip: include at least one fixed shelf (or a stretcher) to prevent “wobble city.”
- Back panel: a 1/4-inch back adds rigidity and helps the unit feel like real cabinetry.
Step 4: Dry fit, level, shim, and anchor (the “make it behave” phase)
Set the carcasses on the base. Use shims to plumb (front-to-back) and level (side-to-side). Then:
- Find studs behind the drywall.
- Pre-drill through the cabinet backs or cleats.
- Screw into studs with cabinet screws.
- If you have two side units, clamp them together and screw them to each other through face-frame areas.
Reality check: you’re not “making it perfect.” You’re making it look perfect. Shims are basically eyeliner for carpentry.
Step 5: Add shelves (fixed, adjustable, or “a mix so you don’t regret everything later”)
Adjustable shelves are handy if your décor style changes (or if you adopt a plant that grows like it’s training for the Olympics). You can drill shelf-pin holes using a jig, or build in fixed shelves for maximum rigidity.
- Typical spacing: 10–12 inches between shelves for books, 14–16 inches for taller items.
- Anti-sag tip: for longer shelves, add a thicker front edge (a “nose” strip) or use plywood with a solid-wood face.
Step 6: Face frames and trim (where “DIY” turns into “Did you hire someone?”)
Face frames (often 1×2 poplar/pine) cover raw plywood edges and give that furniture-like finish. Then trim ties everything into the room:
- Baseboard: run it across the front so the built-ins feel rooted.
- Crown molding: take the units to the ceiling for the most custom look.
- Wall gaps: use filler strips and scribe them to the wall if the wall bows.
Scribing in plain English: you hold a strip against the wall, trace the wall’s wonky shape, then cut to match so the gap disappears. It’s woodworking’s version of “we don’t talk about that corner.”
Step 7: Blend the fireplace surround (and respect heat)
Built-ins look best when the fireplace surround and mantel feel integrated. Common upgrades include adding a thicker mantel shelf, beefier legs/pilasters, or a clean, paint-grade surround made from MDF and stock moldings.
Safety note: keep combustibles (wood trim, MDF, face frames) outside required clearances. If your fireplace manual defines a non-combustible zone, treat it like lava. Use approved non-combustible materials where required, and don’t cover vents or air intakes.
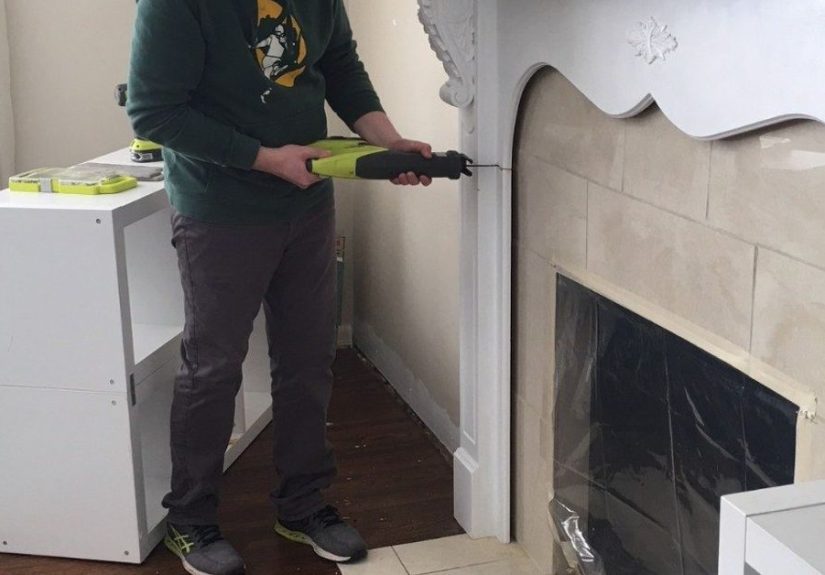
Step 8: Fill, sand, caulk, prime, paint (the finish that forgives everything)
The difference between “homemade” and “high-end” is often finishing.
- Fill nail holes and seams with wood filler.
- Sand smooth (especially face frames and shelf edges).
- Caulk small gaps at trim and wall transitions (paintable caulk only).
- Prime (especially MDF edgesthose thirsty little sponges).
- Paint two coats. Let it cure before loading heavy items.
Paint tip: painting shelves while flat (before install) can be faster and cleanerthen touch up after assembly.
Step 9: Add the “built-in glow” (optional, but extremely satisfying)
Lighting makes shelves feel intentional. Easy options: puck lights, LED tape in an aluminum channel, or small sconces above. If wiring is new to you, consider plug-in options routed through a hidden chase.
Design Choices That Make Fireplace Built-Ins Look Custom
- Match reveals: keep consistent spacing around doors, drawers, and face frames.
- Go taller: to-the-ceiling units look more “architectural.”
- Vary shelf heights: a few taller bays break up the grid and help styling.
- Use a contrasting back: paint the back panel a different color, add wallpaper, or use tongue-and-groove for texture.
- Hide the tech: plan outlets, cord routes, and ventilation if you’re housing media gear.
Budget and Timeline Example (Because Reality Has a Calendar)
Costs vary by size and approach, but here’s a realistic range for a standard fireplace wall with two side units:
- Bookcase hack: $300–$900 (depending on bookcases, trim, and paint)
- Base cabinets + shelves: $800–$2,500 (depending on cabinet quality and hardware)
- Fully custom: $1,000–$3,500+ (sheet goods, trim, doors/drawers, tools you “suddenly need”)
Timeline: a focused DIYer can do a shortcut build in a long weekend; fully custom often takes 2–4 weekends when you include finishing and paint cure time.
FAQ: Quick Answers Before You Start Cutting
Can built-ins go right next to a fireplace?
Sometimes, yesbut only if required clearances are met. Always check the fireplace manual and local code guidance. If you’re unsure, consult an inspector or qualified pro. Heat + wood + “I think it’s fine” is not a vibe.
What’s the best material: MDF or plywood?
For paint-grade built-ins, MDF is smooth and economical, but heavy and moisture-sensitive. Plywood is lighter, stronger for its weight, and holds screws well. Many DIY builds use plywood for structure and MDF for trim/skins.
How do you keep shelves from sagging?
Keep spans reasonable, use thicker material, and add a solid front edge banding. For long shelves, consider a fixed shelf or a hidden support.
Do I need to remove my baseboards?
If you want units perfectly flush to the wall, removing or modifying baseboards can help. Another option is building a notched back or using filler strips, then running baseboard across the front for a continuous look.
Conclusion
DIY built-in shelves around a fireplace are one of the highest-impact upgrades you can make: they add storage, make the room feel finished, and turn the fireplace wall into a true focal point. The winning formula is simple: plan your layout, build a level base, anchor everything to studs, hide wall weirdness with trim, and finish like you’re auditioning for a home show.
Most importantly: respect fireplace clearances and manufacturer instructions. When in doubt, give heat more space than you think it needs. Your future self (and your paint job) will thank you.
What You’ll Experience While Building Fireplace Built-Ins (About of Real-World “Oh, That’s Normal”)
Here’s the honest part nobody puts on the inspirational before-and-after photo: building built-ins around a fireplace is less like assembling furniture and more like negotiating with an old house that has strong feelings. Expect the wall to be slightly bowed, the corners to be slightly out of square, and the floor to slope in a way that makes your level look like it’s telling jokes. None of that means you’re doing it wrongit’s just the house reminding you it existed before laser levels were common.
One of the most common “aha” moments happens during the dry fit. You’ll slide a cabinet into place and discover a mysterious 3/8-inch gap that wasn’t in your sketch. That’s when you learn the sacred DIY phrase: “scribe it.” Filler strips, shims, and trim are not cheating; they’re how built-ins have always looked crisp in real homes. The pros just do it with more confidence and fewer trips to the garage for “one more shim,” which somehow turns into five.
You’ll also develop a complicated relationship with caulk. At first, you’ll be suspicioushow can something that looks like toothpaste fix woodwork? Then you’ll run a neat bead along a ceiling line and watch a shadow gap disappear like a magic trick. The key is restraint: small gaps get caulk, big gaps get wood (or a better cut). If you try to caulk a canyon, it will crack, shrink, and publicly shame you.
Painting is another emotional arc. The first coat can look patchy and rude, especially on MDF edges. This is normal. MDF edges drink primer like they’ve been hiking in the desert. Seal them well, sand lightly between coats, and by coat two, everything starts to look like one clean, intentional surface. Many DIYers say the moment it “becomes built-in” is not when the cabinets are installedit’s when the trim goes on and the paint unifies the whole wall.
Around the fireplace, you’ll likely feel extra cautiousand that’s a good instinct. It’s common to pause, re-check the manual, stare at clearances, and wonder if your shelves are secretly too close. Build in a generous buffer whenever you can, and never block vents or airflow paths. The goal is a beautiful wall that stays beautiful, not one that slowly toasts its own finish over time.
Finally, styling the shelves is its own mini-project. At first you may overfill them (because you’re excited), then pull things off (because it looks busy), then add a basket (because baskets are the adult version of “shove it in the closet”). Give yourself a week to live with the shelves before declaring them “done.” Built-ins are functional, but they’re also a backdropand the best backdrops feel calm, not crowded. And when you’re finished, you’ll notice something funny: everyone will assume they came with the house. Smile politely and accept your new identity as “the person who can just build things.”