Table of Contents >> Show >> Hide
- Why Carving Coconut Shells Is So Addictive
- Tools and Materials
- Before You Start: A Few Quick “Don’t Regret This Later” Notes
- The 13 Steps to Carve a Coconut Shell
- Step 1: Pick the right coconut
- Step 2: Drain the coconut safely
- Step 3: Decide your project shape before cutting
- Step 4: Mark your cut line
- Step 5: Cut the shell (slow and steady)
- Step 6: Remove the coconut meat completely
- Step 7: Clean and dry the shell
- Step 8: Remove outer fibers and level the base
- Step 9: Smooth the inside and rim (the comfort step)
- Step 10: Design your pattern (and transfer it)
- Step 11: Do a test carve first
- Step 12: Carve in layers (outline → depth → details)
- Step 13: Final sand, polish, and seal
- Design Ideas That Look Impressive Without Being a Nightmare
- Troubleshooting: Fix the Most Common Coconut Shell Problems
- Care and Maintenance (So Your Creation Doesn’t Turn Sad)
- Conclusion: Your Coconut Shell Era Starts Now
- Real-World Experience: What You Learn After a Few Coconuts (Extra 500+ Words)
- SEO Tags
A coconut is basically nature’s mystery box: drink inside, dessert inside, andplot twista surprisingly tough shell that’s begging to become a bowl, a lantern, or
the fanciest “I made this” gift you’ve ever wrapped in tissue paper.
This guide blends best practices from well-known U.S. craft tutorials, maker manuals, and woodworking/finishing referencesthen rewrites everything in plain,
standard American English so you can carve confidently (and keep all ten fingers for the victory photo).
Why Carving Coconut Shells Is So Addictive
Coconut shell is hard, dense, and naturally water-resistant compared to many woods. It also has built-in characterdark brown tones, subtle grain, and that
“organic, one-of-one” vibe you can’t fake. The catch? It can crack if you rush, and the dust is not something you want to inhale. Go slow, suit up, and you’ll
end up with a durable piece you can actually use.
- Great for: bowls, cups, planters, candle holders, lanterns, jewelry, spoon rests, desk organizers
- Skill level: beginner to intermediate (advanced if you’re doing detailed relief carving)
- Time: 45 minutes to a few hours, depending on detail and sanding
Tools and Materials
Beginner-friendly toolkit
- 1 mature coconut (older = thicker shell)
- Marker or pencil
- Spoon or butter knife (for removing coconut meat)
- Hand saw or hacksaw (for cutting the shell)
- Sandpaper: 80, 120, 220, 320, 400 grit (or sanding sponges)
- Small file or rasp (optional but helpful)
- Rag or paper towels
Nice-to-have upgrades
- Rotary tool (for carving, engraving, and detail work)
- Carving/engraving bits (small burrs for detail, sanding drums for smoothing)
- Drill + small bits (for dot patterns, starter holes, or “lantern” cutouts)
- Wood-burning pen (for dark linework without deep carving)
- Polishing compound (or a simple buffing wheel)
Safety gear (not optional)
- Safety glasses (shell chips can fly like tiny frisbees)
- Dust mask or respirator (coconut dust is fine and clingy)
- Work gloves (especially during cutting)
- Clamp or non-slip mat (stability prevents slips and cracks)
Pro tip: If you only upgrade one thing, upgrade stability. A wobbly coconut is basically a prank.
Before You Start: A Few Quick “Don’t Regret This Later” Notes
- Work outside or ventilate well. Coconut dust gets everywhere, including your nose and your soul.
- Go slow with power tools. Heat builds fast, and heat can scorch or crack the shell.
- Plan your finish. If your piece will touch food or liquids, choose a finish intended for food-contact surfaces.
- Expect variation. Every coconut is slightly different in thickness and densityadjust pressure as you go.
The 13 Steps to Carve a Coconut Shell
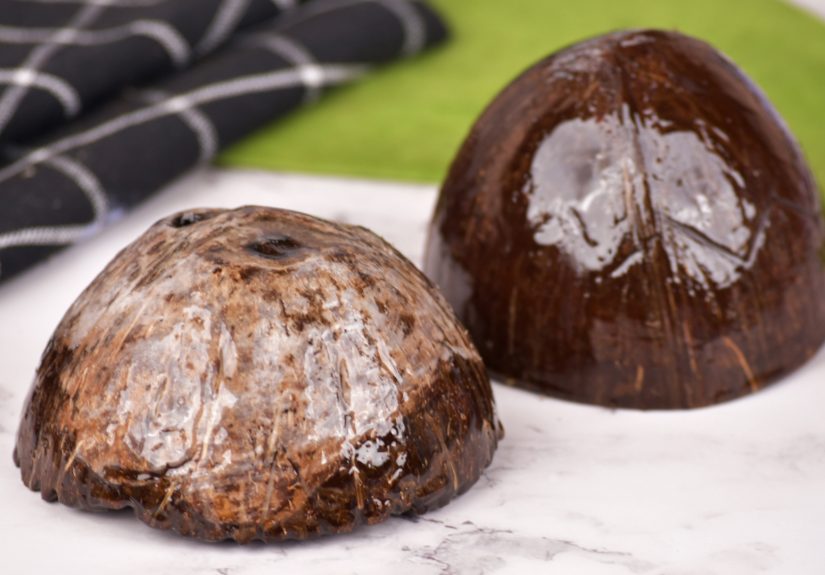
Step 1: Pick the right coconut
Choose a mature coconut (usually brown and hairy). Mature shells tend to be thicker and sturdier than young green coconuts. Inspect for cracks, soft spots, or
moldcarving a damaged shell is like building a sandcastle during high tide.
Step 2: Drain the coconut safely
Locate the “eyes” (the three dots on one end). Use a screwdriver, awl, or drill to make a hole in one or two eyes. Drain the coconut water into a bowl. (Drink
it, cook with it, or just feel proud you didn’t spill it on your shoes.)
Step 3: Decide your project shape before cutting
Are you making a bowl? A cup? A lantern? Sketch your plan. For a bowl, you’ll usually cut the coconut roughly in half or slightly above the midpoint. For a
lantern, you’ll likely keep a taller “cup” shape and carve windows into the side.
Step 4: Mark your cut line
Use a marker to draw a guide line around the coconut. A simple trick: wrap a rubber band around the shell to create a straight reference line, then trace along
it. Your future self will thank you for not free-handing a lopsided bowl.
Step 5: Cut the shell (slow and steady)
Use a hand saw/hacksaw and let the tool do the work. Rotate the coconut as you cut so you’re not forcing the blade. If you’re using a rotary tool with a cutting
wheel, wear eye protection and keep a light touchtoo much pressure can cause binding, kickback, or cracking.
Step 6: Remove the coconut meat completely
Use a spoon, butter knife, or small scraper to pry out the flesh. The cleaner the inside, the easier sanding and finishing will be. If the meat is stubborn,
chill the coconut pieces in the fridge briefly; it can help the flesh separate more cleanly.
Step 7: Clean and dry the shell
Rinse and scrub the shell (inside and out). Remove loose fibers. Dry thoroughlyeither air-dry for a day or two in a warm, dry spot. A damp shell can clog
sandpaper and make finishing unpredictable.
Step 8: Remove outer fibers and level the base
Sand the outside with 80–120 grit to knock off the fuzzy fibers and reveal the hard shell surface. If you want your piece to sit flat, gently sand the bottom on
a flat surface. Check often; it’s easy to overdo it and create a wobble.
Step 9: Smooth the inside and rim (the comfort step)
Sand the inside to remove rough areas and leftover membrane. Round over the rim so it doesn’t feel sharp. Work up through the grits: 120 → 220 → 320. A smooth
rim is the difference between “artisan bowl” and “tiny coconut guillotine.”
Step 10: Design your pattern (and transfer it)
Draw your design directly on the shell with pencil/marker, or tape on a paper stencil. Good beginner patterns include geometric lines, dots, simple waves, or leaf
motifs. If you’re doing a lantern pattern, plan negative space carefullytoo many large cutouts can weaken the shell.
Step 11: Do a test carve first
Before you carve your masterpiece, test your tool settings on a scrap area or inside surface. You’re checking for two things: how fast the tool removes material,
and whether it burns/scorches. Coconut shell can darken with heat, which is cool if you meant it and annoying if you didn’t.
Step 12: Carve in layers (outline → depth → details)
Start by lightly outlining your design. Then gradually deepen the carving, working in shallow passes. For relief carving, remove background material slowly and
keep edges crisp. For engraving, keep consistent pressure and use your wrist like you’re drawingsteady, not tense.
- Clean lines: use small burrs or engraving tips
- Textured fills: stipple with a pointed bit (tiny dots add grip and style)
- Cut-through windows: drill a starter hole, then connect with careful cutting
Step 13: Final sand, polish, and seal
After carving, sand lightly again (220 → 320 → 400) to remove tool marks without blurring details. Buff for shine if you want that “store-bought” glow. Finally,
apply a finish suited to the item’s purpose:
- Decor-only pieces: clear sealers or waxes can add shine and protection
- Food-contact items: use a finish labeled for cutting boards/utensils (often food-grade oils or oil-wax blends)
Let the finish cure or soak as directed. Then do a gentle wipe-down and admire the fact that you turned a snack into functional art.
Design Ideas That Look Impressive Without Being a Nightmare
Beginner patterns
- Dot mandalas (forgiving and elegant)
- Simple bands: triangles, chevrons, waves
- Leaf outlines and botanical silhouettes
- Constellations (random dots, but make it intentional)
Intermediate patterns
- Layered relief: raised petals or geometric “tiles”
- Negative-space lantern windows (stars, teardrops, arabesques)
- Lettering + border (names, dates, short quotes)
Quick style win: Combine shallow engraving for outlines with deeper carved pockets for shadows. The contrast reads as “high effort,” even if you
were mostly just being stubborn.
Troubleshooting: Fix the Most Common Coconut Shell Problems
“My shell cracked while cutting.”
Usually caused by forcing the saw, squeezing too hard, or cutting too fast with a power tool. Next time, clamp more securely, take shallow passes, and rotate the
coconut often. If the crack is small, you can sometimes stabilize it by turning it into a design feature (carve a border around it) or using it for a smaller
project like a scoop or ornament.
“The carving looks scorched.”
Heat buildup. Reduce tool speed, lighten pressure, and take breaks. You can sand away mild scorching, but deep burns may become permanent “character.” (Which is a
fancy word for “oops.”)
“My lines wobble.”
Slow down, brace your hands, and carve seated if possible. Try outlining with a pencil first and using a lighter first pass. Some makers tape a straightedge for
borders or use a stencil for repeated shapes.
“It feels rough even after sanding.”
You may be skipping grits or not spending enough time on the earlier grit. Each grit removes the scratches from the previous one. Also, coconut fibers can
“fuzz” upsand a bit more at a lower grit, then climb again.
Care and Maintenance (So Your Creation Doesn’t Turn Sad)
- Hand wash only if it’s used for food or drinks. No dishwasher. No soaking for hours.
- Dry immediately with a towel, then air-dry fully.
- Re-oil as needed if you used an oil finish. When it looks dry, it’s asking for a refresh.
- Avoid extreme heat (stoves, microwaves, direct flame). Coconut shell is tough, not invincible.
Conclusion: Your Coconut Shell Era Starts Now
Carving a coconut shell is part kitchen hack, part craft project, and part patience training. Once you nail the basicsclean cut, smooth sanding, slow carving, and
a sensible finishyou can turn humble shells into bowls, lanterns, planters, and gifts that look far more expensive than they were.
Start with a simple bowl or dot pattern, keep your tools steady, and embrace the reality that sanding is basically the “editing” phase of crafting: not glamorous,
absolutely necessary, and secretly where the magic happens.
Real-World Experience: What You Learn After a Few Coconuts (Extra 500+ Words)
The first coconut shell I tried to carve taught me three important lessons: (1) coconuts are round because they enjoy rolling away from your plans, (2) sanding is
not a “later problem,” it’s the whole problem, and (3) confidence is great right up until the moment you realize you cut the “bowl” line at a 20-degree angle and
invented a new shape: the tragic hat.
Here’s what carving coconut shells feels like in real lifebeyond the neat step list:
Stability changes everything. The first time, I held the shell in my hand like I was peeling an apple. Bad idea. The shell vibrates under tools,
your grip shifts, and suddenly your clean border becomes modern art. Once I started using a clamp and a folded towel (or a non-slip mat), my cuts got cleaner and
my shoulders stopped creeping up to my ears.
“Light passes” isn’t just adviceit’s a cheat code. Coconut shell is dense, and dense materials punish impatience. When I tried to carve deep in
one go, the bit grabbed and skittered. But when I treated carving like sketchingfirst pass: outline, second pass: deepen, third pass: refinethe design stayed
sharp. It also looked more intentional, even when I absolutely was not.
The dust is real. The dust is not a cute, cinematic “craft montage” dust. It’s clingy, fine, and determined to live on every surface. The moment I
switched to working outdoors (or near solid ventilation) and wore a proper mask, the whole experience became less “why is my throat itchy?” and more “wow, this
actually looks good.”
Design selection matters more than skill. My best-looking early projects were not the most complex ones. Dot mandalas and simple geometric bands
hide tiny mistakes because the pattern is repetitive and forgiving. Meanwhile, lettering is brutally honestone crooked curve and your “LOVE” becomes “L0VE,” which
is either a joke or a crisis depending on who you’re gifting it to.
Finishing is where a “craft” becomes a “thing you’d keep.” Before finishing, coconut shell can look dry or dusty, especially after sanding. After
a careful wipe-down and a proper finish, the shell deepens in color and the grain pops. That transformation is wildly satisfyinglike applying lip balm to a
chapped winter mouth, except… for bowls.
My favorite “beginner win” project: a coconut shell tealight holder. Cut the coconut so you have a stable cup, sand the rim smooth, then drill
small holes in a simple constellation pattern. When a candle is inside, the light shines through and makes the design look ten times more advanced than it is. The
best part? The holes don’t need to be perfect. Stars are supposed to be irregular. Nature said so.
And finally, the most surprising lesson: coconut shell carving is a patience hobby disguised as a craft. If you try to rush it, the shell will remind you it used
to be armor for a fruit that survived falling out of trees. But if you take your time, you’ll end up with something you’ll actually useand you’ll start looking at
every coconut like it’s a future masterpiece with snacks inside.