
Table of Contents >> Show >> Hide
- Why Breast Pump Tubing Matters
- Do You Really Need to Clean Breast Pump Tubing?
- What You Need Before Cleaning or Drying Tubing
- Step-by-Step: How to Clean Breast Pump Tubing
- How to Dry Condensation in Breast Pump Tubing
- When to Replace Breast Pump Tubing
- How Often Should You Replace Breast Pump Tubing?
- Cleaning the Parts That Actually Touch Milk
- Should You Sterilize Breast Pump Tubing?
- Common Mistakes to Avoid
- How to Prevent Milk From Getting Into Tubing
- Quick Breast Pump Tubing Care Checklist
- Real-Life Experience: What Pumping Parents Learn the Hard Way
- Conclusion
- SEO Tags
Breast pump tubing is one of those tiny parenting details nobody warns you about. You expect to learn about bottles, burp cloths, storage bags, and perhaps the mysterious disappearance of every clean pacifier in the house. But then one day, you look at your pump tubing and wonder, “Is that condensation? Milk? A science experiment?”
The good news: cleaning breast pump tubing is usually simpler than cleaning the parts that actually touch your breast milk. In many closed-system breast pumps, the tubing should not come into contact with milk at all. That means routine washing is often unnecessary. The not-so-good news: if moisture, milk, or mold appears inside the tubing, you need to handle it quickly and correctly.
This step-by-step guide explains when to clean breast pump tubing, when to dry it, when to replace it, and how to avoid turning your pumping station into a tiny plumbing project. Whether you are exclusively pumping, pumping at work, building a freezer stash, or just trying to get through the day with two matching socks, this guide will help you keep your breast pump tubing clean, dry, and safe.
Why Breast Pump Tubing Matters
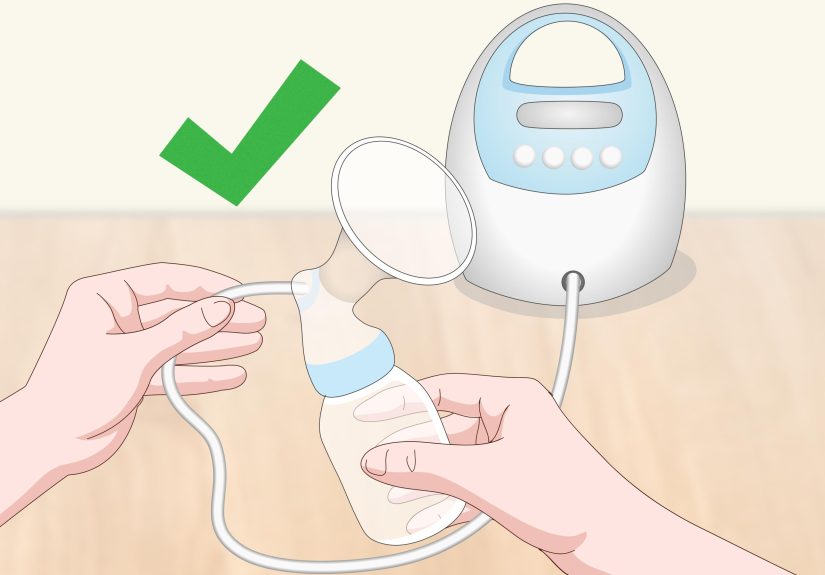
Breast pump tubing connects the pump motor to the collection kit and helps create suction. In most modern pumps, especially closed-system pumps, tubing is designed to move airnot milk. Milk should travel from the flange into the bottle or storage container, while barriers such as backflow protectors help keep milk away from the tubing and motor.
That distinction is important. Pump parts that touch breast milk, such as flanges, valves, membranes, connectors, and bottles, need thorough cleaning after use. Tubing, however, usually stays dry and separate from milk. When tubing is used properly and remains dry, it typically does not need to be washed after every pumping session.
Still, tubing deserves regular inspection. Condensation can form inside the tube, especially after longer pumping sessions or when warm air meets cooler tubing. A few droplets are not unusual, but lingering moisture can create an environment where mold may grow. Milk inside tubing is a bigger concern because it can leave residue that is difficult to remove completely.
Do You Really Need to Clean Breast Pump Tubing?
In most cases, noyou do not need to clean breast pump tubing after every use. This is the part where every exhausted pumping parent takes a tiny victory lap. Your sink already looks like a baby bottle car wash, so one less item is excellent news.
You should clean or replace tubing depending on what you see inside it:
- If the tubing is dry and clear: No washing is usually needed. Store it cleanly and inspect it before each use.
- If you see condensation: Dry the tubing by running the pump with only the tubing attached for a few minutes.
- If milk gets into the tubing: Follow your pump manufacturer’s instructions. Some tubing can be washed and fully air-dried; some should be replaced.
- If you see mold, dark spots, cloudiness, residue, or an odor: Replace the tubing immediately.
- If the tubing is cracked, stretched, loose, or damaged: Replace it because poor tubing can affect suction and hygiene.
Always check your breast pump manual. Different brands and models may have different recommendations. Open-system pumps, older pumps, and certain hospital-grade setups may require different handling than newer closed-system pumps.
What You Need Before Cleaning or Drying Tubing
Before you begin, gather a few basic supplies. You do not need a laboratory, a hazmat suit, or a degree in baby gear engineering.
- Mild dish soap
- Warm running water
- A clean basin used only for infant feeding items
- A clean drying rack or fresh paper towel
- Your breast pump manual
- Replacement tubing, if the tubing is moldy or damaged
Avoid using harsh cleaners, bleach, scented soaps, or random “cleaning hacks” from the internet. Breast pump tubing is narrow and difficult to rinse perfectly, so residue can be a problem. When in doubt, replace the tubing rather than trying to rescue it like a dramatic reality-show makeover.
Step-by-Step: How to Clean Breast Pump Tubing
Use this method only if milk has entered the tubing and your pump manufacturer says the tubing can be washed. If your manual says not to wash the tubing, replace it instead.
Step 1: Turn Off and Unplug the Pump
Safety first. Turn off the breast pump and unplug it before removing tubing or handling any parts near the motor. Never wash, rinse, soak, or submerge the pump motor. The motor is the brains of the operation, and it prefers not to take a bubble bath.
Step 2: Disconnect the Tubing
Remove the tubing from the pump and from the collection kit. Inspect both ends. Look for milk droplets, sticky residue, discoloration, cloudiness, or any suspicious spots. If you see mold, skip washing and replace the tubing right away.
Step 3: Rinse With Running Water
If milk has entered washable tubing, rinse the inside of the tubing with clean running water. Let the water flow through the tube to help remove visible milk. Avoid placing the tubing directly in a sink, because sinks and drains can harbor germs. Use a clean basin if you need to set anything down.
Step 4: Wash With Warm, Soapy Water
Fill a clean basin with warm water and a small amount of mild dish soap. Allow soapy water to pass through the tubing. Gently swirl or move the tubing so the water reaches the inside surfaces. Do not use a brush unless your manufacturer specifically recommends it, because tubing can tear, stretch, or trap fibers.
Step 5: Rinse Thoroughly
Rinse the tubing well with clean running water until no soap remains. This step matters because soap residue inside the tubing may be difficult to see. If you can still smell soap, keep rinsing.
Step 6: Shake Out Excess Water
Hold the tubing securely and shake out as much water as possible. Be gentle. This is tubing, not a jump rope. The goal is to remove trapped droplets without stretching or cracking the tube.
Step 7: Hang to Air Dry Completely
Hang the tubing vertically in a clean area where air can circulate. Let it dry completely before reconnecting it to your pump. This may take several hours depending on humidity, tubing length, and how much water remains inside.
Step 8: Run the Pump to Remove Remaining Moisture
Once the tubing has air-dried, attach only the tubing to the pumpnot the bottles, flanges, or collection kit. Turn the pump on for a few minutes to move air through the tubing and help clear remaining moisture. Do not use the tubing for pumping milk until it is fully dry.
How to Dry Condensation in Breast Pump Tubing
Condensation is different from milk. It usually appears as tiny water droplets inside the tubing after pumping. This can happen when warm air from pumping meets cooler tubing. Condensation is common, but you should dry it before storing the pump.
Here is the easiest way to dry condensation:
- Finish pumping and remove the milk collection kit.
- Leave the tubing attached to the pump motor.
- Turn the pump on for a few minutes.
- Watch the tubing until the droplets disappear.
- Store the dry tubing in a clean, dry place.
This simple habit can prevent a lot of future stress. Think of it as the tubing’s little air-dry spa treatment. It takes only a few minutes and helps keep moisture from sitting inside the tube.
When to Replace Breast Pump Tubing
Sometimes cleaning is not the answer. Sometimes the answer is: “Thank you for your service, little tube, but it is time to retire.”
Replace breast pump tubing immediately if you notice:
- Mold or black, green, gray, or brown spots
- Cloudiness that does not go away
- A sour, musty, or stale smell
- Sticky milk residue inside the tube
- Cracks, holes, stretching, or loose ends
- Reduced suction that improves when new tubing is used
Moldy tubing should not be cleaned and reused. Because tubing is narrow, flexible, and difficult to scrub thoroughly, mold can hide in places you cannot reach. Replacement tubing is usually inexpensive compared with the peace of mind it provides.
How Often Should You Replace Breast Pump Tubing?
Replacement timing depends on your pump model, pumping frequency, and the manufacturer’s recommendations. Some pumping parents replace tubing every few months, especially with frequent use. Others replace it when it becomes loose, damaged, cloudy, or difficult to dry.
If you pump multiple times per day, keep an extra set of tubing on hand. This is especially helpful if you pump at work, travel, or pump during the newborn stage when time has no meaning and coffee becomes a personality trait.
Cleaning the Parts That Actually Touch Milk
While tubing often does not need routine washing, the parts that touch breast milk do. After each pumping session, take apart the pump kit and clean the milk-contact parts as soon as possible. These usually include flanges, valves, membranes, connectors, bottles, caps, and sometimes backflow protector pieces.
For handwashing, use a clean basin reserved only for infant feeding items. Add hot water and soap, scrub according to the pump manufacturer’s instructions, rinse under running water, and allow everything to air dry on a clean paper towel or drying rack. Do not pat parts dry with a used dish towel, because towels can transfer germs.
If your pump parts are dishwasher-safe, place small pieces in a closed-top basket or mesh laundry bag made for dishwasher use. Use hot water and a heated drying cycle if available. Always confirm dishwasher safety in your pump manual first.
Should You Sterilize Breast Pump Tubing?
Usually, no. Breast pump tubing should not be boiled, microwaved, steamed, or sterilized unless your pump manufacturer specifically says it is safe. High heat can damage tubing, and sterilizing narrow tubing may leave moisture trapped inside. That moisture can become a bigger problem than the one you were trying to solve.
Milk-contact pump parts may need regular sanitizing, especially if your baby is younger than two months, was born prematurely, or has a weakened immune system. In those cases, ask your baby’s healthcare provider for specific advice. For tubing, however, replacement is often safer and more reliable than aggressive cleaning when contamination is suspected.
Common Mistakes to Avoid
Mistake 1: Washing Tubing After Every Pumping Session
If the tubing is dry and milk-free, routine washing can introduce unnecessary moisture. More washing does not always mean more cleanliness. Sometimes it just means more drying problems.
Mistake 2: Storing Damp Tubing
Damp tubing is the main villain in this story. Always dry condensation before storing your pump. A few minutes of airflow can save you from discovering mystery spots later.
Mistake 3: Ignoring Backflow Protector Parts
Backflow protectors help keep milk away from tubing and the motor. If they are assembled incorrectly, damaged, or not cleaned properly, milk may travel where it should not. Check these parts regularly.
Mistake 4: Trying to Scrub Mold Out of Tubing
Do not try to rescue moldy tubing. Replace it. Tubing is not a sentimental heirloom. It is a replaceable part that should stay clean, dry, and clear.
Mistake 5: Forgetting the Pump Manual
Breast pumps vary. Your manual is the final authority for your specific model. Keep a digital copy on your phone so you can check cleaning instructions without digging through a drawer full of mystery cords.
How to Prevent Milk From Getting Into Tubing
Prevention is easier than cleanup. To keep tubing dry, make sure all parts are assembled correctly before each pumping session. Check that valves, membranes, and backflow protectors are attached securely. Keep bottles upright while pumping, and avoid overfilling them. If you lean too far back or the bottle tips, milk can sometimes move toward places it does not belong.
Also inspect pump parts for wear. A stretched membrane or damaged valve can affect suction and may contribute to backflow issues. If your pump suddenly feels weaker or louder, or if milk appears in areas where it never used to appear, replace worn parts and check the setup.
Quick Breast Pump Tubing Care Checklist
- Inspect tubing before each pumping session.
- Do not wash dry tubing just because you washed the other parts.
- Dry condensation by running the pump with only tubing attached.
- Wash tubing only if milk enters it and the manufacturer allows washing.
- Air dry tubing completely before using it again.
- Replace tubing if it is moldy, cloudy, smelly, cracked, or sticky.
- Keep spare tubing available, especially if you pump often.
Real-Life Experience: What Pumping Parents Learn the Hard Way
Cleaning breast pump tubing sounds like a tiny task until you are doing it on three hours of sleep with one hand, while the baby makes that suspiciously quiet “I am definitely doing something” face. In real life, the best tubing routine is the one that is safe, simple, and easy enough to repeat when your brain is running on crackers and cold coffee.
One common experience is the first-time condensation panic. Many parents see droplets inside the tubing and immediately assume the whole pump is ruined. Usually, it is just moisture. Running the pump with only the tubing attached for a few minutes often clears it. The trick is remembering to do it right after pumping, before tossing everything into a bag and promising yourself you will deal with it later. Later, of course, is when the laundry mountain has grown a second peak.
Another lesson: spare tubing is not a luxury; it is a sanity saver. If milk gets into one tube right before work, during a trip, or in the middle of a night pumping session, having a backup set means you can keep going without turning your kitchen into an emergency supply chain center. Many experienced pumping parents keep one set with the pump, one set drying, and one unopened backup set tucked away.
Parents who pump at work often develop a “clean station” habit. They keep a small bag with clean pump parts, a few paper towels, storage bags, and backup tubing. The tubing itself usually stays dry, but having a clean place to store it matters. Tossing tubing loose into a tote bag with receipts, keys, and snack crumbs is not ideal. A clean zip-top bag or dedicated pump pouch keeps it protected and easier to inspect.
Exclusive pumpers often become experts at spotting worn-out parts. If suction suddenly feels weaker, the tubing may be loose, stretched, or not attached securely. Sometimes the tubing is fine and the real culprit is a tiny valve or membrane that has given up on life. Replacing small pump parts on a regular schedule can prevent milk from backing up and can make pumping more efficient.
Travel adds another layer of adventure. Hotel bathrooms, airport family rooms, and car pumping setups are not always designed with pump hygiene in mind. The most practical approach is to keep tubing dry, pack extra parts, and avoid washing tubing unless truly necessary. If tubing does get wet, hang it somewhere clean and ventilated, then run air through it before using it again. Glamorous? No. Effective? Yes.
The biggest lesson is not to overcomplicate the process. Clean the parts that touch milk. Keep tubing dry. Replace questionable tubing. Follow the manual. That is the whole plot. Breastfeeding and pumping already come with enough moving parts, emotionally and literally. Your tubing routine should make life easier, not become one more chore that requires a spreadsheet and a motivational speech.
Conclusion
Learning how to clean breast pump tubing is mostly about knowing when not to clean it. If your tubing stays dry and milk-free, routine washing is usually unnecessary. Your main job is to inspect it, dry condensation promptly, store it cleanly, and replace it when it shows signs of mold, residue, odor, cloudiness, or damage.
If milk enters the tubing, check your pump manual before washing. Some tubing can be rinsed, washed with mild soapy water, and air-dried completely. Other tubing should be replaced. When mold appears, replacement is the safest choice.
A clean pumping routine does not have to be complicated. With a few smart habitsrunning the pump to clear condensation, keeping spare tubing nearby, and cleaning milk-contact parts properlyyou can protect your pump, support safe milk handling, and reduce one more source of parenting stress. And honestly, any task that gets simpler deserves a round of applause.


