
Table of Contents >> Show >> Hide
- Before You Start: Is the Oil Worth Saving?
- What You’ll Need
- How to Clean Dark Cooking Oil: 15 Steps
- Step 1: Turn off the heat and let the oil cool down
- Step 2: Remove obvious debris while the oil is still slightly warm
- Step 3: Set up a “no-mess” filtering station
- Step 4: Do a first-pass coarse strain
- Step 5: Let gravity work (settle time)
- Step 6: Decant the cleaner oil and leave the sludge behind
- Step 7: Do a second-pass fine filter (coffee filter or cheesecloth)
- Step 8: Filter twice if you fried breaded foods
- Step 9: Optional “Gelatin Clarification” for very dirty oil
- Step 10: Optional “Starch Polishing” for stubborn cloudiness
- Step 11: Don’t try to “fix” rancid oil with hacks
- Step 12: Store the cleaned oil correctly (this is where most people lose)
- Step 13: Label it like a responsible adult (even if you’re not one yet)
- Step 14: Match oil to the next job
- Step 15: Re-test before reuseand dispose responsibly when it’s done
- Troubleshooting: Why Is My Oil Still Dark?
- How Many Times Can You Reuse Frying Oil?
- Food Safety Notes (Because Nobody Wants Regret Fries)
- Real-World Kitchen Experiences: What People Notice After Cleaning Dark Oil (About )
- Conclusion: Cleaner Oil, Better Frying, Less Waste
Clean dark cooking oil sounds like an impossible missionlike asking a toddler to keep a white couch white. But if your oil is dark because it picked up crumbs (not because it’s gone rancid), you can often filter used cooking oil, improve the flavor, and stretch your fry budget without sacrificing taste.
The key is knowing the difference between:
- “Dirty oil” (full of browned bits and sediment you can remove)
- “Spent oil” (chemically broken downno amount of filtering can un-burn it)
This guide walks you through how to clean deep fry oil at home in a safe, practical waywith a few optional “science fair” tricks (gelatin and starch) for oil that’s extra murky. I’ll keep it in standard American English, with real-world details, and just enough humor to make straining oil feel less like a punishment.
Before You Start: Is the Oil Worth Saving?
Filtering helps when oil is dark mainly from floating crumbs, batter dust, and tiny browned bits. But if the oil has truly degraded, cleaning it won’t make it “fresh”it’ll just be “clearer bad oil,” which is not a glow-up anyone asked for.
Quick “keep it or toss it” checklist
- Smell test: If it smells rancid, sour, fishy (and you didn’t fry fish), or like old crayons, toss it.
- Smoke test: If it smokes at normal frying temperatures (around 325–375°F), it’s breaking downtime to discard.
- Foam test: If it foams aggressively or looks “soapy” when heated, that’s a classic sign it’s done.
- Texture test: If it’s sticky, gummy, or unusually thick at room temp, it’s likely oxidized/polymerizeddiscard.
- Flavor transfer: If everything tastes vaguely burnt or bitter, your oil is telling you it wants retirement.
Safety note (especially for teen cooks): Hot oil can cause serious burns and kitchen fires. If you’re under 18, have an adult help with any step involving lifting, pouring, or reheating oil.
What You’ll Need
- Fine-mesh strainer (or sieve)
- Cheesecloth or coffee filters (paper or reusable fine filter)
- Funnel (optional, but saves your sanity)
- Heat-safe bowl or measuring cup
- Clean, dry, airtight container (glass jar works great)
- Label + marker (date + what you fried)
Optional “oil polishing” helpers
- Unflavored powdered gelatin (for gelatin clarification)
- Cornstarch (for a starch-absorption method)
- Thermometer (helpful for safe reheating and frying later)
How to Clean Dark Cooking Oil: 15 Steps
-
Step 1: Turn off the heat and let the oil cool down
Do not try to “save time” by pouring hot oil. Let it cool until it’s safe to handleideally to room temperature. Warm is okay if it’s just barely warm and not dangerous, but hot oil + shaky hands = a kitchen horror story.
-
Step 2: Remove obvious debris while the oil is still slightly warm
If you can safely do so, use a slotted spoon or spider to scoop out large bits (batter shards, burnt breading). These are oil’s worst roommates because they keep cooking and darkening everything.
-
Step 3: Set up a “no-mess” filtering station
Put a fine-mesh strainer over a heat-safe bowl. If you’re using a coffee filter or cheesecloth, line the strainer with it now. Place everything on a stable surface. If you’re using a funnel, nestle it into your storage jar after the first coarse strain (funnel + crumbs can clog fast).
-
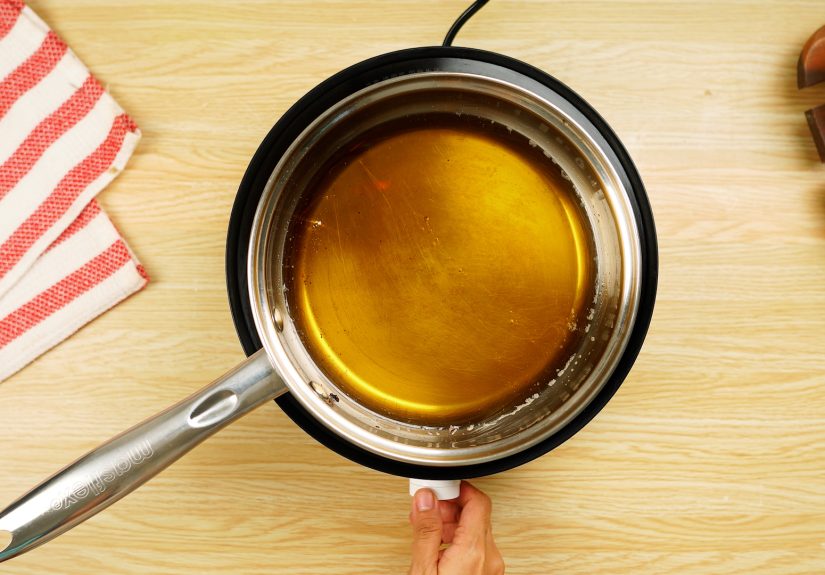
Step 4: Do a first-pass coarse strain
Pour the oil slowly through the fine-mesh strainer to catch larger particles. This step alone often makes oil look dramatically lighter.
-
Step 5: Let gravity work (settle time)
Let the strained oil sit undisturbed for 30–60 minutes. Fine sediment drops to the bottom. This is the laziest stepand somehow the most satisfying.
-
Step 6: Decant the cleaner oil and leave the sludge behind
Carefully pour the top portion into another clean container, stopping when you reach the darker sediment layer. Don’t “save every drop.” That last gritty ounce is the drama you’re trying to remove.
-
Step 7: Do a second-pass fine filter (coffee filter or cheesecloth)
Now filter again, but finer. Line a strainer with a coffee filter (or a few layers of cheesecloth) and pour slowly. Expect it to take a few minutesespecially if the oil is cool. Patience here = cleaner oil later.
-
Step 8: Filter twice if you fried breaded foods
Chicken cutlets, onion rings, fish sticksanything breaded sheds tiny particles that keep browning and darkening oil. If your filter looks like it survived a sandstorm, run the oil through a fresh filter one more time.
-
Step 9: Optional “Gelatin Clarification” for very dirty oil
This is the famous trick for clarify frying oil that looks hopeless but isn’t rancid. The idea: gelatin + water forms a gel that traps particles as it sets, pulling gunk down.
- Heat about 1/2 cup water until hot (steaming, not necessarily raging boil).
- Whisk in about 1 teaspoon unflavored gelatin until dissolved.
- Let your used oil cool so it’s not hot (room temp is safest).
- Whisk the hot gelatin-water into the oil thoroughly.
- Refrigerate overnight. The gelatin puck settles at the bottom with trapped debris.
- Next day, gently pour off the clean oil from the top, leaving the gelatin layer behind.
Important: Never add water-based mixtures to hot oil. If you’re unsure, wait until everything is cool and calm.
-
Step 10: Optional “Starch Polishing” for stubborn cloudiness
Some cooks use cornstarch to help bind and capture fine particles. This method can be messy if rushed because it involves water. The safe approach is slow and controlled:
- Make a slurry: 1 tablespoon cornstarch mixed with 2–3 tablespoons water.
- Warm the oil gently in a pot (low heat) so it’s warm, not scorching.
- Carefully add the slurry and stir. It may sputtergo slow and use a deep pot.
- Keep heat low and stir until bubbling calms down and starch clumps/sets.
- Cool completely, then strain through a fine filter.
If this feels like too much fuss, skip it. A second coffee-filter pass is usually easier.
-
Step 11: Don’t try to “fix” rancid oil with hacks
Salt, potatoes, bread slices, “just add fresh oil,” etc.these may reduce particles or odors a tiny bit, but they won’t reverse chemical breakdown. If the oil fails the smell/smoke/foam tests, let it go.
-
Step 12: Store the cleaned oil correctly (this is where most people lose)
Air, light, heat, and leftover crumbs speed up oil breakdown. Store your cleaned oil in an airtight container in a cool, dark place. A glass jar with a tight lid is great. If you can use an opaque container, even better.
-
Step 13: Label it like a responsible adult (even if you’re not one yet)
Write the date and what you fried: “12/28 – fries,” “12/28 – chicken,” etc. This helps you avoid the classic mystery jar situation: “Is this… oil? Cold brew? A science experiment?”
-
Step 14: Match oil to the next job
Used oil carries flavor. Oil that fried fish will haunt donuts. Oil that fried churros might be amazing for French toast, but odd for fried chicken. For best results, reuse oil with similar foods and flavors.
-
Step 15: Re-test before reuseand dispose responsibly when it’s done
Before frying again, warm a small amount and check for early smoking, weird foaming, or off smells. If anything seems wrong, discard it. Never pour oil down the drain (hello, plumbing disaster). Let it cool, seal it in a non-breakable container, and trash itor use a local cooking-oil recycling option if available.
Troubleshooting: Why Is My Oil Still Dark?
You fried breaded or sugary foods
Breading sheds particles, and sugar caramelizes fastboth darken oil quickly. Double-filter and consider using that oil for savory frying next time (or discard sooner).
The oil overheated
When oil goes past its comfortable temperature range, it breaks down faster. A thermometer helps you keep frying temps steady so oil lasts longer.
You waited too long to strain
If crumbs sit in oil for hours or days, they keep oxidizing and flavoring the oil in a bad way. Strain the same day whenever possible.
How Many Times Can You Reuse Frying Oil?
There isn’t a single magic number because it depends on:
- What you fried (breaded foods shorten oil life)
- How hot you got the oil (overheating is brutal)
- How well you filtered and stored it (crumbs + oxygen = faster breakdown)
For many home kitchens, reusing oil a few times is reasonable if it still smells neutral, doesn’t smoke early, and filters clean. When in doubt, prioritize taste and safety over squeezing out “one more batch.”
Food Safety Notes (Because Nobody Wants Regret Fries)
- Avoid cross-contamination: If you fry raw proteins, be extra strict about temps and storage. Strain promptly and store properly.
- Keep water away from hot oil: Water can cause violent splattering. Cool oil before any method involving water (gelatin, starch).
- Use clean containers: Old crumbs in the jar will re-contaminate fresh-filtered oil.
Real-World Kitchen Experiences: What People Notice After Cleaning Dark Oil (About )
In real home kitchens, the biggest “aha” moment usually happens after the first coarse strain. Cooks will often say something like, “Wait… that’s it?” because removing the large browned bits makes oil look instantly less intimidating. If you fried something lightly batteredsay, tempura vegetables or thin-cut friesyour oil may go from “espresso” to “golden amber” just by filtering and letting it settle for an hour.
Where people get frustrated is the coffee-filter stage, because it moves at the speed of a sleepy snail. This is the part that tests patience: the oil is thicker when cool, and paper filters can clog with ultra-fine sediment. A common trick is to slightly warm the oil (not hotjust warm enough to flow) and pour slowly. Another observation: if you try to rush and dump the whole pot in at once, the filter clogs faster, and you end up doing more work, not less. Slow pours win.
Many cooks also notice a “flavor personality” in reused oil. Oil saved after frying French fries often makes the next batch taste even betterlike the oil learned what its life purpose is. On the flip side, oil used for heavily seasoned or strongly flavored foods (garlic-heavy wings, spicy breading, fish) can leave a lingering aftertaste. The practical takeaway people discover quickly is: label the jar and “assign” oil to a lane. A jar marked “fries” becomes the go-to for potatoes and savory snacks. A jar marked “fish” is… well… best used again for fish, or it becomes the jar you regret.
The gelatin method is where experience splits into two camps: those who love it and those who decide it’s too much like middle-school science lab. Folks who love it usually tried it after frying something crumb-heavy (breaded chicken, donuts, battered onions) and were shocked by how much gunk settled into the gelatin layer. The ones who hate it typically made one of two mistakes: they mixed anything water-based into oil that was still too hot (dangerous), or they didn’t whisk thoroughly, so the gelatin didn’t grab particles evenly. When done carefully with cool oil, people often report a noticeably cleaner look and less “fried” smell.
Another real-world lesson: storage can make or break your success. Cooks who leave strained oil uncovered on the counter often find it smells “off” quickly, because oxygen and light speed oxidation. Meanwhile, cooks who use a clean jar, seal it tightly, and store it in a cool, dark cabinet (or fridge) usually get more reuses with better flavor. Some notice the oil looks cloudy in the refrigeratorthis is normal for many oils and typically clears when it returns to room temperature.
Finally, experienced fryers tend to adopt a simple rule: if you’re debating it, toss it. The cost of new oil is usually less than the cost of ruining a whole batch of foodor feeling weird about what you just ate. Clean oil should make cooking easier and tastier, not turn dinner into an anxiety hobby.
Conclusion: Cleaner Oil, Better Frying, Less Waste
Learning how to clean dark cooking oil is mostly about removing what doesn’t belong there: crumbs, sediment, and the tiny browned bits that keep cooking long after your food is done. With simple toolsfine-mesh strainer, coffee filters, and proper storageyou can reuse frying oil safely when it still passes the smell/smoke/foam tests. And when it doesn’t? Be brave. Say goodbye. Your future fries will thank you.


