
Table of Contents >> Show >> Hide
- Before You Start: What “Clean” Actually Means
- Grab These Supplies (So You Don’t Wander Off Mid-Clean)
- The 10-Step Room-Cleaning Method
- Step 1: Set a Timer, Make It a Game, and Open the Room Up
- Step 2: Remove Trash First (Fast Win, Big Impact)
- Step 3: Round Up Dishes and Food Stuff (Evict the Science Experiments)
- Step 4: LaundryCollect It All (Dirty + Clean), Then Start One Load
- Step 5: Clear the Floor by Making Four Piles (Keep, Relocate, Donate, Trash)
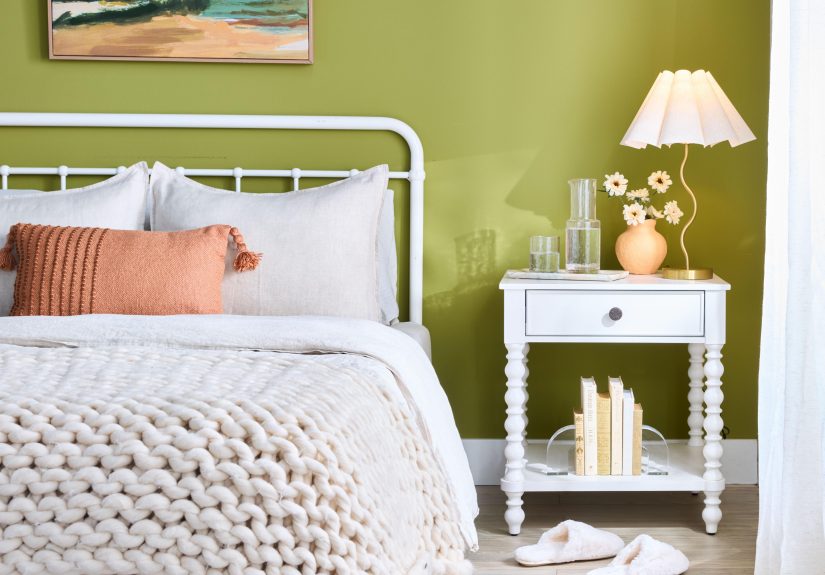
- Step 6: Reset the Bed (Strip It or At Least Make It)
- Step 7: Dust From Top to Bottom (Yes, Top to Bottom)
- Step 8: Wipe Down Surfaces and Handle the “High-Touch” Spots
- Step 9: Clean Mirrors and Windows (Small Effort, Big “Wow”)
- Step 10: Do the Floors Last (Vacuum/Sweep, Then Mop If Needed)
- Mini-Strategies That Make Room Cleaning Way Easier
- How Often Should You Clean Your Room?
- Common Mistakes That Make Cleaning Take Longer
- of Real-Life Cleaning Experiences (So You Feel Less Alone)
- Conclusion
A messy room is basically a tiny chaos museum where every exhibit is labeled “I’ll deal with this later.”
The good news: you don’t need a whole weekend, a new personality, or a motivational speech from your vacuum.
You just need a simple plan that removes the stuff that makes a room feel gross (trash, laundry, dust, mystery cups)
and resets the space so it’s easy to keep clean.
This guide breaks room cleaning into 10 practical steps you can follow in order. The order matters because it prevents
“cleaning twice” (like vacuuming first… and then knocking dust onto the floor like a disappointed snow globe).
You’ll get a tidy room that actually looks cleanand feels calmer, too.
Before You Start: What “Clean” Actually Means
“Clean your room” can mean different things depending on the situation:
- Tidy: Everything is put away, surfaces are mostly clear, and the floor is visible. Guests won’t suspect a raccoon lives here.
- Clean: Tidy plus dusting/wiping, fresh bedding, and floors done. The room looks and smells noticeably better.
- Deep clean: Clean plus the stuff you ignore: baseboards, under-bed dust bunnies, closet corners, and the “why is this sticky?” zone.
The 10 steps below land you solidly in the clean category, with optional mini-upgrades for a deeper reset.
Grab These Supplies (So You Don’t Wander Off Mid-Clean)
Collect what you need first. Otherwise, you’ll leave to get a trash bag and return 40 minutes later holding a snack and zero momentum.
- Trash bag (or two if your room has “projects”)
- Laundry basket/hamper
- Two boxes or bags labeled Donate and Relocate (stuff that belongs elsewhere)
- Microfiber cloths (dry + slightly damp)
- All-purpose cleaner (or a gentle soap-and-water mix)
- Duster or vacuum brush attachment (ceiling fans, vents, corners)
- Glass cleaner (or a microfiber cloth + water for mirrors)
- Vacuum, broom, and/or mop (depending on your floor)
- A timer and a playlist you’ll actually follow through with
The 10-Step Room-Cleaning Method
Step 1: Set a Timer, Make It a Game, and Open the Room Up
Set a timer for 30–60 minutes depending on the state of your room. Put on music, open a window if you can,
and turn on a light. This is not just “vibes”fresh air and good lighting make it easier to spot dust, clutter, and that sock
that’s been emotionally supporting your chair for months.
Quick mindset shift: you’re not aiming for perfection. You’re aiming for visible progress. That’s what keeps you moving.
Step 2: Remove Trash First (Fast Win, Big Impact)
Grab the trash bag and do a quick sweep: wrappers, receipts, broken pens, packaging, empty bottles, and anything that is clearly garbage.
Trash removal is the easiest way to make your room look 20% cleaner in about three minutes.
Pro tip: if you’re unsure whether something is trash, put it in a “Decide Later” pile for now. Don’t stall at the first emotional cardboard box.
Step 3: Round Up Dishes and Food Stuff (Evict the Science Experiments)
Next, collect cups, plates, and anything food-related. Even if you’re not going to wash them this second, get them out of the room.
A room can be messy and still feel okayuntil it’s also crumby. That’s when the vibe turns from “busy” to “biohazard chic.”
Step 4: LaundryCollect It All (Dirty + Clean), Then Start One Load
Laundry is the #1 room-clutter multiplier. Pick up every piece of clothing on the floor, bed, chair, and that corner that functions
as a clothing black hole.
- Dirty clothes: straight into the hamper.
- Clean clothes: fold or hang immediately if you can. If not, put them in one neat “clean stack” to deal with after surfaces are cleared.
If you have access to a washer, start a load nowespecially sheets and pillowcases if you’re doing a full reset. While laundry runs,
you’ll keep cleaning. This is how you stop room-cleaning from turning into an all-day saga.
Step 5: Clear the Floor by Making Four Piles (Keep, Relocate, Donate, Trash)
If the floor isn’t visible, cleaning feels impossible. The solution is sortingnot wandering around holding random objects like
you’re auditioning for a minimalist documentary.
Move items into four simple categories:
- Keep (in this room): items that belong here and you use.
- Relocate: items that belong in another room (kitchen stuff, tools, random mail).
- Donate/Sell: items you don’t use but someone else could.
- Trash/Recycling: obvious goodbye items.
Keep the “Relocate” pile in a box/basket so you can drop it off in one trip later instead of leaving the room 27 times and getting distracted by life.
Step 6: Reset the Bed (Strip It or At Least Make It)
The bed is the biggest visual object in most roomsso it’s the fastest way to make the space look pulled together.
- If you have clean sheets ready: strip the bed and put bedding into the wash.
- If you’re short on time: make the bed neatly, even if you’re not changing sheets today.
Bonus points: shake out the comforter, fluff pillows, and smooth wrinkles. It’s like putting a suit on your room.
Step 7: Dust From Top to Bottom (Yes, Top to Bottom)
Dust first, floors last. That’s how you avoid cleaning the floor twice.
Start high and work down:
- Ceiling fan blades (a slightly damp cloth helps trap dust instead of launching it into the air)
- Light fixtures and vents (use a duster or vacuum attachment)
- Shelves, picture frames, headboard, window sills
- Dresser tops, nightstands, desk
- Baseboards (optional but wildly satisfying)
If you’re using spray cleaner, spray it onto the clothnot the airso you don’t create a floating mist of “cleaning product meets dust.”
Step 8: Wipe Down Surfaces and Handle the “High-Touch” Spots
Now that clutter is under control, wipe down the surfaces you actually touch. Use an all-purpose cleaner (or mild soap and water for most surfaces).
If someone in your home is sick or at higher risk, follow product instructions for disinfecting and focus on high-touch areas.
High-touch room areas can include:
- Doorknobs and light switches
- Desk surface and keyboard area
- Nightstand top (especially if it holds your phone)
- Drawer pulls and closet handles
Cleaning tip that saves time: wipe in one direction, fold the cloth as it gets dirty, and don’t scrub like you’re trying to erase your past.
Most grime is removed with consistent pressure and the right cleanernot dramatic effort.
Step 9: Clean Mirrors and Windows (Small Effort, Big “Wow”)
Mirrors and glass show streaks, fingerprints, and “How did my face get on this?” moments. A microfiber cloth and glass cleaner
(or a lightly damp microfiber cloth followed by a dry one) takes two minutes and makes the whole room look brighter.
If you’re doing a deeper clean, wipe the window sill and track too. That’s where dust likes to throw parties.
Step 10: Do the Floors Last (Vacuum/Sweep, Then Mop If Needed)
Now the floor is ready. Pick up anything still in the way and go for it:
- Carpet/rugs: vacuum slowly (especially near edges and under the bed if possible).
- Hard floors: sweep/vacuum first, then mop for the final polish.
Don’t skip the “invisible gross” zones:
under the bed, behind the door, and the corners where dust bunnies build tiny civilizations.
Finish strong: remake the bed with fresh sheets if they’re ready, return only the items that truly belong in the room,
and take the trash and “Relocate” box out immediately. The room isn’t finished until the piles are gone.
Mini-Strategies That Make Room Cleaning Way Easier
Use a “10-Minute + 10 Items” Declutter Sprint
If you’re overwhelmed, do a short burst: set a timer for 10 minutes and remove 10 items to trash/donate/relocate.
It’s shockingly effective because it’s small enough to startand starting is the hardest part.
Try the “One-Touch” Rule for Clothes
If you pick up a shirt, it should go to one place immediately: hamper, hanger, drawer, or donation bag.
Not the chair. The chair is not a respected storage system. The chair is a trap.
Make “Putting Away” Easier Than “Dropping Down”
The best organizing tip is the one you’ll actually use. If you always drop things in one spot, put a basket there.
If you hate folding, use bins. If you never hang up jackets, install hooks. Organization should match reality, not fantasy.
How Often Should You Clean Your Room?
A room stays clean when you use a simple rhythm instead of occasional panic-cleaning.
Here’s a realistic schedule:
- Daily (2–5 minutes): make the bed, trash out, clothes in hamper, cups to kitchen.
- Weekly (20–40 minutes): dust surfaces, vacuum/sweep, wipe handles/switches, change sheets if you can.
- Monthly (45–90 minutes): deeper dusting (baseboards, fan), under-bed vacuum, closet quick sort, wipe inside drawers if needed.
The goal isn’t to clean constantlyit’s to keep mess from building into something that requires an emergency response team.
Common Mistakes That Make Cleaning Take Longer
- Cleaning around clutter: You can’t wipe a desk properly if it’s holding 43 objects and a mystery cord.
- Leaving the room repeatedly: Use a “Relocate” box so you can do one drop-off trip at the end.
- Vacuuming before dusting: Dust falls downward. Let gravity work for you, not against you.
- Trying to deep clean while sorting: First tidy and categorize, then clean surfaces. Mixing tasks creates chaos.
- Keeping “maybe” items in piles: If you don’t decide, your room stays half-finished. Limit “maybe” to one small box.
of Real-Life Cleaning Experiences (So You Feel Less Alone)
Here’s something nobody tells you: the hardest part of cleaning your room is rarely the cleaning. It’s the emotions attached to the mess.
The mess can mean you’ve been busy, stressed, tired, or just living your life at full speed.
So if you’ve ever looked around your room and thought, “I don’t even know where to start,” congratulationsyou’re human.
One common experience is the pre-visitor panic clean. Someone texts, “I’m five minutes away,” and suddenly you become
the fastest-moving creature on Earth. The first instinct is usually to shove everything into closets and drawers like you’re hiding
evidence. It works… sort of. The room looks okay, but later you open a drawer and a hairbrush falls out like it’s making a dramatic exit.
The better lesson from panic-cleaning is this: the fastest improvements are trash, laundry, and the bed.
Even in a short window, those three actions can turn “disaster” into “lived-in.”
Another real scenario: the dorm room or small bedroom shuffle. When you have limited space, clutter multiplies instantly.
A single hoodie on the floor can make the whole room feel cramped. People often discover that the solution isn’t “clean harder”
it’s “store smarter.” Hooks behind the door, a slim hamper, under-bed bins, and a small bedside basket can prevent everyday items
from spreading across the room like they’re claiming territory.
Then there’s the deeper experience: the overwhelm spiral. You want a clean room because it helps you focus and sleep,
but the mess makes you feel too overwhelmed to beginso you avoid it, and the mess grows, and the cycle continues.
The best way out is not a heroic eight-hour clean. It’s a tiny win: set a timer for 10 minutes, fill one trash bag, or clear one surface.
People are often surprised how quickly motivation shows up after action starts. Not before. After.
Finally, there’s the “I cleaned, and it got messy again in two days” experiencealso known as being alive.
The fix is a small daily reset: put clothes in the hamper, take dishes out, and keep one “drop zone” basket for random items.
When the reset becomes a habit, the big cleans become rare. And your room stops feeling like a recurring boss battle.
Conclusion
Cleaning your room isn’t a moral test. It’s a practical skilland like any skill, it gets easier with a simple method you can repeat.
Use the 10 steps as your default: trash, dishes, laundry, floor, bed, dust, wipe, glass, floors, reset. The order keeps you moving,
prevents rework, and makes your room feel genuinely fresh.
Start with one clean today. Then keep it with tiny resets. Future-you will walk in, exhale, and think, “Wow. I live like a person
who has it together.” (Even if you’re still eating cereal at midnight. No judgment.)


