
Table of Contents >> Show >> Hide
- Quick checklist (before you start unplugging everything)
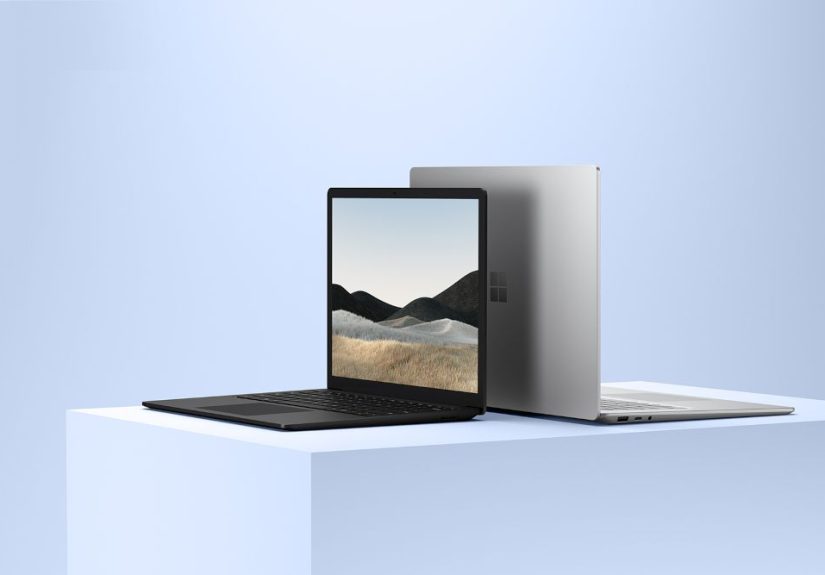
- Step 1: Identify your Surface Laptop’s ports (this determines everything)
- Step 2: Choose the best connection method for your setup
- Option A: USB-C/USB4 to the monitor (fastest, simplest for modern setups)
- Option B: USB-C + an adapter (when your monitor only has HDMI or DisplayPort)
- Option C: Use a Surface dock (best for a “one cable and done” desk setup)
- Option D: Wireless display (best for quick sharing, not always for “serious” work)
- Step 3: Physically connect the Surface Laptop to the monitor
- Step 4: Set the display mode in Windows (make it extend, duplicate, or go solo)
- Step 5: Improve clarity (resolution, scaling, and refresh rate)
- Two monitors on a Surface Laptop (without starting a cable museum)
- Using an external monitor with the laptop closed (aka “clamshell mode”)
- Troubleshooting: when the monitor says “No Signal” and you take it personally
- Extra: of real-world “experiences” from common setups
- Conclusion: the simplest path to a bigger, better setup
Your Surface Laptop is basically a very expensive, very capable calculator until you plug it into a real monitor and suddenly feel like a productivity wizard.
Whether you’re setting up a serious home office, giving your neck a break, or trying to watch spreadsheets “for fun,” connecting a Surface Laptop to a monitor is
usually simpleas long as you match the right port to the right cable and don’t accidentally buy a “charge-only” USB-C cable that does absolutely nothing for video
(except hurt your feelings).
Quick checklist (before you start unplugging everything)
- Your Surface Laptop model (older models use different ports than newer ones).
- Your monitor’s input (HDMI? DisplayPort? USB-C? Something ancient like VGA?).
- The right cable/adapter (USB-C to HDMI, USB-C to DisplayPort, Mini DisplayPort, or a dock).
- Power for the monitor (and ideally for the laptop too, if you’re docking).
- Monitor input/source set correctly (HDMI 1 vs HDMI 2 matters more than it should).
Step 1: Identify your Surface Laptop’s ports (this determines everything)
“Surface Laptop” is a family name, not a single device. Ports vary by generation. The easiest way to avoid adapter chaos is to flip your laptop over (or glance at the sides)
and spot what you’ve got.
Common ports you might see
- USB-C / USB4: Most modern Surface Laptop models use USB-C for video output.
- USB-A: Handy for accessories, not usually for direct video output.
- Surface Connect: Microsoft’s magnetic connector used by many models for charging and Surface docks.
- Mini DisplayPort: Found on some older Surface Laptop generations (yep, the tiny one).
- 3.5mm headphone jack: Not for monitors, unless your monitor is… a pair of headphones.
If your Surface Laptop has USB-C or USB4, you’ll usually connect through that. If it’s an older model with Mini DisplayPort,
you’ll use a Mini DisplayPort cable or adapter. (And if you’re unsure which model you have, you’re not aloneSurface naming can feel like a pop quiz.)
Step 2: Choose the best connection method for your setup
Option A: USB-C/USB4 to the monitor (fastest, simplest for modern setups)
If your Surface Laptop has USB-C/USB4, you can connect directly to a monitor using:
- USB-C to HDMI (most common, especially for TVs and many monitors)
- USB-C to DisplayPort (often the smoothest choice for PC monitors)
- USB-C to USB-C (works when the monitor supports USB-C video input)
Important detail: USB-C is the shape of the portnot a promise. For monitor output, you want USB-C that supports video over DisplayPort Alt Mode.
Some cables are power-only or data-only. Translation: they charge your laptop beautifully while your monitor stays black and judgmental.
Option B: USB-C + an adapter (when your monitor only has HDMI or DisplayPort)
If your monitor doesn’t have USB-C, use a quality adapter or cable. When shopping, look for:
- Resolution and refresh support (for example, “4K at 60Hz” if you want smooth 4K)
- Compatibility with DP Alt Mode (common requirement for USB-C video output)
- A reputable brand (because “Unbranded UltraHD 16K Turbo Cable” is usually a trap)
Real-world example: You have a Surface Laptop with USB-C and a 27-inch 4K monitor with DisplayPort. A USB-C to DisplayPort cable is often a clean, reliable solution.
If your monitor only has HDMI, a USB-C to HDMI adapter/cable does the jobjust confirm it supports the performance you want.
Option C: Use a Surface dock (best for a “one cable and done” desk setup)
If you want a desktop-style setup (monitor(s), keyboard, mouse, Ethernet, charging) without plugging in five different things every day, a dock is your best friend.
Many Surface docks connect via Surface Connect (magnetic) or via USB-C/USB4 depending on the model and dock.
- Surface Dock 2: Provides multiple ports and supports connecting monitors through its USB-C display-capable ports (you may still need USB-C to HDMI/DP adapters depending on your monitor).
- Thunderbolt/USB4 docks (for compatible models): Great for high-bandwidth setups and dual-monitor workflows.
If you’re aiming for two monitors, a dock is often the least frustrating route because it’s designed to handle multi-display output cleanly. Some Surface Laptop models
can support dual external displays depending on hardware capabilities, the dock, and the monitors’ resolution/refresh settings.
Option D: Wireless display (best for quick sharing, not always for “serious” work)
Want to connect without cables? Windows supports wireless projection (often via Miracast) and there are adapters designed to add wireless display support to monitors/TVs.
Wireless is convenient for presentations or casual use, but it can introduce lag or compressionso it’s not always ideal for fast-paced work or gaming.
Step 3: Physically connect the Surface Laptop to the monitor
- Turn on the monitor.
- Select the correct input/source on the monitor (HDMI 1, HDMI 2, DisplayPort, USB-C, etc.).
- Connect the cable:
- If direct: plug USB-C (laptop) to HDMI/DP/USB-C (monitor).
- If using an adapter: plug adapter into the Surface Laptop first, then connect the HDMI/DP cable to the monitor.
- If docking: connect the dock to the laptop, then connect monitor(s) to the dock.
- Wait a few seconds. Many monitors take a moment to “handshake” and show an image.
If nothing appears, don’t panic. The “fix” is often as simple as switching the monitor input to the port you actually used. (It happens to everyone. Yes, everyone.)
Step 4: Set the display mode in Windows (make it extend, duplicate, or go solo)
The quickest method: Windows + P
Press Windows key + P to open the projection menu, then choose:
- PC screen only (Surface Laptop only)
- Duplicate (same image on laptop and monitor)
- Extend (your best productivity choicetwo screens become one big workspace)
- Second screen only (monitor only, laptop screen off)
The detailed method: Settings > System > Display
Go to Start > Settings > System > Display. From here you can:
- Identify which screen is 1 and 2
- Rearrange displays by dragging them (so your cursor moves naturally between screens)
- Select the correct display if you’re changing settings for only one screen
- Choose multiple display behavior (extend/duplicate and detection options)
Pro tip: Drag the display rectangles so they match your physical layout. If the monitor is on the left of your laptop in real life, put it on the left in Windows too.
Otherwise your mouse will “teleport” in ways that feel haunted.
Step 5: Improve clarity (resolution, scaling, and refresh rate)
Once your display is working, make it look good. The three big knobs to turn are:
Resolution
In Settings > System > Display, choose the monitor and set the Display resolution.
“Recommended” is usually correct, but if text looks blurry or too large, check that you’re using the monitor’s native resolution (often 1920×1080, 2560×1440, or 3840×2160 for 4K).
Scaling
High-resolution monitors can make text tiny. Adjust Scale so text is readable without squinting like you’re decoding secret messages.
A common setup is 100% on a 1080p monitor, 125%–150% on a 4K monitor (but your preferences win).
Refresh rate
For smoother scrolling and motion, go to Settings > System > Display > Advanced display, choose the external monitor,
and select the best refresh rate the monitor supports (like 60Hz, 120Hz, or higher).
Two monitors on a Surface Laptop (without starting a cable museum)
Many people connect one monitor and stop there. But if you want two external monitors, here are the cleanest strategies:
Strategy 1: Use a dock designed for dual displays
A Surface dock (or a compatible USB4/Thunderbolt dock) is often the simplest way to run two monitors. You connect the dock to the laptop once, and your monitors plug into the dock.
Depending on your monitors, you may use USB-C to DisplayPort cables, USB-C to HDMI adapters, or direct USB-C connections.
Strategy 2: Use both USB-C ports (if your model has them)
Some Surface Laptop models include multiple USB-C/USB4 ports that can each output video. In that case, you may be able to connect one monitor per port.
Whether you can run both at high resolution and high refresh rate depends on the laptop, cables/adapters, and monitor specs.
Example setup: Two 27-inch 1440p monitors at 60Hz is usually easier than two 4K monitors at 60Hz. If you hit limits (flicker, forced lower refresh rate, or one monitor not detected),
reduce resolution/refresh on one display or switch to a dock optimized for multi-monitor output.
Using an external monitor with the laptop closed (aka “clamshell mode”)
Want your Surface Laptop to behave like a mini desktop? You can keep working on the external monitor with the lid closedjust set Windows not to sleep when you close it.
- Connect the monitor, keyboard, and mouse (Bluetooth or USB via a dock/hub).
- In Windows, open Power settings and set “When I close the lid” to Do nothing (at least while plugged in).
- Use Second screen only (Windows + P) if you want the laptop screen off entirely.
Practical warning: If you run heavy workloads, make sure airflow isn’t blocked. A closed laptop on a soft surface can get warm. Give it a stable, ventilated spot.
Troubleshooting: when the monitor says “No Signal” and you take it personally
1) Check the monitor input/source
If your monitor has multiple ports, it may be listening to the wrong one. Use the monitor’s input/source button and pick the port you actually plugged into.
2) Force Windows to detect the display
Go to Settings > System > Display and look for Multiple displays, then select Detect.
3) Try Windows + P
Press Windows + P and switch to Extend or Duplicate. Sometimes the display is connected, but Windows is set to the wrong mode.
4) Suspect the cable (especially USB-C)
If you’re using USB-C, make sure the cable supports video output (not just charging). If you’re using an adapter, confirm it supports the resolution/refresh you want
(4K at 60Hz is a common “nice-to-have” that cheaper adapters sometimes can’t do).
5) Unplug/replug, restart, and simplify
- Disconnect the adapter/dock, wait 10 seconds, reconnect.
- Restart the Surface Laptop (this fixes more than anyone wants to admit).
- Try one monitor at a time if you’re doing dual monitors.
- Try a different port/cable if possible.
6) If wireless projection is flaky
Wireless display relies on compatible hardware and a solid Wi-Fi connection. Make sure Wi-Fi is on, both devices support the wireless display method you’re using,
and Windows is updated. If it’s still laggy, cables are the brutally effective solution.
Extra: of real-world “experiences” from common setups
Below are practical, experience-based scenarios you’ll recognize the moment you try this in real lifebecause connecting a Surface Laptop to a monitor isn’t hard, but
the details can be surprisingly dramatic.
Experience #1: The “USB-C cable that only charges” situation
A very common first attempt goes like this: you plug a USB-C cable into your Surface Laptop, plug the other end into a monitor, and… nothing. No picture. No error.
Just you and a monitor quietly judging your life choices. In many cases, the cable is the culpritnot because it’s broken, but because it was never designed for video.
USB-C cables vary wildly: some handle charging only, some handle data only, and some handle video (usually through DisplayPort Alt Mode). If the cable came from a random drawer
or was bundled with a gadget that only needed power, it may not support display output. The fix is simple: use a cable clearly labeled for video, or use a known-good USB-C to HDMI
or USB-C to DisplayPort adapter/cable from a reputable manufacturer. Once you swap the cable, the monitor “magically” works. It wasn’t magic. It was standards.
Experience #2: The “it works… but why is 4K so choppy?” moment
Another classic: your Surface Laptop connects successfully, but the mouse feels slightly sluggish, scrolling looks less smooth, or the display tops out at 30Hz in 4K.
This is frequently an adapter limitation. Plenty of USB-C to HDMI adapters support 4K, but only at 30Hzfine for slides, less fun for everyday use. If you want smoother motion,
look for 4K at 60Hz support, and double-check both the adapter and the cable. It’s also worth checking Windows refresh rate settings, because even if your hardware supports 60Hz,
Windows may default to a different value until you select it in Advanced display. Once you bump it to 60Hz (or higher on high-refresh monitors), everything feels instantly more natural.
If your monitor supports DisplayPort, many people find USB-C to DisplayPort to be the more dependable route for PC monitors.
Experience #3: The “conference room roulette” with projectors and TVs
In a meeting room, the problem is rarely your Surface Laptop. It’s the environment. A TV might be set to the wrong HDMI input. A projector might be asleep. The “HDMI” label on the wall
might lead to a cable that’s seen better decades. The fastest way to look competent is to start with basics: confirm the display input, plug in securely on both ends, and use Windows + P
to choose Duplicate (best for presenting). If the room uses wireless display, remember that wireless works best when the network is stableand conference room Wi-Fi is not always stable.
When you need zero surprises, a direct cable connection is still the undefeated champion.
Experience #4: The “I want one-cable perfection” home office upgrade
Once you use a dock for a week, it’s hard to go back. A dock turns your Surface Laptop into a desktop workstation: one connection gives you a monitor (or two), charging, USB accessories,
and sometimes Ethernet. The experience lesson here is that docks reduce friction. You stop thinking about ports and start thinking about work. If you regularly connect and disconnect
your laptop, a dock can feel like a quality-of-life upgrade rather than a tech purchase. The only “gotcha” is matching the dock’s display outputs to your monitors (USB-C to HDMI, USB-C to DP),
and making sure you’re not pushing beyond what your laptop and monitor combination can comfortably handle at once. When in doubt, start with one monitor, confirm stability, then add the second.
Conclusion: the simplest path to a bigger, better setup
Connecting a Surface Laptop to a monitor boils down to three decisions: identify your ports, choose the right cable/adapter (or a dock), and set your preferred display mode in Windows.
If you’re using USB-C/USB4, you’re typically one good cable away from an extended desktop. If you want a true workstation feelespecially with dual monitorsa dock can simplify everything
into a single, repeatable routine. And if something doesn’t work, start with the boring fixes: correct input, Detect in Windows, Windows + P, and swapping the cable.
Boring fixes are boring because they work.


