Table of Contents >> Show >> Hide
- Before You Start: Know What You’re Cutting
- The 14 Steps to Cut Vinyl Like You Meant to Do It
- Step 1: Pick the Right Vinyl for the Job
- Step 2: Create or Import Your Design
- Step 3: Size the Design for the Actual Surface
- Step 4: Mirror the Design if You’re Using HTV
- Step 5: Choose the Correct Cut Settings
- Step 6: Check the Blade and Machine Setup
- Step 7: Load the Vinyl the Right Way
- Step 8: Run a Test Cut First
- Step 9: Send the Full Design to the Cutter
- Step 10: Unload Carefully and Inspect the Cut Lines
- Step 11: Weed the Excess Vinyl
- Step 12: Apply Transfer Tape for Adhesive Vinyl
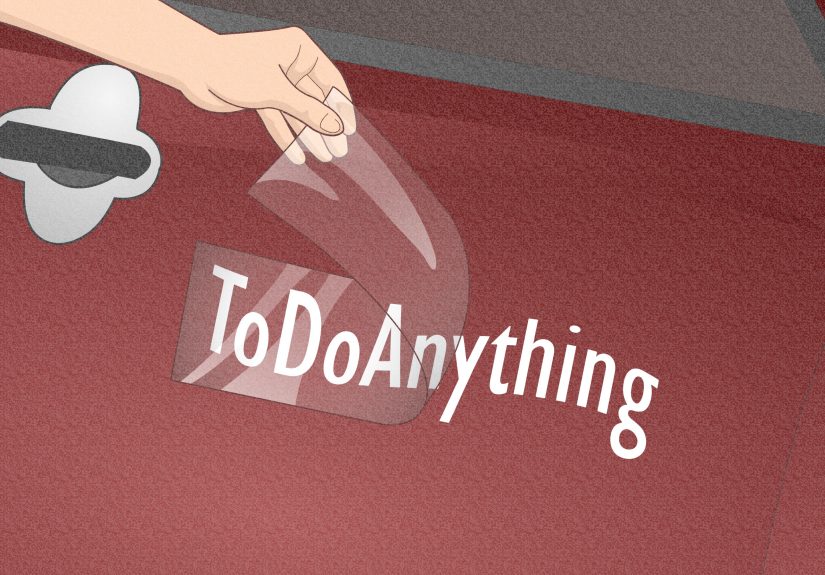
- Step 13: Apply the Design to the Surface
- Step 14: Troubleshoot, Save Your Settings, and Learn from the Cut
- Common Vinyl Cutting Mistakes to Avoid
- Best Use Cases for a Vinyl Cutter
- Final Thoughts
- Extra Experience: What Cutting Vinyl Teaches You After the First Few Projects
- SEO Tags
If you have ever looked at a clean vinyl decal on a tumbler, laptop, storefront, or T-shirt and thought, “Wow, that looks expensive,” here is the good news: it often starts with one machine, one sheet of vinyl, and one tiny moment of courage. The less good news? The first time you cut vinyl, you may also create a modern art piece called Why Is My Blade Trying to Mow the Backing Paper?
The good news returns quickly, though. Once you understand the basics of blade depth, pressure, material type, and weeding, cutting vinyl becomes surprisingly satisfying. A vinyl cutter is not just a crafty gadget. It is a precision tool that can help you make labels, decals, signs, wall graphics, shirt designs, stencils, and customized gifts that look polished and professional.
This guide walks you through the full process in 14 practical steps, from choosing the right vinyl to applying the final design without bubbles, tears, or emotional damage. Along the way, you will also learn the difference between adhesive vinyl and heat transfer vinyl, how to avoid rookie mistakes, and why test cuts deserve more respect than they usually get.
Before You Start: Know What You’re Cutting
Before you feed anything into your machine, identify the type of vinyl you are using. This matters because the setup is not exactly the same for every material.
Adhesive Vinyl
This is the kind used for decals, mugs, signs, windows, walls, and labels. It usually sits on a paper liner and gets transferred to a hard surface with transfer tape.
Heat Transfer Vinyl (HTV)
This is used on fabric such as shirts, tote bags, aprons, and pillow covers. It has a carrier sheet and usually needs to be mirrored before cutting because the design is applied face-up after weeding.
If you mix those two workflows up, your project will become a teaching moment. Let’s avoid that.
The 14 Steps to Cut Vinyl Like You Meant to Do It
-
Step 1: Pick the Right Vinyl for the Job
Start by matching the vinyl to the project. Removable adhesive vinyl is great for temporary wall decals and short-term decorations. Permanent adhesive vinyl is better for mugs, outdoor signs, car decals, and surfaces that need stronger hold. HTV belongs on fabric and other heat-safe materials.
Example: If you are making a quote decal for a bedroom wall, removable vinyl is usually the smarter choice. If you are labeling a water bottle that sees sink time and daily abuse, permanent vinyl is the one to invite to the party.
-
Step 2: Create or Import Your Design
Open your cutter software and either build your design from scratch or import one. Keep it simple if you are a beginner. A basic monogram, label, or one-color decal is far less likely to test your patience than a filigree snowflake with twenty-seven tiny islands.
Use clean lines, readable fonts, and enough spacing between small elements. Designs with ultra-thin strokes or tiny script letters can cut beautifully, but they demand good settings and a steady hand during weeding.
-
Step 3: Size the Design for the Actual Surface
Do not guess. Measure the surface first. Then size your design in software to fit that exact area. This is especially important for mugs, tumblers, shirt fronts, storage bins, and signs.
A design that looks “about right” on your laptop screen can look hilariously wrong in real life. A 4-inch decal on a tiny cup may dominate it like a billboard. A 3-inch chest graphic on an oversized hoodie may disappear like it owes someone money.
-
Step 4: Mirror the Design if You’re Using HTV
This is the step people forget exactly once. If you are cutting heat transfer vinyl, mirror the design before sending it to the machine. That includes any text. The reason is simple: HTV is cut from the back and applied face-up after weeding.
If you are using regular adhesive vinyl for decals or signs, do not mirror it. Unless, of course, you are intentionally making a design for the inside of a window to be viewed from the outside.
-
Step 5: Choose the Correct Cut Settings
Select the material setting that best matches your vinyl. Most cutting programs include presets for common materials such as permanent vinyl, removable vinyl, smooth HTV, glitter HTV, stencil vinyl, and specialty films.
Your key variables are usually blade depth, pressure, and speed. Thin standard vinyl usually needs less force than glitter vinyl, flocked HTV, reflective film, or thicker specialty materials. If your machine allows it, slower speeds often help with intricate designs because they reduce dragging and improve control.
The goal is a kiss cut: the blade should cut the vinyl cleanly without slicing through the backing or carrier sheet.
-
Step 6: Check the Blade and Machine Setup
Before loading your material, inspect the blade. A dull, dirty, or poorly installed blade can ruin even the best design. Tiny scraps of vinyl or lint can build up around the blade housing and cause dragging, incomplete cuts, or jagged corners.
If your cutter supports different blade angles, remember the basic idea: standard vinyl often works well with a general-purpose blade, while thicker or more detailed materials may benefit from a blade suited for finer or heavier work. You do not need to become a blade philosopher on day one, but you do need a sharp blade and a properly seated tool.
-
Step 7: Load the Vinyl the Right Way
Now it is feeding time. For standard adhesive vinyl on a cutting mat, place the vinyl liner-side down and smooth it firmly so it lies flat. For machines or materials that can cut without a mat, align the edge straight against the guide and make sure the rollers grip the material evenly.
For HTV, place the shiny carrier side down if that is how your brand instructs it to be cut. If the sheet loads crooked, unload it and start again. Crooked loading is one of those tiny mistakes that grows up fast.
-
Step 8: Run a Test Cut First
This step saves vinyl, time, and dramatic sighing. A small test cut tells you whether your blade depth and pressure are correct before you commit to the full design.
A good test cut should weed easily and leave the liner mostly untouched. If the vinyl does not separate cleanly, you may need a bit more pressure or blade depth. If the backing is deeply cut, reduce the force or back off the blade. Test cuts are not glamorous, but they are the adults in the room.
-
Step 9: Send the Full Design to the Cutter
Once the test cut looks clean, send the full design. Keep an eye on the first few moments of the cut, especially if the material is on a roll or if the design is long. You want smooth feeding, stable tracking, and no bunching.
Some software also offers helpful extras like a weed box around the design. That little border can make cleanup easier by separating the main design from the outer waste vinyl.
-
Step 10: Unload Carefully and Inspect the Cut Lines
When the cut finishes, unload the mat or material gently. Before you peel anything, look closely at the cut lines. You should be able to see the design clearly. Lift one small corner or weed a tiny section to confirm the vinyl cut all the way through without shredding.
If the design did not cut completely, resist the urge to freestyle with scissors like a raccoon with office supplies. Adjust your settings and recut a fresh piece instead.
-
Step 11: Weed the Excess Vinyl
Weeding is the process of removing the unwanted vinyl around and inside the design. Use a weeding hook, tweezers, or another pointed tool. Work slowly, especially around small letters and fine details.
For adhesive vinyl, leave the design on its liner after weeding. For HTV, leave the design attached to the carrier sheet. If tiny pieces lift when they should stay put, press them back down and continue carefully. For especially small adhesive designs, some crafters apply transfer tape before weeding to hold delicate pieces in place.
-
Step 12: Apply Transfer Tape for Adhesive Vinyl
If you are working with adhesive vinyl, cut a piece of transfer tape slightly larger than the design. Place it over the weeded vinyl, then burnish it well with a scraper or squeegee. Flip the design and burnish the back too.
This helps the vinyl stick to the transfer tape so it lifts away from the liner as one clean piece. If the vinyl stays on the liner, burnish again and peel more slowly. The key is steady pressure, not brute force. You are transferring a design, not opening a stubborn pickle jar.
-
Step 13: Apply the Design to the Surface
Make sure the destination surface is clean and dry. Smooth, hard surfaces usually perform best. Position your design carefully, tack down one section, and then work outward with a scraper to reduce bubbles and wrinkles.
For adhesive vinyl, peel off the transfer tape slowly at an angle once the design is adhered. For HTV, position the weeded design on the fabric and follow the recommended heat, time, and pressure for that specific material. Pressing instructions vary by vinyl type, so always follow the material’s heat application guidance.
-
Step 14: Troubleshoot, Save Your Settings, and Learn from the Cut
Every vinyl project teaches you something. If the cut was perfect, save the settings for next time. If the vinyl tore during weeding, your pressure may have been too high, the blade may be dull, or the design may have been too delicate for the material. If the cut was incomplete, you may need slightly more pressure or blade exposure.
Take notes on the material brand, blade used, pressure, speed, and whether you used a mat. That simple habit can turn future projects from “let’s see what happens” into “yes, I absolutely meant to look this competent.”
Common Vinyl Cutting Mistakes to Avoid
Using Too Much Blade
A little blade goes a long way. Too much blade exposure causes torn corners, backing damage, and ugly cuts. Let pressure do the work, not excess blade sticking out like it is auditioning for a sword fight.
Skipping the Test Cut
It feels faster until it is not. One tiny test cut can prevent an entire sheet of waste.
Choosing the Wrong Vinyl
Wall decal vinyl, outdoor sign vinyl, and T-shirt vinyl are not interchangeable. Match the film to the surface and the job.
Forgetting to Mirror HTV
Yes, this gets its own section. Because it keeps happening. Because text becomes a sad little backward mystery when this step is skipped.
Rushing the Weeding Process
Fast hands can ruin small lettering. Good weeding is part patience, part lighting, and part refusing to panic when an apostrophe tries to escape.
Best Use Cases for a Vinyl Cutter
Once you get comfortable, a vinyl cutter becomes one of the most versatile tools in a home workshop or craft studio. You can use it for:
Custom labels for pantry jars and office supplies. Personalized drinkware and gift boxes. Wall quotes and nursery decals. Car decals and window graphics. Stencils for paint or glass etching. Team shirts, tote bags, and event apparel. Small-business packaging, branding stickers, and sign prototypes.
That range is exactly why learning how to cut vinyl properly matters. One skill opens the door to dozens of profitable, practical, and genuinely fun projects.
Final Thoughts
Learning how to cut vinyl using a vinyl cutter is part skill, part setup, and part refusing to let one ugly first attempt define your crafting destiny. The machine matters, but the process matters more. When you choose the right material, set the blade correctly, run a test cut, and weed with patience, vinyl work starts to feel less like guesswork and more like a repeatable system.
The biggest difference between beginners and experienced makers is not some secret wizard setting hidden in the software. It is usually consistency. Experienced users measure first, test first, and keep notes. They understand that clean cuts come from a calm workflow, not from clicking random presets and hoping the vinyl gods are in a good mood.
So start simple. Make a label. Cut a decal. Try a shirt. Then do another one with better spacing, cleaner burnishing, or smarter pressure settings. That is how vinyl cutting goes from intimidating to addictive. One minute you are testing your first scrap piece. The next minute you are labeling every container in your house and eyeing your plain tote bag like it has untapped potential.
Extra Experience: What Cutting Vinyl Teaches You After the First Few Projects
The funny thing about vinyl cutting is that the first lesson is rarely about design. It is usually about humility. Your first project makes you think the machine will do all the work. Then your vinyl loads slightly crooked, your tiny script font weeds like wet spaghetti, and suddenly you realize the cutter is not a magician. It is more like a talented coworker that still needs good instructions.
After a few real projects, you start noticing patterns. You learn that simple designs are not boring; they are efficient, readable, and much easier to apply. You learn that a clean surface matters more than people think. You learn that pressure settings are not random numbers from the universe. They are the difference between a beautiful decal and a backing paper autopsy.
You also learn that different projects have different personalities. A basic adhesive vinyl label for a pantry jar is forgiving. A multi-word wall quote with skinny letters is not. A shirt with smooth HTV can feel easy one day and strangely dramatic the next if the fabric stretches, the design shifts, or the corners lift because the press time was rushed. Vinyl work teaches patience in a way few hobbies do. It asks you to slow down just enough to get a cleaner result.
One of the most useful experiences comes from mistakes you can actually see. If your blade is too deep, the backing shows the damage immediately. If your pressure is too low, weeding becomes a treasure hunt for half-cut lines. If your transfer tape is not burnished well, the design refuses to leave the liner and acts like it pays rent there. These are frustrating moments, yes, but they are also excellent teachers because the feedback is immediate and visual.
Another real-world lesson is that workflow matters almost as much as machine settings. Good lighting makes weeding easier. Keeping a scraper, tweezers, lint-free cloth, and rubbing alcohol nearby makes application smoother. Cutting a little extra material around the design gives you room to handle it without touching the edges. Even the order of operations matters. Measure first, cut second, weed third, apply last. Reverse that logic and chaos arrives wearing craft-store receipts.
Experience also changes how you think about materials. At first, vinyl is just vinyl. Later, you start noticing finish, thickness, tack, stretch, and surface compatibility. You realize that glitter HTV behaves differently from smooth HTV. You realize that glossy permanent vinyl on a curved mug needs patience during transfer. You realize that textured surfaces may accept vinyl only if the design is simple and firmly burnished. In other words, you stop forcing one method onto every job and start adapting intelligently.
Most of all, repeated experience builds confidence. You stop being nervous about test cuts. You stop guessing where to place decals. You stop choosing fonts that seem cute until they turn into a weeding crime scene. And once that confidence shows up, the projects get better fast. Not because you became perfect, but because you learned how to read the material, trust the process, and adjust without panic. That is the real skill behind clean vinyl work, and it is what turns a beginner into someone who can make consistently sharp, professional-looking results.