Table of Contents >> Show >> Hide
- Quick Navigation
- Start Here: Your Hair’s “Starting Line”
- Choose Your Lightening Path
- Option A: Salon lightening (best for big changes)
- Option B: Highlights or balayage at home (only if you’re experienced)
- Option C: At-home bleach/lightener + toner (highest risk, biggest payoff)
- Option D: High-lift hair dye (works for some starting levels)
- Option E: Gradual lighteners and “no-bleach” methods (subtle results)
- Step-by-Step: Lightening Dark Hair at Home (Safely-ish)
- Step 0: Do a patch test and a strand test
- Step 1: Gather supplies like you’re hosting a tiny science fair
- Step 2: Start with dry hair and detangle
- Step 3: Section your hair (more sections than you think)
- Step 4: Mix lightener fresh, and apply mids-to-ends first
- Step 5: Watch the lift, not the clock
- Step 6: Rinse thoroughly, then condition like it’s your part-time job
- Step 7: Tone to your target shade (this is where “pretty” happens)
- Step 8: If you need a second session, wait
- A realistic example plan (because vibes are not a strategy)
- Toner, Brass, and Other Plot Twists
- Aftercare: Keep It Light Without Keeping It Crunchy
- When to Call a Pro (and Save Yourself a Group Chat Intervention)
- FAQ
- Real-World Experiences: What It’s Like to Go Lighter From Dark Hair (The 500-Word Reality Check)
- Conclusion
Going from dark hair to a lighter shade is a little like trying to turn a latte into an oat-milk cappuccino after someone already drank half of it:
totally possible, but the method matters, and chaos is always lurking nearby.
The good news? With the right game plan, you can lighten dark hair safely and get a color that looks intentional (not “I fought my bathroom lighting and the bathroom lighting won”).
This guide breaks down your optionssalon and at-homeplus the prep, the process, the toning, and the aftercare that keeps your hair on your head and not in your hairbrush.
Start Here: Your Hair’s “Starting Line”
1) Know your natural level (and your hair’s secret undertone)
Hair colorists often talk in “levels,” usually from 1 (black) to 10 (lightest blonde).
If you’re starting at a level 2–4 (black to dark brown), getting to a level 8–10 blonde usually takes more than one round of lightening.
That’s not pessimismthat’s chemistry.
Here’s the part that surprises people: when you lift dark hair, you don’t jump straight to “pretty blonde.”
You pass through warmer stagesred, orange, goldbecause darker hair contains more underlying pigment.
That’s why many DIY “blonde” attempts land in the land of pumpkin spice before they arrive at vanilla.
2) Figure out whether your hair is virgin or previously colored
Virgin hair (never dyed) is generally more predictable to lighten.
Previously dyed hair can be tricky because permanent color doesn’t always lift evenlyespecially dark box dye, and especially if it’s been layered over time.
If you’ve ever thought, “I’ll just put blonde dye on top,” your hair would like to remind you that it is not a blank canvasit is a scrapbook.
3) Check your hair health before you check Pinterest
Lightening is demanding. If your hair already feels dry, snaps easily, or looks frizzy no matter what you do,
treat that as your hair waving a tiny white flag. You can still go lighter, but you’ll want a slower approach,
bond-building care, and possibly a professional plan.
Choose Your Lightening Path
There isn’t one “right” way to dye dark hair a lighter color. There’s the right way for your starting shade,
your timeline, your budget, and your tolerance for risk (and for the smell of hair lightener in a small bathroom).
Option A: Salon lightening (best for big changes)
If you’re going significantly lighterthink dark brown to blonde, or black to anything “sun-kissed”a salon is usually the safest route.
Pros can control application, manage uneven lift, and use targeted toners and treatments to keep hair integrity intact.
Salon techniques that often work beautifully for dark hair include:
- Balayage/foilyage for a softer, dimensional lift
- Babylights for gradual brightness without harsh contrast
- Global blonding for full blonde (often multiple sessions)
- Color correction if previous dye or banding is involved
Option B: Highlights or balayage at home (only if you’re experienced)
Doing highlights at home can be done, but it’s not “beginner-friendly.” Placement, saturation, and timing matter.
If you’re new to lightening, consider starting with subtle changes (or a pro).
Option C: At-home bleach/lightener + toner (highest risk, biggest payoff)
Bleach is typically required for dramatic lightening. It removes pigment; it doesn’t “deposit” a lighter shade.
If you’re committed to at-home lightening, the most realistic expectation is:
lift first, tone second, and possibly repeat later.
Option D: High-lift hair dye (works for some starting levels)
High-lift permanent color can lighten hair a few levels without traditional bleach in some casesusually on natural hair that’s more like
medium brown (not black). It can be a solid route if you’re aiming for a lighter brown, dark blonde, or “bronde” vibe,
and your hair isn’t heavily dyed already.
Option E: Gradual lighteners and “no-bleach” methods (subtle results)
Sprays, brightening shampoos, and gentle lightening products can create small shiftsmore “sun-kissed” than “shockingly blonde.”
They’re typically better for already-light hair or for tiny changes on dark hair.
Step-by-Step: Lightening Dark Hair at Home (Safely-ish)
If you’re going the DIY route, the goal is to be methodical. Bleach is powerful, but it’s also wildly literal:
it will do exactly what it does, whether or not you like the outcome.
Step 0: Do a patch test and a strand test
- Patch test (skin): Follow the product instructions and patch test before using dyes/lighteners to reduce the risk of an allergic reaction.
- Strand test (hair): Lighten a small hidden section first. This tells you how fast your hair lifts, what undertone appears, and how your hair feels after rinsing.
Step 1: Gather supplies like you’re hosting a tiny science fair
- Powder or cream lightener (bleach) and developer (follow brand instructions)
- Non-metal mixing bowl + tint brush
- Gloves, clips, and an old T-shirt you don’t love anymore
- Petroleum jelly (for hairline protection)
- Timer (your “eyeballing it” era ends today)
- Toner or gloss (for brass control)
- Deep conditioner and/or bond-building treatment
Step 2: Start with dry hair and detangle
Many stylists recommend not shampooing right before lightening to reduce scalp irritation.
Work on dry, detangled hair so application is even and you’re not yanking through knots mid-process.
Step 3: Section your hair (more sections than you think)
Divide hair into four main quadrants (or more if it’s thick). Clip each section.
Clean sectioning is the difference between “professional-looking” and “why is one side honey blonde and the other side… nacho cheese?”
Step 4: Mix lightener fresh, and apply mids-to-ends first
Here’s a key technique: apply lightener to mid-lengths and ends first, leaving about a half-inch to an inch at the roots.
Your scalp heat makes roots process faster, so doing roots first can lead to “hot roots” (brighter roots, darker lengths).
Once mids-to-ends lift, go back and apply to roots.
Step 5: Watch the lift, not the clock
Check every 5–10 minutes. You’re looking for the level you need for your goal:
- Caramel / honey brunette: lift to warm gold
- Neutral dark blonde: lift to yellow-gold (less orange)
- Cool blonde: lift closer to pale yellow, then tone
If your hair feels gummy, stretches excessively, or snaps, rinse immediately and switch to repair mode.
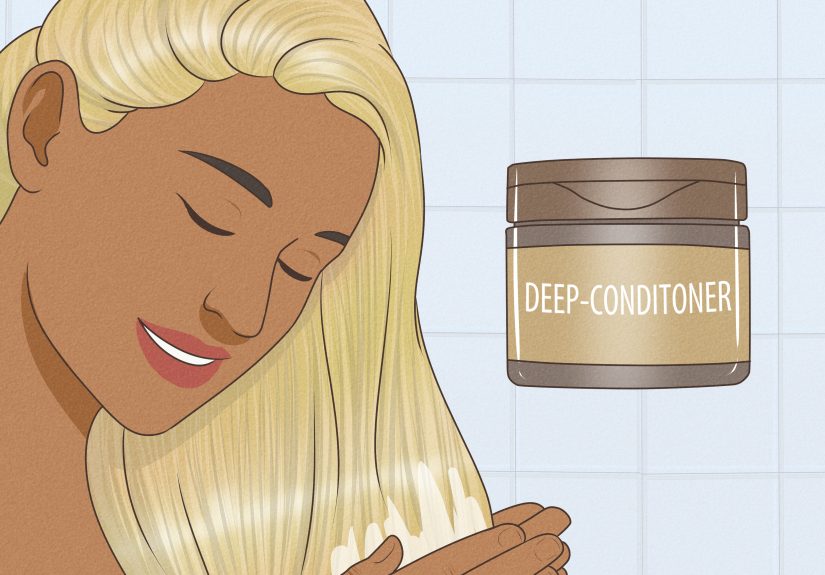
Step 6: Rinse thoroughly, then condition like it’s your part-time job
Rinse with lukewarm water until it runs clear. Shampoo only if your product instructions suggest it.
Follow with a deep conditioner or bond-building treatment. Lightened hair is more porous and needs moisture and structure support.
Step 7: Tone to your target shade (this is where “pretty” happens)
Lightening exposes undertones; toner helps neutralize or refine them.
Toner generally deposits colorit doesn’t replace the lifting step. If you lift to orange, toner can help, but it can’t magically rewrite physics.
Quick guide:
- Too yellow: purple toner/shampoo helps neutralize
- Too orange: blue-based toners/shampoos help neutralize
- Too red/copper: you may need additional lift or professional correction
Step 8: If you need a second session, wait
Many “dark to blonde” journeys take multiple rounds. Give hair time to recoverthink weeks, not dayswhile focusing on repair and hydration.
Slow and steady beats “fast and fried.”
A realistic example plan (because vibes are not a strategy)
Scenario: Level 3 dark brown hair aiming for a level 7–8 honey blonde.
Typical approach: Lift to strong gold in session one, tone to soften brass, then do a second lightening session later to push brighter,
followed by toning/gloss for the final shade.
Scenario: Level 1–2 black hair aiming for platinum.
Typical approach: Multiple sessions, careful toning, and aggressive aftercare. Often better handled by a pro due to higher risk of breakage and uneven lift.
Toner, Brass, and Other Plot Twists
Why brassy hair happens
Brassiness is basically your hair saying, “Hello, I contain warm pigments and I will not be ignored.”
Lightened hair can become brassy from the lift itself, fading, sun exposure, hard water, heat styling, and chlorine.
Fixing brass at home (without spiraling)
- Purple shampoo: best for yellow tones in blondes
- Blue shampoo: best for orange tones in brunettes and darker blondes
- Gloss/glaze: adds shine and subtle tone refinement
- Water filter: helpful if hard water is turning your tone warm and dull
Don’t overuse purple/blue shampoos. Used too often, they can make hair look dull or slightly darker (yes, toning can visually deepen hair).
Common DIY lightening problems (and what to do)
-
Hot roots: Roots lighter than lengths. Usually from applying bleach to roots too early.
Fix often requires professional rebalancing. -
Banding: A stripe of darker color in the mid-shaft, common with old dye.
Often needs targeted correction, not repeated all-over bleach. - Patchiness: Uneven saturation or uneven hair history. Best handled by a pro if it’s obvious.
- Breakage: Stop chemical processing. Switch to repair, trims, and gentle styling until strength returns.
Scalp irritation: listen to your head (literally)
Mild tingling can happen with lighteners. Burning, pain, or swelling is not “normal.” Rinse immediately and seek medical advice if symptoms are severe.
Also: if you’ve ever reacted to hair dye ingredients, take patch testing seriously before future coloring.
Aftercare: Keep It Light Without Keeping It Crunchy
1) Moisture first, then strength
Lightened hair often needs a steady rhythm of hydration. Add a deep conditioner weekly, plus leave-in conditioner for daily softness.
If hair feels mushy or overly stretchy, you may benefit from proteinbut don’t overdo it. Too much protein can make hair feel stiff and brittle.
2) Bond-building treatments are your new best friend
Many people use bond-building products to improve the feel and resilience of lightened hair.
They don’t turn bleach into a hug, but they can help support hair that’s been through it.
3) Turn down the heat (and turn up the protectant)
Your hair is already working overtime. If you heat-style, use a heat protectant and lower temperatures.
Think “gentle simmer,” not “surface of the sun.”
4) Protect from sun, chlorine, and hard water
- Rinse hair before swimming, and condition afterward
- Wear a hat in intense sun
- Consider a shower filter if you have hard water
5) Maintenance timeline
Lighter hair usually needs ongoing toning and conditioning. Many people refresh tone with a gloss,
a toning product, or occasional salon appointments to keep color looking expensive (even if your budget is not).
When to Call a Pro (and Save Yourself a Group Chat Intervention)
DIY can work for subtle lightening, but certain situations are prime candidates for professional help:
- You have dark box dye or multiple layers of permanent color
- You’ve used henna or metallic-salt dyes
- You want platinum blonde or a very cool/icy tone
- Your hair is already fragile, very curly/coily, or highly porous
- You’re seeing uneven lift (patchiness, banding, hot roots)
- You have a history of scalp sensitivity or allergic reactions
A pro can also create a more flattering, low-maintenance lighter look with highlights or balayageoften with less damage than full lightening.
FAQ
Can you dye dark hair blonde without bleach?
Sometimesbut usually only a little. High-lift dyes can lighten natural hair a few levels, but dramatic blonde results from very dark hair
typically require a lightener. If you want “noticeably lighter,” bleach (or professional lightening) is often the tool.
Does toner lighten hair?
Toner mostly refines tone after you lift. It helps neutralize brass and steer color warmer or cooler.
It’s the polish, not the power drill.
What developer volume should I use?
Follow your product instructions. Many experts caution that higher developer volumes increase damage risk.
If you’re unsure or have fragile hair, choose a gentler approach or consult a professional.
How long should I wait between lightening sessions?
If you need multiple sessions, waiting a few weeks while focusing on repair is often a smarter move than rushing.
Your future hairline will thank you.
How do I keep my lighter color from turning brassy?
Use purple or blue shampoo as needed, consider gloss/toner refreshes, protect hair from sun and heat, and minimize mineral buildup from hard water.
Real-World Experiences: What It’s Like to Go Lighter From Dark Hair (The 500-Word Reality Check)
If you’ve ever watched a “dark to blonde” transformation video and thought, “Cute, I’ll do that Saturday morning,”
let’s add some real-life contextbecause real life includes uneven bathroom lighting, a timer you forget to start,
and a friend texting “OMG how’s it going??” exactly when you’re elbow-deep in foils.
First, most people experience a moment of surprise during the lift stage. Dark hair doesn’t politely fade into blonde;
it often reveals warm undertones in an order that feels personal: deep red-brown, then orange, then gold.
This is where a lot of DIY attempts go sideways, not because anything is “wrong,” but because expectations were set by a shampoo commercial.
The winning mindset is: lift is a process, tone is the finish. If you stop at orange and panic-dye over it with an ash box color,
you might temporarily mute the warmth, but you can also end up with muddy tones or uneven results.
Another common experience: the ends behave differently than the roots. Mid-lengths and ends are older hair, often more porous,
and they can lift fasteror get drierthan the newer growth near the scalp. Meanwhile, scalp heat can speed processing at the roots.
People frequently report the classic “why are my roots lighter than the rest?” moment. It’s not a moral failing. It’s physics.
That’s why application order and saturation matter so much.
The texture shift is also real. Even when things go well, freshly lightened hair often feels different: slightly rougher, less stretchy,
or “squeaky” when wet. Many people describe a learning curve where their old hair routine suddenly stops working.
A conditioner that used to feel rich might now feel too light, and a styling product might suddenly make hair feel sticky.
The fix is usually a more moisturizing routine, occasional strength support, gentler detangling, and reducing heat styling.
Trims become less optional, toobecause lightened ends can fray faster.
Maintenance surprises people most. Lighter hair can look amazing, but it can also become brassy faster than expected,
especially with sun exposure, hot tools, and hard water. Many people end up building a “blonde maintenance toolkit”:
a purple or blue shampoo used strategically, a weekly mask, and either a gloss or toner refresh. The reward is that the color looks intentional
for longerand your hair feels touchable instead of like it’s auditioning for a broom commercial.
Finally, the most consistent “I wish I knew this” takeaway: going lighter is usually easier in stages.
People who try to jump from very dark to very light in one go report more breakage, more patchiness, and more regret.
People who go graduallythrough highlights, bronde, honey tones, and then brighter blondetend to report better hair health,
fewer emergency fixes, and a lot more compliments that start with, “Wait… did you do something different?”
Conclusion
Lightening dark hair is totally doablebut it’s not just “pick a lighter box and hope.” The safest results come from a smart path:
understand your starting level, choose the right lightening method, lift gradually when needed, and use toning plus aftercare to keep hair healthy.
If your goal is a dramatic blonde (especially from very dark or previously dyed hair), a professional plan is often the fastest route to a result you’ll actually love.