
Table of Contents >> Show >> Hide
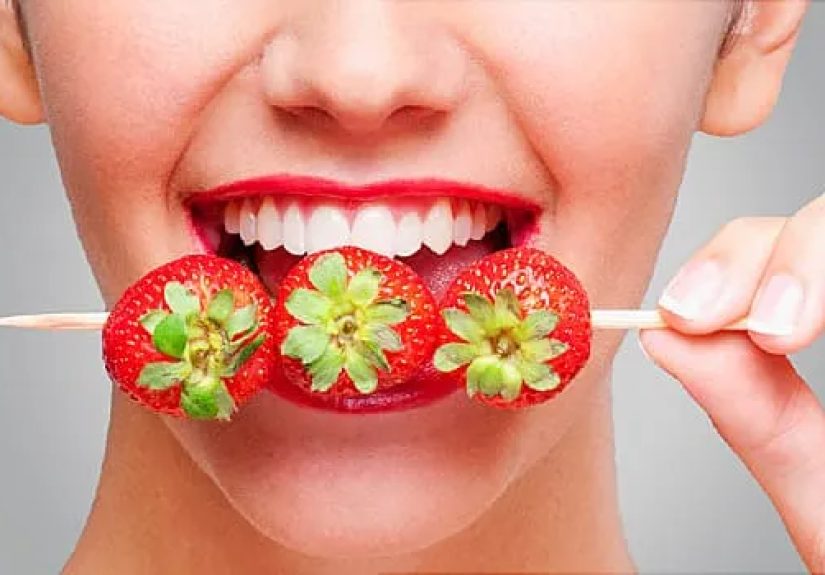
- Start With the “Invisible Whitening”: Clean Teeth Look Whiter
- Know Your Stains: Extrinsic vs. Intrinsic (AKA Surface vs. Deep)
- Daily Habits That Make Teeth Look Brighter (No Bleach Required)
- Teeth Whitening Options: Pick the Right Level of “Extra”
- Option 1: Whitening toothpaste (slow and steady)
- Option 2: Over-the-counter whitening strips and gels (popular for a reason)
- Option 3: OTC tray kits (more coverage, more variables)
- Option 4: Dentist-supervised at-home whitening (custom fit, better control)
- Option 5: In-office professional whitening (fastest results, highest intensity)
- How to Whiten Teeth Without Wrecking Your Enamel
- Professional Cleaning: The Most Underrated Smile Upgrade
- A Practical 14-Day Plan for a Brighter, Better Smile
- What to Avoid: Smile Myths That Waste Time (or Cause Trouble)
- Conclusion: Brighter Is Better When It’s Healthy
- Real-World Experiences: What People Notice When They Brighten Their Smile
A brighter smile is basically the “good lighting” of your face. It makes photos pop, boosts confidence, and can even
make you look more awakewithout requiring three coffees and a motivational podcast.
But here’s the truth: getting whiter-looking teeth isn’t just about slapping on a whitening strip and hoping for the
best. The best smiles are a mix of clean, healthy teeth and smart (not reckless) whitening choices. Let’s build you a
plan that actually worksand keeps your enamel out of the group chat.
Start With the “Invisible Whitening”: Clean Teeth Look Whiter
Before you spend a dime on teeth whitening, make sure you’re not trying to bleach over plaque. When teeth are coated
with film, stains cling harder and reflect light differentlylike putting a sparkle filter on a foggy camera lens.
Translation: cleaner teeth often look whiter even when their color hasn’t technically changed.
Brush like you mean it (and like you have a timer)
The goal isn’t to scrub your teeth like you’re sanding a deck. Use a soft-bristled brush, gentle pressure, and take
the full two minutes. Hit the gumline, the backs of teeth, and the chewing surfaces. If your toothbrush looks like a
frayed broom, you’re brushing too hardor you’re fighting your toothbrush in your sleep.
Clean between teeth daily (yes, daily)
Most stains and plaque love hanging out between teeth because toothbrush bristles don’t RSVP to that party. Floss,
interdental brushes, or a water flosser can help remove what brushing misses. Consistency matters more than fancy
gadgetsthough the “best” tool is the one you’ll actually use without negotiating with yourself.
Don’t skip fluoride and don’t overdo abrasives
Fluoride toothpaste supports enamel strength, which matters if you’re considering any whitening product. But watch
overly abrasive whitening pastes used aggressively“polishing” can become “overpolishing” if you treat your teeth
like stainless steel.
Know Your Stains: Extrinsic vs. Intrinsic (AKA Surface vs. Deep)
Not all discoloration is created equal. Some stains sit on the surface of the enamel (extrinsic), while others live
deeper (intrinsic). That difference determines whether you need better daily habits, a whitening product, or a dentist.
Common extrinsic stain culprits
- Coffee and tea (your morning joy… and your enamel’s side hustle)
- Red wine (delicious, dramatic, and very pigmented)
- Tobacco (the heavyweight champion of stubborn stains)
- Dark sauces like soy sauce, tomato sauce, and curry
Intrinsic discoloration: when whitening is trickier
Intrinsic staining can come from aging (enamel gets thinner and underlying dentin shows more), certain medications,
tooth trauma, or developmental factors. These cases can still improve, but results varyand this is where professional
guidance becomes especially helpful.
Daily Habits That Make Teeth Look Brighter (No Bleach Required)
Want quick wins? These habits help prevent stains from “setting up camp.” They won’t turn your teeth into glowing
piano keys overnight, but they can make a noticeable difference over time.
Use the “rinse rule” after stain-heavy drinks
After coffee, tea, or wine, rinse your mouth with water. It’s a simple way to reduce how long pigments hang around.
You can also sip water alongside staining drinks to dilute and wash pigments away.
Time acidic foods wisely
Acidic foods and drinks (citrus, soda, sports drinks) can temporarily soften enamel. Brushing immediately afterward
can be rougher on enamel than you think. If you’ve had something acidic, rinse with water and wait a bit before
brushing.
Chew sugar-free gum
Sugar-free gum can stimulate saliva. Saliva is your mouth’s built-in rinse system, helping neutralize acids and wash
away particles. Your teeth love saliva. Your dentist loves saliva. Basically everyone wins.
Quit tobacco (your smile will send thank-you notes)
Smoking and chewing tobacco stain teeth and raise serious oral health risks. If a brighter smile is your goal, tobacco
is the villain twirling its mustache in the background.
Teeth Whitening Options: Pick the Right Level of “Extra”
Whitening can be safe and effective when used correctly. The key is choosing the method that matches your goals,
timeline, and sensitivity leveland following directions like your smile depends on it (because it kind of does).
Option 1: Whitening toothpaste (slow and steady)
Whitening toothpastes typically help by removing surface stains with gentle abrasives and/or low levels of whitening
ingredients. They’re great for maintenance and mild brightening, but they won’t dramatically change deep tooth color.
Think: “tidy up the vibe,” not “full renovation.”
Option 2: Over-the-counter whitening strips and gels (popular for a reason)
Strips and paint-on gels can lighten teeth a few shades for many people, usually over one to two weeks depending on
the product and consistency. They’re convenient and widely available. The trade-off? Increased risk of sensitivity if
you overdo it, plus they may whiten unevenly if your teeth have varied stain patterns.
Option 3: OTC tray kits (more coverage, more variables)
Tray-based kits can distribute whitening gel across more surfaces, sometimes faster than strips. Fit matters a lot:
poorly fitting trays can let gel ooze onto gums (hello irritation), or miss spots and create patchy results. If you’re
going the tray route, follow instructions exactly and don’t “freestyle” with extra gel.
Option 4: Dentist-supervised at-home whitening (custom fit, better control)
This is the sweet spot for many people: professional guidance with the convenience of home use. Custom trays fit
better, which can mean more even whitening and less gum irritation. It’s also a good option if you’ve had sensitivity
with OTC products and need a smarter plan.
Option 5: In-office professional whitening (fastest results, highest intensity)
In-office whitening uses higher-strength whitening agents under professional protection, so you can often see faster
results. It’s the “I have a wedding/interview/reunion in 48 hours” option. You’ll pay more, and some people get
temporary sensitivity, but it can be a great choice for a strong jump-start.
Important reality check: whitening products work on natural tooth structure, not on crowns, veneers,
or tooth-colored fillings. If you have restorations on visible teeth, whitening can create a mismatch where your teeth
brighten but the restorations don’t. That doesn’t mean you’re doomedit just means you’ll want a plan (often with a
dentist) to keep color consistent.
How to Whiten Teeth Without Wrecking Your Enamel
Whitening is not supposed to hurt. Mild, temporary sensitivity can happen, but sharp pain or gum burns are red flags.
If your whitening routine feels like a dare, it’s time to adjust.
Common mistakes that backfire
- Doubling up sessions (“If one strip is good, two is better!”) No. Please no.
- Leaving products on longer than directed More time doesn’t always mean more white.
- Using multiple whitening products at once Sensitivity jackpot, not the fun kind.
- Starting whitening with untreated cavities or gum inflammation That’s like waxing a car with a cracked windshield.
Sensitivity-proofing your routine
If you’re prone to sensitive teeth, try a sensitivity toothpaste for a couple of weeks before whitening. During
whitening, consider spacing out treatments (every other day instead of daily) or choosing a lower-strength option.
Also, avoid very cold foods right after whitening sessions if you notice zingy sensitivity.
If sensitivity is intense or lasts more than a few days after stopping, pause and check in with a dental professional.
Teeth don’t do “dramatic for no reason.”
Professional Cleaning: The Most Underrated Smile Upgrade
Sometimes what you think is “tooth color” is actually buildup or surface stain that professional cleaning can remove.
A routine cleaning can make teeth look noticeably brighterand it improves gum health, which frames your smile. Healthy
gums are basically the perfect picture frame for your teeth.
Regular dental checkups also help catch issues that make whitening a bad idealike cavities, enamel wear, or gum
recession. Whitening on top of problems is like putting fresh paint on a leaky roof: it looks good for five minutes,
and then reality shows up.
A Practical 14-Day Plan for a Brighter, Better Smile
Here’s a simple two-week approach that improves cleanliness first (so teeth look brighter immediately), then adds
whitening in a controlled way.
Days 1–3: Clean up the basics
- Brush twice daily for two minutes with fluoride toothpaste.
- Clean between teeth once a day (floss, interdental brush, or water flosser).
- Rinse with water after coffee/tea/wine.
- Swap to a soft-bristle brush if yours is firm or frayed.
Days 4–7: Upgrade technique (your teeth deserve skill, not effort)
- Angle bristles toward the gumline; use small circles instead of aggressive scrubbing.
- Brush your tongue (bad breath loves tongue real estate).
- Reduce “sipping all day” habits with stain-heavy drinksdrink, rinse, move on.
Days 8–14: Add whiteningcarefully
- Choose one whitening method: strips or a tray kit or dentist-supervised whitening.
- Follow instructions exactly. No bonus rounds.
- If sensitivity appears, switch to every-other-day whitening or pause for 48 hours.
- Keep up flossing/brushingwhitening works better on clean surfaces.
At the end of two weeks, you’ll usually see either visible brightening or a clear sense of what’s limiting results
(intrinsic stains, restorations, or sensitivity). That’s valuable informationand it points you toward the next best
step: maintenance, a different product, or professional help.
What to Avoid: Smile Myths That Waste Time (or Cause Trouble)
Myth: “Lemon juice and baking soda will whiten fast!”
Acid plus abrasion is not a whitening hackit’s an enamel hazard. You might remove some surface stain, but you also
risk wearing enamel down, which can make teeth look more yellow over time because deeper dentin shows through.
Myth: “Whitening should feel intense.”
Discomfort is not proof of effectiveness. If your gums burn or your teeth ache sharply, that’s your body saying,
“Absolutely not.” Adjust, pause, and get guidance.
Myth: “Once white, always white.”
Whitening results fade gradually, especially if you love coffee, tea, wine, or anything that could double as a fabric
dye. Maintenance is normaloften with periodic touch-ups and stain-prevention habits.
Real-World Experiences: What People Notice When They Brighten Their Smile
The internet is full of before-and-after photos, but real life is messier (and honestly more helpful). Below are
composite-style scenarios based on common experiences people report when improving oral hygiene and whiteningso you
can recognize yourself and plan smarter.
1) The Coffee Loyalist Who “Did Everything Right”… Except Coffee
This person brushes twice a day, flosses “most nights,” and still wonders why their teeth look a little dull. The
breakthrough usually isn’t a stronger whitening productit’s changing the coffee routine. Instead of sipping slowly
for hours (which gives stains maximum hangout time), they drink their coffee in a shorter window, chase it with water,
and rinse after. After a couple weeks, teeth often look brighter even before whitening. Then, if they use whitening
strips, results tend to look more even because new stains aren’t constantly redepositing on the enamel.
2) The “Whitening Toothpaste Only” Tester
Lots of people start here because it’s simple: buy a whitening toothpaste and hope for magic. The typical experience
is mild improvementmainly from surface stain removalespecially if stains come from tea, coffee, or smoking history.
The best outcome happens when toothpaste is paired with better technique: two minutes, gentle pressure, consistent
flossing, and not rinsing aggressively right after brushing (so fluoride can do its job). This person often ends up
happy with a natural-looking brightness rather than a dramatic shade jumpand that’s a win if the goal is “healthy and
fresh,” not “flashlight chic.”
3) The Big Event Countdown (Wedding, Reunion, Job Interview)
When there’s a deadline, people tend to panic-buy the strongest product and overuse it. The smarter experience is
pacing: start with professional cleaning first, then choose one whitening method and stick to the instructions. If
sensitivity shows up, spacing sessions can still deliver a noticeable improvement by the event day. Many people also
discover the “lipstick effect”: whitening a couple shades makes the whole face look brighter, even if teeth aren’t
perfectly uniform. The takeaway: a controlled plan beats frantic whitening marathons that leave you wincing at ice
water.
4) The Sensitive-Tooth Crew (Who Think Whitening Is Off-Limits)
People with sensitive teeth often assume whitening is impossible. But their best experience usually comes from prep
and moderation: using a sensitivity toothpaste for a couple weeks, choosing a gentler whitening option, and doing
treatments every other day (or less). They also learn to avoid stacking productsno whitening mouthwash plus strips
plus whitening toothpaste all at once. The result is often a slower, steadier brightening with fewer “zings.” And if
sensitivity is severe, a dentist can help identify causes like recession, enamel wear, or cracksthings whitening
won’t fix and might aggravate.
5) The Surprise: “My Crowns Didn’t Change Color”
This is one of the most common plot twists. A person whitens diligently and then notices a front crown or filling
looks darker than the surrounding teeth. That’s not a failureit’s how materials work. The best next step is planning
for color matching: whiten natural teeth first, then talk with a dentist about whether a restoration should be
replaced or adjusted to match the new shade. People who handle it in this order usually end up with the most natural,
consistent smile. People who don’t… end up googling “why is one tooth a different color” at 1 a.m. while staring into
the bathroom mirror like it’s a crime scene.


