
Table of Contents >> Show >> Hide
- Tip 1: Start with the Right Orchid and the Right Pot
- Tip 2: Give Orchids Bright, Indirect Light
- Tip 3: Keep Temperature Comfortable (for You and the Plant)
- Tip 4: Master the Art of Watering (and Avoid Overwatering)
- Tip 5: Use the Right Potting Mix (Not Regular Soil)
- Tip 6: Add Humidity Without Soaking the Plant
- Tip 7: Fertilize “Weakly, Weekly” During the Growing Season
- Tip 8: Repot Every 1–2 Years (But Not While It’s in Full Bloom)
- Tip 9: Encourage Re-Blooming with Light and Cool Nights
- Tip 10: Watch for Pests and Problems Early
- Extra Boost: Learn to “Read” Your Orchid
- Real-World Experiences: What Actually Works to Keep Orchids Thriving
- Conclusion
If you’ve ever brought home a gorgeous orchid only to watch it slowly collapse into a pot of crunchy leaves and regret, you’re not alone. Orchids have a reputation for being “divas” of the houseplant world, but the truth is they’re more like creatures of habit: give them the right routine and they’ll reward you with blooms for monthsand sometimes for years.
This guide focuses mainly on phalaenopsis orchids (the classic “moth orchid” you see in grocery stores and garden centers), because they’re the easiest type for beginners. Once you understand how to keep orchids alivelight, water, temperature, humidity, and a few other detailsyou’ll realize they’re actually pretty forgiving. Let’s walk through ten practical tips to keep your orchid not just alive, but thriving.
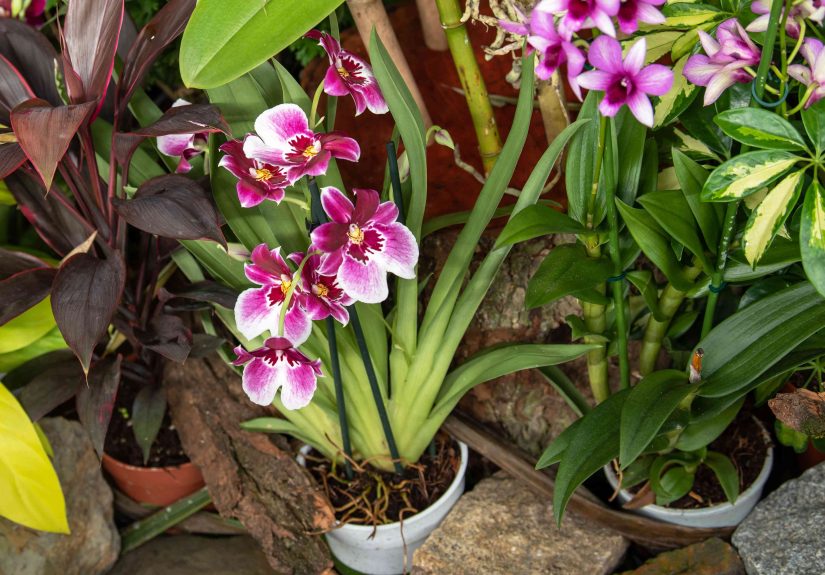
Tip 1: Start with the Right Orchid and the Right Pot
Step one in successful orchid care is choosing a plant that isn’t already struggling. Look for:
- Firm, bright green leaves (no wrinkles, yellowing, or large black spots).
- Plump, green or silvery roots visible through the pot (if it’s a clear pot).
- Flowers that aren’t all the way open yetthis gives you more bloom time at home.
Phalaenopsis are ideal for beginners because they tolerate typical indoor temperatures and lower light better than many other orchids. They’re also the ones most likely to bloom again on a windowsill without a greenhouse-level setup.
Equally important is the pot. Orchids do not want to live in standard, heavy potting soil in a pot with one tiny drain hole. They prefer:
- A pot with generous drainage holes, so excess water can escape.
- Often a clear plastic pot set inside a decorative cachepot, so you can see root color and moisture levels.
If your orchid came jammed in a pot with soggy sphagnum moss and no drainage, put “repot after blooming” on your to-do list. Don’t stressthis isn’t an emergency, but it is an important upgrade for long-term health.
Tip 2: Give Orchids Bright, Indirect Light
Light is a make-or-break factor. Most orchids are native to tropical forests, where they grow on trees and receive bright but filtered light. Recreating that indoors means:
- East- or west-facing windows are usually ideal.
- South-facing windows can work if you diffuse the light with a sheer curtain.
- North windows are often too dim unless you pair them with a grow light.
Your orchid will actually “tell” you whether the light is right:
- Healthy light: leaves are medium green and firm.
- Too little light: very dark green leaves, no new flower spikes for a year or more.
- Too much light: yellow patches or scorched spots on leaves, especially the side facing the window.
Think of it this way: orchids like the light you’d want if you worked from home near a windowbright enough to read comfortably, but not so intense you’re squinting all day.
Tip 3: Keep Temperature Comfortable (for You and the Plant)
Most indoor orchids thrive in the same temperatures you enjoy at home. For phalaenopsis and many commonly sold varieties, aim for:
- Daytime: around 70–80°F (21–27°C)
- Nighttime: around 60–65°F (16–18°C)
A small drop of about 10°F at night is actually helpfulit can trigger flower spikes in fall and early winter. What orchids don’t like is drama: big swings, cold drafts, or blasts of hot air from heaters and vents.
Watch out for these problem spots:
- Right next to frequently opened exterior doors (cold drafts).
- Directly under air conditioners or heating vents.
- Pressed against cold window glass in winter.
If you’re comfortable in a light sweater and your orchid isn’t shivering by the window or sweating over the radiator, you’re probably in a good temperature range.
Tip 4: Master the Art of Watering (and Avoid Overwatering)
If orchids could put up a warning sign, it would say: “Overwatering kills.” The roots need moisture, but they also need air. Constantly soggy potting mix suffocates roots and leads to rot.
Instead of watering on a strict calendar, take a “check first, then water” approach:
- Stick a finger about an inch into the bark or moss. If it feels dry, it’s time to water. If it feels damp or cool, wait a few days.
- Look at the roots if you have a clear pot:
- Silvery or whitish roots: ready for water.
- Bright green roots: already hydrated; don’t water yet.
When you do water:
- Take the orchid to the sink.
- Run room-temperature water through the pot for 15–30 seconds, soaking the bark.
- Let all excess water drain completely before putting the pot back into its decorative container.
Many people find that once a week works well, but your home’s humidity and temperature may shift that a bit. Err on the side of slightly dry rather than constantly wet.
What About the Ice Cube Method?
You may have heard of watering orchids with three ice cubes once a week. Research has shown that, for phalaenopsis in particular, this can be a safe way to prevent overwatering and is unlikely to “freeze” the roots as long as the cubes sit on the potting medium, not directly on the leaves. That said, if the idea makes you nervous, regular room-temperature watering works perfectly well. The key is measured amounts and thorough drainage, however you deliver the water.
Tip 5: Use the Right Potting Mix (Not Regular Soil)
Here’s one of the biggest surprises for new orchid owners: most orchids are epiphytes. In the wild, they grow attached to trees, not buried in soil. That’s why standard potting soil is a terrible matchit smothers the roots and stays wet too long.
Instead, use a special orchid mix designed to provide both moisture and airflow. A typical mix may include:
- Bark chips (often fir or pine)
- Perlite
- Charcoal
- Sometimes sphagnum moss or coconut husk chips
This chunky mix mimics the nooks and crannies of tree bark, allowing water to drain while still holding enough moisture for the roots to sip on between waterings. When you squeeze a handful of mix, it should feel springy and loose, not dense like potting soil.
Tip 6: Add Humidity Without Soaking the Plant
Most orchids come from humid tropical environments, so they appreciate more moisture in the air than the typical heated or air-conditioned home provides. A relative humidity of 40–60% is usually a sweet spot.
Easy ways to boost humidity for orchids:
- Place the pot on a pebble tray: a shallow dish filled with pebbles and water, with the pot sitting on top of the stones (not in the water).
- Group plants together to create a mini “humidity bubble.”
- Use a small humidifier nearby if your home is very dry in winter.
You don’t need to mist phalaenopsis orchids constantlyin fact, frequent misting can leave water sitting in the crown of the plant, which can cause rot. Focus on raising ambient humidity rather than spritzing the leaves all day.
Tip 7: Fertilize “Weakly, Weekly” During the Growing Season
Orchids aren’t heavy feeders, but they do appreciate regular, diluted fertilizer when they’re actively growing. The classic orchid motto is “weakly, weekly.”
General guidelines:
- Use a balanced, water-soluble orchid fertilizer (for example, 20-20-20).
- Mix it at ¼ to ½ the strength recommended on the label.
- Apply every 2–4 weeks during the growing season (often spring and summer).
- During cooler months or while the plant is in full bloom, you can reduce feeding or skip it altogether.
Always water with plain water first, then apply the diluted fertilizer. Every few cycles, flush the pot thoroughly with water to rinse out accumulated salts that can burn the roots.
Tip 8: Repot Every 1–2 Years (But Not While It’s in Full Bloom)
Even if your orchid looks happy, the potting mix doesn’t last forever. Bark and other organic ingredients slowly break down, becoming compacted and holding too much water. That’s your cue to repot.
Signs it’s time to repot:
- The orchid has been in the same mix for 2 years or more.
- The bark looks spongy, decomposed, or smells musty.
- Roots are circling tightly or climbing far out of the pot.
The best time to repot is right after the plant finishes blooming and before it begins heavy new growth. Here’s a simple repotting routine:
- Gently remove the plant from its pot and shake off old mix.
- Trim away dead or mushy roots with sterilized scissors.
- Place the orchid in a slightly larger pot with fresh, moistened orchid mix.
- Tap the pot to settle the mix around the roots, keeping the plant stable but not buried.
Don’t be alarmed if your orchid sulks a bit right after repotting. A short adjustment period is normal; within a few weeks, you should see new root tips and leaves if conditions are good.
Tip 9: Encourage Re-Blooming with Light and Cool Nights
Keeping an orchid alive is one thing; getting it to flower again can feel like advanced magic. Luckily, it mostly comes down to consistent care and a little temperature strategy.
To encourage re-blooming:
- Make sure the plant is getting enough bright, indirect light. No light, no flowers.
- In early fall, try giving it slightly cooler nights for several weeks (around 60°F) while keeping days warmer.
- Keep your watering and fertilizing routine steady, but don’t overfertilizethis can lead to abundant leaves and no blooms.
What to do with the old flower spike?
- If the spike turns brown and dry, cut it off near the base.
- If it stays green, you can either leave it alone (it may branch and rebloom) or trim it just above a node to encourage a side spike.
Be patient. It can take months for a phalaenopsis to rest, build energy, and then send up a new spike. As long as the leaves and roots look healthy, your orchid is not “dead”it’s just recharging.
Tip 10: Watch for Pests and Problems Early
Even well-cared-for orchids can run into issues, but catching them early makes all the difference.
Common orchid problems include:
- Root rot: roots look brown, mushy, or hollowoften due to overwatering or compacted mix.
- Mealybugs or scale: small white, brown, or shell-like bumps on leaves or stems; sticky honeydew may be present.
- Leaf spots: can be caused by fungal or bacterial infections, especially when water sits on leaves for too long.
If you spot trouble:
- Isolate the plant from your other houseplants.
- Trim off heavily damaged parts with clean tools.
- Repot if the roots or potting mix are compromised.
- Use appropriate pest treatments (such as insecticidal soap or horticultural oil) according to label directions.
Most importantly, adjust your care routine so the problem doesn’t come back. A little detective work now means fewer headaches later.
Extra Boost: Learn to “Read” Your Orchid
Once you have the basics down, the secret to keeping orchids alive and thriving is learning to treat them less like decorative objects and more like roommates who communicatequietly, but clearly.
- Leaves: firm and medium green = happy; very dark green = needs more light; pale yellow or scorched = getting too much sun or too much fertilizer.
- Roots: plump and green/silvery = healthy; shriveled and gray = too dry; brown and mushy = too wet.
- Bloom cycles: long gaps in flowering often point to low light or inconsistent care, not “mystery orchid behavior.”
The more you look at your orchid, the quicker you’ll notice small changes. And in the orchid world, small changes caught early are exactly how you prevent big problems later.
Real-World Experiences: What Actually Works to Keep Orchids Thriving
Advice is great, but lived experience is what really sticks. Here are some practical, down-to-earth lessons that people discover after a year or two of living with orchids on their windowsills.
The Overwatering Wake-Up Call
Almost every orchid owner has a “root rot story.” It usually starts with good intentions: you see a beautiful plant, you want to take care of it, and “taking care of it” translates to watering it constantly because that’s what you do with other houseplants.
Then one day you notice yellowing leaves, the plant looks a little wobbly in its pot, and when you finally investigate, the roots are brown and mushy. It’s an ugly momentbut also an incredibly useful one. Once you’ve seen what overwatering does, you start taking that finger-test seriously, watching root color, and letting the pot dry more between waterings.
The good news? Orchids can often recover from moderate root damage if you catch it early, trim off the dead roots, repot in fresh mix, and then water more thoughtfully. Many plant parents will tell you their strongest orchids are the ones that survived an early “drowning” episode and came back better than ever.
The Sunburned Orchid on the Kitchen Counter
Another common story: the orchid that lived happily in a bright living room suddenly gets “upgraded” to a south-facing kitchen window. It seems like a reward“Look at all this sun!”until a week later when you see yellow patches or crispy brown spots on the leaves. Your orchid basically got a tropical sunburn.
Moving an orchid closer to a brighter window is fine, but sudden changes are not. A better approach is to shift the plant gradually, starting a few feet away from the window or adding a sheer curtain to soften the light. With orchids, it’s always safer to ease them into more light than to shove them into a new sunny lifestyle overnight.
Office Orchids and the Fluorescent Light Surprise
On the flip side, many people discover that orchids surprisingly love a desk spot under fluorescent or LED lightsespecially in buildings where those lights stay on for 8–10 hours a day. The consistent light, stable temperature, and moderate air movement can be a near-perfect setup.
If your home doesn’t have a good window, a simple clamp-on grow light can replicate this effect. Mount it 8–12 inches above your orchid and set it on a timer for 10–12 hours a day. Suddenly, that “impossible” plant becomes the easiest part of your workday.
The Ice-Cube Experiment That Actually Helped
The ice-cube method for watering orchids has started many debates. Some people swear by it, others swear at it. In practice, what many beginners find is that the method’s biggest advantage isn’t magical iceit’s predictability. Three small ice cubes per week add up to a measured amount of water, which is much harder to overdo than tipping a full watering can into a small pot.
Some orchid owners treat it as “training wheels”: they start with ice cubes to avoid overwatering, then switch to regular watering once they’re more confident about how heavy a well-watered pot should feel or how quickly their home dries out the mix. The lesson here is not that everyone must use ice, but that consistent, measured watering is more important than the exact delivery method.
The Moment You Realize Dormant Isn’t Dead
One of the most heartbreakingand avoidableorchid experiences is the premature trash can. The flowers fade, the stem dries up, and the plant sits there looking green but unexciting. Many people assume, “Well, that’s done,” and toss it.
Seasoned orchid keepers will tell you this is the turning point. The orchid isn’t dying; it’s resting. If you keep up good caresteady light, watering, and occasional fertilizerit will quietly grow new leaves and roots. Months later, a new spike appears. That first “re-bloom” from a plant you thought was finished is incredibly satisfying, and it completely changes how you see orchids.
After that, orchids stop feeling like disposable decor and start feeling like long-term companions. You may even find yourself giving plants names, rearranging your furniture for better light, and casually dropping the phrase “phalaenopsis spike” into conversations. It happens.
The Big Takeaway from All These Experiences
Across all these stories, one theme keeps coming up: orchids respond to consistency and observation. You don’t need a greenhouse, a fog machine, or a horticulture degree. What you need is a bright spot, reasonable temperatures, a good potting mix, and a willingness to pay a little attention.
Once you start reading your orchid’s leaves, roots, and bloom cycles, you shift from guessing to understanding. And that’s when orchids truly start to thrivenot just surviving from gift season to trash day, but living on as long-term, blooming members of your plant family.
Conclusion
Keeping orchids alive and thriving is less about luck and more about habits. Choose a healthy plant, give it bright indirect light, keep temperatures comfortable, water thoughtfully instead of frequently, use the right potting mix, boost humidity when needed, fertilize gently, repot every couple of years, and pay attention to signs of stress.
Do that, and your “difficult” orchid becomes a surprisingly reliable housemate that shows off its flowers for months and comes back year after year. Not bad for a plant that most people assume is temporary.


