Table of Contents >> Show >> Hide
- Why lubricating a garage door matters (beyond “it’s loud”)
- What you’ll need
- Choose the right lubricant (and avoid the classic mistakes)
- Safety checklist (please readyour future self will thank you)
- How to lubricate a garage door: 10 steps
- Where NOT to lubricate (the “please don’t do this” section)
- How often should you lubricate a garage door?
- Quick troubleshooting: what your garage door noise is trying to tell you
- When to call a pro (smart DIY has limits)
- Conclusion
- Experiences & real-world lessons from garage door lubrication (extra)
A noisy garage door is basically your house clearing its throat… loudly… at 6:30 a.m.
The good news: most “screechy, grumpy, wake-the-neighbors” garage doors don’t need a dramatic makeover.
They need a simple, 20–30 minute tune-up: clean the moving parts, lubricate the right spots, and don’t
accidentally create a dirt-magnet slime sculpture.
In this guide, you’ll learn how to lubricate a garage door the correct waywhere to apply
lubricant, what to avoid, and how to test your results. We’ll keep it DIY-friendly, but also safety-first,
because garage doors are heavy and their springs are not the place to “learn by improvisation.”
Why lubricating a garage door matters (beyond “it’s loud”)
Lubrication reduces friction between moving metal partsrollers, hinges, bearings, and springsso the door
travels smoothly. When friction drops, you often get:
- Less noise (squeaks, squeals, and grinding)
- Less wear on rollers, hinges, and bearings
- Less strain on the garage door opener
- Better reliability in hot summers and cold snaps
Think of this as brushing your teeth, but for your garage door. Skip it too long and you’ll eventually pay
for itpossibly in the currency of “Why is the opener screaming like that?”
What you’ll need
- Garage door lubricant: silicone-based spray or a garage-door-specific lubricant (often silicone or lithium-based)
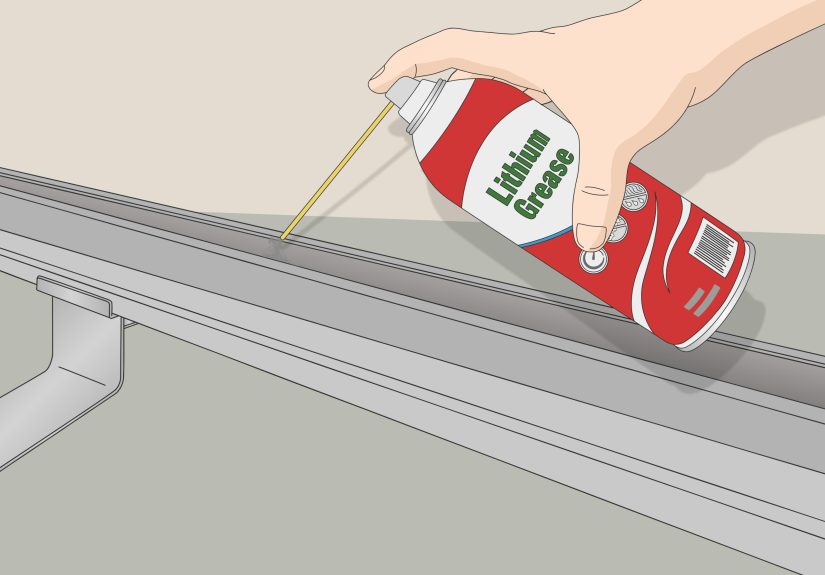
- Optional: white lithium grease (useful for certain opener rails/chains when the manufacturer recommends it)
- Clean rags or shop towels
- Step ladder (stable and tall enough to reach the spring area safely)
- Gloves and safety glasses (overspray happens)
- Household cleaner (or mild degreaser) for wiping grime off hardware
- Socket/wrench set (for snugging loose boltsno need to Hulk-smash them)
Choose the right lubricant (and avoid the classic mistakes)
Best lubricant types for garage doors
For most residential garage doors, a silicone-based spray or a garage-door-specific lubricant
is a safe, common choice. Silicone products tend to lubricate without turning every surface into a lint-and-dust buffet.
Lithium-based products are also used in some casesespecially for certain metal-to-metal applications and some opener components.
What not to use
-
WD-40 as your “main lubricant”: it’s great as a water-displacing cleaner/penetrant, but it’s not ideal as the long-term lubricant for door hardware.
(You’ll often get short-term silence… then the squeak comes back for an encore.) - Heavy grease everywhere: thick grease can attract dirt and gum up parts if overappliedespecially around rollers and hinges.
- Lubricating the track surface: the track is a guide; the rollers should roll. Grease on the track can collect debris and cause a messy, gritty ride.
Quick note about locks
If your door has a manual lock cylinder, many pros prefer graphite for the keyway rather than oil-based sprays.
Oil can attract dust inside the lock and eventually make it feel sticky.
Safety checklist (please readyour future self will thank you)
- Work with the door closed whenever you’re lubricating springs and upper hardware.
- Turn off power to the opener (unplug it or switch off the outlet).
- Do not adjust springs or cables. Lubricating is fine; adjusting is a job for trained technicians.
- Use a stable ladder and keep your body out from under heavy moving sections.
- If anything looks damaged (frayed cables, cracked rollers, bent track), stop and call a pro.
How to lubricate a garage door: 10 steps
These steps are designed for a typical sectional residential garage door. If you have a specialty door or a unique opener,
check your owner’s manual for any model-specific lubrication points.
-
Step 1: Close the door and cut the power.
Close the garage door completely. Unplug the opener (or turn off the breaker to the outlet).
This prevents accidental activation while your hands are near hinges and rollers. -
Step 2: Do a quick inspection (the “spot trouble early” scan).
Look for loose bolts, worn rollers, wobbly hinges, rust, or anything that looks bent or cracked.
Pay attention to cables near the springsdo not touch them, but do check for fraying.
If the door shudders, binds, or looks crooked in the track, lubrication may not be the main issue. -
Step 3: Wipe off grime from the moving hardware.
Use a clean rag to wipe dirt and old residue from:
hinges, roller bearings (if exposed), and the spring surface.
You’re not trying to make it sparkle like a car commercialjust remove the gunk so fresh lubricant can do its job.Tip: Clean the tracks too, but focus on wiping them rather than lubricating them. The track should guide, not “grease-slide.”
-
Step 4: Tighten loose hardware (gently).
Garage doors vibrate. Vibration loosens things. It’s science.
Tighten any loose hinge bolts and bracket fasteners with a wrench/socket.
Do not overtightenstripped hardware is a whole new hobby you don’t need. -
Step 5: Lubricate the hinges (pivot points only).
Aim the spray at the hinge’s moving jointwhere the hinge bends as the door moves.
Apply a short burst, then move to the next hinge.
Wipe any drips so you don’t create streaks down the door panels. -
Step 6: Lubricate the rollers (bearings, not the track).
If you have steel rollers with exposed bearings, apply lubricant to the bearing area where the roller shaft meets the roller.
Avoid coating the entire roller wheel and avoid spraying lubricant directly onto the track surface.If you have nylon rollers: some have sealed bearings and need little to no lubrication. If bearings are exposed, a light spray on the bearing is fine.
If everything is sealed plastic, skip itlubricant won’t help and can attract grime. -
Step 7: Lubricate the springs (light coat, door closed).
With the door fully closed, lightly spray along the length of the torsion spring (above the door) or extension springs (along the sides, if that’s your setup).
This helps reduce noise from coil-on-coil friction and can help limit rust.Important: lubricate onlydo not adjust, tighten, or “test your bravery” near springs and cables.
-
Step 8: Lubricate bearing plates and end bearings.
Look near the ends of the torsion spring shaft (the metal bar above the door). You’ll usually see bearing plates/end bearings.
Apply a small amount of lubricant where metal rotates in the bearing.
A little goes a long waythis is not a cooking show. -
Step 9: Hit the lock, arm bar, and any metal pivot points.
If your door has a manual lock mechanism, apply a small spray to the moving parts (not the keyway).
For the keyway itself, consider graphite instead of oil.
Also lubricate any connecting arms/pivot points that move as the opener lifts the door. -
Step 10: Lubricate opener components only if your manual recommends itthen test the door.
Some openers (especially chain-drive units) may call for light lubrication on the rail/trolley area or specific points.
Many manufacturers recommend wiping off old residue and applying a small layer of the specified lubricant (often lithium grease) on the opener rail.
If you have a belt-drive opener, it usually needs less lubrication on the drive mechanism than a chain.After lubricating, restore power and run the door 2–3 open/close cycles.
Listen for improvement. Wipe excess lubricant that squeezes outexcess attracts dust and drips onto your car like an unsolicited art project.
Where NOT to lubricate (the “please don’t do this” section)
- Track surfaces: clean them; don’t grease them. If any checklist suggests lubricating “tracks,” keep it extremely light and wipe thoroughlymost of the benefit comes from lubricating rollers/bearings instead.
- Plastic rollers or sealed bearings: lubricant won’t penetrate sealed parts and can attract grime.
- Weatherstripping: it doesn’t need grease. If it’s sticking in winter, look for silicone-safe rubber conditioners rather than hardware lubricant.
- Broken or damaged components: lubricant won’t “heal” cracked hinges or worn rollers. It just makes them slippery while they fail.
How often should you lubricate a garage door?
A common schedule is every 6 monthsoften spring and fall. If you live in a dusty area, near salty air,
or you notice the door getting louder, you might bump it to every 3–4 months.
The goal isn’t constant spraying. The goal is smooth operation, minimal noise, and hardware that isn’t grinding itself into early retirement.
Quick troubleshooting: what your garage door noise is trying to tell you
Squeaking or chirping
Usually hinges, rollers, or bearings asking for lubricant. Focus on pivot points and roller bearings.
Grinding or scraping
Often dirty tracks, a misaligned track, worn rollers, or something rubbing where it shouldn’t.
Clean tracks first. If the door still scrapes, stop and consider professional inspection.
Rattling and vibration
Loose hardware is a frequent culprit. Tighten bolts on hinges and brackets (snug, not stripped).
Door feels heavy or jerky
This can indicate balance or spring issues. Lubrication may help a little, but a heavy door can be a safety issue.
If the door is difficult to lift manually, call a garage door technician.
When to call a pro (smart DIY has limits)
DIY lubrication is great for routine maintenance. But call a professional if you notice:
- Frayed cables, rusted or stretched springs, or loose spring hardware
- The door is off-track, crooked, or binds hard in one spot
- Loud “bang” sounds from the spring area (could indicate a spring failure)
- The opener struggles, reverses unexpectedly, or the door won’t stay balanced
Conclusion
Learning how to lubricate a garage door is one of the highest-payoff home maintenance tasks you can do with minimal tools and time.
Follow the 10 steps: power down, clean, lubricate hinges/rollers/springs/bearings, avoid greasing the track surface, and test the door.
You’ll reduce noise, improve performance, and help your garage door live a longer, less dramatic life.
Experiences & real-world lessons from garage door lubrication (extra)
Let’s talk about the part no one mentions: the “experience” of lubricating a garage door is 50% technique and 50% discovering what your door has been
quietly putting up with. Homeowners often start this project thinking, “I’ll spray a little stuff and it’ll be fine,” and end it thinking,
“Oh wow… that hinge has been auditioning for a horror movie soundtrack for years.”
Experience #1: The ‘one squeak’ that turns into a full symphony
A common scenario goes like this: you hear a squeak near the middle of the door, so you spray one hinge.
The squeak stops… and suddenly you notice a different squeak. Then another. It’s not that lubrication creates new problems
it’s that once the loudest noise is gone, your ears finally pick up the rest. The fix is simple: go methodically from top to bottom,
hinge by hinge, roller by roller, using short bursts. This is why a step-by-step routine works better than “random acts of spraying.”
Experience #2: Overspray is real (and gravity is undefeated)
Another very normal moment: you aim upward at the spring, the lubricant mists back down, and now your safety glasses are earning their keep.
People who skip eye protection learn fast that aerosol lubricant has a talent for drifting. The trick is to keep the can close enough to be accurate,
spray lightly, and keep a rag in your non-spraying hand to catch drips. Wiping excess isn’t just about cleanlinessit helps prevent dust from sticking
to freshly lubricated surfaces.
Experience #3: The track temptation
Nearly everyone has the same thought at least once: “The track is metal. The roller rides in it. Metal + motion = lube, right?”
It feels logical. But in practice, greasing the track surface often becomes a dirt magnet. The door might sound better for a week,
but then the track collects dust and debris, and the roller rides through gritty paste. The better “experience-based” takeaway is:
clean the tracks, lubricate the roller bearings. You’ll get smooth movement without turning the track into a sticky runway.
Experience #4: The surprise diagnosis
Lubrication sessions frequently reveal something else: a loose hinge bolt, a roller with a wobble, a bracket that’s slightly shifted,
or a hinge that looks a little warped. The best DIYers treat lubrication day as a mini-inspection. Tighten what’s loose, note what’s worn,
and don’t ignore “small” issues. Replacing a tired roller early is usually cheaper and easier than waiting until it fails and the door binds.
Experience #5: The satisfying before-and-after test
The best part is the moment you run the door after lubricating. It’s common to hear a smoother, lower “whoosh” instead of squeals and chatter.
Many people do the test twiceonce because they’re impressed, and a second time because it’s oddly satisfying. If the sound improves but doesn’t fully
go quiet, that’s normal. Some noise is structural (door panels flexing, opener vibration), and some indicates parts that may need attention.
The point is improvement: less friction, less strain, and a door that sounds like it belongs to your housenot a haunted warehouse.
Bottom line: doing this job once teaches you where your specific door needs help. Doing it regularly makes the whole system feel smoother,
keeps the opener from working overtime, and reduces the chances of you getting jump-scared by your own garage at the worst possible hour.