
Table of Contents >> Show >> Hide
- Why Maintenance Matters (Beyond “Because I Said So”)
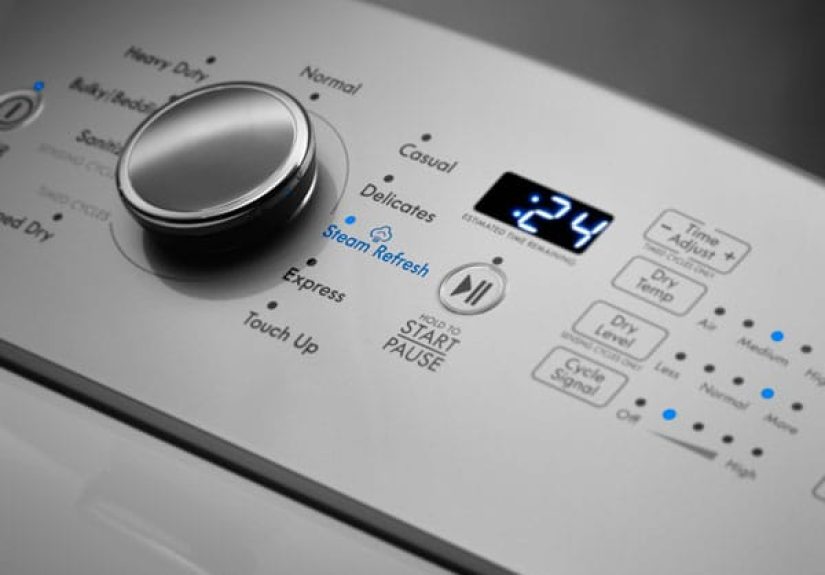
- Washer Maintenance: Keep It Clean, Dry, and Not Overfed
- Dryer Maintenance: Lint Is Not a Cute Accessory
- A Simple Washer & Dryer Maintenance Schedule
- Common Problems (and the Maintenance Fix That Usually Solves Them)
- When to Call a Pro (No Shame, Just Strategy)
- Real-World Experiences: What Laundry Rooms Teach You (Extra )
- Conclusion: A Little Routine Beats a Big Repair
Your washer and dryer are basically the backstage crew of your life: they handle the mess, they don’t get applause,
and the second they stop working, everyone suddenly notices. The good news? Most laundry appliance problems don’t
start with a dramatic “BOOM.” They start with boring stufflint, soap gunk, trapped moisture, and hoses that have
quietly decided they’re done with adulthood.
This guide breaks down washer and dryer maintenance into simple habits you can actually keep:
quick after-each-load steps, a monthly refresh, and a yearly deep-clean that helps your machines run safer,
smell better, and last longer. (Yes, your laundry room can be less… emotionally complicated.)
Why Maintenance Matters (Beyond “Because I Said So”)
Maintaining a washing machine and dryer isn’t just about extending appliance lifespanthough that’s a nice bonus.
It’s also about safety, energy efficiency, and clothes that don’t come out smelling like a damp basement.
A clean dryer moves air properly and dries faster. A clean washer is less likely to grow odor-causing residue and mold.
And a few minutes of prevention can save you from expensive repairs (or the classic “why is there water on the floor?” mystery).
Washer Maintenance: Keep It Clean, Dry, and Not Overfed
1) Use the Right Detergent and Don’t Overdo It
If you have a high-efficiency washer, use HE detergentotherwise you’re basically throwing a bubble party your machine
didn’t RSVP to. Too much detergent (even the “good” stuff) can leave residue behind, trap smells, and make your washer work harder.
If your clothes feel stiff, look cloudy, or the drum smells off, detergent overload may be a suspect.
Practical tip: If you’re guessing on detergent amounts, you’ll usually guess high. Start with less, especially for
smaller loads or lightly soiled clothes. Your washer isn’t impressed by extra soapjust burdened by it.
2) Leave the Door/Lid Open After Loads
Moisture is the washer’s love language… but it’s mold’s love language too. After you finish laundry,
leave the door or lid open for a while so the interior can dry out. This is especially important for
front-load washers with door gaskets that can trap water in folds.
- Front-load washer tip: Wipe the gasket dry if you see water pooling in the bottom folds.
- Top-load washer tip: Let the tub air outespecially if your laundry room is humid.
3) Clean the Detergent and Softener Dispensers
Dispenser drawers can collect gooey buildup that turns into odor and clogs. Once a month, remove the drawer if your model
allows it, rinse with warm water, and scrub residue with an old toothbrush. Let it dry before putting it back.
If your fabric softener has been “mysteriously not dispensing,” it’s usually not a mystery. It’s sludge.
4) Run a Washer Cleaning Cycle Monthly
Many washers include a “Clean Washer” or “Self Clean” cycle designed to flush out detergent residue and odors.
Run it about once a month (or roughly every 30–40 loads if you’re a “laundry every day” household).
Use a cleaner made for washing machines or follow your manufacturer’s instructions for bleach use. Some brands
caution against using vinegar regularly because acidity can potentially damage rubber components over time.
The safest approach is simple: check your owner’s manual and use what your model recommends.
5) Check Pockets, Filters, and “Hidden Gunk Traps”
Your washer does not enjoy surprise coins, tissues, or hairpins. Check pockets before every load.
Then, once a month, inspect the places where grime likes to hide:
- Drain/pump filter (common on front-loaders and some combos): Clean on the schedule your machine recommends (some suggest every ~50 cycles).
- Door gasket (front-load): Wipe the folds and remove lint or pet hair.
- Agitator lint filter (some top-loaders): If your model has one, keep it clean so water can flow properly.
6) Inspect Hoses and Connections (Your Leak Prevention Plan)
Washer hoses are the unsung heroesand sometimes the villainsof laundry rooms. Check them every few months:
look for bulges, cracking, corrosion at fittings, or dampness. If you can’t remember when they were last replaced,
many home maintenance guides recommend replacing washer hoses about every five years as a precaution.
Bonus upgrade: braided stainless steel hoses are often considered more durable than basic rubber hoses.
And if your washer is in a finished space (or above a living area), a drip pan and leak detector can be a smart, low-stress safety net.
Dryer Maintenance: Lint Is Not a Cute Accessory
1) Clean the Lint Filter Every Load
This is the big one. Clean the lint screen after every cycle (or before, if you prefer). Better airflow means
better drying, lower energy use, and less strain on the machine. It also reduces fire risk.
If you use dryer sheets, scrub the lint screen about once a month with a soft brush and a little soap and water.
Dryer sheets can leave a film that blocks airflow even when the screen looks “clean.”
2) Don’t Ignore the Moisture Sensor
Many dryers use moisture sensors (often small metal strips inside the drum) to decide when clothes are dry.
Fabric softener residue can coat those sensors and confuse the dryer into running longer than necessary
(or stopping too soon). If your cycles feel inconsistent, gently wipe the sensor with rubbing alcohol and a soft cloth.
3) Keep the Vent and Ductwork Clear (Airflow = Everything)
If your dryer vent is partially clogged, your dryer may run hot, take forever, and still leave clothes damp.
That’s not “a quirky dryer personality.” That’s restricted airflow.
A good baseline is a yearly dryer vent cleaning. If you do laundry constantly, have pets,
or notice performance slipping, you may benefit from cleaning it more often.
Signs your dryer vent needs attention:
- Clothes take longer than usual to dry
- The dryer feels very hot to the touch
- The laundry room gets unusually warm or humid during drying
- You notice a musty smell, excess lint, or weak airflow at the outside vent hood
For DIY dryer vent cleaning, always unplug the dryer (and shut off gas if you have a gas dryer) before moving it.
If the vent route is long, goes through tight spaces, or exits on the roof, hiring a professional is often the safer,
more thorough option.
4) Quick Drum and Interior Cleanup
Every few months, wipe the dryer drum with a damp microfiber cloth to remove residue (especially if you’ve had
a crayon incidentno judgment). Vacuum lint around the lint filter housing if your model allows access.
And keep the area around the dryer clear of boxes, clothes, and anything that can block airflow or become a hazard.
5) Gas Dryer Extras
Gas dryers add one more reason to respect professional help: gas connections. If you ever smell gas, stop using the dryer
and contact a professional immediately. For routine maintenance, it’s still about airflow, lint control, and keeping venting
in good conditionbut periodic professional inspection can add peace of mind.
A Simple Washer & Dryer Maintenance Schedule
Here’s a realistic checklist you can follow without turning your weekend into an appliance-themed documentary series:
After Every Load
- Dryer: Clean the lint trap.
- Washer: Remove wet clothes promptly; leave door/lid open to air out.
Weekly
- Wipe washer door gasket (front-load) and check for trapped lint/hair.
- Quick wipe of washer top and dryer surfaces (dust is sneaky).
Monthly
- Run the washer’s cleaning cycle with a recommended cleaner.
- Clean detergent/softener dispenser drawer.
- Scrub dryer lint screen if you use dryer sheets.
- Check behind machines for kinks, crushed ducts, or signs of leaks.
Every 3–6 Months
- Vacuum lint around the dryer (and inside accessible areas per manual).
- Inspect washer hoses and fittings for wear or dampness.
- Clean moisture sensor strips if cycles seem “off.”
Yearly
- Deep-clean the dryer vent line and outside vent hood.
- Level check: make sure the washer isn’t wobbling or “walking.”
- Replace washer hoses if they’re aging, worn, or near the recommended replacement window.
Common Problems (and the Maintenance Fix That Usually Solves Them)
“My washer smells musty.”
- Run a cleaning cycle and clean the dispenser drawer.
- Wipe and dry the gasket folds (front-load).
- Use less detergent and skip excess fabric softener.
- Leave the door open after loads to dry the interior.
“My dryer takes two cycles to dry anything.”
- Clean the lint filter and check for film buildup.
- Check airflow at the outdoor vent hood.
- Inspect the duct for kinks/crushing and schedule a vent cleaning.
“My washer shakes like it’s trying to escape.”
- Re-level the washer feet.
- Avoid overloading (especially with heavy blankets).
- Make sure loads are balancedone giant towel can throw off a whole spin cycle.
“There’s water on the floor.”
- Check hose connections and the condition of hoses.
- Look for a slow drip at the shutoff valves.
- Confirm the drain hose is secured and not backing up.
When to Call a Pro (No Shame, Just Strategy)
Maintenance is about prevention, not proving you can wrestle an appliance by yourself. Consider professional help if:
- The dryer vent exits on the roof or runs a long distance through walls/ceilings.
- You smell gas or suspect a gas connection issue.
- Your dryer overheats, shuts off unexpectedly, or trips breakers.
- Your washer won’t drain, makes loud grinding noises, or leaks from underneath.
A solid rule: if the fix requires you to disassemble parts you’ve never seen before (and you don’t have the manual open),
it might be time to tag in a technician.
Real-World Experiences: What Laundry Rooms Teach You (Extra )
Maintenance advice can sound abstract until you’ve lived through a few classic laundry-room plot twists. Here are the
kinds of experiences homeowners and renters share all the timeand what they teach you about keeping a washer and dryer happy.
1) The “My Towels Smell Clean… But Also Not Clean” Phase
This usually starts with towels that come out warm and fluffy, yet somehow smell like they spent the night thinking
about mildew. The fix often isn’t a fancy detergentit’s airflow and residue control. People notice improvement after
running a proper washer cleaning cycle, cutting back detergent, and leaving the washer door open after loads. The lesson:
washers don’t just wash clothes; they also need to be washed. Otherwise, the machine becomes a tiny ecosystem.
2) The Dryer That “Works Fine” Until It Doesn’t
A super common story: “It’s always been a little slow, but I thought that was normal.” Then one day, a load that used
to take 45 minutes takes 90and the laundry room feels like a sauna. After a vent cleaning, drying times suddenly drop
back to normal. The lesson: a slow dryer often isn’t a broken dryer. It’s a clogged-airflow dryer.
3) The Detergent Arms Race
When clothes don’t smell “fresh enough,” many people instinctively pour in more detergent or softener. It feels logical:
more clean stuff = more clean results. But in real laundry life, extra detergent can trap oils and grime, leaving film behind
that makes odors worse. Folks who switch to smaller detergent doses (and do a monthly drum clean) often report fewer smells
and better rinsing. The lesson: your washer likes precision, not enthusiasm.
4) The Washer That Starts “Walking” During Spin
Some machines slowly drift across the floor like they’re trying to find better lighting. Usually the cause is simple:
the washer isn’t level, the load is unbalanced, or both. The people who fix it fastest are the ones who treat leveling like
a real maintenance step, not a one-time installation detail. The lesson: vibration isn’t just annoyingit’s wear and tear.
5) The Hose Surprise Nobody Wants
Another real-world scenario: everything is fine until someone notices a damp patch near the washer, a tiny drip at a fitting,
or (worst case) a hose failure that turns laundry day into indoor weather. People who replace hoses proactivelyespecially if
they can’t remember the last replacementtend to avoid this drama. The lesson: hoses age quietly, and the floor always finds out.
Put together, these experiences point to one simple truth: most laundry disasters aren’t random. They’re the result of small,
fixable maintenance steps being skipped for months (or years) because nobody wants to spend their Saturday thinking about lint.
The upside is that the same small stepscleaning filters, running a monthly washer clean, checking hoses, and keeping vents clear
prevent a huge percentage of problems. Your future self will thank you. Your laundry room might not. But your future self will.
Conclusion: A Little Routine Beats a Big Repair
If you remember nothing else, remember this: airflow for the dryer, dryness for the washer,
and less soap than you think. Clean the lint trap every load. Run a monthly washer cleaning cycle. Keep vents and hoses
on your radar. Do that, and your washer and dryer will usually reward you with fewer odors, faster drying, and fewer “why is it doing that?”
moments. Laundry will still be laundrybut your machines won’t make it harder than it has to be.


