Table of Contents >> Show >> Hide
- Why Use Ableton Live for a DJ Mix Set?
- Step 1: Plan the Mood and Purpose of Your DJ Mix
- Step 2: Prepare Your Tracks Before Importing
- Step 3: Set Up Ableton Live for DJ Mixing
- Step 4: Warp Tracks Correctly
- Step 5: Arrange the Track Order
- Step 6: Create Smooth DJ Transitions
- Step 7: Automate Tempo Changes
- Step 8: Polish the Mix
- Step 9: Export the DJ Mix Set
- Step 10: Prepare the Mix for Publishing
- Common Mistakes to Avoid
- Practical Experience: Lessons From Building DJ Mixes in Ableton Live
- Conclusion
Making a DJ mix set in Ableton Live is a little like building a roller coaster for people’s ears. You choose the tracks, control the climbs, hide the awkward turns, and make sure nobody suddenly flies out of the groove because one song entered four beats late wearing muddy boots. The good news? Ableton Live is one of the most flexible tools for creating a polished DJ mix, whether you want a clean one-hour house session, a dramatic techno journey, a hip-hop blend, a chill lounge mix, or a festival-style monster with drops big enough to scare your coffee mug.
Unlike traditional DJ software, Ableton Live gives you a full production timeline, detailed automation, audio effects, warping tools, and total control over every transition. That means you can prepare a studio-quality DJ mix set with precise beatmatching, smooth EQ moves, creative effects, custom edits, and a final export that sounds ready for streaming, sharing, or impressing that one friend who claims they “can totally hear when the kick is off-grid.”
This guide explains how to make a DJ mix set using Ableton Live from start to finish. We will cover track selection, tempo planning, warping, arranging, transitions, effects, loudness, exporting, and practical workflow tips. Grab your headphones. Your future mix is about to stop being a folder full of hopeful MP3s and become an actual set.
Why Use Ableton Live for a DJ Mix Set?
Ableton Live is not only a digital audio workstation; it is also a performance and arrangement environment. For DJs, that combination is powerful. You can use Arrangement View to build a linear mix with full visual control, or Session View to trigger clips and tracks in a more live-performance style. For a polished recorded DJ mix, Arrangement View is usually the easiest place to start because you can see the full timeline from intro to final fade.
The biggest advantage is precision. In a traditional DJ setup, transitions happen in real time. In Ableton, you can zoom in, adjust the beat grid, draw volume automation, fine-tune EQ curves, test different breakdowns, and fix tiny timing issues before exporting. Think of it as DJing with an undo button, which is basically a superpower.
Step 1: Plan the Mood and Purpose of Your DJ Mix
Before dragging tracks into Ableton Live, decide what kind of DJ mix set you are making. Is it a high-energy workout mix? A deep house sunset session? A promotional mix for club bookings? A radio-style mix with smooth pacing? A 20-minute audition set? Your goal affects your track order, transition length, tempo movement, and overall energy curve.
Build an Energy Map
A great DJ mix is not just a pile of good songs glued together with hope. It needs movement. Start by sorting tracks into energy levels: warm-up, groove builder, peak-time, emotional break, and closing track. For example, a 60-minute melodic techno set might begin at 122 BPM with atmospheric tracks, build to 126 BPM with stronger drums, reach a peak around minute 40, then end with a memorable vocal or cinematic outro.
Do not put all your biggest tracks at the beginning. That is like serving dessert before the appetizer and then asking everyone to stay excited for soup. Give the listener a reason to continue.
Step 2: Prepare Your Tracks Before Importing
Good preparation saves hours later. Create a project folder for your DJ mix and place all selected tracks inside it. Use high-quality audio files when possible, such as WAV, AIFF, or high-bitrate MP3. Low-quality files may sound acceptable alone but can become harsh or thin once mixed, processed, and exported.
Analyze BPM and Key
It helps to know each track’s BPM and musical key before arranging. Ableton Live can detect tempo, but checking with DJ library tools or your ears is still smart. Harmonic mixing is not mandatory, but matching compatible keys can make blends feel smoother, especially when melodies overlap. If two tracks have clashing vocals, synth hooks, or basslines, no amount of fancy EQ wizardry will fully save them. Sometimes the best transition is simply choosing a better pair.
Choose Clean Intro and Outro Sections
Tracks with drum-only intros and outros are easier to mix. If a song starts with a huge vocal, random explosion, or dramatic spoken-word monologue about destiny, it may still work, but you will need more careful planning. Look for sections where the beat is stable and there is enough space to introduce the next track naturally.
Step 3: Set Up Ableton Live for DJ Mixing
Open Ableton Live and create a new set. Switch to Arrangement View by pressing the Tab key if needed. Set the project tempo near the average BPM of your tracklist. For example, if most tracks are between 124 and 126 BPM, start at 125 BPM. You can automate tempo changes later, but beginning near the center keeps things manageable.
Create Two Main Audio Tracks
Create two audio tracks and name them Deck A and Deck B. This classic A/B layout makes it easy to overlap songs, just like using two DJ decks. Place the first song on Deck A, the second on Deck B, the third on Deck A, and continue alternating. This keeps transitions visible and organized.
You can also create extra tracks for samples, risers, voice tags, drum loops, or emergency sparkle. Use sparkle responsibly. Nobody needs a white-noise sweep every eight bars unless the mix is being sponsored by a leaf blower.
Add Utility, EQ, and Limiter Devices
On each deck, add an EQ device for frequency control. Ableton’s EQ Eight is useful for cutting lows, mids, and highs during transitions. You can also add Auto Filter for sweeps, Utility for gain control, and delay or reverb for creative exits. On the master channel, add a limiter only as a safety net, not as a brick wall of doom. If the limiter is constantly working hard, your mix is too loud before mastering.
Step 4: Warp Tracks Correctly
Warping is the heart of making a DJ mix set in Ableton Live. It tells Ableton how the audio lines up with the project grid. When tracks are warped correctly, their beats stay synchronized, making transitions cleaner and easier to control.
Find the First Downbeat
Drag your first track into Arrangement View and open the Clip View. Find the first clear downbeat, usually the first kick drum of a phrase. Set that point as the start of the track and align it to bar 1.1.1 or another clean bar marker. If Ableton’s automatic guess is wrong, move the warp marker manually. Ableton is smart, but it is not a mind reader. Sometimes it sees a soft hi-hat and confidently declares, “Yes, this is the beginning of civilization.”
Use Warp From Here Carefully
For modern electronic tracks with steady tempo, setting the first downbeat and using a straight warp approach can work well. For older disco, funk, rock, or live-drum recordings, the tempo may drift. In those cases, you may need additional warp markers throughout the track to keep the groove aligned. Avoid adding too many warp markers unless necessary, because excessive warping can make audio feel unnatural.
Pick the Right Warp Mode
For full songs, Complex or Complex Pro can preserve overall musical quality when changing tempo. Re-Pitch can sound natural for some DJ-style tempo changes, but it changes pitch along with speed. Beats mode may work for drum loops but can sound choppy on full tracks. Always listen after warping, especially in breakdowns and vocal sections.
Step 5: Arrange the Track Order
Once your tracks are warped, start placing them on the timeline. Put Track 1 on Deck A, Track 2 on Deck B, and overlap the outro of Track 1 with the intro of Track 2. Use the grid to align phrases. Most dance music is structured in 8-bar, 16-bar, or 32-bar sections, so phrase matching is essential.
Mix by Phrases, Not Just Beats
Beatmatching gets the kicks lined up. Phrase matching makes the transition feel musical. If Track B’s drop arrives while Track A is still in the middle of a vocal chorus, the mix may feel crowded. Try introducing the next track at the beginning of a new phrase, such as after a breakdown, during an outro, or at the start of a drum section.
A simple example: let Track A play through its final chorus, start Track B’s drum intro 32 bars before Track A’s outro ends, gradually remove Track A’s bass, bring in Track B’s bass at the phrase change, then fade Track A out as Track B’s main groove takes control. Congratulations, you have created a clean transition instead of an audio traffic accident.
Step 6: Create Smooth DJ Transitions
Transitions are where a DJ mix set becomes a story. Ableton Live gives you several tools to shape them: volume automation, EQ cuts, filters, effects, clip fades, and arrangement edits.
Use Volume Automation
Draw volume automation on Deck A and Deck B to create smooth fades. A basic transition might fade Track B in over 16 or 32 bars while Track A slowly fades out. Do not rely only on volume, though. Two full tracks playing at the same time can overload the low end and create a muddy mix.
Use EQ for Bass Swaps
One of the most useful DJ transition techniques is the bass swap. As Track B enters, cut or reduce its low frequencies at first. Let the listener hear the hats, percussion, or melody without adding another kick and bassline. When the phrase changes, lower the bass on Track A and bring in the bass on Track B. This keeps the low end clean and gives the transition a satisfying “handoff” moment.
Use Filters for Movement
Auto Filter can create smooth builds and exits. A high-pass filter can thin out Track A as it leaves, while a low-pass filter can introduce Track B gradually. Filter transitions are especially useful when both tracks are busy. Just avoid sweeping filters so dramatically that the mix sounds like it is being vacuumed through a tunnel.
Add Effects with Taste
Delay, reverb, echo throws, beat repeats, and risers can make transitions more exciting. The trick is restraint. Use effects to support the music, not to announce that you recently discovered effects. A short delay on the final vocal phrase can help Track A disappear gracefully. A subtle reverb tail can make a breakdown feel bigger. A tiny drum loop can bridge two songs with different grooves.
Step 7: Automate Tempo Changes
If your mix moves across a range of BPMs, you can automate the master tempo in Arrangement View. This is useful when starting with slower tracks and gradually increasing energy. Keep tempo changes smooth and musical. A sudden jump from 118 BPM to 128 BPM can work for a dramatic edit, but in most mixes it feels like the dance floor just stepped on a banana peel.
When possible, make tempo changes during breakdowns, ambient sections, or transitions where drums are less exposed. If the kick pattern is playing clearly, fast tempo ramps may sound obvious.
Step 8: Polish the Mix
After arranging all transitions, listen from start to finish without stopping. Take notes. Do not fix every tiny issue during the first pass. Just listen like a normal person, not like a nervous raccoon with studio monitors. Mark places where the energy dips, the bass gets crowded, vocals clash, or a transition feels too long.
Check Gain Staging
Each track should sit at a consistent level. Some mastered tracks are louder than others, so use Utility or clip gain to balance them. Watch the master meter and leave headroom. A clean DJ mix should not be clipping. Loud is good. Distorted loud is just your speakers filing a complaint.
Clean Up Clashing Frequencies
During transitions, listen closely to the low end and vocal range. If two basslines fight, cut one. If two vocals overlap awkwardly, shorten the blend or choose a different entry point. If the highs feel harsh, reduce cymbals or bright synths slightly during the overlap.
Create a Strong Intro and Outro
A professional DJ mix needs a clear beginning and ending. The intro can be simple: start with atmosphere, a filtered groove, or the first track’s natural opening. The outro can fade gently, end on a final hit, or resolve with a memorable melodic section. Avoid chopping off the ending like someone pulled the power cable.
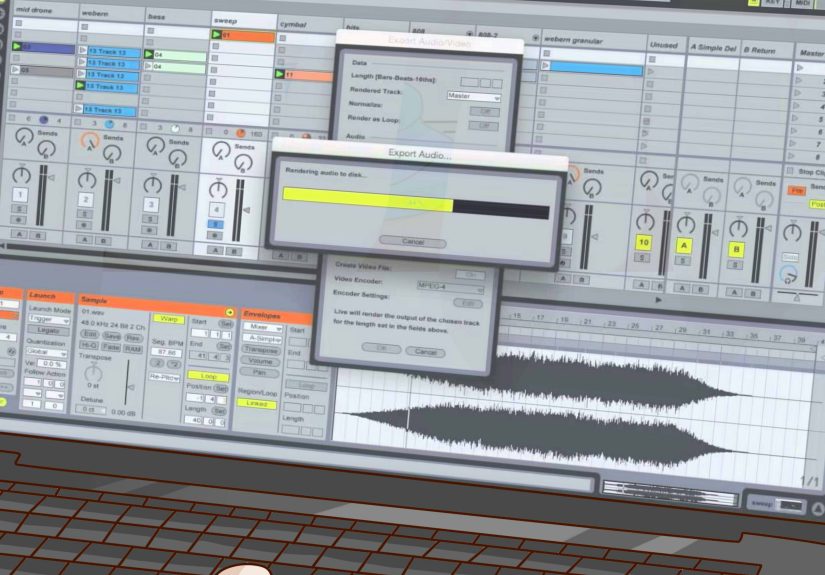
Step 9: Export the DJ Mix Set
When the arrangement sounds right, select the full length of the mix in Arrangement View. Use Ableton’s export function to render the master output. For high-quality archiving, export a WAV or AIFF file at the project’s sample rate. For uploading or sharing, you can later convert to MP3 or AAC using a reliable encoder.
Before publishing, listen to the exported file on several systems: studio monitors, headphones, laptop speakers, car speakers, and earbuds. This reveals problems that one listening setup may hide. If the kick disappears on earbuds or the bass shakes the car like it owes money, go back and adjust.
Step 10: Prepare the Mix for Publishing
If you plan to upload your DJ mix, prepare a tracklist with artist names, song titles, remix names, and labels where appropriate. Make sure you have the rights or permissions required for your intended platform. Some platforms are designed for DJ mixes, while others may flag copyrighted music automatically. A great mix deserves a smooth release, not a surprise copyright wrestling match.
Write a Strong Mix Description
Your description should include the style, mood, BPM range, and best listening context. For example: “A 60-minute melodic house mix built for late-night driving, warm-up sets, and people who dramatically stare out windows.” Add relevant keywords naturally, such as Ableton Live DJ mix, melodic house mix, techno DJ set, live mix, studio DJ set, and electronic music mix.
Common Mistakes to Avoid
Over-Warping Every Track
Too many warp markers can damage the natural feel of a song. Use enough markers to keep tracks aligned, but do not turn every waveform into a spreadsheet.
Mixing Tracks with Clashing Keys
Key clashes are not always forbidden, but they can sound messy when melodies overlap. If two tracks fight harmonically, use shorter transitions or mix during drum-only sections.
Leaving Both Basslines On
This is the classic beginner mistake. Two kicks and two basslines rarely become twice as powerful. Usually, they become one giant swamp wearing headphones.
Using Too Many Effects
Effects should add excitement, not cover weak transitions. If every transition has reverb, delay, filter sweeps, white noise, and beat repeat, the listener may need a small vacation.
Ignoring the Full Listening Experience
A DJ mix is more than transitions. Pacing matters. Energy matters. Emotional contrast matters. The best sets feel intentional from first bar to last fade.
Practical Experience: Lessons From Building DJ Mixes in Ableton Live
After making DJ mixes in Ableton Live, one of the first lessons you learn is that preparation feels boring until it saves the entire project. Warping tracks carefully, naming audio lanes, color-coding sections, and setting markers may not feel glamorous, but neither does spending 40 minutes wondering why Track 7 sounds like it is slowly escaping the beat grid. A clean setup gives you more room to be creative later.
Another useful experience is learning to trust long transitions only when the tracks truly support them. Some songs blend beautifully for two minutes because their drums, basslines, and keys complement each other. Other songs should shake hands quickly and leave. Forcing a long transition between two crowded tracks can make the mix feel heavy. The best approach is to test different overlap lengths. Sometimes 64 bars feels hypnotic. Sometimes 8 bars is perfect. Sometimes the correct answer is, “Absolutely not, these two tracks should never meet again.”
Ableton Live also teaches you to listen visually and listen emotionally. The waveform can show where drops, breakdowns, and phrase changes happen, but your ears decide whether the transition feels good. It is easy to make a mix that looks perfect on the grid but feels lifeless. Add small human choices: delay a fade slightly, let a vocal breathe, cut the bass one bar earlier, or create a pause before a big drop. These little decisions make the mix sound like a DJ performance, not a robot arranging rectangles.
One of the most practical habits is exporting rough versions. Render the mix, listen away from the screen, and take notes. When you are staring at Ableton, you may focus on technical details. When you listen while walking, driving, or cleaning your room, you notice the actual flow. Does the energy rise too soon? Does the middle section drag? Is one track much louder than the others? Does a transition make you smile? That kind of listening is brutally honest and incredibly helpful.
Another real-world tip: leave headroom and avoid chasing loudness too early. Many DJs try to make the mix sound huge while still arranging it. This can lead to clipping, harsh highs, and tired ears. Keep levels controlled while building the set. Once the arrangement is finished, then polish the final loudness. A balanced mix with clean dynamics usually sounds more professional than a crushed mix that is loud but exhausting.
Finally, remember that Ableton Live rewards experimentation. You can create mashups, add drum loops, extend intros, remove awkward sections, automate filters, build custom transitions, and turn a basic playlist into a crafted performance. But the strongest mixes still come from taste. Choose good tracks. Put them in an order that makes sense. Respect the groove. Let the music lead. Ableton gives you the tools; your ears make the decisions. And when in doubt, mute the extra bassline. Seriously. The bassline knows what it did.
Conclusion
Learning how to make a DJ mix set using Ableton Live gives you a powerful blend of DJ control and music-production precision. You can warp tracks, arrange them on a timeline, automate EQ and filters, build creative transitions, balance levels, and export a polished mix that sounds intentional from beginning to end. The workflow may feel detailed at first, but once you understand warping, phrase matching, bass swaps, and automation, Ableton becomes a playground for building professional DJ sets.
The secret is not using every tool in Ableton Live. The secret is using the right tools at the right moments. Keep your tracks organized, protect the low end, listen to the full journey, and make transitions that serve the music. Do that, and your DJ mix will sound less like a playlist with anxiety and more like a real set with direction, emotion, and groove.
Note: This article is written for educational and web publishing purposes. Always use legally obtained music and check platform rules before uploading or monetizing a DJ mix.