
Table of Contents >> Show >> Hide
- Why This Dollar Tree Wreath Idea Works So Well
- What to Buy at Dollar Tree
- How to Make a Scarecrow Face Wreath Out of Dollar Tree Items
- Easy Design Variations to Try
- Common Mistakes to Avoid
- How to Make It Look More Expensive Than It Is
- Real-World Crafting Experiences and Lessons From This Project
- Conclusion
- SEO Tags
If your fall door decor budget says “pumpkin spice dreams” but your wallet says “absolutely not,” a scarecrow face wreath made from Dollar Tree items is the kind of craft that saves the season. It looks cheerful, cozy, and handmade in the best way, not in the “my glue gun and I had a disagreement” way. Best of all, this project is flexible. You can make it rustic, cute, farmhouse, colorful, or wonderfully over-the-top with bows and leaves that practically announce pumpkin season from the curb.
The beauty of this DIY is that you do not need fancy floral design skills or a craft room that looks like a boutique exploded. A simple wire wreath form, ribbon or mesh, raffia, a few basic embellishments, and a homemade face are enough to create a wreath that feels custom without acting expensive. Whether you want a front-door statement piece, a wall hanging for your entryway, or a fun craft night project, this tutorial walks you through the whole process in a realistic, beginner-friendly way.
Why This Dollar Tree Wreath Idea Works So Well
A scarecrow face wreath is one of those rare fall crafts that checks every box. It is seasonal without being tied to one holiday, playful without looking childish, and budget-friendly without screaming, “I was built in the seasonal aisle next to plastic acorns.” The face gives your wreath personality, while the wreath base adds volume and texture. That combination makes it more eye-catching than a flat sign but easier to build than a full character wreath with complicated layers.
Dollar Tree is especially useful for a project like this because the store often carries the exact categories you need for wreath making: wire forms, ribbon, deco mesh, chenille stems, glue sticks, faux florals, seasonal signs, and basic craft supplies. That means you can build the whole design around a few inexpensive pieces and still leave room to customize colors and details.
What to Buy at Dollar Tree
Here is a smart shopping list for a scarecrow face wreath out of Dollar Tree items. You do not need every single option, but having choices helps when your store has one orange ribbon left and it is somehow glitter camouflage.
Basic Supplies
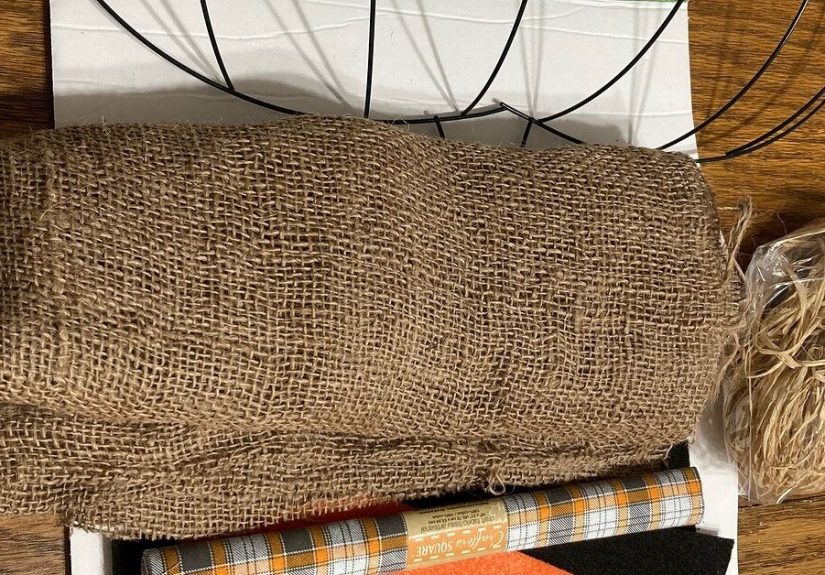
- 1 wire wreath form
- 2 to 4 rolls of deco mesh, burlap ribbon, or wide fall ribbon
- 1 pack of chenille stems or floral wire
- Hot glue sticks and glue gun
- Scissors or wire cutters
For the Scarecrow Face
- A round sign, wood cutout, foam circle, or sturdy cardboard base
- Tan, beige, or cream craft paper, felt, or paint for the face
- Black buttons, googly eyes, felt circles, or painted eyes
- Orange felt, paper, or foam for the nose
- Brown marker or paint for the smile and stitched details
For the Hat and Hair
- Burlap ribbon, brown felt, or a small straw-style hat if you find one
- Raffia, jute, or shredded paper filler for hair
- Sunflowers, leaves, mini pumpkins, berries, or a bow for trim
If your Dollar Tree has limited fall stock, do not panic. This wreath is forgiving. A mesh wreath base with a handmade face in the center still reads “scarecrow” the moment you add raffia hair and a tiny hat.
How to Make a Scarecrow Face Wreath Out of Dollar Tree Items
Step 1: Build the Wreath Base
Start with your wire wreath form. If you want a fuller, fluffier look, use deco mesh. If you want a rustic look, use burlap ribbon or wide fall-pattern ribbon. Cut your mesh or ribbon into even sections, then attach each section to the wire form with chenille stems or floral wire. Twist tightly and space the bundles evenly around the form so the wreath looks balanced from all sides.
For beginners, the easiest method is the pinch-and-twist approach. Gather the center of each strip, pinch it, set it against the form, and secure it. Repeat all the way around the outer ring, then fill the inner ring. Fluff the loops or ruffles as you go. You are aiming for soft volume, not military precision. Wreaths actually look better when they have a little movement and texture.
A good fall color mix includes orange, tan, brown, mustard, cream, and touches of green. Plaid ribbon also looks fantastic here, especially if you want a cozy porch look instead of a bright craft-store look.
Step 2: Make the Scarecrow Face
Next, create the face that will sit in the center of the wreath. Use a round sign, lightweight wood circle, or a sturdy cardboard circle covered with tan paper or fabric. Keep it light enough that the wreath can support it without sagging.
Draw or glue on simple features:
- Two round eyes, either painted, cut from felt, or made with buttons
- A triangle nose in orange or mustard
- Rosy cheeks using pink paper, chalk, or paint
- A curved smile with little stitched marks on the corners
The trick is to keep the face friendly and slightly whimsical. Think “happy harvest greeter,” not “haunted corn maze employee working overtime.” If you like a more farmhouse look, keep the face minimal with painted eyes and a stitched smile. If you want something cuter, add oversized cheeks, lashes, or a tiny patch detail.
Step 3: Create the Hat
A scarecrow needs a hat. Otherwise, you just made a suspiciously cheerful circle. You can make the hat several ways using Dollar Tree materials. The easiest method is to cut a trapezoid shape from brown felt, cardstock, or thin foam for the top, then add a long rectangle for the brim. Glue the pieces together and decorate the band with ribbon, twine, or a faux sunflower.
If you find a small straw hat in the seasonal aisle, even better. Trim it down if needed and glue it to the top of the face or slightly behind the face so it overlaps the wreath. A slightly crooked hat often looks more charming than a perfectly centered one.
Step 4: Add the Hair
Raffia is the secret sauce. It instantly gives the face that classic scarecrow texture. Bundle small sections of raffia and glue or wire them behind the face on both sides. Let it stick out like messy straw hair. You can keep it neat and symmetrical, or go delightfully windblown. Either works.
If raffia is unavailable, use jute twine strands, shredded kraft paper, or even narrow strips of burlap ribbon teased apart for a straw-like effect. Layer the hair before attaching the face to the wreath so you can hide the glue points more easily.
Step 5: Attach the Face to the Wreath
Place the finished face in the center of the wreath and test the position before securing it. Once it looks balanced, attach it with floral wire threaded through the back of the face base and around the wire form. Hot glue can help hold pieces in place, but wire should do the heavy lifting whenever possible.
This is especially important if you plan to hang the wreath on a front door that gets opened and closed often. Door slams are the natural enemy of any craft held together by optimism alone.
Step 6: Add Embellishments
Now for the fun part. Tuck in faux leaves, berry stems, mini pumpkins, sunflowers, or ribbon tails around the hat and lower half of the wreath. You can also add a bow under the face or off to one side of the hat. This extra layer makes the whole wreath look more finished and less like the scarecrow is floating in an orange cloud.
Try one of these combinations:
- Classic rustic: burlap ribbon, raffia, sunflower, and plaid bow
- Soft farmhouse: cream mesh, muted orange ribbon, eucalyptus, and a simple twine bow
- Bright and playful: orange mesh, polka-dot ribbon, big cheeks, and a striped hat band
Step 7: Fluff, Adjust, and Hang
Before hanging, fluff the mesh or ribbon so it fills any thin spots. Trim stray glue strings, tuck in loose wires, and check the back so nothing scratches your door. Add a ribbon loop or use the top of the wire frame to hang it. If the door is exposed to heavy rain or strong sun, consider placing the wreath on a covered porch or protected interior entry wall to help it last longer.
Easy Design Variations to Try
One of the best things about learning how to make a scarecrow face wreath out of Dollar Tree items is that once you understand the base structure, you can remix it endlessly.
Use a Pumpkin Wire Form
If your store has a pumpkin-shaped frame, you can place the face at the center and let the lower frame shape become the body of the wreath. This makes the whole project feel extra fall-forward.
Swap Mesh for Burlap
If deco mesh is not your style, a burlap-heavy wreath feels more natural and cozy. It also pairs beautifully with raffia hair and muted ribbons.
Add a Welcome Sign
Tuck a small wooden “Welcome” sign under the chin or across the bottom of the wreath. It gives the project a front-porch-ready look and makes the design feel more polished.
Go Neutral
Not every fall wreath needs to look like a bag of candy corn exploded. Cream, tan, rust, olive, and soft gold create a more elevated version that still feels festive.
Common Mistakes to Avoid
- Making the face too heavy: Lightweight materials are easier to secure and keep the wreath balanced.
- Using only glue for the center piece: Wire is much more dependable for major parts.
- Skipping the fluffing step: Mesh and ribbon need shaping or the wreath can look flat.
- Overcrowding the design: Pick one focal point, usually the face and hat, then let the surrounding details support it.
- Ignoring your door color: If your door is dark, use more cream, mustard, or lighter ribbon so the wreath stands out.
How to Make It Look More Expensive Than It Is
This is the part everyone loves. Yes, it came from Dollar Tree. No, it does not need to look like it. The easiest way to elevate the wreath is to limit the color palette, repeat textures, and mix matte materials with one or two statement accents. For example, pair burlap with soft plaid ribbon and one sunflower instead of twelve random floral picks. Or use neutral mesh with a crisp black stitched smile and a hat band that echoes your porch colors.
Another upgrade trick is layering. A wreath always looks richer when it has a base layer, a focal layer, and a detail layer. In this project, the base is the mesh or ribbon, the focal layer is the face and hat, and the detail layer is the bow, leaves, and florals. Even inexpensive supplies look intentional when they are arranged with that kind of structure.
Real-World Crafting Experiences and Lessons From This Project
One thing people quickly learn with a scarecrow face wreath is that the project almost always looks a little awkward halfway through. That is completely normal. Before the hair goes on, the face can look too plain. Before the hat is attached, it can look a little unfinished. Before the bow and leaves are tucked in, it may seem like the whole thing is missing personality. Then suddenly, usually during the final ten minutes, everything clicks and the wreath turns into something that looks cheerful and pulled together. So if the early stages feel underwhelming, keep going. Fall magic is often a late arrival.
Another common experience is discovering that Dollar Tree crafting rewards flexibility. Sometimes your store has the perfect orange mesh but no raffia. Sometimes you find a cute sign but not a single matching ribbon spool. That is why the best makers go in with a plan but not a rigid one. The strongest version of this project is not necessarily the one copied exactly from a photo. It is usually the one adapted to what was actually available, then balanced with smart color choices and a few simple textures. A neutral ribbon can rescue a loud sign. A homemade felt nose can rescue a missing embellishment. A sunflower can rescue almost anything, honestly.
Many crafters also realize that wreath making is less about perfection and more about editing. It is easy to keep adding things because the supplies are inexpensive and the seasonal aisle is persuasive. But the prettiest scarecrow wreaths usually have breathing room. A friendly face, textured hair, one hat accent, and a balanced bow often look better than a wreath packed with every leaf, pumpkin, berry stem, and glitter acorn in sight. When in doubt, step back from the wreath, hang it up temporarily, and look at it from a few feet away. Doors are viewed from a distance, not from six inches away while you are holding hot glue in one hand and questioning every life choice in the other.
There is also a practical lesson here: securing the center well matters more than people think. A wreath can look amazing on the table and then shift the second it is vertical. That usually happens when the face piece is attached with glue only, or when the embellishments are heavier on one side. A quick test hang before the final trim saves a lot of frustration. If the wreath leans, add a hidden wire anchor point or move a floral pick to the lighter side. Small adjustments make a big difference.
Finally, this project tends to become the kind of craft people want to remake. Once you finish one scarecrow face wreath, you immediately start thinking of another version: a softer farmhouse one for the kitchen, a brighter one for the front porch, maybe even a mini version for an apartment door. That is a sign of a good DIY. It is affordable, easy to personalize, and satisfying enough to repeat. And unlike some trendy crafts that require an engineering degree and three online specialty orders, this one is approachable. You can make it with basic supplies, a little patience, and the willingness to let a scarecrow have fabulous hair.
Conclusion
Learning how to make a scarecrow face wreath out of Dollar Tree items is a great way to create custom fall decor without spending a fortune. With a simple wreath form, budget-friendly ribbon or mesh, a lightweight face, raffia hair, and a few seasonal accents, you can build a door decoration that feels warm, welcoming, and genuinely handmade. The finished look can be rustic, cute, farmhouse-inspired, or bold depending on your color choices and embellishments, which makes this one of the most versatile fall wreath ideas around.
The best part is that this project is beginner-friendly but still creative enough to feel special. You do not need expensive materials or advanced skills. You just need a solid base, a little texture, and enough fall spirit to give your scarecrow some character. Once it is hanging on your door, do not be surprised if neighbors ask where you bought it. You can smile proudly and say, “The seasonal aisle and I collaborated.”


