Table of Contents >> Show >> Hide
- What Is a Ceramic Photo for a Headstone?
- The Two Best Ways to Make Ceramic Photos for Headstones
- What You Need Before You Start
- Step-by-Step: How to Make Ceramic Photos for Headstones
- Step 1: Check the cemetery rules first
- Step 2: Choose the right photo
- Step 3: Scan and restore the image
- Step 4: Pick the shape and size
- Step 5: Choose a proper ceramic surface
- Step 6: Create the image transfer
- Step 7: Apply the decal to the plaque
- Step 8: Dry and fire the ceramic photo
- Step 9: Inspect the finished plaque
- Step 10: Install it the right way
- Common Mistakes to Avoid
- Is It Better to DIY or Order One?
- How to Make the Finished Memorial Look More Elegant
- Care Tips After Installation
- Final Thoughts
- Experiences Related to Making Ceramic Photos for Headstones
- SEO Tags
Note: Cemetery rules vary, and some locations restrict portrait plaques, sizes, frames, or installation methods. Always get approval before ordering materials or mounting anything to a headstone.
Some projects are fun because they let you show off your creativity. This one is different. Learning how to make ceramic photos for headstones is about creating something that can last outdoors for years while honoring someone people still miss every day. In other words, no pressure. But the good news is that the process is very doable when you understand what actually works.
The first thing to know is this: a true headstone photo is usually not a regular paper print laminated and glued to stone. The durable version is typically a kiln-fired ceramic or porcelain memorial photo made for outdoor use. That matters because headstones face sun, rain, snow, heat, cold, and the occasional overenthusiastic lawn crew. If the image is not made correctly, it can fade, peel, crack, or simply give up on life before anyone is ready.
So, if you want a memorial portrait that holds up, you need the right image, the right ceramic surface, the right production method, and the right installation. Below is a practical, respectful, and no-nonsense guide to making a ceramic photo for a headstone without turning a meaningful tribute into a very expensive craft lesson.
What Is a Ceramic Photo for a Headstone?
A ceramic photo for a headstone is a portrait image transferred onto a ceramic or porcelain plaque and then fired in a kiln so the image becomes part of the finished surface. You may also see these called porcelain memorial photos, grave marker photo plaques, ceramic portrait medallions, or headstone picture plaques.
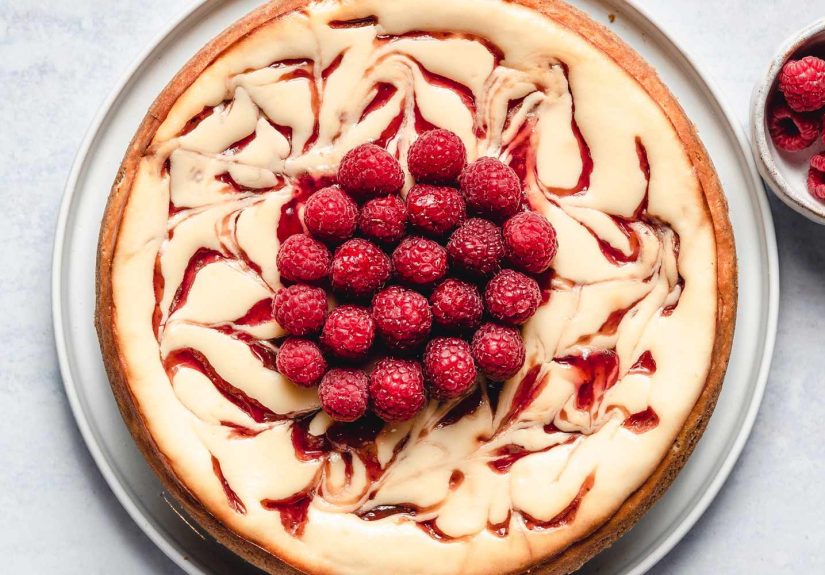
These plaques are commonly made in oval, rectangle, square, heart, or round shapes, though the oval style is the classic choice for memorials. Many families prefer them because they add a human touch to granite, bronze, or marble memorials. A name and date tell the facts. A photo tells the story.
The Two Best Ways to Make Ceramic Photos for Headstones
1. Design it yourself and outsource the firing
This is the most realistic option for most people. You prepare the photo, choose the shape and size, approve the layout, and send it to a memorial photo company that prints and kiln-fires the plaque. You still “make” the memorial in the creative sense, but professionals handle the technical part that requires specialized ceramic toners, decals, and firing schedules.
2. Make it fully yourself in a ceramic studio
This route is for people who already have access to ceramic supplies, decal materials, and a kiln. It is absolutely possible, but it is not the ideal time to learn every pottery skill from scratch while emotionally exhausted and covered in decal backing paper. If you are new, the smart move is usually a hybrid approach: do the photo editing yourself, then let a memorial printer fire the plaque.
What You Need Before You Start
- A high-quality original photo
- A scanner or a sharp digital copy
- Basic photo-editing software
- A ceramic or porcelain blank, preferably outdoor-rated
- Ceramic decal paper or access to digital ceramic printing
- A kiln, if you are firing it yourself
- Monument-safe adhesive or 3M VHB-style mounting tape for installation
- Rubbing alcohol, lint-free cloths, measuring tools, and painter’s tape for positioning
Step-by-Step: How to Make Ceramic Photos for Headstones
Step 1: Check the cemetery rules first
Start here, not after you have fallen in love with a beautiful oval portrait. Some cemeteries allow ceramic plaques freely. Others restrict the size, thickness, shape, material, frame style, or installation method. A few do not allow photo plaques at all. Ask whether ceramic or porcelain memorial photos are permitted, whether a recessed setting is preferred, and whether the cemetery or monument company must do the installation.
This step may not be glamorous, but it prevents the heartbreak of creating a tribute that cannot be used. Administrative boringness saves emotional chaos. That is a trade worth making.
Step 2: Choose the right photo
The best memorial photos are usually simple, clear, and emotionally warm. Choose an image where the face is well lit, in focus, and not hidden behind sunglasses, deep shadows, or a suspiciously large fish. A close-up or chest-up portrait often works better than a full-body image because headstone plaques are usually small.
Look for a photo that captures the person the way family remembers them. Sometimes that is a formal portrait. Sometimes it is a candid photo with a gentle smile. The most important thing is recognition and emotional truth, not fashion-magazine perfection.
Step 3: Scan and restore the image
If you are working from an old printed photo, scan it at a quality meant for printing, not just for texting your cousin. A 300 ppi print-ready file is a strong baseline for sharp results. If the photo is faded, scratched, or dusty, clean it up digitally before you move on.
At this stage, you can also:
- Adjust brightness and contrast
- Correct yellowing or color cast
- Remove dust spots and scratches
- Simplify a distracting background
- Crop tightly around the face
Do not over-edit the image until the person looks like they were airbrushed into another dimension. Memorial portraits should feel natural. The goal is “clear and flattering,” not “mysterious soap opera resurrection.”
Step 4: Pick the shape and size
The most popular shape for a ceramic headstone photo is the oval. It feels classic, balanced, and easy to fit on many granite markers. Rectangles and squares work well for more modern memorials, while circles and hearts are more decorative.
Size should match the memorial, not overpower it. A plaque that looks elegant on a large upright monument can feel crowded on a small flat marker. Before you order or make anything, measure the exact area where the portrait will go and leave breathing room around inscriptions and design elements.
Step 5: Choose a proper ceramic surface
For outdoor use, look for a glazed ceramic or vitrified porcelain blank that is meant for memorial or exterior applications. This is important because the surface and firing compatibility affect image adhesion, weather resistance, and long-term color stability.
In plain English: not every ceramic tile from the craft aisle is qualified for a lifetime in a cemetery. Headstone photos need outdoor-grade materials.
Step 6: Create the image transfer
Now we get into the technical heart of the project. There are two common ways this is done:
Option A: Professional digital ceramic printing
A memorial printer uses specialized ceramic toners or ceramic inks to place the image onto a porcelain plaque or decal, then fires it in a kiln. This is the easiest route for most families because the printer handles the finicky parts, including color correction and compatibility with the ceramic surface.
Option B: Ceramic decal method
If you are doing it yourself, you will usually print the image onto ceramic decal paper, then transfer that decal to a pre-glazed ceramic or porcelain plaque. This method requires careful handling because wrinkles, trapped air, and poor drying can affect the final result.
Step 7: Apply the decal to the plaque
Once your decal is ready, soak it according to the product instructions, slide it onto the glazed ceramic surface, and position it carefully. Use a soft rubber rib or squeegee to push out water and air bubbles from the center outward. Then blot away extra moisture with a lint-free cloth.
This is the stage where patience earns its paycheck. A decal slapped on in a rush can trap bubbles, misalign the face, or wrinkle near the edges. Slow, steady, and annoyingly careful is the correct mood here.
Step 8: Dry and fire the ceramic photo
Allow the applied decal to dry thoroughly before firing. Ceramic decals are generally fired slowly and with ventilation, and the exact temperature depends on the decal type and substrate. For ceramic and porcelain applications, manufacturers often recommend a firing range around the mid-1300s to low-1400s Fahrenheit for overglaze decal work, though some systems vary and should always be test-fired first.
If that sentence made you want to back away slowly and let a pro handle it, that is a perfectly reasonable response. Kiln-fired memorial portraits are one of those things that sound simple until temperature curves enter the chat.
Step 9: Inspect the finished plaque
After cooling, inspect the plaque closely. Check for:
- Good detail in the eyes and facial features
- Even color and contrast
- No bubbling, silvering, or peeling at the edges
- No cracks or warping
- A clean, glossy, fully bonded surface
If the image looks weak, cloudy, or misfired, do not install it and hope for the best. A memorial plaque should feel finished, not “close enough if you squint.”
Step 10: Install it the right way
Once the ceramic memorial photo is ready, installation matters just as much as production. Clean the mounting area with rubbing alcohol and let it dry fully. Measure and mark the placement carefully. Depending on the product and monument surface, installation may use a high-bond mounting tape, monument-grade epoxy, silicone, or a recessed setting handled by a monument professional.
For flat, smooth surfaces, some memorial products use 3M VHB-style tape because it creates a strong bond without visible fasteners. In other cases, a stone-compatible epoxy or silicone seal is used. The best choice depends on the plaque, the monument material, the surface finish, and cemetery requirements. When in doubt, ask a monument installer. Headstones are not the place for mystery glue from the back of a junk drawer.
Common Mistakes to Avoid
Using the wrong kind of photo
A low-resolution image may look acceptable on your phone and disappointing on ceramic. Start with the best original you can find.
Skipping cemetery approval
Never assume a porcelain photo plaque is allowed just because you have seen one elsewhere.
Choosing indoor craft materials
Regular printable decals, scrapbook sealers, and decorative glues are not designed for long-term outdoor exposure on stone memorials.
Installing on a dirty or damp surface
Dust, moisture, wax residue, and polishing compounds can weaken adhesion.
Cleaning the memorial too aggressively later
After installation, avoid power washers, wire brushes, bleach, or harsh acids. Gentle cleaning with water and soft brushes is the safer approach for headstones and markers.
Is It Better to DIY or Order One?
For most people, the best answer is: DIY the design, not the firing. You can handle the meaningful part yourself by choosing the image, restoring it, cropping it, deciding on a shape, and approving the final portrait. Then let a memorial ceramics company produce the actual kiln-fired plaque.
Go fully DIY only if you already have ceramic experience and access to a kiln. Otherwise, the learning curve can be steep, and this is not a casual Saturday project like painting a flower pot and pretending it is artisanal. A memorial piece deserves reliability.
How to Make the Finished Memorial Look More Elegant
- Choose a background that is clean and uncluttered
- Use a classic oval for traditional stones
- Match black-and-white portraits with older monuments
- Use color only when the original photo reproduces well
- Leave enough space between the portrait and engraved text
- Consider a recessed mount for a seamless look
Sometimes the most beautiful memorial choices are the quiet ones. You do not need sparkle, chrome, and seventeen design flourishes. One strong portrait can do more than a whole parade of decorative extras.
Care Tips After Installation
Once the ceramic photo is installed, check it periodically for edge lifting, seal failure, or damage from weather or maintenance equipment. Clean the surrounding stone gently with water and a soft brush. Avoid harsh chemicals, abrasive tools, and pressure washing. If the plaque is framed or sealed, inspect those materials too, because the weak point is often the mounting system rather than the ceramic image itself.
A well-made ceramic headstone photo can last a very long time, but “weatherproof” does not mean “invincible.” Even the toughest memorial still benefits from thoughtful care.
Final Thoughts
When people ask how to make ceramic photos for headstones, they are usually asking two questions at once. The practical one is, “How is this done?” The deeper one is, “How do I create something lasting enough for someone who mattered?”
The answer is a mix of craftsmanship and restraint. Use the clearest photo you can find. Prepare it carefully. Choose outdoor-grade ceramic or porcelain. Follow the correct firing process, or work with a professional who can. Install it with the right adhesive and the cemetery’s approval. And above all, keep the result simple, clear, and sincere.
A good memorial photo does not try too hard. It just quietly says, “This person was here, and they are still loved.” That is more than enough.
Experiences Related to Making Ceramic Photos for Headstones
One of the most common experiences families describe is how difficult it can be to choose the “right” picture. At first, that sounds like a simple design decision. In reality, it can become an emotional family meeting disguised as a photo-editing session. One person wants the formal church portrait. Another wants the fishing photo because “that’s how Dad really looked.” Someone else brings up an old black-and-white wedding picture that makes everybody cry within fourteen seconds. In many cases, the final choice is not the most glamorous image but the one that feels most familiar. That is an important lesson: a ceramic memorial photo works best when it reflects memory, not perfection.
Another common experience comes from people who try the project themselves with craft-store materials before they understand the difference between decorative ceramics and true memorial ceramics. They print a beautiful image, mount it carefully, step back proudly, and for a brief moment it looks fantastic. Then the weather happens. Sun fades the print, moisture sneaks in, and edges begin lifting like the project has developed personal doubts. Families who have gone through this often say the same thing afterward: they wish they had known earlier that kiln-fired porcelain is what gives cemetery portraits their staying power. That hard-earned lesson often pushes people toward professional firing or monument-grade materials the second time around.
Monument companies and cemetery workers also see a pattern. The ceramic image itself often holds up surprisingly well, while poor installation causes the trouble. A plaque mounted on a dusty surface, a slightly damp stone, or a poorly chosen adhesive may loosen long before the portrait fails. Professionals talk a lot about preparation because the boring steps are the steps that save the job: cleaning thoroughly, measuring carefully, checking placement twice, and using the correct tape, epoxy, silicone, or recessed mount. It is not dramatic. It is just effective. In memorial work, effective beats exciting every time.
People with pottery or kiln experience often describe the process with a mix of fascination and humility. They know ceramic decals can produce beautiful results, but they also know how much depends on testing. One firing may come out slightly too cool and leave the image underdeveloped. Another may run too hot and shift the tones. A hobby potter might spend an entire weekend doing test tiles, venting the kiln, adjusting the soak, and whispering tense little speeches to the controller like it can be emotionally persuaded. Their experience is valuable because it reminds us that ceramic memorial work is a craft. It is precise, technical, and worthy of patience.
Then there is the experience families remember years later: visiting the grave and seeing the face still there. That is the quiet payoff. The name is carved in stone, but the photo adds recognition. Children who were too young to remember can see a smile. Grandchildren can say, “So that’s what she looked like.” Spouses can bring flowers and feel, for one small moment, that the memorial is more personal and less distant. That is why people go through the effort of making ceramic photos for headstones in the first place. They are not just adding decoration. They are preserving connection in a form sturdy enough to stand in the weather.