
Table of Contents >> Show >> Hide
- What You Need to Make Homemade Chocolate
- How to Make Homemade Chocolate: 12 Steps
- Step 1: Set up a dry workspace
- Step 2: Prep your mold and ingredients
- Step 3: Melt the cocoa butter gently
- Step 4: Add the cocoa powder
- Step 5: Stir in sugar, salt, and optional milk powder
- Step 6: Add flavor without adding water
- Step 7: Smooth the mixture
- Step 8: Decide whether to temper
- Step 9: Temper the chocolate
- Step 10: Fill the molds
- Step 11: Let it set properly
- Step 12: Store and enjoy
- Tips for Better Homemade Chocolate
- Common Homemade Chocolate Mistakes
- Flavor Ideas for Homemade Chocolate
- Is Homemade Chocolate Worth It?
- What Making Homemade Chocolate Feels Like in Real Life
- Conclusion
- SEO Tags
If you have ever looked at a chocolate bar and thought, “How hard could it be?” the answer is: easier than building a spaceship, trickier than making toast, and absolutely worth trying at least once. Homemade chocolate is one of those kitchen projects that feels a little dramatic in the best way. You melt, stir, pour, wait, and suddenly you are the kind of person who casually says things like cocoa butter crystal structure while licking chocolate off a spatula.
The good news is that you do not need a factory, a cacao plantation, or a golden ticket. You can make homemade chocolate in a regular kitchen with food-grade cocoa butter, unsweetened cocoa powder, sugar, and a little patience. The better news? You can control the flavor, sweetness, texture, and add-ins. Want sea salt? Go for it. Toasted almonds? Great choice. Espresso powder? Now we are talking.
This guide walks you through how to make homemade chocolate in 12 steps, including ingredients, tempering tips, common mistakes, and simple ways to make your batch taste like it came from a very tiny but very ambitious chocolate shop.
What You Need to Make Homemade Chocolate
- 1 cup food-grade cocoa butter, chopped
- 3/4 cup unsweetened cocoa powder, sifted
- 1/3 to 1/2 cup powdered sugar, sifted
- 1/8 teaspoon fine sea salt
- 1 teaspoon vanilla powder or oil-based vanilla flavoring
- Optional: 2 to 3 tablespoons milk powder for a milk-chocolate-style bar
- Optional add-ins: chopped nuts, freeze-dried berries, orange zest, espresso powder, flaky salt
Equipment
- Heatproof bowl
- Double boiler or saucepan with a bowl that fits on top
- Silicone spatula or whisk
- Instant-read thermometer
- Chocolate mold, loaf pan, or parchment-lined container
- Fine-mesh sieve
A quick but important note: everything should be dry. Chocolate and water have a famously dramatic relationship. Even a small splash can make melted chocolate seize into a thick, grainy mess.
How to Make Homemade Chocolate: 12 Steps
Step 1: Set up a dry workspace
Before you melt anything, wipe down your tools and make sure your bowl, spatula, and mold are completely dry. Humidity and stray droplets are not your friends here. This is the culinary version of telling everyone to stay calm before the mission begins.
Step 2: Prep your mold and ingredients
Lightly polish your chocolate mold with a dry paper towel if you want a shinier finish. Chop the cocoa butter into small pieces so it melts evenly. Sift the cocoa powder and powdered sugar into separate bowls. Sifting may feel fussy, but it saves you from chasing lumps later like a detective in an apron.
Step 3: Melt the cocoa butter gently
Place the cocoa butter in a heatproof bowl over barely simmering water. Do not let the bowl touch the water. Stir occasionally until melted. You want gentle heat, not a volcanic event. Aim for about 115 to 120 degrees Fahrenheit if you plan to temper the chocolate later.
Step 4: Add the cocoa powder
Remove the bowl from heat and gradually whisk in the sifted cocoa powder. Add a little at a time and stir until smooth. The mixture should look glossy and smell like you have made excellent life choices.
Step 5: Stir in sugar, salt, and optional milk powder
Add the powdered sugar, sea salt, and milk powder if you are using it. Stir thoroughly. Powdered sugar works well because it dissolves more smoothly than granulated sugar in this kind of homemade mixture. Taste carefully with a clean spoon and adjust sweetness if needed.
Step 6: Add flavor without adding water
Mix in vanilla powder or an oil-based flavoring. Avoid water-based extracts unless you know exactly how your mixture will behave, because extra moisture can interfere with the texture. For extra personality, you can add a pinch of cinnamon, espresso powder, or orange zest.
Step 7: Smooth the mixture
If you want a silkier bar, pour the chocolate through a fine-mesh sieve into another dry bowl. This helps catch any stubborn bits of cocoa powder or sugar. Homemade chocolate will not usually be as ultra-refined as commercial bars, but you can still get a pleasantly smooth result.
Step 8: Decide whether to temper
You can pour the chocolate as-is and chill it for a rustic homemade treat, or you can temper it for a shinier finish and cleaner snap. Tempering is the process of controlling how cocoa butter crystals form. In practical terms, it helps your chocolate look glossier, set more neatly, and resist that pale streaky bloom that makes it look like it had a rough week.
Step 9: Temper the chocolate
For dark-style chocolate, cool the melted mixture to about 82 to 84 degrees Fahrenheit, stirring frequently, then gently rewarm it to about 88 to 90 degrees Fahrenheit. If you have a bit of already tempered chocolate on hand, you can use the seeding method by stirring in finely chopped chocolate during the cooling phase. If not, just stir patiently and monitor the temperature closely. This is the part where a thermometer earns its paycheck.
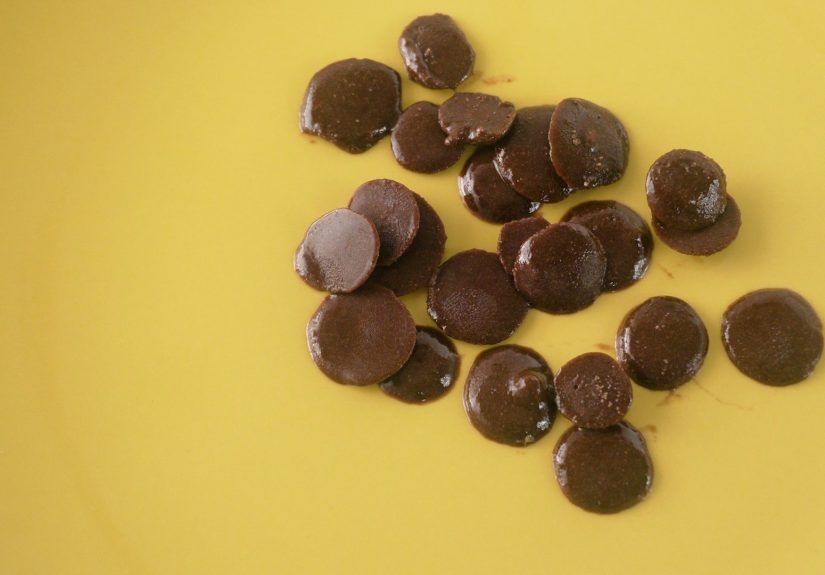
Step 10: Fill the molds
Pour the chocolate into your mold or lined container. Tap it lightly on the counter to release air bubbles. Sprinkle on any toppings right away, such as chopped pistachios, cacao nibs, flaky salt, or crushed freeze-dried raspberries. A little texture on top makes homemade chocolate look intentional and fancy, which is much nicer than “I dropped trail mix on it by accident.”
Step 11: Let it set properly
Leave the mold at cool room temperature if the chocolate is tempered. If your kitchen is warm, refrigerate it briefly just until firm, usually 10 to 15 minutes. Do not leave it in the fridge forever, or moisture and temperature swings can affect the finish. Once set, unmold carefully.
Step 12: Store and enjoy
Store homemade chocolate in an airtight container in a cool, dry place away from sunlight and strong odors. Chocolate absorbs smells more easily than most people realize, so maybe do not park it next to chopped onions unless you are inventing a very niche dessert trend. Properly stored, it should stay tasty for several weeks, though in many homes it mysteriously disappears much sooner.
Tips for Better Homemade Chocolate
Use good ingredients
The flavor of homemade chocolate depends heavily on the cocoa powder and cocoa butter you choose. A rich, high-quality cocoa powder gives you deeper flavor, while fresh cocoa butter helps create a smooth melt. Cheap ingredients can still work, but the difference is noticeable.
Keep the heat low
Chocolate burns more easily than people expect. Low, slow, and patient is the winning strategy. If the mixture smells scorched or tastes bitter in a burnt way, the batch is probably beyond saving.
Understand texture expectations
Commercial chocolate is conched and refined with specialized equipment that most home kitchens do not have. That means your homemade chocolate may be slightly more rustic on the tongue. That is normal. Think artisanal, not flawed.
Balance sweetness carefully
If you want a dark chocolate feel, stay closer to the lower end of the sugar range. If you are making chocolate for kids or for candy molds, add a little more. A tiny pinch of salt helps round out bitterness and makes the chocolate taste more complete.
Common Homemade Chocolate Mistakes
The chocolate turns grainy
This usually happens because of moisture, overheating, or poorly incorporated dry ingredients. Sift the powders, stir steadily, and keep water far away from the bowl.
The bar looks dull or streaky
That is often a tempering or storage issue. It may still taste fine, but it will not have the same glossy finish. Bloom is usually a quality problem, not a safety problem.
The chocolate is too bitter
Add a bit more powdered sugar next time, or use a cocoa powder with a smoother flavor profile. A little vanilla or milk powder can also soften the edge.
The bar is too soft
That can mean the chocolate was not tempered well, your cocoa butter ratio is off, or your kitchen is too warm. Chill it briefly, then store it in a cooler place.
Flavor Ideas for Homemade Chocolate
- Classic sea salt: Sprinkle flaky salt on top for contrast.
- Mocha bar: Add 1/2 teaspoon espresso powder.
- Orange dark chocolate: Stir in a little orange zest and top with candied peel.
- Nutty crunch: Add toasted almonds, hazelnuts, or pistachios.
- Berry bright: Crumble freeze-dried strawberries or raspberries over the mold.
- Warm spice: Add cinnamon or a pinch of cayenne for Mexican hot chocolate vibes.
Is Homemade Chocolate Worth It?
Yes, especially if you enjoy kitchen projects and like knowing exactly what goes into your food. Homemade chocolate lets you control sweetness, experiment with flavor, and skip ingredients you do not want. It also makes a thoughtful gift. A small box of homemade bars with toppings looks charming, tastes personal, and suggests that you are either very generous or dangerously good at hobbies.
It is also a useful skill if you love desserts. Once you understand how to make homemade chocolate, you can use it for bark, molded candies, chocolate-covered fruit, layered treats, truffles, and edible decorations. Even an imperfect batch can be chopped into cookies, melted over strawberries, or stirred into brownie batter. Chocolate, thankfully, is forgiving in spirit even when it is fussy in process.
What Making Homemade Chocolate Feels Like in Real Life
The first time most people make homemade chocolate, there is a very specific moment of doubt. It usually arrives somewhere between melting the cocoa butter and staring nervously at the thermometer, wondering whether two degrees really matter. Then the kitchen starts smelling incredible, the bowl turns glossy, and suddenly the whole project feels less like chemistry homework and more like edible magic.
One of the most common experiences is surprise at how hands-on chocolate can be. It is not difficult in the way laminated pastry is difficult, but it does ask for attention. You cannot wander off, answer six messages, reorganize a cabinet, and expect chocolate to patiently wait for you. It likes focus. It likes dry tools. It likes gentle heat. In return, it gives you a result that feels far more impressive than the ingredient list suggests.
Another real-life lesson is that the first batch may not look like a luxury store-bought bar, and that is completely fine. Maybe the surface is a little matte. Maybe the edges are uneven. Maybe you added pistachios with too much enthusiasm and now the bar looks like it joined a parade. None of that means it failed. In fact, that homemade look is often part of the charm. People are usually far more impressed by “I made this myself” than by a perfectly sharp corner.
Texture is another area where expectations shift once you try it. Many first-time makers expect the exact silky snap of a commercial chocolate bar, then realize that home methods produce something a little more rustic unless you have professional refining equipment. That discovery is not disappointing; it is actually liberating. You stop chasing factory perfection and start enjoying the rich, fresh flavor of chocolate made in your own kitchen. It becomes less about imitation and more about customization.
There is also the oddly satisfying ritual of troubleshooting. If a batch is too bitter, you know to raise the sugar slightly next time. If it is too soft, you improve the temper or adjust the cooling. If it blooms, you learn that appearance and flavor are not always the same thing. Homemade chocolate teaches you quickly, but not cruelly. Even the “mistakes” are often still delicious enough to chop into cookies, melt into hot milk, or eat in secret while pretending you are evaluating the results scientifically.
And then there is the part people do not always mention: homemade chocolate makes you feel resourceful. Once you know the process, you stop seeing chocolate as something mysterious that only professionals can handle. You start thinking in variations. What if you add orange zest? What if you make mini bars for gifts? What if you swirl in peanut butter powder or top it with crushed pretzels? Before long, one project turns into a whole lineup of ideas, and your kitchen starts to look like a tiny experimental candy studio.
In the end, the experience of making homemade chocolate is part flavor, part skill-building, and part pure kitchen joy. It smells amazing, rewards curiosity, and turns a few pantry ingredients into something that feels special. Even if your first batch is not glossy enough for a magazine cover, it is still chocolate you made with your own hands. That counts for a lot. Also, it usually disappears very fast, which is one of the clearest signs of success any recipe can hope for.
Conclusion
Learning how to make homemade chocolate is one of those kitchen skills that sounds fancy but becomes surprisingly approachable once you break it into steps. Start with quality cocoa butter and cocoa powder, keep your tools dry, control the temperature, and do not panic if your first batch looks a little handmade. That is because it is. And that is the whole point.
Once you get comfortable with the process, you can tweak the sweetness, play with flavors, and create chocolate bars that actually taste like something you wanted to eat, not just something you bought because it was near the checkout line. Homemade chocolate is part recipe, part craft, and part delicious science experiment. Happily, this is the kind of science that lets you eat the evidence.


