
Table of Contents >> Show >> Hide
- Why Maple Whipped Cream Belongs on Pumpkin Pie
- Ingredients
- Equipment You’ll Actually Use
- Step-by-Step: How To Make Pumpkin Pie with Maple Whipped Cream
- Maple Whipped Cream (5 Minutes, Big Glory)
- How to Tell When Pumpkin Pie Is Done (No Crystal Ball Needed)
- Troubleshooting: Fixes for the Usual Pumpkin Pie Drama
- Make-Ahead, Storage, and Food Safety
- Fun Variations (If You Want to Show Off Casually)
- Serving Suggestions
- Kitchen Stories and Real-Life Moments (The 500-Word “Experience” Section)
- Conclusion
Pumpkin pie is the kind of dessert that shows up once a year, acts like it owns the place, and then disappears
before you can figure out why your crust got soggy or why the top looks like the Grand Canyon. The good news:
a truly silky, richly spiced pumpkin pie with a crisp crust is totally doable at home
and the upgrade that makes people pause mid-bite is maple whipped cream.
This recipe leans on what reliable American test kitchens and baking authorities agree on: treat pumpkin pie like a
custard (because it is), bake it with intention (not vibes), and stop cooking it before it begs for mercy.
We’ll also make a maple whipped cream that tastes like fall got a promotion.
Why Maple Whipped Cream Belongs on Pumpkin Pie
Regular whipped cream is great. Maple whipped cream is regular whipped cream after it moved to a cabin, started
chopping its own firewood, and learned the mandolin. Maple syrup adds warm caramel notes that play beautifully with
cinnamon, ginger, and nutmegwithout turning the topping into “sugar cloud on sugar custard.”
Ingredients
For the crust (choose one)
- Option A (easy): 1 chilled, unbaked 9-inch deep-dish pie crust (store-bought)
-
Option B (homemade): 1 homemade 9-inch pie crust, chilled in the pan at least 30 minutes
(a flaky butter crust or a half-butter/half-shortening crust both work well)
Why deep-dish? Pumpkin filling is generous. A standard shell can overflow and cause the oven-floor smoke
show nobody asked for.
For the pumpkin filling
- 1 (15-ounce) can pumpkin purée (not pumpkin pie filling)
- 3 large eggs
- 1 cup evaporated milk (or 3/4 cup evaporated milk + 1/4 cup heavy cream for extra richness)
- 3/4 cup packed brown sugar (or 1/2 cup brown sugar + 1/4 cup white sugar for a cleaner sweetness)
- 1 teaspoon ground cinnamon
- 1/2 teaspoon ground ginger
- 1/4 teaspoon ground nutmeg
- 1/8 teaspoon ground cloves (or allspice)
- 1/2 teaspoon fine salt
- 1 teaspoon vanilla extract
- Optional smoothness boost: 2 tablespoons flour or 1 tablespoon cornstarch
- Optional bakery-style upgrade: 2–4 ounces cream cheese, softened (for a silkier custard)
- Optional warmth: 1/8 teaspoon freshly ground black pepper (tiny amount, big payoff)
For maple whipped cream
- 1 cup cold heavy cream
- 2–3 tablespoons pure maple syrup (start with 2; adjust to taste)
- 1/2 teaspoon vanilla extract
- Pinch of salt
- Optional “holds all day” stabilization: 2 tablespoons powdered sugar or 3 ounces cream cheese
Equipment You’ll Actually Use
- 9-inch deep-dish pie pan
- Sheet pan (for baking the pie onless mess, more even heat)
- Pie weights or dried beans (for par-baking)
- Whisk or (better) blender/food processor for extra-smooth filling
- Instant-read thermometer (optional, but makes doneness less of a guessing game)
Step-by-Step: How To Make Pumpkin Pie with Maple Whipped Cream
Step 1: Prep the crust (a little pre-bake goes a long way)
- Place a rack in the lower third of the oven and preheat to 425°F.
-
Fit your crust into the pie pan. Crimp the edges. Chill the crust for 15–30 minutes while the oven heats.
(Cold fat = flakier crust. Warm fat = sadness.) -
Line the crust with parchment or foil and fill with pie weights (or dried beans). Bake for
12–15 minutes, until the edges look set. -
Remove the weights and lining. Bake 5 minutes more to dry the bottom slightly.
Leave the oven on.
This brief par-bake helps fight the classic pumpkin pie problem: crisp edge, soggy bottom. Think of it as giving
your crust a raincoat before pouring in the custard.
Step 2: Make the filling (smooth matters)
-
In a bowl (or blender), combine pumpkin purée, sugars, spices, salt, and optional flour/cornstarch. Mix until
uniform. - Add eggs and blend or whisk until smooth.
-
Add evaporated milk (and optional cream), plus vanilla. Blend briefly or whisk well.
If using cream cheese, blend until fully incorporated. -
For an ultra-silky finish, strain the filling through a fine-mesh sieve into a pitcher.
(This is optional, but it’s the “why does this taste like a fancy bakery?” move.)
Step 3: Fill and bake (hot start, gentle finish)
- Place the par-baked crust on a sheet pan.
- Pour in the filling. If you have extra, don’t overfillbake any leftovers as mini custards in ramekins.
-
Bake at 425°F for 15 minutes, then reduce oven temperature to 350°F
(keep the pie in the oven) and bake 35–50 minutes more. -
Start checking at the 35-minute mark. The edges should look set, and the center should jiggle like gelatin,
not ripple like soup. If using a thermometer, aim for roughly 170–175°F in the center,
and avoid pushing much past 180°F for a smoother custard. - If the crust edge is browning too fast, loosely cover the rim with foil or use a pie shield.
That high-then-lower temperature approach helps the crust set early while the custard finishes gently, which is
one of the best ways to reduce cracking and graininess. Translation: the pie stays creamy instead of turning into
sweet scrambled eggs.
Step 4: Cool completely (this is where patience pays rent)
- Cool the pie on a wire rack for at least 2 hours at room temperature.
- Then refrigerate until cold if you want clean slices (recommended), especially for serving later.
Cutting warm pumpkin pie is like trying to slice a cloud. A delicious cloud, surebut still a cloud.
Maple Whipped Cream (5 Minutes, Big Glory)
Classic maple whipped cream
- Chill a mixing bowl and whisk/beaters for 10 minutes (optional, but helpful).
- Add heavy cream, maple syrup, vanilla, and salt.
- Beat on medium-high until soft peaks form. Taste and add a touch more maple syrup if you want it sweeter.
- Beat briefly to reach medium peaksfluffy, spoonable, and stable enough to dollop.
Make-ahead options (because holidays are chaos)
-
Powdered sugar method: Add 2 tablespoons powdered sugar along with the maple syrup.
It helps the cream hold its shape a bit longer. -
Cream cheese method: Beat 3 ounces softened cream cheese until smooth, then slowly stream in
the heavy cream and beat until thickened; sweeten with maple syrup and vanilla. This version pipes beautifully
and won’t slump as quickly on a buffet table.
How to Tell When Pumpkin Pie Is Done (No Crystal Ball Needed)
- Jiggle test: Nudge the pie. The center should wobble slightly, while the outer ring looks set.
-
Thermometer test: If you use an instant-read thermometer, you’re looking for a custard set
in the 170–175°F neighborhood, keeping below about 180°F for best texture. -
Knife test: Insert a small knife near the center. It should come out mostly clean, but note:
stabbing your custard can sometimes encourage cracksso don’t treat it like a medieval duel.
Troubleshooting: Fixes for the Usual Pumpkin Pie Drama
“Why did my pumpkin pie crack?”
Almost always: overbaking. Custards crack when the proteins tighten too far and squeeze out
moisture. Pull the pie when the center still has a gentle wobble, and let carryover heat finish the job.
Baking too hot at the end can also contribute, which is why the lower finishing temperature matters.
“My crust is soggy on the bottom.”
- Par-bake the crust (even briefly).
- Bake on a preheated sheet pan to boost bottom heat.
- Don’t overbake the fillingovercooked custard can weep moisture and soak the crust.
“My filling tastes flat.”
- Add salt (yes, even in dessert). It’s the volume knob for flavor.
- Use fresh spices if yours have been living in the cabinet since a previous administration.
- Try a mix of brown and white sugar for both depth and clarity.
- A tiny pinch of black pepper can make the spices pop without tasting “peppery.”
“I used fresh pumpkin and it’s watery.”
Homemade pumpkin purée varies wildly in moisture. If you want to use it, strain it in cheesecloth for 30–60 minutes
(or simmer it briefly to evaporate water) before baking. For the most consistent resultsespecially if you’re making
this for guestscanned pumpkin purée is the dependable option.
Make-Ahead, Storage, and Food Safety
- Make-ahead: Pumpkin pie is often best the next day after chilling; flavors meld and slices cleanly.
-
Refrigeration: Because pumpkin pie is an egg-and-dairy custard, refrigerate it (and leftovers)
within about 2 hours. - Fridge life: Expect best quality within 3–4 days, though the crust softens over time.
-
Freezing: Freeze fully cooled pie (wrapped well) for longer storage. Thaw overnight in the fridge.
Texture stays surprisingly good, though the crust won’t be quite as crisp.
Fun Variations (If You Want to Show Off Casually)
- Bourbon pumpkin pie: Add 1–2 tablespoons bourbon to the filling.
- Gingersnap crust: Swap pastry for a gingersnap crumb crust for extra spice and crunch.
- Smoky edge: Add a pinch of smoked salt to the whipped cream (tiny pinchdon’t get brave).
- Extra-dark maple: Use dark/robust maple syrup for a stronger maple presence in the topping.
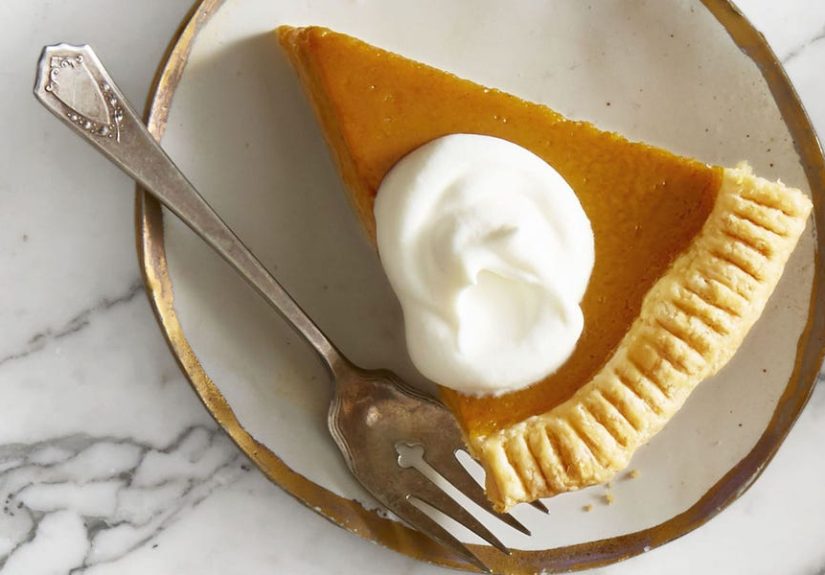
Serving Suggestions
Serve chilled or at cool room temperature with a generous dollop of maple whipped cream. If you want a “wow” moment,
dust the cream with cinnamon or freshly grated nutmeg. If you want a “people will talk about this” moment, drizzle
the plate with a teaspoon of maple syrup and sprinkle toasted pecans around the slice.
Kitchen Stories and Real-Life Moments (The 500-Word “Experience” Section)
Pumpkin pie has a special talent: it convinces otherwise rational adults that baking is “basically just mixing stuff”
right up until the moment something goes sideways. One of the most common scenes goes like this: you pull the pie out
of the oven, admire the puffed edges, and think, “I nailed it.” Then, ten minutes later, the center sinks and a crack
appears like the pie just remembered it has student loans. The twist is that a slight sink is normalcustard relaxes
as it cools. The crack, though, is your pie quietly saying, “You left me in there too long.”
The best “aha” moment for most home bakers is learning to trust the jiggle. It feels wrong at first. We’re taught that
done equals firm, and firm equals safe, and safe equals “I won’t be judged at Thanksgiving.” But custard pies finish
setting as they cool. If you wait until the center is completely firm in the oven, it’s already over the line, and
the texture can go from creamy to slightly grainy. The first time you pull a pie that still wobbles a little, you may
hover nearby like a worried lifeguard. Then it cools, sets up beautifully, and you wonder why nobody told you earlier
that pumpkin pie is basically a science project with better PR.
Maple whipped cream tends to become the “accidental star” experience. You make it thinking it’s a simple topping,
then someone takes a bite and asks what you did differently. It’s the maple syrup: not just sweetness, but a warm,
woodsy flavor that feels like fall in stereo. If you’ve ever had whipped cream that tastes like… air with ambition,
maple fixes that. The pinch of salt matters too. Salt doesn’t make it salty; it makes it interesting. It’s the
difference between “nice” and “wait, can I get more of that?”
Another real-life lesson: crust management is half the battle. The most confident pie-maker in the room is often the
one who quietly uses a pie shield. There’s no shame in it. Pie crust edges are thin, exposed, and dramaticthey brown
first and complain the loudest. A simple ring of foil saves you from the “perfect filling, charcoal rim” experience.
And baking the pie on a sheet pan isn’t just for spills; it helps the bottom crust cook more evenly, which can turn a
“soft-ish” base into something that actually crunches.
Finally, there’s the make-ahead discovery: pumpkin pie is a better teammate when it’s had a night in the fridge.
Chill time lets the spices round out, the filling firm up, and slicing become a clean, confident act instead of a
messy scoop situation. If you want to feel like a baking wizard, bake the pie the day before, whip the maple cream
right before serving, and act surprised when everyone asks for the recipe. (Optional, but highly recommended.)
Conclusion
The best pumpkin pie isn’t about complicated ingredientsit’s about smart technique: a quick par-bake for the crust,
a smooth custard filling, a gentle finish in the oven, and pulling the pie before it overcooks. Add maple whipped cream,
and you get a dessert that tastes classic but feels upgraded. Make it once, and you’ll start looking at plain whipped
cream like it forgot to do its homework.


