
Table of Contents >> Show >> Hide
- What Is an RCA Cable?
- Tools and Materials You Need
- Safety First: Read This Before You Solder
- How to Make RCA Cables: 11 Steps
- Step 1: Choose the Right Cable
- Step 2: Pick Good Solder-Type RCA Connectors
- Step 3: Measure and Cut the Cable
- Step 4: Slide on the Connector Shell and Heat Shrink
- Step 5: Strip the Outer Jacket
- Step 6: Prepare the Shield and Center Conductor
- Step 7: Tin the Wires
- Step 8: Solder the Center Conductor to the RCA Pin
- Step 9: Solder the Shield to the Ground Sleeve
- Step 10: Add Strain Relief and Close the Connector
- Step 11: Repeat, Test, and Label
- Common Mistakes When Making RCA Cables
- How to Improve Sound Quality with DIY RCA Cables
- When Should You Make RCA Cables Instead of Buying Them?
- Troubleshooting Your DIY RCA Cable
- Extra Experience: Lessons Learned from Making RCA Cables
- Conclusion
- SEO Tags
Making your own RCA cables may sound like the kind of project reserved for audio engineers, vintage stereo collectors, or that one uncle who owns three soldering irons “just in case.” In reality, learning how to make RCA cables is a practical, budget-friendly DIY skill that can help you build cleaner custom audio connections, repair damaged cables, and create the exact cable length your setup actually needs.
RCA cables are commonly used for analog audio connections between turntables, receivers, amplifiers, CD players, subwoofers, mixers, and many home theater components. A basic RCA cable uses a center conductor for the signal and an outer shield or ground connection to complete the circuit and help reduce interference. Because RCA is an unbalanced connection, good cable choice, careful soldering, and solid strain relief matter more than fancy marketing words printed on a package.
This guide walks you through how to make RCA cables in 11 clear steps, using real-world techniques that work for home audio, car audio, studio patching, and general AV projects. You do not need a luxury workshop. You need patience, a safe work area, the right parts, and the emotional strength to remember to slide the connector shell onto the cable before soldering. Everyone forgets once. Only legends admit it.
What Is an RCA Cable?
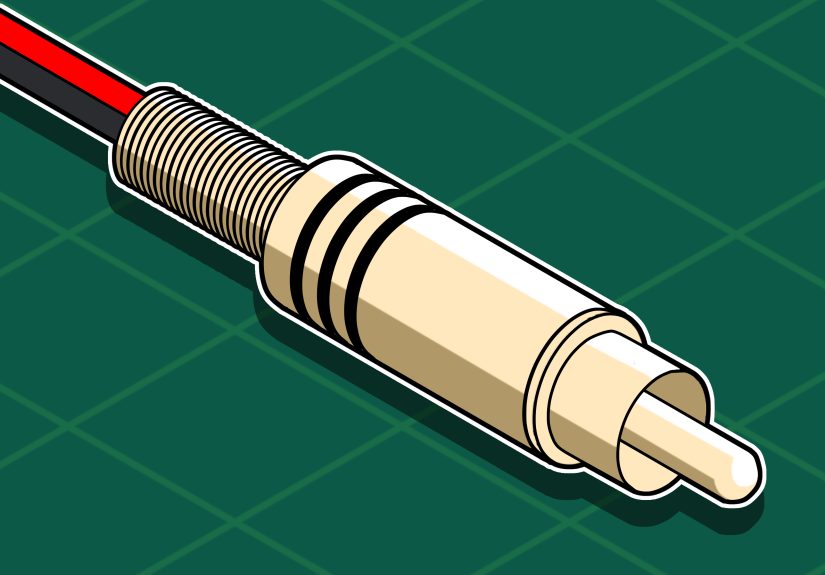
An RCA cable is a signal cable fitted with RCA plugs, also called phono plugs. The most common audio version has a center pin and an outer metal sleeve. The center pin carries the audio signal, while the outer sleeve connects to ground. Stereo audio usually requires two RCA cables: red for the right channel and white or black for the left channel.
For DIY RCA cables, shielded coaxial cable is often the simplest choice. It has one center conductor surrounded by insulation, then a braided or spiral shield, and finally an outer jacket. This construction is ideal for short to medium unbalanced audio runs because it keeps the signal path straightforward and gives the cable some protection from hum, radio-frequency interference, and nearby power cables.
Tools and Materials You Need
Before starting, gather your parts and tools. A clean setup makes the work easier and keeps your cable from looking like it was assembled during a mild earthquake.
Materials
- Shielded coaxial audio cable or quality instrument/interconnect cable
- Two solder-type RCA plugs for one mono cable, or four for a stereo pair
- Rosin-core electronics solder
- Heat-shrink tubing in small and medium sizes
- Optional colored rings, labels, or red/white heat shrink for channel marking
Tools
- Soldering iron with a clean tip
- Wire cutters
- Wire strippers or a sharp hobby knife
- Helping hands clamp or small vise
- Heat gun or lighter used carefully for heat shrink
- Multimeter with continuity mode
- Small pliers
- Safety glasses
Safety First: Read This Before You Solder
A soldering iron is hot enough to burn skin, melt plastic, and permanently redesign your table if you get careless. Work in a ventilated area, keep the iron in its stand, and avoid touching the metal tip. Use electronics solder, not plumbing solder. Plumbing solder and acid flux are not suitable for audio cables because they can corrode electrical connections over time.
If you are new to soldering, practice on scrap wire first. You want shiny, smooth solder joints, not dull blobs that look like tiny silver potatoes. Also, unplug audio equipment before connecting or testing your new cable. RCA plugs can cause loud pops or hum if inserted while equipment is powered on.
How to Make RCA Cables: 11 Steps
Step 1: Choose the Right Cable
Start with shielded audio cable. For most home audio RCA cables, a flexible coaxial cable works well. Look for cable with a stranded center conductor if the cable will be moved often, because stranded wire handles bending better than solid core. The shield can be braided, served, or foil-assisted. Braided shielding is durable and flexible, while foil can offer high coverage but may be less tolerant of repeated bending.
For analog RCA audio, avoid using random speaker wire. Speaker wire is not normally shielded and is intended for amplified speaker-level signals, not low-level line signals. RCA interconnects carry relatively small signals, so shielding helps prevent noise from becoming an unwanted guest in your music.
Step 2: Pick Good Solder-Type RCA Connectors
Choose RCA plugs designed for soldering. A decent connector should have a clear center solder tab or cup, a separate ground sleeve or clamp, and enough room inside the barrel for your cable diameter. Do not buy connectors so tiny that assembling them feels like performing surgery on a mosquito.
Gold plating is not magic, but it can resist corrosion. More important than plating is mechanical fit. The plug should grip the RCA jack firmly without requiring heroic force. A plug that is too loose can cause dropouts, hum, or crackling. A plug that is too tight can damage equipment jacks.
Step 3: Measure and Cut the Cable
Measure the cable length you need, then add a few extra inches for trimming and mistakes. Custom RCA cables are especially useful behind entertainment centers, where standard six-foot cables often become a spaghetti festival. Shorter cables can reduce clutter, but do not make them so short that they tug on your gear.
Use clean wire cutters to make a straight cut. If you are building a stereo pair, cut both cables to the same length. Matching length is not usually critical for short analog audio runs, but it looks professional and keeps cable management tidy.
Step 4: Slide on the Connector Shell and Heat Shrink
Before stripping anything, slide the RCA connector shell onto the cable, threaded side facing the correct direction. Then slide on any heat-shrink tubing you plan to use. This step deserves its own spotlight because forgetting it is the classic DIY cable mistake. Nothing builds character like finishing a perfect solder joint and realizing the metal barrel is still sitting on the table, silently judging you.
Move the shell and heat shrink several inches away from the soldering area so heat from the iron does not shrink the tubing too early.
Step 5: Strip the Outer Jacket
Carefully remove about 3/4 inch of the outer cable jacket from one end. Use wire strippers if they fit the cable. If using a hobby knife, score gently around the jacket without cutting into the shield. Bend the cable slightly at the score line, then pull off the jacket.
The goal is to expose the shield while keeping it intact. If you cut away half the shield strands, trim the end and try again. A damaged shield can still work, but a clean shield makes soldering easier and improves durability.
Step 6: Prepare the Shield and Center Conductor
Gather the shield strands and twist them into a neat wire. This twisted shield will connect to the ground side of the RCA plug. Next, strip a small amount of insulation from the center conductor, usually about 1/8 to 1/4 inch, depending on the connector.
Keep the center conductor and shield separated. If even one tiny shield strand touches the center pin after assembly, the cable may short out. This is where neatness matters. Audio cables do not care if your workbench is messy, but they absolutely care if signal and ground are accidentally hugging.
Step 7: Tin the Wires
Tinning means applying a small amount of solder to the exposed wire before making the final connection. Heat the center conductor with the soldering iron, then touch solder to the wire, not directly to the iron tip. The solder should flow into the strands and coat them lightly. Repeat this process for the twisted shield.
Do not overload the wires with solder. Too much solder can make the wire stiff and bulky, which may prevent the connector shell from closing properly. A good tinned wire looks silver and smooth, not like a melted disco ball.
Step 8: Solder the Center Conductor to the RCA Pin
Secure the RCA plug in helping hands or a small vise. Identify the center pin solder point. Place the tinned center conductor into the solder cup or against the center tab. Heat the connector tab and wire together, then apply a small amount of solder until it flows and forms a clean joint.
Remove the solder first, then remove the iron, and let the joint cool without movement. Moving the wire while the solder cools can create a weak, dull, unreliable joint. The finished connection should be shiny and secure.
Step 9: Solder the Shield to the Ground Sleeve
Now connect the twisted shield to the RCA plug’s ground tab or sleeve. This is usually the outer part of the connector. Heat the ground tab and shield together, then apply solder until the joint is solid. Keep the solder away from the center connection.
On a basic coaxial RCA cable, the shield is normally connected to ground at both ends. That completes the unbalanced signal path. Some specialized audio cable designs use directional or pseudo-balanced wiring methods, but for a beginner-friendly RCA cable, center conductor to center pin and shield to outer sleeve on both ends is the standard approach.
Step 10: Add Strain Relief and Close the Connector
Many RCA plugs include a small crimp tab or clamp that grips the cable jacket. Use small pliers to close it gently around the outer jacket, not around the bare shield. This strain relief prevents everyday pulling from stressing the solder joints.
Slide heat shrink into place if you are using it, then shrink it carefully. After that, screw or slide the connector shell into place. Make sure nothing twists inside while tightening the shell. If the connector becomes difficult to close, do not force it. Open it and check whether excess solder or stray shield strands are blocking the fit.
Step 11: Repeat, Test, and Label
Repeat the same process on the other end of the cable. For a stereo pair, make a second cable and label the channels. Traditionally, red means right channel and white or black means left channel.
Use a multimeter in continuity mode to test the finished cable. Touch one probe to the center pin on one end and the other probe to the center pin on the opposite end. The meter should beep or show low resistance. Then test outer sleeve to outer sleeve. That should also show continuity. Finally, test center pin to outer sleeve. That should not beep. If it does, you have a short, most likely from a stray shield strand or solder bridge.
Common Mistakes When Making RCA Cables
Using Unshielded Cable
Unshielded cable may work in some lucky situations, but it is more likely to pick up hum and interference. Use shielded cable for line-level RCA connections.
Melting the Insulation
Too much heat can melt the center insulation and cause the signal conductor to short against the shield. Use a hot, clean iron and work quickly. A weak iron can actually cause more heat damage because you must hold it on the joint too long.
Creating Cold Solder Joints
A cold joint often looks dull, grainy, or lumpy. It may work at first and fail later when moved. Reheat the joint properly until the solder flows smoothly.
Forgetting Strain Relief
Solder is not a mechanical support system. Without strain relief, normal cable movement can break the connection. Always use the connector clamp, heat shrink, or both.
Making the Cable Too Long
RCA cables are unbalanced, so longer runs are more vulnerable to noise. Keep cables as short as practical, especially near power cords, transformers, routers, and dimmer switches.
How to Improve Sound Quality with DIY RCA Cables
A DIY RCA cable will not transform a basic speaker into a concert hall or make a dusty receiver suddenly reveal “hidden jazz molecules.” However, a properly built cable can reduce noise, improve reliability, and clean up your system layout. Sound quality improvements usually come from better shielding, secure connectors, correct routing, and avoiding damaged or poorly made cables.
Route RCA cables away from AC power cords when possible. If they must cross, cross them at a right angle instead of running them side by side. Avoid sharp bends, crushed cables, and loose connectors. In many real systems, good cable management makes a bigger difference than expensive cable branding.
When Should You Make RCA Cables Instead of Buying Them?
Making RCA cables is worth it when you need custom lengths, want to repair a broken cable, enjoy DIY audio projects, or need stronger connectors than the bargain cables that came in a box. It is also useful for car audio installations, where custom routing can make the difference between a neat install and a dashboard full of cable chaos.
Buying premade cables may be better if you need many cables quickly, dislike soldering, or are working with very small connectors. There is no shame in buying cables. There is only shame in using a 25-foot cable for a 2-foot connection and calling the extra coil “decor.”
Troubleshooting Your DIY RCA Cable
No Sound
Check continuity from center pin to center pin. If there is no continuity, the center conductor may be broken or poorly soldered.
Hum or Buzz
Check the shield connection. A missing or weak ground connection can cause noise. Also move the cable away from power supplies and AC cords.
Crackling When Moved
This usually means a weak solder joint, poor strain relief, or a loose plug. Reopen the connector and inspect the joints.
Short Circuit
If the multimeter beeps between the center pin and outer sleeve, look for stray shield strands or solder bridges. Trim, re-insulate, and resolder as needed.
Extra Experience: Lessons Learned from Making RCA Cables
The first lesson of making RCA cables is simple: the cable always tells the truth. You can have expensive connectors, pretty heat shrink, and the confidence of a superhero walking into the final scene, but if the solder joint is poor or one tiny shield strand touches the center conductor, the multimeter will expose the whole drama immediately. That is why testing is not optional. It is the moment where your cable graduates from “arts and crafts” to “working audio equipment.”
One practical experience is that connector size matters more than beginners expect. Some RCA plugs look sleek online but are cramped inside. If your cable is too thick for the connector barrel, assembly becomes frustrating. You may end up trimming too much shield, bending the conductor sharply, or forcing the shell closed. A slightly larger solder-type RCA plug is often easier for beginners and produces a stronger final cable.
Another real-world tip is to prepare both ends before soldering, but finish one end completely before moving to the next. This helps you build rhythm without mixing up parts. For stereo pairs, place red parts on one side of your workbench and white or black parts on the other. It sounds overly organized until you accidentally make two left-channel cables and start questioning your life choices.
Heat control is also a skill that improves with practice. Many beginners hold the soldering iron on the joint too long because they are waiting for solder to melt. Usually, the real problem is a dirty iron tip, a connector that has not been preheated enough, or wire that was not tinned properly. Clean the iron tip, add a tiny bit of fresh solder to help heat transfer, and make the joint quickly. Good soldering is not about roasting the connector; it is about heating the right parts just long enough for solder to flow.
Labeling is another underrated habit. If you make several RCA cables, add small labels showing length, direction if using a special wiring style, and channel color. Behind a receiver, every cable eventually looks like a black snake attending a family reunion. Labels save time when troubleshooting, upgrading gear, or moving equipment.
Finally, do not chase myths. A well-made RCA cable should be electrically solid, shielded, flexible, and mechanically reliable. It does not need to cost a fortune or contain mysterious materials blessed by an audiophile wizard. Focus on good cable, clean soldering, proper grounding, strain relief, and careful testing. Those basics will take you much further than marketing hype.
Conclusion
Learning how to make RCA cables is a rewarding DIY audio skill because it combines simple electronics, hands-on craftsmanship, and immediate usefulness. Once you understand the basic wiringcenter conductor to center pin, shield to outer sleeveyou can build custom RCA cables for home stereo systems, subwoofers, car audio, vintage gear, and workshop projects.
The key is patience. Choose shielded cable, use solder-type RCA connectors, tin your wires, keep signal and ground separated, add strain relief, and test every cable with a multimeter before plugging it into your equipment. Do that, and your homemade RCA cable can be clean, quiet, durable, and exactly the length you need. Plus, you get the quiet satisfaction of pointing behind your audio rack and saying, “I made that.” Try not to say it too often. Your friends still want to enjoy the music.


