
Table of Contents >> Show >> Hide
- Why Ribbon Christmas Tree Ornaments Are the Holiday Craft That Always Works
- Supplies You Need for DIY Ribbon Christmas Tree Ornaments
- Method 1: Folded Ribbon Christmas Tree Ornament with Beads
- Method 2: Scrap Ribbon Christmas Tree Ornament
- Design Ideas for Ribbon Christmas Tree Ornaments
- Tips for Making Your Ornaments Look Professionally Finished
- Common Mistakes and How to Fix Them
- Creative Ways to Use Ribbon Christmas Tree Ornaments
- Real-Life Experience: What I Learned Making Ribbon Christmas Tree Ornaments
- Conclusion
Note: This original guide is based on real DIY ornament techniques, ribbon-craft best practices, and common holiday crafting methods used by American home-decor and craft publishers. It is written for web publication with clean HTML, natural SEO wording, and no copied tutorial text.
Why Ribbon Christmas Tree Ornaments Are the Holiday Craft That Always Works
Ribbon Christmas tree ornaments are the little black dress of holiday crafting: simple, affordable, flexible, and somehow appropriate at every Christmas gathering. You can make them rustic with burlap, elegant with satin, cozy with velvet, playful with polka dots, or classic with red-and-green plaid. Best of all, they do not require a craft room the size of Santa’s warehouse. A kitchen table, a spool of ribbon, a few beads, and a pair of scissors are enough to create ornaments that look thoughtful, festive, and impressively “I totally planned this weeks ago.”
This DIY project is especially popular because it works for almost every skill level. Beginners can make a basic folded ribbon Christmas tree ornament in under 20 minutes. Kids can help choose colors, arrange ribbon strips, or add beads. More experienced crafters can customize the shape with wired ribbon, charms, mini stars, bells, embroidery floss, wood slices, or personalized name tags. The final result is lightweight, shatterproof, and easy to hang on a Christmas tree, garland, wreath, gift bag, or holiday mantel display.
In this guide, you will learn how to make ribbon Christmas tree ornaments DIY style using two beginner-friendly methods: a folded ribbon-and-bead tree ornament and a scrap ribbon tree ornament. You will also find tips for choosing ribbon, preventing fraying, creating neat layers, fixing common mistakes, and styling the ornaments so they look charming instead of “my glue gun sneezed.”
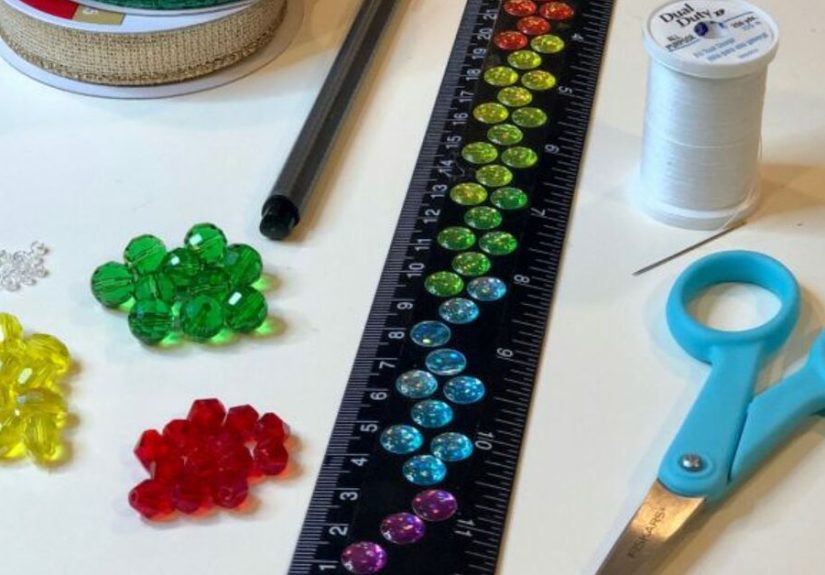
Supplies You Need for DIY Ribbon Christmas Tree Ornaments
Before you begin, gather your supplies. The exact materials depend on the style you want, but the basic list is easy to find at craft stores, dollar stores, fabric shops, or in that mysterious holiday box you swear you organized last January.
Basic Materials
- Ribbon in 3/8-inch to 5/8-inch width for small ornaments
- Wood beads, pearl beads, or plastic craft beads
- Twine, embroidery floss, thin cord, fishing line, or floral wire
- Scissors or fabric scissors
- Ruler or measuring tape
- Hot glue gun, craft glue, or fabric glue
- Small star charm, button, bow, or bead for the tree topper
- Optional: cinnamon stick, craft stick, wooden dowel, or chenille stem for the trunk
- Optional: mini bells, sequins, pom-poms, lace, felt, or tiny tags
Best Ribbon Types for Christmas Tree Ornaments
The best ribbon for ribbon Christmas tree ornaments depends on the look you want. Grosgrain ribbon is a reliable choice because it has a ribbed texture, holds folds well, and does not look too floppy. Satin ribbon gives a shiny, traditional holiday finish, but it can slide around more easily while you work. Velvet ribbon looks luxurious and cozy, especially for farmhouse or vintage Christmas decor. Wired ribbon is excellent for larger ornaments because it holds shape beautifully, but it can be bulky for tiny folded trees.
For a clean beginner project, choose ribbon between 3/8 inch and 5/8 inch wide. Wider ribbon can work, but it creates a chunkier ornament. Narrow ribbon makes delicate ornaments, but it requires more patience. If the ribbon frays, apply a tiny amount of clear-drying craft glue or fabric sealant to the cut edges. Avoid using an open flame to seal ribbon, especially when crafting with children or synthetic materials.
Method 1: Folded Ribbon Christmas Tree Ornament with Beads
This is the classic ribbon Christmas tree ornament DIY method: ribbon loops form the tree branches, while beads create spacing and structure. It looks polished, but the technique is surprisingly simple. Think of it as making a tiny Christmas tree sandwich, except the bread is ribbon and the filling is holiday cheer.
Step 1: Cut the Ribbon
Cut one long piece of ribbon about 18 to 24 inches long. The exact length depends on how tall and full you want the ornament. For a small tree, 18 inches is usually enough. For a fuller ornament, use 22 to 24 inches. If you are using thick velvet or wired ribbon, start shorter because bulky ribbon builds height quickly.
You can use one continuous piece of ribbon or several shorter strips. A continuous ribbon gives the tree a smooth zigzag shape, while separate strips create a layered branch effect. For beginners, the continuous ribbon method is easier because there are fewer pieces to control.
Step 2: Prepare the Hanging Cord
Cut a piece of twine, embroidery floss, or thin cord about 10 to 12 inches long. Tie a knot at one end, leaving a small tail. This knot will keep the first bead from sliding off. Thread one bead onto the cord and push it down to the knot. This bead becomes the base of the ornament and helps the tree hang straight.
Step 3: Fold the Ribbon into Tree Layers
Take one end of the ribbon and fold it back and forth in a gentle zigzag pattern, making each loop slightly smaller as you move upward. The bottom loops should be the widest, and the top loops should be the narrowest. This creates the triangular Christmas tree shape. Do not worry if the first attempt looks more like a festive accordion than a tree. Ribbon is forgiving, and Christmas is famous for second chances.
To keep the shape balanced, hold the ribbon folds together in your fingers and check the width from side to side. If one branch sticks out too far, adjust it before threading. The goal is not mathematical perfection. Handmade ornaments look best when they have personality, as long as the overall silhouette still reads as a Christmas tree.
Step 4: Thread the Ribbon and Beads
Using a large-eye needle, floral wire, or a stiffened cord end, thread through the center of the bottom ribbon fold. Add a bead above the ribbon fold, then fold the ribbon back in the opposite direction and thread through the next layer. Continue alternating ribbon folds and beads until you reach the top.
The beads act as spacers, keeping each ribbon branch visible instead of squished together. Wood beads give a Scandinavian or farmhouse look. Pearl beads make the ornament more elegant. Red, green, gold, or silver beads add traditional Christmas color. Clear beads can make the tree feel icy and wintery, which is perfect if your holiday theme is “North Pole but make it stylish.”
Step 5: Add the Tree Topper
Once the tree shape is complete, add a small star charm, button, bead, bow, or mini jingle bell to the top. Tie a knot above the topper to secure everything. Then tie the remaining cord into a hanging loop. Trim away extra cord if needed.
If the ornament feels loose, add a dot of fabric glue between the top bead and ribbon layer. If the ribbon slides too much, gently tighten the cord and reshape the loops with your fingers. Let any glue dry completely before hanging the ornament on the tree.
Method 2: Scrap Ribbon Christmas Tree Ornament
The scrap ribbon Christmas tree ornament is a perfect project for using leftover ribbon pieces from gift wrapping, wreath making, sewing, or previous holiday crafts. It is also one of the easiest DIY Christmas ornaments for kids because it uses simple tying instead of precise folding.
Step 1: Choose a Trunk
Use a cinnamon stick, craft stick, wooden dowel, twig, or sturdy chenille stem as the center trunk. A cinnamon stick adds a warm holiday scent, while a small twig gives a rustic woodland style. If you want a cleaner modern look, use a thin wooden dowel or craft stick painted brown, white, gold, or green.
Step 2: Cut Ribbon Strips
Cut ribbon strips in graduated lengths. Start with pieces around 6 inches long for the bottom branches, then cut slightly shorter pieces as you move upward. A good beginner set includes ribbon strips measuring about 6 inches, 5.5 inches, 5 inches, 4.5 inches, 4 inches, 3.5 inches, and 3 inches.
You can use matching ribbon for a clean designer look or mix patterns for a cheerful handmade style. Plaid, gingham, velvet, burlap, satin, lace, and metallic ribbon can all work together if the colors share a common holiday palette.
Step 3: Tie the Ribbon to the Trunk
Starting near the bottom of the trunk, tie the longest ribbon strip around the center. Pull the knot snug, but not so tight that the ribbon twists awkwardly. Continue tying shorter strips above it, stacking them close together to form a tree shape. Rotate the knots slightly as you go so the ornament looks full from the front.
Step 4: Trim the Shape
After all the ribbon strips are tied, trim the ends at a diagonal or cut small V-shaped notches for a dovetail finish. This simple step makes the ornament look neat and intentional. Without trimming, the tree may look a little like it woke up late for the Christmas parade.
Step 5: Add a Hanger and Topper
Glue or tie a loop of twine to the top of the trunk. Add a small star, bow, button, bead, or tiny pom-pom as the topper. Let the ornament dry fully before hanging. This style looks especially cute on farmhouse Christmas trees, rustic garlands, kids’ bedroom trees, or wrapped gifts.
Design Ideas for Ribbon Christmas Tree Ornaments
Once you know the basic method, you can customize your DIY ribbon Christmas tree ornaments in dozens of ways. The easiest way to make them look cohesive is to choose a color palette before you start. Classic red, green, and gold will always feel festive. White, silver, and blue create a frosty winter look. Cream, tan, wood beads, and burlap feel warm and rustic. Pink, mint, and metallic gold create a trendy pastel Christmas theme.
Farmhouse Ribbon Tree Ornament
Use buffalo plaid ribbon, natural wood beads, jute twine, and a small wooden star. This style pairs beautifully with flocked trees, galvanized metal accents, kraft paper gift wrap, and cozy neutral decor.
Elegant Ribbon and Pearl Ornament
Choose satin or velvet ribbon in deep green, burgundy, champagne, or navy. Add pearl beads between folds and finish with a gold charm. This version looks boutique-worthy and makes a lovely handmade gift for teachers, neighbors, coworkers, or holiday hosts.
Kid-Friendly Colorful Ornament
Use grosgrain ribbon in bright patterns such as candy canes, snowflakes, dots, stripes, or cartoon-style holiday prints. Replace hot glue with tacky craft glue where possible, and let kids help with ribbon choices, bead colors, and trimming under supervision.
Memory Ribbon Ornament
Use ribbon saved from a special gift, wedding favor, baby shower, school event, or family celebration. Add a small tag with the year. This turns a simple DIY ornament into a keepsake that feels personal every time it comes out of the Christmas storage box.
Tips for Making Your Ornaments Look Professionally Finished
The difference between a homemade ornament and a handmade ornament often comes down to small details. First, use sharp scissors. Dull scissors chew ribbon edges and make even expensive ribbon look tired. Second, measure your ribbon pieces instead of guessing. A tiny ruler can save your ornament from becoming a lopsided holiday shrub.
Third, keep your center line straight. Whether you are threading folded ribbon or tying strips to a trunk, the middle should stay aligned. If the center wanders, the tree will lean. A little lean is charming. A dramatic lean says the ornament may need coffee.
Fourth, choose lightweight embellishments. Ribbon ornaments are meant to hang easily, so avoid heavy charms unless the branch can support them. Fifth, make the hanging loop large enough to slip over a branch. A loop between 2 and 3 inches usually works well for most Christmas trees.
Finally, let glue dry before storing or wrapping the ornaments. Ribbon can shift if it is handled too soon. Place finished ornaments flat on parchment paper or a silicone craft mat while they dry. Once dry, store them in a small box with tissue paper so the loops do not get crushed.
Common Mistakes and How to Fix Them
The Ribbon Keeps Fraying
Use fabric scissors, cut at a diagonal, and seal the edge with a tiny amount of clear-drying craft glue or fray-prevention liquid. Grosgrain ribbon usually frays less than satin ribbon, making it a smart choice for beginners.
The Tree Shape Looks Uneven
Lay the ornament flat and gently pull each loop into place. If one loop is much longer than the others, trim it or refold it. For scrap ribbon trees, trim both sides after tying all strips so the finished outline forms a triangle.
The Ornament Is Too Floppy
Use ribbon with more structure, such as grosgrain or wired ribbon. You can also add more beads between layers to give the ornament height and spacing. If using scrap ribbon, choose a firmer trunk such as a cinnamon stick or wooden dowel.
The Glue Shows
Use less glue than you think you need. A tiny dot is usually enough. Place glue on the back side of the ornament when possible, then cover visible spots with a bead, bow, button, or small charm.
Creative Ways to Use Ribbon Christmas Tree Ornaments
These ornaments are not limited to Christmas trees. Tie one to a wrapped gift instead of a disposable bow. Hang several from a garland across the mantel. Add them to a wreath for extra texture. Use them as place cards by attaching a small name tag to each hanging loop. You can even make a matching set for a holiday craft night, classroom activity, church event, office party, or family ornament exchange.
For gift giving, bundle three ornaments together in a small kraft box with tissue paper. Add a handwritten note that says they are handmade. People love receiving ornaments with a story, especially when the story does not involve glitter permanently moving into their carpet.
Real-Life Experience: What I Learned Making Ribbon Christmas Tree Ornaments
The first time I made ribbon Christmas tree ornaments, I made the classic beginner mistake: I bought ribbon because it looked beautiful on the spool, not because it behaved well in real life. Satin ribbon in the store looked elegant, shiny, and calm. On the craft table, it acted like it had three cups of cocoa and nowhere to be. It slipped, twisted, and refused to hold its folds. The finished ornament was still cute, but it taught me an important lesson: ribbon personality matters. Grosgrain is dependable. Velvet is dramatic but gorgeous. Wired ribbon is helpful for bigger shapes. Satin is lovely, but it needs patience.
Another thing I learned is that the bead spacing makes a huge difference. Without beads, the folded ribbon layers can collapse into each other, especially if the ribbon is soft. With beads, the ornament suddenly looks intentional and dimensional. Natural wood beads create that warm handmade Christmas style that works with almost any tree. Pearl beads dress everything up. Gold beads make the ornament look like it belongs near twinkle lights and a plate of cookies. If you only change one thing from basic to better, add beads.
I also found that making several ornaments at once is easier than making one from start to finish. Cut all ribbon pieces first, then prepare all hanging cords, then thread or tie them assembly-line style. This keeps your measurements consistent and prevents the classic “where did I put the scissors?” holiday mystery. Spoiler: they are usually under the ribbon pile.
For crafting with kids, the scrap ribbon tree method is the winner. Children enjoy choosing ribbon colors and tying strips to the trunk, and the project does not require perfect folding. Adults can handle trimming and glue. The results are wonderfully individual: one child may make a neat red-and-green tree, while another creates a rainbow tree that looks like Christmas and a birthday party became best friends. Both belong on the tree.
For a more polished ornament set, I recommend choosing three coordinating ribbons and repeating them across every ornament. For example, use red plaid, cream grosgrain, and gold satin. Even if each ornament varies slightly, the repeated colors make the set look designed. This is especially useful when making ornaments as gifts or selling handmade holiday crafts at a small local market.
Storage matters too. Ribbon ornaments can flatten if tossed into a crowded decoration bin. I like placing them in a shallow box with tissue paper between layers. Do not pack heavy ornaments on top. When December returns, a quick fluff with your fingers brings the ribbon loops back to life. That little moment feels satisfying, like your past self left you a tiny festive present.
The best part of this DIY project is that it does not need to be perfect. In fact, a little variation makes each ornament feel warm and human. Store-bought ornaments can be beautiful, but handmade ribbon Christmas tree ornaments carry a different kind of charm. They show time, attention, and a bit of creative courage. Plus, they are lightweight, inexpensive, customizable, and nearly impossible to break. That is a holiday miracle hiding in a spool of ribbon.
Conclusion
Learning how to make ribbon Christmas tree ornaments DIY style is one of the easiest ways to add handmade beauty to your holiday decor. With a few ribbon scraps, beads, twine, and simple tools, you can create ornaments that look charming, personal, and festive without spending much money. The folded ribbon-and-bead version gives you a polished tree shape, while the scrap ribbon method is perfect for kids, beginners, and anyone who loves rustic holiday crafts.
Whether you prefer farmhouse plaid, elegant velvet, shiny satin, or cheerful patterned grosgrain, ribbon gives you endless room to customize. Make one ornament as a quick afternoon craft, or create a full set for gifts, garlands, wreaths, and Christmas tree decorating. The process is simple, the supplies are affordable, and the finished ornaments bring that cozy handmade feeling every holiday home deserves.


