
Table of Contents >> Show >> Hide
Building your own PC is a bit like adult LEGO – except the pieces are sharper, more expensive, and
capable of catching fire if you do something truly wild. One of the most important (and slightly
intimidating) parts of a PC build is mounting the motherboard in the case.
The good news? Once you understand how standoffs, screws, and the I/O shield work together, installing
a motherboard is actually pretty simple. In this guide, we’ll walk through how to mount a motherboard
in a case step by step, with picture ideas you can use when documenting your own build. We’ll also
cover safety tips, common mistakes, and real-world experiences so your first (or next) build goes
smoothly.
Before You Start: What You’ll Need
Here’s a quick checklist so you’re not hunting for tools with a motherboard balanced on one hand:
- Computer case with side panels removed
- Motherboard (ATX, microATX, Mini-ITX, etc.)
- Case hardware:
- Motherboard standoffs (usually brass-colored)
- Motherboard screws (often labeled as M3)
- Phillips #2 screwdriver (a standard PC-building essential)
- Optional but recommended: anti-static wrist strap or anti-static mat
- Motherboard manual and case manual
Picture idea: Flat lay of the case, motherboard, screws, standoffs, and screwdriver neatly arranged on a clean desk.
Safety First: Protecting Your Components
Motherboards are tougher than they look, but they don’t like static electricity or metal shorting out
their circuits. A few basic habits can dramatically reduce the risk of ruining something before your
build even boots.
- Work on a hard surface, not a carpet.
-
Ground yourself regularly by touching the bare metal of the case, or wear an anti-static wrist strap
clipped to the case or another grounded object. - Keep components in their anti-static bags until you’re actually ready to use them.
- Always unplug the power supply from the wall (and flip the PSU switch off) before working.
Take your time hererushing is how screws get dropped into places they don’t belong and PCBs get scratched.
Picture idea: Close-up of a builder touching the bare metal of the case while wearing an anti-static wrist strap.
The 6-Step Process to Mounting a Motherboard
For this guide, we’ll assume you’ve already installed the CPU, cooler, and RAM onto the motherboard,
which is usually easier to do outside the case. Now it’s time to give the board a home.
Step 1: Prepare the Case and Workspace
Lay the case on its side with the open interior facing up. Remove both side panels so you have room
to route cables and check standoffs. If your case has a removable motherboard tray (less common these
days, but still found on some higher-end cases), slide that out according to the manual.
Clear your workspace so you’re not shoving boxes and extra cables around while trying to maneuver the
motherboard into place. A cluttered space is how you end up leaning your elbow into a pile of screws.
Picture idea: Sideways shot of the empty PC case lying open on a desk with both side panels removed.
Step 2: Install (or Check) the I/O Shield
Most motherboards either come with a separate I/O shield (a thin metal plate with cutouts for USB,
audio, and other rear ports) or have one pre-installed. If yours is separate, it must go into the case
before the motherboard goes in. Don’t skip this or you’ll be uninstalling the board and
questioning your life choices.
- Identify the rectangular opening at the back of the case where the ports will stick out.
-
Align the I/O shield so the text and port cutouts match the orientation of the rear ports on the
motherboard. - Press the shield firmly into the opening from inside the case until it clicks into place on all sides.
A little flexing or metallic “snap” is normal. Just make sure the shield is fully seated and not bowed
inward, or it may fight you when you try to line up the motherboard later.
Picture idea: Close-up of hands pressing an I/O shield into the rectangular cutout at the back of the case.
Step 3: Install and Position the Standoffs
Standoffs are the tiny metal posts that keep the motherboard raised off the case. They prevent the back
of the board from touching metal and shorting out. They’re absolutely not optional.
-
Look for pre-installed standoffs in the case. Many modern cases come with some already in the common
ATX patterns. -
Find the tiny labels stamped into the motherboard tray (like “ATX,” “mATX,” or “ITX”) that point to
the correct standoff positions for your motherboard size. -
Screw standoffs into the correct holes using your fingers or a small wrench/socket if included. They
should be snug but not gorilla-tight. -
Double-check that there are no extra standoffs in positions that don’t line up with
a screw hole on your motherboard. An extra standoff touching the underside of the board can cause a
short.
Picture idea: Overhead shot of a case interior with brass standoffs highlighted in all the correct positions.
Step 4: Test Fit and Seat the Motherboard
Now for the moment of truth: lowering the motherboard into the case without scraping it on everything
inside. This step feels scarier than it actually is.
-
Hold the motherboard by its edges with the rear I/O ports facing the I/O shield opening at the back
of the case. -
Angle the board slightly so the rear ports slide into the I/O shield cutouts first. You may need to
gently push against the springy metal tabs on the shield so they don’t block any ports. - Once the ports are properly aligned, lower the rest of the board down onto the standoffs.
-
Check that every screw hole on the motherboard lines up with a standoff below it. If one doesn’t,
lift the board back out and adjust standoffs as neededdon’t force it.
If the board feels like it’s “springing” away from the tray, an I/O shield tab may be caught inside a
port instead of resting on top of it. Lift, reposition, and try again.
Picture idea: Angled shot of a motherboard being lowered into the case with ports sliding into the I/O shield.
Step 5: Screw Down the Motherboard (Without Overdoing It)
With the board sitting flush on the standoffs and all holes aligned, it’s time to secure everything.
This is where a lot of first-time builders get nervousbut it’s pretty straightforward.
-
Insert a screw into one of the center holes first (or a top corner near the I/O area). Turn it a few
times by hand or with very light screwdriver pressure just to catch the threads. -
Repeat with screws in the opposite corner(s), again only tightening halfway at first. The goal is to
hold the board in place while you get all screws started. -
Once all screws are in and threaded correctly, go back and snug them down. You’re aiming for “firm”
– not “I’m closing a jar of pickles for eternity.”
If a screw keeps spinning and never tightens, you may have the wrong screw type for those standoffs, or
the threads might be stripped. Don’t force it; swap in another screw or standoff if needed.
Picture idea: Close-up of a screwdriver tightening a motherboard screw into a standoff with other screws already in place.
Step 6: Connect the Essential Cables and Headers
Technically, the motherboard is “mounted” once it’s screwed in. But while you’re here, it’s smart to
plug in a few key connections while the interior is still open and easy to reach.
-
24-pin ATX power connector: The big main power plug from the power supply to the
motherboard. - CPU power connector: Usually 8-pin (or 4+4-pin) near the top of the board.
- CPU fan header: Connect the CPU cooler fan to the CPU_FAN header on the board.
- Case fan headers: Plug in any nearby case fans if their cables can reach neatly.
-
Front panel connectors: Power switch, reset switch, power LED, HDD LED, and front
USB/audio headers. Your motherboard manual will show the exact pin layout.
Don’t panic if the front panel header looks like it was designed by someone who hates humans. Make sure
you refer to the manual’s diagram; once you’ve done it once or twice, it becomes second nature.
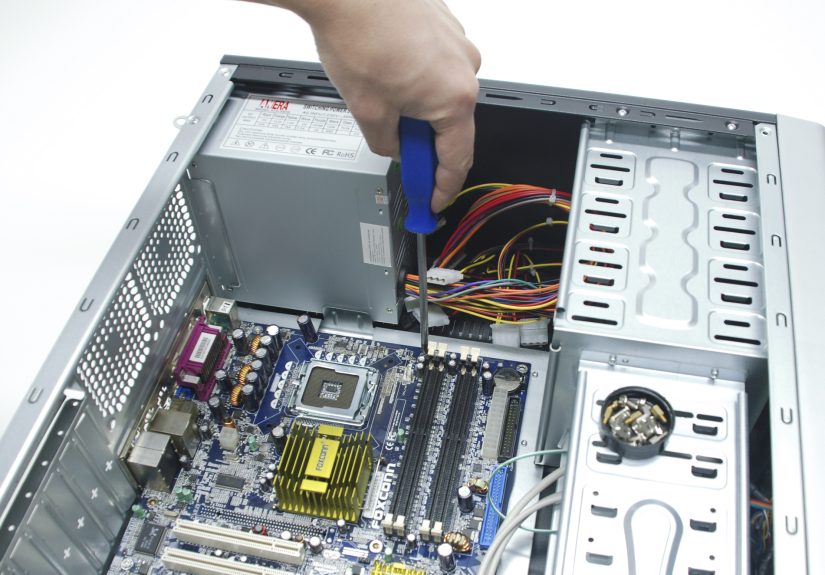
Picture idea: Close-up of a hand plugging the 24-pin power connector into the right-hand side of the motherboard.
Troubleshooting: Common Motherboard Mounting Problems
Problem: The Screw Holes Don’t Line Up
If you can’t get all the screws to line up with standoffs, stop and check:
- Is the I/O shield fully seated and not pushing the board inward or outward?
- Are all standoffs in the right positions for your specific motherboard size?
- Is the board actually the same form factor your case supports (ATX vs. microATX, etc.)?
It’s better to remove the board and adjust than to force screws in at an angle or leave unsupported
corners that can flex over time.
Problem: Extra Standoffs Under the Board
Extra standoffs that don’t match a screw hole are a hidden danger. They can press against traces or
solder points on the underside of the motherboard and cause shorts that prevent the system from
powering onor worse, cause intermittent and maddening issues.
The fix: Remove the motherboard, identify any standoffs that don’t match a hole, and remove them before
reinstalling the board.
Problem: Board Bows or Flexes When Tightening Screws
A tiny amount of flex is inevitable, but visible bending means something’s off:
- You might be overtightening screws.
- A standoff might be mis-threaded or taller than the others.
- Part of the I/O shield might be pushing too hard against a port.
Loosen the screws slightly, reseat the board, and try again. You want the board flat and supported, not
arched like a tiny green bridge.
Problem: Case Won’t Power On After Installation
If everything looks fine but the system doesn’t power on, check:
- 24-pin and CPU power cables are fully seated.
- Front panel power switch header is correctly connected.
- No loose screws are rolling around the case (yes, really).
- No visible metal contact between the back of the motherboard and the case.
If you’re still stuck, try a minimal boot: disconnect everything except CPU, one stick of RAM, and the
GPU (if required), and see if the system at least attempts to power on.
Real-World Experiences and Pro Tips
Guides and diagrams are helpful, but a lot of the comfort with building PCs comes from real-world
experience and the little lessons you only learn by doing (or by watching someone else mess up first).
Build on the Box – The Classic Trick
One of the most popular PC-building habits is to place the motherboard on top of its own cardboard box
while you install the CPU, cooler, and RAM. The box is non-conductive, flat, and just the right size.
It keeps the back of the board safe from scratches and makes it easier to pick up and move when you’re
ready to mount it in the case.
If you’re nervous about your first build, do a quick “bench test” on the box: connect the power supply,
one stick of RAM, and (if needed) a GPU, then briefly short the power pins with a screwdriver to see if
the system powers on. Once you know it boots, mounting the board in the case feels much less risky.
Don’t Rush the I/O Shield
Ask almost any PC builder about early mistakes and you’ll hear stories like: “I installed the whole
motherboard and then realized I forgot the I/O shield.” It’s such a common error that many modern
motherboards now have pre-installed shields just to save people from this exact moment of regret.
When you’re installing a separate I/O shield, take an extra 30 seconds to double-check its orientation.
The text on the ports should be readable from the outside of the case, and any audio color-coding or
USB labels should match your board. If you’re squinting and thinking, “Maybe this is right?” it’s worth
flipping and confirming before you snap it in.
Standoffs: Small Parts, Big Problems
Standoffs feel like tiny unimportant parts, but they can cause some of the most frustrating issues:
-
If they’re too loose, the motherboard can wobble or shift, making it hard to line up ports and
connect cables. - If they’re overtightened, you risk stripping the threads so screws never fully tighten.
- If they’re in the wrong place, they can short the board and prevent it from booting.
The best habit is to do a quick “dry run” early in the process: hold the motherboard over the tray and
mentally match each standoff to a hole. If something doesn’t line up, fix it before you commit to
installing the board.
Learn to Feel “Tight Enough”
New builders often ask, “How tight should I screw the motherboard down?” There’s no torque spec listed
in most manuals, so you have to go by feel. The general rule:
- Turn the screw until it stops turning freely.
- Give it a small additional nudgejust enough that it feels secure.
- Stop as soon as you meet firm resistance.
If you find yourself bracing your entire arm or the screwdriver tip starts to slip, you’ve gone too far.
It’s better for a screw to be slightly less tight than to crack a trace or strip a standoff.
Cable Management Starts Now, Not Later
While motherboard mounting is the focus, this step also sets up your cable management. Once the board is
in place, it’s a great time to plan cable paths:
-
Route the 24-pin cable and CPU power cable through cutouts closest to their connectors before you
fully tighten all the cable ties. - Use the space behind the motherboard tray to hide excess cable length.
- Keep cables away from fansespecially front intake and rear exhaust fansto avoid noisy surprises.
A little planning here makes your final build look cleaner, run cooler, and be much easier to work on
when you upgrade parts later.
Expect a Little Trial and Error
Even experienced builders sometimes need to loosen a screw, re-seat a board, or nudge an I/O shield tab
out of the way. That’s normal. The key is staying patient and methodical: change one thing at a time,
check your work, and don’t be afraid to pull the board and start the mounting step again if something
just doesn’t feel right.
Once you’ve mounted a few motherboards, the whole process becomes muscle memory. You’ll go from “please
don’t snap” to “I’ve got this” faster than you think.
Conclusion
Mounting a motherboard in a case looks complicated when you’re staring at a pile of screws and a shiny
new PCB, but it really boils down to a few repeatable steps: prepare the case, install the I/O shield,
set up the standoffs, seat the board, secure it with the right screws, and plug in the essentials. With
a little patience and an eye on details like standoff placement and gentle screw tension, you can
install your motherboard safely and confidentlyand set yourself up for a clean, reliable PC build.


