Table of Contents >> Show >> Hide
- Before You Start: Know What You’re Painting
- Tools & Materials Checklist
- 15 Steps to Paint Chrome Bumpers (Without the Heartbreak)
- Pick your finish and your paint system
- Remove the bumper (if you can)
- Wash like you mean it
- Degrease with a dedicated cleaner
- Inspect for peeling chrome, rust, and pitting
- Knock down the shine (mechanical adhesion step)
- Feather chips and smooth transitions
- Fix pits and dings (optional, but worth it)
- Refine the sanding for primer
- Clean again (yes, again)
- Choose your primer approach (and follow it exactly)
- Prime in light, even coats
- Build and level (primer surfacer + sanding)
- Spray your color with patience, not panic
- Clear coat (if your system uses it)
- Cure, reassemble, and treat it gently
- Troubleshooting: What Went Wrong (and How to Fix It)
- How to Make Painted Chrome Last Longer
- Extra : Real-World Experiences & Lessons People Learn the Hard Way
- Conclusion
Chrome looks amazing… right up until you want it to be any other color. Then it becomes the world’s shiniest problem. That mirror-smooth plating is designed to resist corrosion and wearwhich is great for bumpers, and absolutely terrible for paint adhesion.
The good news: you can paint chrome bumpers and get a finish that looks legit. The not-so-fun news: the job is won or lost in prep. If you skip sanding, cleaning, or the right primer strategy, the paint may peel faster than a sunburn after spring break.
This guide walks you through a real-world, shop-inspired process with DIY-friendly options. It’s written for standard American conditions and products commonly available in the U.S. (and yes, we’ll talk about the “why” so you’re not just following steps like a robot with sandpaper).
Before You Start: Know What You’re Painting
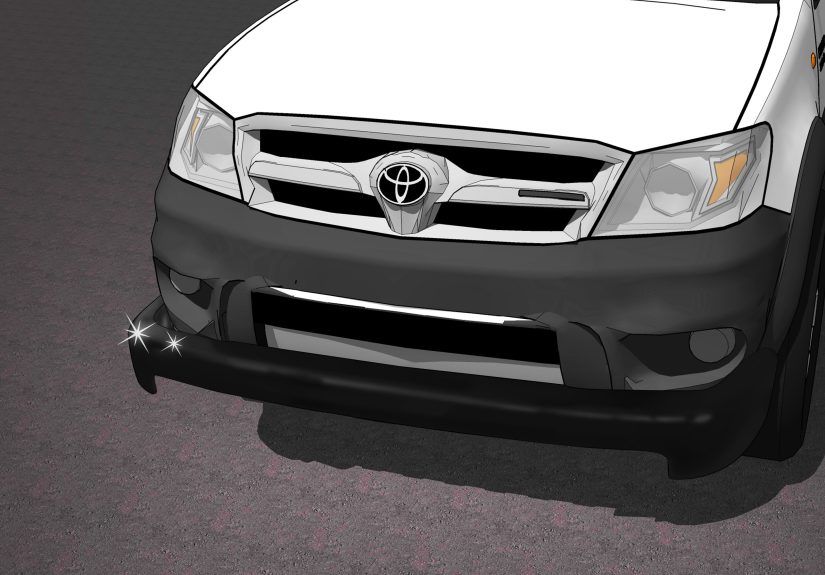
Chrome bumper types (and why it matters)
- Steel bumpers with chrome plating (common on older trucks/classics): heavy, magnetic, and usually repairable with sanding and primer.
- Plastic bumpers with chrome-look trim (common on newer vehicles): often vacuum-metalized plastic. Paint can work, but product choice (plastic adhesion promoter + flexible coatings) matters more.
Quick test: If a magnet sticks, you’re likely dealing with metal. If it doesn’t, you may be on plastic or stainless. Either way, the steps below still applyjust follow the notes for plastic where mentioned.
Tools & Materials Checklist
- Car wash soap, bucket, microfiber towels
- Wax and grease remover (or dedicated surface cleaner)
- Scuff pads (gray is a common “fine” prep pad)
- Sandpaper: 80/120/180 (heavy prep), 320/400 (refine), 600 (optional final)
- Body filler/glazing putty (only if you have pits/dings)
- Masking tape, masking paper/plastic, nitrile gloves
- Tack cloth (optional but helpful)
- Primer strategy (choose one):
- Option A (pro-leaning): epoxy primer + primer surfacer
- Option B (DIY aerosol-friendly): adhesion promoter + compatible primer
- Topcoat (single-stage or basecoat) + clear coat (if using basecoat/clear)
- Respirator rated for paint fumes, eye protection, and ventilation
Safety note (especially if you’re under 18): Paint products can be hazardous. Work outdoors or in a well-ventilated area, wear proper protection, and ask an adult to help with product handling and setup.
15 Steps to Paint Chrome Bumpers (Without the Heartbreak)
-
Pick your finish and your paint system
Decide what you want: satin black, gloss body color, or something custom. Then choose a system that matches your tools. Aerosols can look great if you prep well and spray patiently. A gun setup offers more control but requires more equipment. Whatever you choose, keep the products compatible (primer + paint + clear from the same “type” or brand family whenever possible).
-
Remove the bumper (if you can)
Painting on the vehicle is possible, but removing the bumper makes it easier to sand evenly and spray without overspray landing on your fenders like unwanted confetti. If removal is a huge job, mask carefully and accept that it’ll take longer.
-
Wash like you mean it
Start with soap and water to remove road grime. Bumpers collect the greatest hits of the highway: tar, bugs, brake dust, and mystery residue from every puddle you’ve ever trusted.
-
Degrease with a dedicated cleaner
After washing and drying, use wax and grease remover (or an automotive surface cleaner). This step is crucial because silicones and waxes can cause fisheyesthose annoying little craters that make your paint look like it panicked and tried to escape.
-
Inspect for peeling chrome, rust, and pitting
If the chrome is flaking or lifting, paint will only be as strong as what it sticks toand loose chrome is basically a paint booby trap. If you see widespread peeling, you may need stripping, blasting, or replacement. For small pits and chips, you can repair with filler later.
-
Knock down the shine (mechanical adhesion step)
Paint hates glossy chrome. Your mission is to remove the mirror finish and create a consistent scratch pattern.
- For solid, intact chrome: start around 180 grit or a coarse scuff pad in tight areas.
- For rough areas or heavy defects: you may need 80–120 grit locally, then refine.
You’re not trying to destroy the bumperyou’re creating “tooth” so primers can grab.
-
Feather chips and smooth transitions
If you have stone chips or edges where the surface changes height, feather them so your paint doesn’t telegraph every flaw like it’s auditioning to be a spotlight. Blend with 180–320 grit until transitions feel smooth to the touch.
-
Fix pits and dings (optional, but worth it)
Chrome bumpers often have pits from age. If you want a “new bumper” look, fill pits with a thin layer of body filler or glazing putty, then sand smooth. Keep repairs thinthick filler on a bumper is like wearing winter boots to a sprint.
-
Refine the sanding for primer
Once the shine is gone, refine the surface with 320–400 grit so primer lays smoothly. The goal is an evenly dulled finishno glossy islands, no deep trench scratches across the whole bumper.
-
Clean again (yes, again)
Blow off dust (or wipe carefully), then use surface cleaner again. Wear gloves so you don’t reintroduce skin oils. If you have a tack cloth, use it lightly right before priming.
-
Choose your primer approach (and follow it exactly)
Option A: Epoxy primer route (durable, shop-style)
Epoxy primer is popular for tough adhesion and sealing. It’s often the “serious” choice for metal parts that need strong bonding.Option B: Adhesion promoter route (DIY aerosol-friendly)
Some adhesion promoters are labeled for use on chrome and can improve topcoat grip when used properly. Apply light, even coats and respect flash times.Important: Don’t freestyle product stacking. Some systems don’t want adhesion promoter under certain primers, while others are designed around it. Read the labels and tech sheets like they’re the instructions to defuse a bombbecause peeling paint feels like one.
-
Prime in light, even coats
Apply primer in multiple light coats rather than one heavy coat. Heavy coats can run, trap solvents, or create texture that takes forever to sand out. Let each coat flash as directed. If you’re using epoxy, follow its recoat window rules carefully.
-
Build and level (primer surfacer + sanding)
If you want a truly smooth finishespecially on older chromeuse a primer surfacer after the initial adhesion/epoxy layer. Then sand it smooth (often 400–600 grit depending on your paint). This is where a bumper goes from “painted” to “professional-looking.”
-
Spray your color with patience, not panic
Hold the can/gun at a consistent distance and overlap passes evenly. Start with a light tack coat, then medium coats for coverage. If you’re doing metallic paint, keep your final passes consistent so the metallic lays evenlyotherwise you get blotchy “tiger striping.”
Example: If you’re painting satin black, uneven spray shows up as patchy sheen. The fix is not “more paint right now.” It’s consistent coats, proper flash time, and resisting the urge to chase wet spots.
-
Clear coat (if your system uses it)
If you’re using basecoat/clearcoat, apply clear after the base flashes properly. Use multiple coats for depth and protection. Chrome-painted parts can chip more easily than factory finishes, so clear helpsespecially on a front bumper that eats road debris for breakfast.
-
Cure, reassemble, and treat it gently
Paint may feel dry quickly, but curing takes longer. Avoid washing aggressively or installing tight hardware too soon. When reinstalling, use care around edges and mounting pointsfresh paint scratches easier than your phone screen in a pocket full of keys.
Troubleshooting: What Went Wrong (and How to Fix It)
Paint peeling or flaking
Likely causes: chrome wasn’t scuffed enough, contamination remained, incompatible products, or you painted over loose plating.
Fix: sand back to a stable layer, clean thoroughly, and restart with a proven primer approach.
Fisheyes (tiny craters)
Likely causes: silicone/wax contamination, oily fingerprints, dirty rags.
Fix: stop, let it dry, sand smooth, degrease properly, and recoat. Use clean towels and gloves.
Runs and sags
Likely causes: coats too heavy, spraying too close, not enough flash time.
Fix: let it cure, sand the run flat, then respray lightly.
Orange peel texture
Likely causes: spraying too far away, coats too dry, temperature/humidity issues, or not enough leveling in primer.
Fix: improve technique, refine primer sanding, and consider a smoother clear strategy.
How to Make Painted Chrome Last Longer
- Give it time: wait for full cure before harsh washing or road trips in heavy rain/grit.
- Skip aggressive chemicals: avoid strong solvents and harsh wheel acids on fresh paint.
- Protect high-impact areas: consider a protective film on the leading edge if chips are a concern.
- Be realistic: painted chrome will rarely be as chip-resistant as plating. Prep + primer choice buys you durability, not immortality.
Extra : Real-World Experiences & Lessons People Learn the Hard Way
If you ask ten people how their first chrome-bumper paint job went, at least six will stare into the distance like they just remembered a suspense movie. Chrome is unforgiving because it doesn’t “help” paint stick. Regular painted metal has pores and texture; chrome is like a polished dinner plate that’s been trained to reject everything. That’s why the best experiences usually start with the same sentence: “I sanded way more than I thought I needed.”
One of the most common first-timer mistakes is sanding until the bumper looks “kind of dull” and calling it good. In real life, that usually leaves shiny patches around curves, corners, and tight spots near brackets. Those glossy islands don’t always fail immediatelywhich is even worsebecause the paint looks fine for a week or two, then begins lifting at the edges after the first car wash or a few temperature swings. People often assume the paint was “bad,” but the culprit is usually uneven abrasion. The fix is boring but effective: scuff pads for curves, careful hand sanding, and checking from multiple angles under good light until the entire bumper has a uniform, consistent dullness.
Another lesson: cleaning is not optional theater. A bumper is basically a collection device for wax overspray, tire shine mist, oily fingerprints, and road film. Many DIYers wash with soap, dry it, and start sandingonly to grind contaminants into the surface. The better experiences come from washing first, degreasing second, sanding third, and then degreasing again. It feels repetitive, but it’s cheaper than repainting.
Then there’s the “primer identity crisis.” People mix and match products because they’re convenient: one brand of adhesion promoter, another brand of primer, a third brand of clear. Sometimes it works. Sometimes it turns into wrinkling, lifting, or a finish that stays soft longer than expected. The best outcomes usually happen when someone picks a simple system, follows the recoat windows, and resists improvising. In other words: treat the labels like they’re not suggestions.
Spraying technique is the final reality check. Many first attempts go heavy because the painter wants quick coverageespecially with black. But heavy coats on a bumper are an invitation for runs on vertical surfaces and solvent issues in clear. People who end up proud of their result usually describe a slower approach: light tack coat, controlled medium coats, consistent overlap, and walking away during flash time instead of hovering like an anxious parent at a toddler playground.
The biggest “experience” takeaway is actually comforting: most failures are fixable. If something goes wrong, you usually sand it smooth, clean properly, and redo the last steps. Chrome painting rewards stubborn patience. It’s not glamorous, but the final resultwhen that formerly shiny bumper becomes a smooth satin or gloss finishfeels like winning an argument with physics.
Conclusion
Painting chrome bumpers is absolutely doable, but chrome demands respect. The steps that matter most aren’t the exciting ones (color and clear)they’re the prep steps: deep cleaning, thorough abrasion, and a primer strategy designed to bond to slick surfaces. Follow the 15-step process, keep products compatible, and let coats flash and cure properly. Do that, and your bumper won’t just look betterit’ll stay that way long enough to enjoy it.