
Table of Contents >> Show >> Hide
- Quick Reality Check: What Lavender Actually Wants
- What You’ll Need
- How to Plant Lavender in Pots: 13 Steps
- Step 1: Pick the right lavender for your climate and your goals
- Step 2: Choose a pot that’s wide, heavy, and full of drainage holes
- Step 3: Pick a breathable material (terracotta is the MVP)
- Step 4: Build a gritty soil mix (lavender likes it lean, not lush)
- Step 5: Aim for a slightly alkaline pH (but don’t get weird about it)
- Step 6: Prep the pot for clean drainage
- Step 7: Plant at the correct height (don’t bury the crown)
- Step 8: Water deeply once, then let the soil dry between waterings
- Step 9: Put the pot in full sun and prioritize airflow
- Step 10: Feed lightly (or not at all) so you get flowers, not just leaves
- Step 11: Prune in spring to prevent the “woody tumbleweed” look
- Step 12: Deadhead and harvest at peak fragrance
- Step 13: Overwinter strategicallypots get colder than the ground
- Troubleshooting Cheat Sheet
- FAQ: Quick Answers That Save Plants
- of Real-World Lavender-in-a-Pot Experience (So You Don’t Panic Later)
- Conclusion
Lavender is basically the Mediterranean friend who shows up wearing linen, insisting on “good vibes only,”
and quietly judging your soggy soil. The good news: when you grow lavender in a pot, you get way more control
over the two things lavender cares about mostsun and drainage. Do that right, and you’ll be rewarded
with fragrant blooms, happy pollinators, and the smug satisfaction of walking past your patio planter like,
“Yes, I do have my life together.”
This guide walks you through exactly how to plant lavender in a containerstep by stepplus the real-life
“what usually goes wrong” fixes (spoiler: it’s almost always water). Whether you’re planting a compact
English lavender for culinary projects or a showier Spanish type for pure balcony drama, these 13 steps will
set you up for success.
Quick Reality Check: What Lavender Actually Wants
- Full sun: Think 6+ hours daily, more if you can swing it.
- Fast-draining soil: Lavender would rather be thirsty than soggy.
- Slightly alkaline to neutral pH: Many lavenders prefer the “not-too-acidic” side of life.
- Lean nutrition: Too much fertilizer = leafy plant, fewer flowers, and existential disappointment.
- Airflow: Crowded, humid, still air is not lavender’s love language.
What You’ll Need
- Lavender plant (starter plant/transplant is easiest)
- Container with drainage holes (wide, stable)
- Well-draining potting mix + drainage amendments (perlite/pumice/coarse sand)
- Optional: dolomitic lime (to gently raise pH if your mix runs acidic)
- Small gravel or mesh screen (to keep soil from washing out of holes)
- Watering can or hose with a gentle setting
- Hand pruners (you’ll use them, promise)
How to Plant Lavender in Pots: 13 Steps
-
Step 1: Pick the right lavender for your climate and your goals
Not all lavenders behave the same, and your pot will magnify those differences. Start by choosing a type
that matches your winters and what you want to use it for:-
English lavender (Lavandula angustifolia): Usually the most cold-hardy option and commonly used
for culinary purposes (think lavender sugar, tea blends, baked goods). -
Spanish or French types (often L. stoechas or L. dentata): Gorgeous “look at me!” blooms and
a longer blooming vibe in mild climates, but generally less cold-tolerant.
If you live where winters are real (snow, freeze-thaw cycles, the whole seasonal mood swing), a cold-hardy
English lavender cultivar is typically your best bet. If you’re in a warm coastal or southern area, you can
enjoy the more tender, ornamental typesespecially in containers that can be moved. -
English lavender (Lavandula angustifolia): Usually the most cold-hardy option and commonly used
-
Step 2: Choose a pot that’s wide, heavy, and full of drainage holes
Lavender’s #1 enemy is wet feet, so drainage holes are non-negotiable. Wide containers are also
helpful because they’re more stable (lavender can get top-heavy when blooming) and they dry evenly.Size-wise, pick a pot that’s comfortably larger than the root ball so roots can expand, but don’t jump to a
comically oversized container “for future growth.” Huge pots hold extra moisture, and lavender does not
appreciate your optimism. -
Step 3: Pick a breathable material (terracotta is the MVP)
Unglazed terracotta or clay is popular for lavender because it can help wick moisture and promote airflow at
the root zone. That little bit of “breathing” matters when your plant is essentially begging you not to keep
the soil wet.If you use plastic or glazed ceramic (which hold moisture longer), you can still succeedjust be extra
disciplined about soil mix and watering. -
Step 4: Build a gritty soil mix (lavender likes it lean, not lush)
Standard potting soil can be too water-retentive for lavender, especially indoors or in humid regions. Aim
for a mix that drains fast and doesn’t stay soggy. A simple DIY approach:- 2 parts high-quality potting mix
- 1 part drainage amendment (perlite, pumice, or coarse sand)
- Optional: a handful of fine gravel or horticultural grit for extra “Mediterranean hillside” energy
The goal is soil that feels light and airy, not dense and spongey. If you’ve ever lifted a wet towel and felt
the weight of your life choices… yeah, avoid that. -
Step 5: Aim for a slightly alkaline pH (but don’t get weird about it)
Many lavenders prefer soil that’s neutral to slightly alkaline. If your potting mix tends to be acidic,
you can gently raise pH with a small amount of dolomitic lime mixed into the soil.Keep it modest. Think “seasoning,” not “turning your planter into a chemistry final.” If you want to be
precise, a simple soil test kit can tell you where you’re starting. -
Step 6: Prep the pot for clean drainage
Put a small piece of mesh screen, landscape fabric, or even a coffee filter over the drainage holes to keep
soil from washing out while still letting water escape. Skip the old myth about “rocks at the bottom” being
requiredwhat matters is a fast-draining mix and open holes.Fill the container about halfway to two-thirds with your prepared soil mix.
-
Step 7: Plant at the correct height (don’t bury the crown)
Remove the lavender from its nursery pot and gently loosen any circling roots. Place it in the container so
the top of the root ball sits at the same level it was growing beforesometimes even a touch higher is fine.Backfill around the root ball, firm lightly (no aggressive tamping), and leave about 1 inch of space at the
top of the pot so watering doesn’t overflow like a tiny soil tsunami. -
Step 8: Water deeply once, then let the soil dry between waterings
Right after planting, water thoroughly until you see water draining from the bottom. This settles the soil
around roots and eliminates big air pockets.After that? Resist the urge to “just give it a little sip.” Lavender typically does best when you
water only after the soil has dried out. A practical rule: check an inch or two down; if it’s still moist,
walk away and feel proud of your self-control.And pleasedo not let the pot sit in a water-filled saucer. If you use a saucer for patio protection, empty
it after watering. -
Step 9: Put the pot in full sun and prioritize airflow
Lavender wants bright, direct sunideally at least six hours daily. Morning sun is great, and all-day sun is
even better if your summers aren’t brutally scorching.Also: give it space. Don’t wedge lavender into a tight jungle of planters where leaves stay damp and air can’t
move. Lavender’s natural vibe is open, breezy, and dry. -
Step 10: Feed lightly (or not at all) so you get flowers, not just leaves
Lavender often performs best in relatively low-fertility conditions. Overfeedingespecially high nitrogencan
create lots of green growth and fewer blooms.If your plant looks healthy, skip fertilizer. If it seems sluggish after months in the same pot, top-dress
with a small amount of compost or use a gentle, diluted organic fertilizer once in spring. Keep it minimal. -
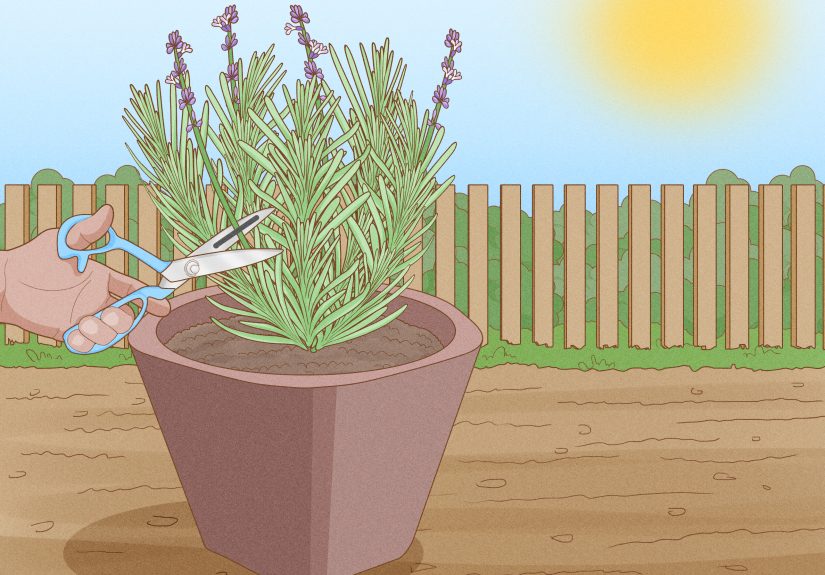
Step 11: Prune in spring to prevent the “woody tumbleweed” look
Lavender blooms on newer growth and benefits from yearly pruning once established. In spring, when you see
fresh green growth starting near the base, trim back about a third of the plant to keep it compact and
encourage branching.Important: don’t cut into bare, leafless wood. Lavender typically doesn’t regrow well from old woody stems,
and an overzealous haircut can turn your plant into a stick sculpture. -
Step 12: Deadhead and harvest at peak fragrance
Deadheading (removing spent flower stems) helps keep the plant tidy and can encourage more blooming in some
varieties. If you’re harvesting for drying, timing matters:- Harvest in the morning after dew has dried.
-
Many growers aim to cut stems when roughly about half the flower buds are openthat’s a sweet spot
for fragrance and color.
Bundle stems with a rubber band and hang them upside down in a dry, dark, well-ventilated place. (Lavender
perfumes your closet while drying. This is a known side quest and it’s delightful.) -
Step 13: Overwinter strategicallypots get colder than the ground
Container lavender needs extra winter planning because roots in pots are exposed to colder temperatures than
in-ground plants. Your options depend on your climate and lavender type:-
Mild winters: Move the pot to a sheltered spot (near a wall or foundation), protect it from harsh
wind, and water sparingly. -
Cold winters: Consider moving the pot into an unheated garage, enclosed porch, or other bright,
cool space. The goal is to keep it alive and restingnot actively growing like it’s July.
Indoors, lavender needs very bright light and careful watering (too wet + low light is a fast track to root
rot). Think “cool, sunny, and barely damp.” -
Mild winters: Move the pot to a sheltered spot (near a wall or foundation), protect it from harsh
Troubleshooting Cheat Sheet
| What you see | Likely cause | What to do |
|---|---|---|
| Yellowing leaves, droopy growth | Overwatering / poor drainage | Let soil dry, improve mix, ensure holes are open, ditch standing water in saucer |
| Plant looks healthy but barely blooms | Not enough sun or too much fertilizer | Move to brighter spot; ease up on feeding; prune properly in spring |
| Leggy, woody, splitting open | Skipped pruning | Prune yearly (spring), shape gently after flowering; avoid cutting into bare wood |
| Leaves browning at base, musty soil smell | Root rot setting in | Stop watering, improve drainage fast, consider repotting into fresh gritty mix |
| Sticky residue or tiny insects | Aphids (often indoors or stressed plants) | Rinse off, use insecticidal soap as needed, improve airflow and light |
FAQ: Quick Answers That Save Plants
How often should I water lavender in a pot?
There’s no universal schedule because heat, pot size, and soil mix change everything. Instead, water based on
dryness: check the soil an inch or two down and water only when it’s dry. In peak summer heat, that might be
every few days; in cooler weather, it might be once a week or less.
Can lavender live indoors year-round?
It can, but it’s picky. Lavender indoors needs extremely bright light (a sunny south window or strong grow light),
low humidity, and careful watering. Many people do best moving it outdoors for the warm months, then overwintering
it in a bright, cool space.
Do I need to repot lavender?
If roots are circling the pot, poking out of drainage holes, or the plant dries out instantly after watering,
it’s probably time. Repot one size up with fresh gritty mixlavender likes “refreshed soil” more than “massive
upgrade.”
of Real-World Lavender-in-a-Pot Experience (So You Don’t Panic Later)
The first “experience” most container lavender growers share is discovering that lavender is not like basil.
Basil wants steady moisture, frequent harvests, and a little emotional support. Lavender wants you to back away
slowly with the watering can and prove you can be trusted.
A very common beginner story goes like this: you plant lavender in a cute pot, place it on the patio, and water
it every day because that feels like what responsible plant parents do. Two weeks later, the plant looks tired,
the leaves start yellowing, and you water more because it looks thirsty. This is the gardening equivalent of
trying to fix a sinking boat by adding more water. The “aha” moment is learning to water based on soil dryness,
not habit. Once growers switch to checking the soil an inch down before watering, lavender usually perks up fast.
The second shared experience: pot size and pot material matter more than people expect. Lavender in a small,
lightweight pot can tip over in wind (especially once flower stalks get tall). That’s why so many successful
patio lavender setups use wider, heavier containersoften terracotta. Terracotta’s breathability is also forgiving
if you accidentally overwater once. It’s not magic, but it can be the difference between “oops” and “oh no.”
Then there’s the pruning anxiety. Lots of people are nervous the first time they prune lavender because it feels
wrong to cut something that’s alive and beautiful. What helps is thinking of pruning as shaping a small shrub,
not trimming a flower. The most consistent success stories come from gardeners who prune annually (usually in
spring), removing about a third of the soft, green growth to keep the plant compact and prevent it from getting
woody and splitting open. The consistent caution is also the same: don’t cut into bare wood.
Another very real experience is winter confusion. People often assume that because lavender is “hardy,” it can
stay outside in a pot no matter what. But pots expose roots to colder temperatures than the ground does, so
overwintering becomes a strategy game. Many gardeners end up moving pots into a sheltered spot (near a wall, out
of wind), insulating the container, and watering only enough to prevent bone-dry soil. In colder regions, the
“garage-with-a-window” overwinter method becomes a favorite: cool, bright, and barely watered.
Finally, there’s the fun experience that keeps people growing lavender: harvesting. The first time you cut a
bundle, hang it upside down, and your laundry area starts smelling like a spa, you’ll understand why lavender is
a classic. Successful growers tend to treat harvesting as part pruning, part aromatherapy, and part bragging
rights. And honestly? They’re not wrong.
Conclusion
Planting lavender in a pot is less about having a green thumb and more about mastering two habits:
choose the right container/soil and water with restraint. Give lavender full sun, fast
drainage, a slightly alkaline lean mix, and a sensible pruning routine, and it will reward you with years of
fragrant bloomsright where you can enjoy them most. If your lavender ever struggles, don’t panic: check drainage,
cut back watering, and remember lavender’s mottodry feet, happy life.


