Table of Contents >> Show >> Hide
- First: Identify the Situation Before You Start
- Safety Comes First: Do Not Skip This Part
- Method 1: Remove an Exposed Broken Drill Bit With Locking Pliers
- Method 2: Reverse the Drill Carefully
- Method 3: Tap and Loosen the Bit
- Method 4: Use a Left-Hand Drill Bit
- Method 5: Try a Screw ExtractorBut Understand Its Limits
- Method 6: Remove a Broken Drill Bit From Wood
- Method 7: Remove a Broken Drill Bit From Metal
- Method 8: Remove a Broken Drill Bit From Masonry, Brick, or Concrete
- Method 9: Remove a Broken Drill Bit From Plastic
- What Not to Do When a Drill Bit Breaks
- How to Prevent Drill Bits From Breaking Again
- When to Call a Professional
- Real-World Experience: Lessons From Stuck Bits, Snapped Bits, and Tiny Metal Villains
- Conclusion
- SEO Tags
A broken drill bit has a special talent for ruining a perfectly normal afternoon. One minute you are making a clean pilot hole; the next, the bit snaps, the drill goes quiet, and your project suddenly feels like it needs a rescue team, a therapist, and maybe a snack break. The good news: in many cases, you can remove a broken drill bit without destroying the workpiece.
This guide explains how to remove a broken drill bit from wood, metal, masonry, plastic, and tight holes using practical, safe methods. You will learn when to grab locking pliers, when to use reverse drilling, when a left-hand drill bit helps, when a screw extractor makes sense, and when it is wiser to stop before turning one small problem into a modern art sculpture called “Regret in Steel.”
First: Identify the Situation Before You Start
Before reaching for every tool in the garage, take ten seconds to inspect the broken bit. The best removal method depends on three things: how much of the bit is exposed, what material it is stuck in, and whether the hole is through-drilled or blind.
Ask These Quick Questions
- Is any part of the drill bit sticking out? If yes, locking pliers may be enough.
- Is the bit stuck in wood, metal, concrete, tile, or plastic? Each material needs a slightly different touch.
- Did the bit snap because it overheated? Let it cool completely before touching or twisting it.
- Is the hole important and visible? If it is on finished furniture, cabinetry, or a metal part, go slowly.
- Is the broken bit hardened steel or carbide? Standard drill bits usually will not drill into a hardened broken bit.
Most broken drill bits snap from too much pressure, poor alignment, dull cutting edges, high speed in metal, lack of lubrication, or chips packing inside the hole. In other words, the bit was not “being dramatic.” It was probably hot, jammed, and begging for a break.
Safety Comes First: Do Not Skip This Part
Broken bits are sharp. They can also be brittle, especially small twist bits, masonry bits, and carbide-tipped bits. Put on safety glasses before tapping, twisting, grinding, or extracting. Gloves can help when handling rough material, but avoid loose gloves near rotating tools because they can catch.
Unplug corded drills and remove batteries from cordless drills before adjusting the chuck, grabbing the bit, or working near the hole. If you use penetrating oil, cutting oil, or lubricant, keep it away from open flames and wipe up excess. If grinding is required, protect nearby surfaces and control sparks.
Method 1: Remove an Exposed Broken Drill Bit With Locking Pliers
If even a small section of the drill bit is sticking out, start with the simplest method: grip and reverse. This works well in wood, plastic, drywall framing, and some metal pieces where the bit has not fused into the hole.
Steps
- Let the bit cool if it recently broke.
- Brush away dust, chips, or debris around the hole.
- Apply a small amount of penetrating oil if the bit is stuck in metal.
- Clamp locking pliers firmly onto the exposed shank or flute.
- Twist counterclockwise while pulling gently outward.
- If it moves slightly, keep working it back and forth rather than yanking hard.
The trick is steady torque, not superhero force. If you clamp too loosely, the pliers will chew up the bit. If you pull too aggressively, you may snap the exposed piece shorter, which upgrades the repair from “annoying” to “why did I do that?”
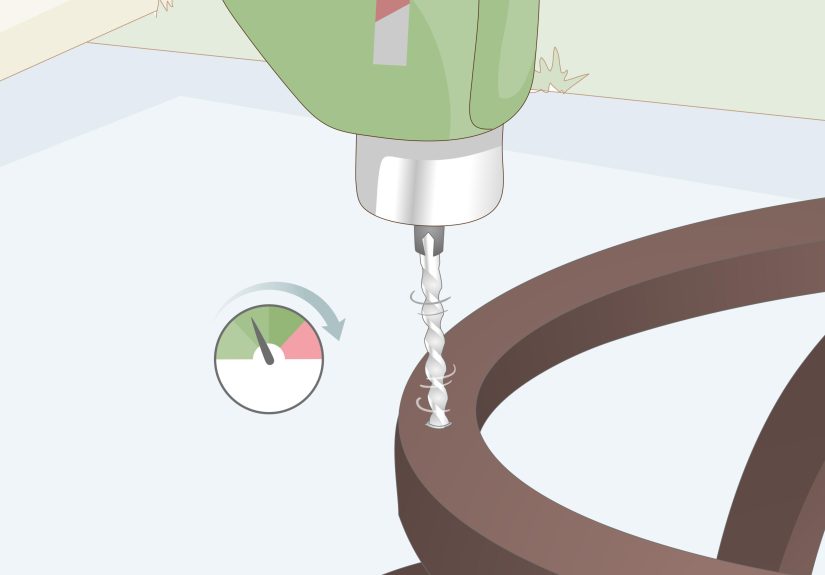
Method 2: Reverse the Drill Carefully
If the drill bit is still held in the chuck but jammed in the material, reverse drilling may release it. This method is common when the bit binds from heat, chips, or drilling at an angle.
Steps
- Stop drilling immediately when the bit binds.
- Keep the drill straight in line with the hole.
- Set the drill to reverse.
- Use low speed and light pressure.
- Back the bit out slowly while maintaining alignment.
Do not wiggle the drill wildly from side to side. That can enlarge the hole, bend the bit, or snap it flush with the surface. If the drill does not reverse the bit out after a few controlled attempts, stop and move to another method.
Method 3: Tap and Loosen the Bit
Sometimes the bit is not truly trapped; it is wedged. A few light taps can loosen chips or release tension in the hole. This works best in wood, masonry, and non-precision metal jobs.
Steps
- Place a small punch, nail set, or screwdriver against the exposed part of the bit.
- Tap lightly with a hammer to vibrate the bit loose.
- Try turning the bit counterclockwise with locking pliers.
- Alternate tapping and twisting until the bit moves.
Use light taps, not demolition energy. The goal is vibration, not revenge. On finished wood or tile, place painter’s tape around the hole to reduce scratches and protect the surface.
Method 4: Use a Left-Hand Drill Bit
A left-hand drill bit rotates counterclockwise, which can help loosen a stuck broken piece while cutting. Left-hand bits are often used for broken screws and bolts, but they can also help in some broken drill bit situations, especially when the broken piece has enough center access and is not extremely hard.
Steps
- Center punch the broken bit if the surface allows it.
- Install a small left-hand drill bit in the drill.
- Set the drill to reverse.
- Apply cutting oil if working in metal.
- Drill slowly and keep the tool straight.
- Stop if the broken bit begins to spin out.
This method is especially useful when a broken fastener is involved, such as a screw or bolt, but it must be used carefully on a broken drill bit. Many drill bits are hardened, so a standard left-hand bit may skate, dull, or break if forced.
Method 5: Try a Screw ExtractorBut Understand Its Limits
Screw extractors are designed to remove damaged screws, broken bolts, studs, and fittings. They work by biting into a drilled pilot hole and turning counterclockwise. For a broken drill bit, an extractor may help only if the broken piece can accept a centered hole or if you are actually removing a broken screw that contains the broken bit.
When a Screw Extractor Helps
- The broken drill bit is inside a broken screw or bolt.
- You can drill a centered pilot hole into the stuck fastener.
- The material around the hole is strong enough to handle extraction torque.
- The extractor size matches the hole and fastener.
When a Screw Extractor Is a Bad Idea
- The broken drill bit itself is hardened and too small to drill into.
- The hole is off-center and close to an edge.
- The workpiece is fragile, finished, or expensive.
- You are tempted to force the extractor with high torque.
Extractors are hard and brittle. If you snap one inside the same hole, congratulationsyou have created the “final boss” of stuck metal problems. Use slow speed, correct sizing, and patience.
Method 6: Remove a Broken Drill Bit From Wood
Wood is usually forgiving, which is one reason it remains popular among people who enjoy fixing mistakes without needing industrial machinery. If a drill bit breaks in wood, start by exposing and gripping the bit.
Best Options for Wood
- Grip it with locking pliers: Twist counterclockwise and pull slowly.
- Use a plug cutter around the bit: Cut a small wood plug around the stuck piece, remove the bit, then glue in a matching dowel or plug.
- Drill beside it only if appearance does not matter: A nearby relief hole can reduce pressure, but it may leave a visible repair.
- Fill and redrill: For hidden areas, remove damaged fibers, glue in a dowel, trim flush, and drill again.
For cabinetry, furniture, doors, or trim, avoid aggressive prying. A tiny broken bit can become a large crescent-shaped scar faster than you can say, “Maybe I should have used a pilot hole.”
Method 7: Remove a Broken Drill Bit From Metal
Metal is less forgiving because heat, friction, and chip packing can lock the bit tightly. A bit broken in steel, aluminum, or cast iron requires patience and controlled technique.
Best Options for Metal
- Let the workpiece cool: Heat can expand the metal and increase binding.
- Apply penetrating oil: Let it soak around the broken bit.
- Tap lightly: Use a punch to create vibration and loosen chips.
- Use locking pliers if exposed: Twist counterclockwise slowly.
- Use a carbide burr or rotary tool: For hardened fragments, carefully grind around or into the broken bit.
- Consider professional EDM removal: Electrical discharge machining can remove hardened broken tools from precision parts.
Do not try to drill through a hardened broken drill bit with a normal high-speed steel bit. It will likely dull, wander, or break. If the part is valuablean engine component, a machine part, a hinge jig, or a custom metal bracketprofessional removal may cost less than replacing the part.
Method 8: Remove a Broken Drill Bit From Masonry, Brick, or Concrete
Masonry bits can snap when they hit rebar, hard aggregate, or when too much side pressure is applied. If the broken bit is in concrete, brick, or block, the removal strategy depends on whether the bit is loose in dust or wedged against hard material.
Steps
- Vacuum dust from the hole.
- Tap around the bit lightly to loosen debris.
- Grip exposed metal with locking pliers.
- Twist counterclockwise while pulling outward.
- If the bit is buried, drill a new hole nearby if the anchor placement allows it.
If the hole is for an anchor, you may not need to save the exact location unless the layout is critical. Sometimes the fastest clean fix is to shift the anchor point slightly, patch the old hole, and move on with your life like a wise person.
Method 9: Remove a Broken Drill Bit From Plastic
Plastic can melt around a hot bit, then grip it as it cools. Use gentle pressure because plastic cracks easily.
Steps
- Let everything cool completely.
- Use pliers to rotate the bit counterclockwise.
- If melted plastic is gripping the bit, trim around it with a utility knife.
- Back the bit out slowly without prying against the surface.
- Repair the hole with plastic epoxy if needed.
When drilling plastic again, use slower speed, lighter pressure, and clear chips often. Heat is the enemy. Treat plastic like it has trust issues.
What Not to Do When a Drill Bit Breaks
Removing a stuck bit is partly about knowing when not to make things worse. Avoid these common mistakes:
- Do not keep drilling at full speed. Heat caused the problem; more heat will not become a solution.
- Do not pry hard against finished surfaces. You may damage wood, tile, drywall, or metal edges.
- Do not force a screw extractor. A broken extractor is much harder to remove than a broken drill bit.
- Do not use the wrong bit for the material. Wood bits, masonry bits, and metal bits are not interchangeable.
- Do not ignore eye protection. Small metal fragments can fly when tapping or grinding.
How to Prevent Drill Bits From Breaking Again
Once you retrieve the stuck bit, take a moment to figure out why it broke. Prevention is cheaper, faster, and much less emotionally dramatic.
Use the Right Drill Bit
Use brad-point bits for clean holes in wood, high-speed steel or cobalt bits for metal, masonry bits for brick and concrete, and tile/glass bits for fragile hard surfaces. A general-purpose bit can handle light work, but specialized materials need specialized cutting edges.
Slow Down in Metal
Metal drilling usually works better at lower speed with steady pressure and cutting oil. High speed creates heat, heat dulls the bit, and a dull bit grabs. That is the classic path to a snapped bit.
Clear Chips Often
Back the bit out occasionally to remove chips, especially in deep holes. Packed chips increase friction and can wedge the bit inside the hole.
Keep the Drill Straight
Side pressure bends small bits. Use two hands when possible, keep the drill aligned, and let the bit cut instead of forcing it. For precision work, a drill guide or drill press can save you from broken bits and crooked holes.
Start Small and Step Up
For larger holes in metal or hardwood, drill a smaller pilot hole first, then increase to the final size. This reduces stress on the bit and improves accuracy.
When to Call a Professional
Call a machinist, mechanic, or experienced repair professional if the broken drill bit is stuck in an expensive metal part, a threaded hole, a visible finished surface, or a precision component. Professional shops may use carbide tooling, specialty extractors, milling equipment, or EDM to remove hardened pieces without ruining the original hole.
There is no shame in stopping early. The real DIY wisdom is knowing the difference between “I can fix this” and “I am about to make this part cost three times as much.”
Real-World Experience: Lessons From Stuck Bits, Snapped Bits, and Tiny Metal Villains
One of the most common broken-bit situations happens during simple woodworking. A person drills a pilot hole for a hinge screw, pushes a little too hard, and the tiny bit snaps below the surface. The first instinct is usually panic, followed by poking the hole with a screwdriver. A better move is to stop, clear the dust, and check whether any metal is exposed. If there is even a few millimeters of bit available, small locking pliers can usually grip it. Twist counterclockwise, pull slowly, and resist the urge to rock the pliers side to side. If the bit is buried, a plug cutter can remove a neat circle of wood around the problem. After that, glue in a matching dowel, trim it flush, sand it smooth, and drill a fresh pilot hole. The repair can be nearly invisible if the grain and color are close.
Metal work teaches a different lesson: heat management matters. Imagine drilling a hole in a steel bracket with a dull bit, no cutting oil, and a drill running fast enough to sound like it is preparing for takeoff. The bit starts squealing, the hole smokes, and thensnap. In that case, patience beats force. Let the bracket cool, add penetrating oil, tap the broken bit lightly with a punch, and try to rotate it out with locking pliers. If the broken piece is flush, a left-hand bit might help, but only if it can bite properly. If not, grinding carefully with a carbide burr may be the better route. For threaded holes or valuable parts, a machine shop is often the smartest choice.
Masonry has its own personality. A bit may break when it hits hard aggregate, old brick, or hidden metal. The hole fills with dust, and the broken piece feels welded in place. Usually, the first step is simple: vacuum the hole. Dust can lock the bit tighter than expected. Then tap gently, grip the shank if possible, and twist it out. If the location is not critical, moving the anchor slightly and patching the failed hole can save time.
The best experience-based advice is this: do not turn a stuck drill bit into a battle of pride. Broken bits reward calm problem-solving. Start with the least destructive method, protect the surface, use lubricant when appropriate, and stop before you break an extractor inside the broken bit inside the hole. That is not a repair job anymore; that is a nesting doll of frustration.
Also, keep a small “rescue kit” nearby: locking pliers, needle-nose pliers, a center punch, a small hammer, cutting oil, penetrating oil, left-hand drill bits, screw extractors, painter’s tape, a plug cutter, and safety glasses. You will not need all of them every time, but when a bit snaps, having the right tool within reach keeps the situation from becoming a full garage opera.
Conclusion
Learning how to remove a broken drill bit is really about working carefully, reading the material, and choosing the least destructive solution first. If the bit is exposed, locking pliers and counterclockwise rotation often solve the problem. If it is stuck in metal, cooling, oil, tapping, and controlled extraction are your best friends. If it is buried in wood, plug cutting and repair may leave the cleanest result. And if the broken bit is trapped in a valuable part, professional help is not defeatit is strategy.
The next time a drill bit snaps, take a breath. The project is probably not ruined. It is just asking you to slow down, use the right method, and maybe stop drilling like the tool owes you money.
Note: Always wear eye protection, disconnect power before handling the drill or bit, and avoid forcing extractors or power tools. When the workpiece is expensive, structural, or precision-machined, consult a qualified professional before attempting aggressive removal.