
Table of Contents >> Show >> Hide
- First: Does Your MacBook Pro Have a Removable “Hard Drive”?
- Before You Open It: Backup, Power Down, and Screw Sanity
- Tools and Supplies You’ll Want
- Tutorial A: Removing the 2.5-Inch Hard Drive (Unibody MacBook Pro 2009–2012)
- Tutorial B: Removing the Blade SSD (Retina MacBook Pro 2012–2015)
- If Your MacBook Pro Has Soldered Storage (Many 2016+ Models)
- Common Mistakes (and How to Avoid Them)
- What to Do After the Drive Is Removed
- Real-World Experiences: Lessons People Learn the “Fun” Way (Extra )
- Conclusion
Removing a MacBook Pro “hard drive” can be either (1) pleasantly straightforward or (2) a dramatic plot twist where you discover your “drive” is actually
a soldered chip living permanently on the logic board. So before we grab screwdrivers and confidence, we’re going to do one quick thing:
make sure your MacBook Pro actually has a removable drive.
This tutorial pulls together best practices from established repair references and Apple’s own guidance on identification and backups, then translates it into
normal-human Englishwith fewer “Step 47: become a robot” vibes.
First: Does Your MacBook Pro Have a Removable “Hard Drive”?
Apple’s MacBook Pro lineup spans eras where storage was:
(a) a classic 2.5-inch hard drive you can remove,
(b) a removable blade-style SSD, or
(c) soldered storage that’s basically “married” to the motherboard.
The steps you follow depend entirely on which one you own.
Quick model check (do this before touching a screw)
- Click Apple menu → About This Mac to see your model name and (often) year.
- Use your serial number to confirm the exact model on Apple’s coverage/tech specs pages.
- Flip the laptop over and look for the model number like A1278, A1286, A1398 (varies by year).
Which category are you in?
-
Unibody MacBook Pro (roughly 2009–2012, non-Retina):
Usually has a removable 2.5-inch SATA hard drive (or SATA SSD if upgraded).
This is the “yes, a normal hard drive” scenario. -
Retina MacBook Pro (roughly 2012–2015):
Has a removable blade SSD in many models (still removable, but different screws and shape). -
Many newer MacBook Pros (2016+ and most Apple silicon models):
Storage is commonly soldered. You can open the bottom case, surebut you can’t remove the “drive” like the old days.
In those cases, skip to the section on alternatives.
Before You Open It: Backup, Power Down, and Screw Sanity
1) Back up like Future-You is paying the bill
Even if you’re “just removing the drive,” accidents happen: a torn cable, a short, a stripped screw that turns into a two-day saga.
A backup turns disasters into minor inconveniences.
- Time Machine backup: simplest full-system safety net for most people.
- Manual copy: drag important folders to an external drive if you’re short on time.
- Cloning: helpful if you’re swapping drives and want an identical copy (especially for older Macs).
2) Proper shutdown (no “sleep mode bravery”)
- Shut down macOS completely.
- Unplug the charger and all accessories.
- Press and hold the power button for a few seconds (helps discharge residual power).
- Work on a clean, dry surface with decent lighting.
3) Organize screws (because they love to escape)
MacBook screws are tiny, shiny, and absolutely convinced they’re Olympic sprinters.
Use a magnetic mat, a pill organizer, an egg carton, or labeled tape.
The big rule: don’t mix screw lengths. A long screw in the wrong hole can damage components.
Tools and Supplies You’ll Want
- Phillips #00 screwdriver (common for Unibody bottom cases)
- P5 Pentalobe screwdriver (common for Retina bottom cases)
- Torx T6 (commonly used for hard drive mounting posts/brackets)
- Torx T5 (often used for SSD retaining screws in some Retina models)
- Plastic spudger or nylon pry tool (for gentle connector work)
- Tweezers (optional, but handy for tiny screws)
- ESD precaution (anti-static strap or at least touch grounded metal often)
- Small containers for screws
- External drive enclosure/adapter (optional, great for data transfer)
Tutorial A: Removing the 2.5-Inch Hard Drive (Unibody MacBook Pro 2009–2012)
If your MacBook Pro is a classic Unibody model with a removable 2.5-inch SATA drive, this is the main event.
The exact screw locations vary slightly by size/year, but the workflow is very consistent.
Step 1: Remove the bottom case
- Flip the MacBook Pro upside down.
- Remove the perimeter screws holding the bottom case.
-
Lift the bottom case off.
If it feels stuck, don’t pry like you’re opening a paint canuse gentle upward pressure and check for a missed screw.
Step 2: Disconnect the battery (strongly recommended)
Many Unibody models allow you to disconnect the battery connector from the logic board. Do it.
It reduces the chance of shorting something while you work near cables and metal brackets.
- Locate the battery connector on the logic board (near the battery edge).
- Use a plastic spudger to gently lift/disconnect the connector straight up (no yanking).
Step 3: Find the hard drive and remove the retaining bracket
The 2.5-inch drive usually sits along one side of the chassis, held in place by a small bracket.
The bracket commonly uses two screws (sometimes captive screws that stay attached to the bracket).
- Locate the hard drive bracket at the edge of the drive.
- Remove the bracket screws.
- Lift out the bracket and set it aside.
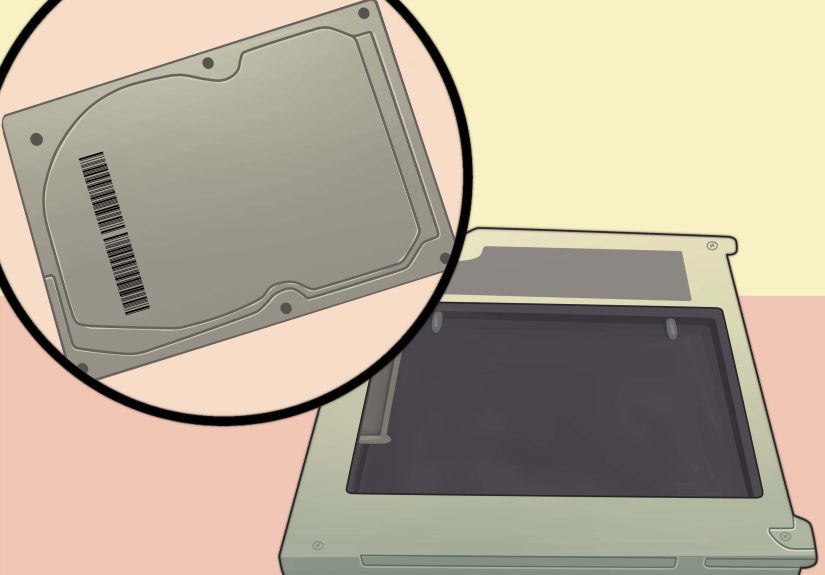
Step 4: Lift the drive out and disconnect the SATA cable
-
Many models include a black pull tab on the drive. Lift gently using the tab.
If there’s no tab, lift from the side carefully. -
Once the drive is slightly raised, disconnect the SATA connector by pulling the connector straight out of the drive.
Don’t pull on the cable itself; grip the connector. - Remove the drive completely.
Step 5: If you’re replacing the drive, transfer the mounting posts
Unibody MacBook Pros typically use four small side mounting posts/screws (often Torx T6) on the drive.
These help align the drive in the bay.
- Unscrew the four side posts from the old drive (usually Torx T6).
- Screw them into the same positions on the new drive/SSD.
Step 6: Reassembly checklist
- Reconnect the SATA cable to the drive firmly.
- Seat the drive back into the bay (posts align into rubber grommets/slots).
- Reinstall the bracket.
- Reconnect the battery connector.
- Put the bottom case back on and return screws to their original locations.
Pro tip: If you upgraded from a spinning HDD to a faster SSD and suddenly see weird slowdowns or drive detection issues,
some Unibody models are notorious for a failing SATA hard drive cable. If the new drive behaves strangely, the cable is a common culprit.
Tutorial B: Removing the Blade SSD (Retina MacBook Pro 2012–2015)
Retina-era MacBook Pros often use a thin blade-style SSD. The good news: it’s lighter and easier to remove than a 2.5-inch drive.
The important difference: you’ll typically need a P5 pentalobe for the bottom case and a Torx driver for the SSD screw.
Step 1: Remove the bottom case (pentalobe screws)
- Flip the MacBook Pro over.
- Remove the pentalobe screws holding the lower case.
- Lift the case off gently.
Step 2: Disconnect the battery connector
This matters even more on Retina models because the battery is large and nearby, and you’ll be working around delicate connectors.
- Locate the battery connector.
- Use a plastic tool to disconnect it carefully.
Step 3: Remove the SSD retaining screw and slide out the SSD
- Find the blade SSD (a slim card secured by a single screw at one end).
- Remove the retaining screw (often Torx T5, model-dependent).
- Slide the SSD out of its slot at a slight angle.
Compatibility warning: Retina MacBook Pro SSDs can be proprietary. Replacements aren’t always “any M.2 drive will do.”
If your goal is an upgrade, confirm compatibility with your exact model identifier before buying anything.
If Your MacBook Pro Has Soldered Storage (Many 2016+ Models)
If you opened the bottom case and found no removable drivewelcome to the modern era, where storage often lives permanently on the logic board.
In this case, there is no “hard drive removal” in the traditional sense.
What you can do instead
- Use an external SSD for extra storage or for fast backups.
- Prioritize backups (Time Machine + cloud copies for critical files).
- For serious data recovery issues, consider professional helpespecially if the Mac won’t power on.
Common Mistakes (and How to Avoid Them)
Mixing screws like a chaotic trail mix
Bottom case screws can be different lengths. Keep them organized.
If your screw pile looks like it came from three different universes, pause and sort.
Stripping a screw head
Use the correct driver and apply firm, straight-down pressure.
If a screw resists, don’t “power through”that’s how you turn a simple project into a tiny metal tragedy.
Forgetting the battery connector
Disconnecting the battery reduces risk. It’s a small step that can prevent big regret.
Damaging the SATA cable (Unibody models)
The hard drive cable in older MacBook Pros can be delicate and sometimes fails over time.
Be gentle with bends and connectors, and don’t crease the cable sharply.
What to Do After the Drive Is Removed
If you’re replacing/upgrading the drive
- Install macOS (via Recovery, installer USB, or another method appropriate for your model).
- Format/initialize the new drive using Disk Utility if it isn’t recognized or prepared yet.
- Restore your data from Time Machine or migrate files manually.
- Run a quick health check (verify the drive shows up correctly and boots reliably).
If you removed the drive for data transfer
- Put the drive into a SATA-to-USB enclosure/adapter (Unibody 2.5-inch drives) and connect it to another Mac/PC to copy files.
- For blade SSDs, you may need a model-specific enclosurenot all adapters fit Apple’s proprietary connectors.
Real-World Experiences: Lessons People Learn the “Fun” Way (Extra )
“How hard can it be?” is the traditional opening line of every electronics adventure storyright before a screw rolls into a parallel dimension.
In real life, the experience of removing a MacBook Pro hard drive usually falls into one of three categories: smooth, mildly annoying, or
“why does this laptop have twelve different screw lengths and a personal vendetta against me?”
One of the most common experiences people report is that the physical removal is easier than the mental organization.
The drive itself is typically held by a small bracket and a connector that slides off with gentle pressure. The real challenge is keeping track of
where everything came from. A simple trick that shows up again and again: lay screws on a piece of paper in roughly the same pattern as the bottom case,
then label sections like “front edge” and “hinge edge.” It feels overly carefuluntil you’re staring at a leftover screw at the end like it’s a tiny
accusatory eyebrow.
Another frequent “experience moment” is discovering how much a small part can cause a big problem. On older Unibody
MacBook Pros, people often upgrade from a spinning hard drive to a fast SSD and then get weird symptoms: slow performance, intermittent detection,
or boot issues that seem to contradict the whole point of upgrading. In many cases, the new SSD is finethe hard drive cable is the
weak link. It’s the laptop equivalent of buying a sports car and then realizing your driveway is made of pudding. The lesson: if things act strange
after a drive swap, don’t panic-buy another SSD. Check the cable and seating first.
There’s also the “I did everything right, but it still won’t boot” experienceusually tied to software steps after the hardware work.
People sometimes assume that once the drive is installed, the Mac will magically know what to do next. But a new or erased drive is like a blank notebook:
useful, yes, but it doesn’t write your term paper on its own. The smoothest outcomes tend to come from those who plan the aftercare:
they have a Time Machine backup ready, they know how they’ll reinstall macOS, and they’ve already decided whether they’ll restore everything at once
or start fresh and migrate only what they need.
A surprisingly positive experience many people mention is the confidence boost. The first time you open a MacBook Pro, it can feel like you’re
sneaking into a highly guarded museum exhibit. Then you realize it’s mostly screws, a cover, and carefully arranged components.
The key is patience: slow turns on the screwdriver, gentle connector handling, and stopping the moment something feels forced.
Taking quick photos as you go (just with your phone) can be a lifesaver when reassemblingespecially if you get interrupted mid-project.
Finally, there’s the “new habits” experience. After doing one successful drive removal, people often become the type who backs up more regularly,
labels cables, and keeps a tiny tool kit. Not because they became a repair wizard overnight, but because they’ve seen how fast a minor hardware change
can turn into data drama if you skip preparation. If you walk away from this tutorial with only one new habit, let it be this:
backup first, screwdriver second. Your future self will be annoyingly grateful.
Conclusion
Removing a MacBook Pro hard drive can be a genuinely simple projectif you match the steps to your exact model.
Unibody (2009–2012) machines usually let you remove a 2.5-inch SATA drive with a Phillips and Torx driver. Many Retina (2012–2015) models use a removable
blade SSD with pentalobe and Torx screws. Newer MacBook Pros often have soldered storage, which changes the strategy from “remove the drive” to “protect your data.”
Go slow, organize screws, disconnect the battery when possible, and treat connectors gently. And remember: the only thing smaller than MacBook screws
is the patience you’ll wish you had if you rush.


