
Table of Contents >> Show >> Hide
- Why Kool-Aid Stains Skin So Easily
- Quick Safety Notes Before You Start
- How to Remove Kool Aid from Skin: 10 Steps
- Step 1: Rinse Immediately (If You Caught It Fresh)
- Step 2: Wash with Gentle Soap and Warm Water
- Step 3: Upgrade to Dish Soap (For Hands Only)
- Step 4: Try an Oil Massage (Baby Oil, Olive Oil, Coconut Oil)
- Step 5: Use Petroleum Jelly (Especially Around Nails)
- Step 6: Reach for Makeup Remover or Micellar Water
- Step 7: Gentle Exfoliation with a Baking Soda Paste
- Step 8: Try a White Vinegar Soak (Diluted)
- Step 9: Use Rubbing Alcohol or Hand Sanitizer (Last Resort, Small Amount)
- Step 10: Let Time Finish the Job (Plus Moisturizer)
- What Not to Do (Unless You Enjoy Regret)
- Extra Tips to Prevent Kool-Aid Skin Stains Next Time
- When to Call a Doctor
- Real-World Experiences: What People Commonly Run Into (and What Actually Helps)
Kool-Aid is delicious, nostalgic, andwhen spilledshockingly committed to the bit. One second you’re mixing
“Cherry Blast,” the next you’re rocking hands that look like you just finished finger-painting a crime scene.
The good news: Kool-Aid stains on skin are usually temporary, harmless, and removable with a little strategy
(and a lot less panic than your mirror suggests).
This guide walks you through ten practical, skin-safe steps to remove Kool-Aid from skin using common household
items. We’ll start gentle, level up only if needed, and keep your skin barrier intactbecause the goal is
“clean hands,” not “why do my knuckles feel like sandpaper?”
Why Kool-Aid Stains Skin So Easily
Kool-Aid (and similar drink mixes) gets its bold color from food dyes. Those dyes can cling to the outermost
layer of your skin (the stratum corneum), especially around dry patches, cuticles, and tiny creases where pigment
loves to settle in like it pays rent. The stain looks intense because your skin is light and the dye is… not shy.
The upside: that outer layer constantly sheds. Even if you do nothing, most dye stains fade over a day or two
with normal washing. The steps below simply speed things upwithout turning your hands into a DIY science fair project.
Quick Safety Notes Before You Start
- Avoid eyes, lips, and broken skin. Use extra caution on faces and around mouthsespecially for kids.
- Start gentle. You can always repeat a mild method; it’s harder to un-irritate irritated skin.
- Stop if you feel burning or see a rash. Mild warmth from warm water is fine. Stinging is not.
- Moisturize after stain removal. Most “stronger” methods work by dissolving oilsyour skin’s included.
How to Remove Kool Aid from Skin: 10 Steps
Think of this as a ladder. Try each step for 30–60 seconds (or the time noted), rinse, and check. If the stain is
still throwing a tantrum, move to the next step.
Step 1: Rinse Immediately (If You Caught It Fresh)
If the stain just happened, head straight for cool-to-warm running water. Rinse for 20–30 seconds,
gently rubbing with your fingertips. Fresh dye lifts more easily before it settles into dry areas.
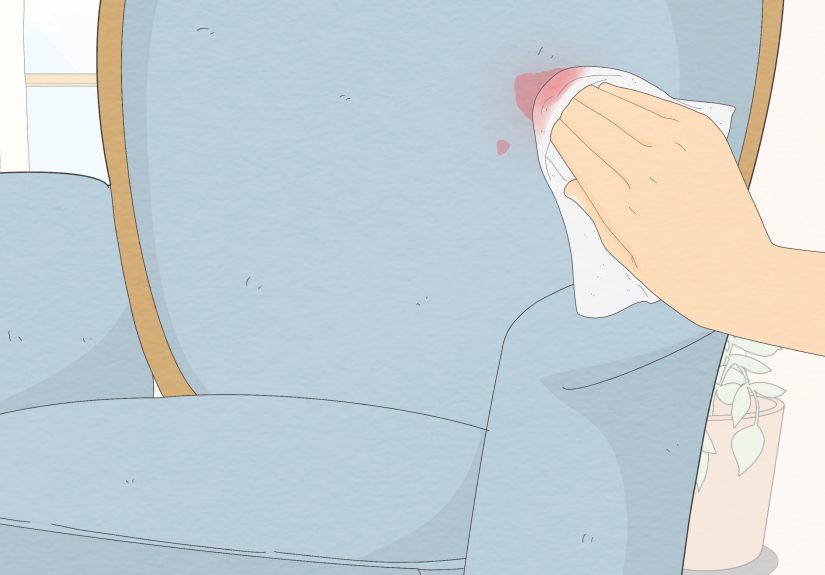
Step 2: Wash with Gentle Soap and Warm Water
Use a mild hand soap or body wash and warm water. Lather thoroughly, rubbing palms, backs of hands, between fingers,
and around nails. Rinse and repeat once. This works surprisingly often, especially for light stains.
Pro tip: If your hands are very dry, apply a little moisturizer after this step before moving on. Dry skin grabs dye.
Step 3: Upgrade to Dish Soap (For Hands Only)
If regular soap isn’t cutting it, switch to a small drop of dish soap (the grease-cutting kind). Dish soap is a stronger
surfactant, which can help lift pigment and sugars left behind by drink mixes.
- Wet hands.
- Use a pea-sized amount of dish soap.
- Rub gently for 20–30 seconds, focusing on stained areas.
- Rinse well and pat dry.
Step 4: Try an Oil Massage (Baby Oil, Olive Oil, Coconut Oil)
Dye molecules can cling to oils on your skin, so using oil can help “re-dissolve” and lift the pigment. This is one of the
best options for sensitive skin because it’s gentle and doubles as a mini hand treatment.
- Put a few drops of oil on a cotton pad or your fingertips.
- Massage into the stain for 30–60 seconds.
- Wipe with a clean cloth or paper towel.
- Wash with mild soap and rinse.
Step 5: Use Petroleum Jelly (Especially Around Nails)
If the stain is concentrated near cuticles, petroleum jelly can act like a thick oil barrier that loosens pigment.
Rub a small amount over the stain, let it sit for 1–2 minutes, then wipe and wash with soap.
Step 6: Reach for Makeup Remover or Micellar Water
If you have micellar water or a gentle makeup remover, it can be great for removing pigment without aggressive scrubbing
particularly on faces (avoiding eyes) or sensitive areas.
- Soak a cotton pad with micellar water or remover.
- Press onto the stain for 10–15 seconds.
- Wipe gently, then rinse.
Step 7: Gentle Exfoliation with a Baking Soda Paste
If the color is stubborn, mild exfoliation helps lift stained dead skin cells. Make a paste using
baking soda + water (about 1 teaspoon baking soda with a few drops of water).
- Apply paste to the stained area.
- Rub lightly in circles for 15–20 seconds (no sandpaper energy).
- Rinse well.
- Follow with moisturizer.
Important: Skip this step if you have eczema, cracks, or irritationexfoliation can make those worse.
Step 8: Try a White Vinegar Soak (Diluted)
Diluted vinegar can help lift dye stains. Mix equal parts white vinegar and warm water in a small bowl. Soak the stained
area for about 30–60 seconds, then wash with soap and rinse.
Keep it diluted and avoid cutsvinegar can sting and irritate sensitive skin.
Step 9: Use Rubbing Alcohol or Hand Sanitizer (Last Resort, Small Amount)
Alcohol (like isopropyl rubbing alcohol) can remove pigments fastbut it can also dry out skin quickly. If you use it:
- Apply a small amount to a cotton pad (don’t pour it directly on skin).
- Wipe the stained area for 5–10 seconds.
- Rinse immediately.
- Moisturize right away.
Use this sparingly, especially on kids’ skin or if you’re prone to dryness. If your hands feel tight afterward,
that’s your cue to stop and hydrate.
Step 10: Let Time Finish the Job (Plus Moisturizer)
If there’s still a faint tint, congratulationsyou’ve reached the “this will fade naturally” stage. Your skin will shed
the stained cells over the next 24–48 hours. Help it along by:
- Washing normally (no marathon scrubbing sessions).
- Moisturizing after handwashing.
- Using gentle exfoliation once daily at most (if your skin tolerates it).
What Not to Do (Unless You Enjoy Regret)
- Don’t use bleach on skin. It can cause burns and serious irritation.
- Avoid acetone/nail polish remover. It’s harsh, drying, and can inflame skin fast.
- Don’t scrub with abrasive tools. Pumice stones and rough scouring pads belong nowhere near human hands.
- Skip undiluted acids on skin. Lemon juice and vinegar can irritateespecially on cuts or eczema.
- Don’t keep escalating if you’re getting red or sore. A little dye is better than angry skin.
Extra Tips to Prevent Kool-Aid Skin Stains Next Time
- Wear gloves when mixing powdered drink packets or doing big batches for parties.
- Use a spoon, not fingers, to stir pigment-heavy mixtures.
- Apply a barrier (a thin layer of lotion) before crafts or cooking projects involving dyes.
- Rinse quickly if you spillfresh stains are easier than “I noticed this two hours later.”
When to Call a Doctor
Kool-Aid staining itself is usually not a medical problem. But reach out to a clinician if you notice:
- Rash, hives, swelling, or intense itching
- Cracked skin that won’t heal, bleeding, or signs of infection
- Burning pain after using a removal method (especially alcohol or acids)
- Eye exposure with discomfort, redness, or vision changes (rinse with water and seek care)
Real-World Experiences: What People Commonly Run Into (and What Actually Helps)
Most Kool-Aid-on-skin incidents fall into a few classic categories. The first is the “party prep panic”:
you’re making a giant pitcher for a birthday, a packet tears open like it was designed by a prankster, and suddenly
your fingertips look like you’ve joined a very niche superhero teamThe Crimson Cuticles. In these cases, the stain
is usually concentrated around nails and dry knuckle creases. The fix tends to be boring but effective: warm water,
soap, then an oil massage. The oil step is the one people skip, and it’s often the one that makes the biggest visible
difference, especially near cuticles where dye loves to camp out.
The second common scenario is “kids + science experiment energy”. Maybe it’s a homemade “slime” attempt,
a kitchen craft, or a “let’s make rainbow drinks” moment that escalated quickly. Kids’ skin can be more sensitive, so
the win is to keep it gentle: soap, rinse, repeat, then baby oil or a mild remover. Parents often report that one aggressive
scrub session creates more drama than the stain itselfredness, dryness, and a child who now believes you’re trying to
sand their hands down to the bone. If you keep it calm (short washes, gentle rubbing), stains fade without turning into
a full household event.
Another frequent one: the “Kool-Aid mustache”especially with red flavors. Around the mouth, people tend to
reach for harsh options too fast. Instead, the simplest approach is best: a mild cleanser, then a little petroleum jelly
or oil on a soft cloth, wipe gently, and wash again. It’s slower than blasting it with alcohol, but it’s kinder to skin
that’s already delicate. If the stain is faint, sometimes the most efficient strategy is to moisturize and waitbecause
over-cleaning your face is how you earn a surprise breakout the next day.
You’ll also see the “I tried everything and now my hands are dry” situation. This usually happens when someone
stacks strong methods: dish soap, then baking soda, then alcohol, then another round of dish soaplike they’re speedrunning
a skincare apocalypse. If that’s you, hit pause. Switch to lukewarm water, use a gentle cleanser, and moisturize generously.
Dry skin can hold onto pigment longer, which is the cruel irony: the more you over-strip, the more the stain seems to “stay.”
A heavy hand cream or ointment after washing often makes the remaining tint look less dramatic immediately.
Finally, there’s the underrated truth: time is an ingredient. If you’ve done the gentle steps and the stain is
down to a whisper, let your skin do what it does bestshed. People often notice the biggest improvement after a normal shower
and a night of sleep (and, yes, a respectable amount of moisturizer). So if you’re staring at your hands at 11:47 p.m. thinking
you need a chemical solution before tomorrow’s meeting, you probably don’t. You need soap, oil, and the confidence to say,
“It’s called fashion. Look it up.”


