Table of Contents >> Show >> Hide
- What Is a One-Way Screw?
- Tools You May Need
- Before You Start: Prep the Screw
- Method 1: Use a One-Way Screw Remover Tool
- Method 2: Grab the Head With Locking Pliers
- Method 3: File or Grind Two Flat Sides for Better Grip
- Method 4: Cut a New Slot and Use a Flathead Screwdriver
- Method 5: Use a Screw Extractor or Left-Hand Drill Bit
- Method 6: Drill Off the Head and Remove the Shank
- Which Method Should You Try First?
- Common Mistakes to Avoid
- Practical Examples
- How to Replace One-Way Screws After Removal
- Field Experience: What Actually Works When the Screw Refuses to Behave
- Conclusion
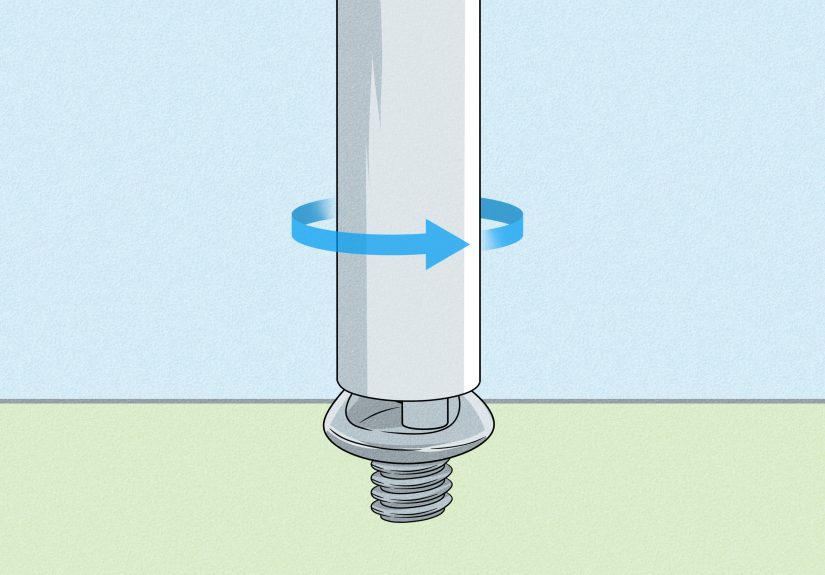
One-way screws are the tiny metal bouncers of the fastener world. They let you in, but they are very committed to not letting you back out. You often find them on security doors, window guards, public restroom fixtures, license plate frames, access panels, tamper-resistant hardware, and older home security products. Their slotted head is shaped so a regular flathead screwdriver can tighten the screw clockwise, but when you try to loosen it counterclockwise, the driver slips off like it suddenly remembered another appointment.
The good news? You can remove one-way screws. The not-so-good news? The cleanest method depends on the screw head, material, rust level, location, and how much damage you can tolerate around the surface. A screw on a painted security door needs a different strategy than one buried in a rusty bracket behind a garage. This guide explains the six best methods and tools for removing one-way screws, starting with the least destructive options and ending with the “fine, you win, I’m drilling your head off” approach.
Before you begin, make sure you are working only on hardware you own or are authorized to repair. One-way screws are often used for security, so this article is intended for legitimate maintenance, replacement, restoration, and DIY repair.
What Is a One-Way Screw?
A one-way screw, sometimes called a security screw, clutch-head screw, or tamper-resistant screw, is designed to be installed easily and removed with difficulty. The head usually looks like a slotted screw at first glance, but the slot has ramped edges. A flathead screwdriver catches when turning clockwise, yet slips when turning counterclockwise.
That design is useful when manufacturers want to discourage casual removal. The screws are common on security screen doors, window guards, bathroom partitions, signs, license plates, public fixtures, and outdoor hardware. Unfortunately, “discourage casual removal” can become “annoy the homeowner into questioning every life choice” when you need to replace a damaged part.
Tools You May Need
You do not need every tool on this list, but having a few options nearby saves time. One-way screws vary wildly in how cooperative they are. A fresh screw in clean metal may back out with a remover bit. A rusted screw that has lived outside for fifteen summers may require cutting, gripping, drilling, and a motivational speech.
- One-way screw remover bit or one-way screw remover screwdriver
- Variable-speed drill or impact driver
- Locking pliers or screw extraction pliers
- Rotary tool with a cutoff wheel
- Small hacksaw or metal file
- Flathead screwdriver with a wide blade
- Screw extractor kit
- Left-hand drill bits
- Center punch and hammer
- Penetrating oil for rusty screws
- Painter’s tape, cardboard, or thin metal flashing to protect nearby surfaces
- Safety glasses, gloves, and hearing protection when cutting or grinding
Before You Start: Prep the Screw
Preparation can make the difference between a five-minute fix and an afternoon of muttering at a door frame. First, clean the screw head with a stiff brush. Paint, dirt, and rust can keep tools from seating properly. If the screw is outdoors or visibly corroded, apply penetrating oil and give it time to work. Tap the screw head lightly with a hammer to help vibration break up rust, but do not smash it like it owes you money.
Next, protect the surface around the screw. Use painter’s tape, cardboard, or a thin scrap of metal if you will be using pliers, a file, or a rotary tool. One slip from a cutoff wheel can leave a dramatic scratch that says, “I watched one tutorial and got confident.”
Finally, choose the least destructive method that has a realistic chance of working. Start with a dedicated remover tool if the screw head is accessible. Move to pliers or slot-cutting if the tool slips. Save drilling for damaged, rusted, flush, or stubborn screws.
Method 1: Use a One-Way Screw Remover Tool
The best first attempt is usually a dedicated one-way screw remover. These tools are made with hardened tips that bite into the ramped screw head. Some are screwdriver-style tools. Others are bits that fit a drill or driver. Many sets include multiple sizes for common screw numbers, such as #4, #6, #8, #10, #12, and #14.
Best for
Clean one-way screws with heads that are still intact, accessible, and not badly rusted.
How to do it
- Match the remover to the screw size. A loose fit is the enemy.
- Place the remover squarely on the screw head.
- Press firmly downward. Pressure matters because the tool needs to bite.
- Turn counterclockwise slowly. Avoid high speed at first.
- If using a drill, use low speed and steady pressure rather than full throttle.
This method is clean, simple, and often inexpensive. The drawback is that one-way remover tools are not magic wands. If the head is rounded, painted over, rusty, or sitting perfectly flush against a hard surface, the tool may slip. If it slips twice, stop and reassess. Repeated slipping can polish the screw head smooth, which is the opposite of progress.
Method 2: Grab the Head With Locking Pliers
If the screw head sticks above the surface, locking pliers can be surprisingly effective. This is the garage version of persuasion: clamp hard, twist slowly, and try not to bark your knuckles on the frame.
Best for
Raised-head one-way screws, pan-head screws, truss-head screws, and screws with enough exposed edge to grip.
How to do it
- Open the locking pliers and adjust them so they clamp tightly around the screw head.
- Grip the screw head from the sides, not the top.
- Lock the pliers firmly.
- Turn counterclockwise in short, controlled movements.
- If the pliers slip, stop and create better gripping surfaces using Method 3.
The trick is patience. Do not yank. A sudden twist can tear up the surrounding material or snap the screw. Once the screw backs out even slightly, the pliers usually get a better bite. From there, keep turning until you can remove it by hand or with a standard tool.
For small screws, specialty screw extraction pliers can work better than ordinary locking pliers because their jaws are shaped to bite into damaged fastener heads. They are especially useful for license plate screws, small brackets, and household hardware.
Method 3: File or Grind Two Flat Sides for Better Grip
When pliers almost work but keep slipping, give them something to hold. Filing or grinding two opposite sides of the screw head creates flat surfaces. Think of it as giving the screw tiny shoulders so the pliers can grab it by the jacket.
Best for
Raised screw heads where the sides are too smooth or rounded for pliers.
How to do it
- Protect the surrounding surface with tape, cardboard, or thin metal.
- Use a metal file, rotary tool, or small grinder to flatten two opposite edges of the screw head.
- Work slowly and check your progress often.
- Clamp locking pliers onto the new flats.
- Turn counterclockwise with steady pressure.
This method is practical because it improves Method 2 instead of replacing it. It also avoids drilling, which can be risky near glass, thin metal, or finished wood. However, it does create metal filings and may scratch nearby surfaces if you are careless. Wear safety glasses and clean the area afterward.
Method 4: Cut a New Slot and Use a Flathead Screwdriver
Cutting a new slot is one of the most reliable ways to remove a one-way screw. You are basically converting the security screw into a normal slotted screw. A rotary tool with a thin cutoff wheel is ideal, but a small hacksaw can work if the screw head is accessible.
Best for
Stubborn screws with enough head surface to cut a straight slot.
How to do it
- Put on safety glasses. A cutoff wheel throws sparks and tiny metal bits.
- Protect the surrounding material.
- Cut a straight groove across the screw head.
- Make the groove deep enough for a flathead screwdriver to seat firmly.
- Insert a wide flathead screwdriver and press down hard.
- Turn counterclockwise slowly.
The wider the screwdriver blade, the better. A tiny screwdriver concentrates force in a small area and can twist out of the slot. A properly sized flathead spreads torque across the new groove and gives you more control.
If the screw is rusty, add penetrating oil before turning. If it resists, try tightening it a hair clockwise first, then loosening it. That small movement can break rust bonds. Yes, tightening before loosening feels wrong, but home repair is full of tiny betrayals.
Method 5: Use a Screw Extractor or Left-Hand Drill Bit
A screw extractor is designed for damaged, stripped, or stuck screws. The usual process is to drill a small pilot hole into the screw head, insert the extractor, and turn it counterclockwise. As the extractor bites into the hole, it backs the screw out.
Best for
Damaged one-way screws, stripped heads, screws too flush for pliers, and screws where slot-cutting is difficult.
How to do it
- Use a center punch to mark the middle of the screw head. This helps keep the drill bit from wandering.
- Drill a pilot hole using the size recommended by your extractor kit.
- Keep the drill straight and use slow speed.
- Insert the extractor into the pilot hole.
- Set the drill or tap handle to turn counterclockwise.
- Apply firm pressure and remove the screw slowly.
Left-hand drill bits are another useful option. Because they spin counterclockwise, they sometimes catch and unscrew the fastener while drilling. If that happens, congratulations: the screw removed itself, and you are allowed to feel smug for the rest of the day.
Be careful with small screws. Extractors are hardened but brittle. If you snap one inside the screw, drilling becomes much harder. Use low speed, keep the bit straight, and avoid side pressure.
Method 6: Drill Off the Head and Remove the Shank
This is the last-resort method. It is also one of the most effective when the screw refuses every polite request. Instead of unscrewing the fastener normally, you drill through the head until it separates from the shank. Then you remove the attached fixture, leaving the remaining screw stem exposed. After that, you can grab the shank with pliers and turn it out.
Best for
Severely rusted screws, ruined heads, flush screws, or hardware that is being replaced anyway.
How to do it
- Select a drill bit slightly larger than the screw shank but smaller than the screw head.
- Center punch the screw head.
- Drill slowly into the center until the head pops free or becomes thin enough to break off.
- Remove the bracket, plate, lock, or fixture.
- Grip the exposed shank with locking pliers.
- Turn counterclockwise until the remaining screw comes out.
This method is destructive to the screw and may mark the hardware. Use it when the screw is disposable or when the attached item is being replaced. If the screw goes into thin metal, be especially careful not to enlarge the mounting hole more than necessary.
Which Method Should You Try First?
Use this simple decision path:
- If the screw head is clean and accessible, try a one-way screw remover first.
- If the head is raised, try locking pliers.
- If pliers slip, file two flat sides and try again.
- If the head has enough surface, cut a new slot and use a wide flathead screwdriver.
- If the head is damaged or flush, use a screw extractor or left-hand drill bit.
- If nothing works, drill off the head and remove the remaining shank.
The main rule is to avoid making the screw worse too early. A rushed drill attempt can wander. A sloppy rotary cut can scar the surrounding surface. A wrong-size remover can round off the head. Start clean, slow, and square.
Common Mistakes to Avoid
Using Too Much Speed
High speed feels powerful, but it often causes slipping, heat, and damage. Most one-way screw removal methods work better with low speed and high control.
Skipping Eye Protection
Cutting, grinding, drilling, and extracting can throw metal fragments. Safety glasses are not optional decoration. They are cheaper than an urgent care visit and look much better than regret.
Using the Wrong Size Tool
A one-way remover must match the screw head closely. Too small and it slips. Too large and it cannot bite. If you are unsure, test the fit by hand before using a drill.
Forgetting Surface Protection
A screw may cost five cents, but the painted door, finished cabinet, or aluminum frame around it may cost much more. Mask the area before filing, cutting, or gripping.
Drilling Off-Center
An off-center drill bit can damage the fixture or enlarge the hole. Use a center punch and begin with a small bit before stepping up.
Practical Examples
Removing One-Way Screws From a Security Door
Security doors often use larger one-way screws with shallow heads. Start with a properly sized remover tool. If it slips, cut a clean slot with a rotary tool and use a large flathead screwdriver. If the screw is rusted into the frame, apply penetrating oil and wait before trying again. Drilling off the head is common when the door hardware is being replaced.
Removing One-Way Screws From a License Plate Frame
Small one-way screws on license plate frames may be easier to remove with screw extraction pliers or a small extractor bit. Because the screws are small, avoid aggressive drilling unless you are prepared to replace the mounting hardware.
Removing One-Way Screws From Bathroom Partitions
Public restroom hardware often uses tamper-resistant fasteners. If you are maintaining your own commercial property, a one-way remover set is worth having. It is cleaner and faster than cutting slots in every screw.
How to Replace One-Way Screws After Removal
Once the old screws are out, decide whether you really need one-way screws again. If the hardware is in a public or security-sensitive location, replacing them with new one-way or tamper-resistant screws makes sense. For ordinary home repairs, a stainless steel Phillips, square-drive, Torx, or hex-head screw may be easier to service in the future.
If the old hole is enlarged, use a slightly larger screw or repair the hole before reinstalling. In wood, toothpicks and wood glue can tighten a loose hole for light-duty hardware. In metal, you may need a larger fastener, rivet nut, threaded insert, or new mounting location.
Field Experience: What Actually Works When the Screw Refuses to Behave
In real-world repair, one-way screws rarely fail in a neat, textbook way. The screws that need removal are usually the ones that have been painted over six times, installed outdoors, attacked by rust, or tightened by someone who believed torque was a personality trait. That is why experience matters as much as the tool list.
The first lesson is to slow down. Most damage happens in the first two minutes, when the person doing the repair assumes the screw will behave like a normal fastener. It will not. Pressing a regular flathead screwdriver into a one-way screw and twisting harder usually just polishes the ramped slot. Once the head is shiny and rounded, even a proper remover has less to bite. A better habit is to inspect the head, clean it, and choose a method before applying force.
The second lesson is that dedicated one-way screw removers are worth trying, but they are not guaranteed. On clean indoor screws, they can feel almost magical. On old exterior screws, they may slip because rust, paint, or shallow head geometry keeps the tool from seating. When that happens, do not keep spinning. Switch tactics. Many experienced DIYers move quickly from a slipping remover to either locking pliers or a cut-slot method.
The third lesson is that cutting a new slot often beats wrestling. A rotary tool with a thin cutoff wheel can turn an annoying security screw into a normal slotted screw in under a minute. The key is control. Cut straight, keep the groove centered, and make it deep enough for a large flathead screwdriver. A shallow groove will cam out. A crooked groove will twist the screwdriver sideways. A clean groove gives you torque, and torque is the language stubborn screws understand.
The fourth lesson is to protect the surrounding surface before you think you need to. Painted metal doors, aluminum frames, and finished wood trim scratch easily. A few strips of painter’s tape are better than explaining why the repair now includes touch-up paint. If using a rotary tool near glass or a finished surface, add a physical shield, such as cardboard or thin scrap metal.
The fifth lesson is that drilling should be calm, centered, and deliberate. A center punch is not a fancy extra; it keeps the bit from skating across the screw head. Start small, use low speed, and let the bit cut. If you are drilling off the head, stop as soon as the head separates. Do not keep drilling into the fixture just because the drill is already in your hand and making heroic noises.
The final lesson is to plan for reassembly. Removing the screw is only half the job. Before you destroy the old fastener, know what will replace it. If the location still needs tamper resistance, buy new security screws and the matching driver. If future maintenance matters more, switch to a serviceable screw type. The best repair is not just getting the old screw out; it is making sure the next person does not curse your name while holding a drill.
Conclusion
Removing one-way screws is not about brute force. It is about choosing the right escalation path. Begin with a one-way screw remover when the head is clean. Use locking pliers when the head is raised. File flats if you need better grip. Cut a new slot when the screw needs a second chance at being normal. Use a screw extractor for damaged or flush heads. Drill off the head only when the screw has officially chosen chaos.
With patience, eye protection, and the right tools, most one-way screws can be removed without ruining the surrounding surface. And when one refuses? Well, that is why drills, extractors, and coffee exist.