
Table of Contents >> Show >> Hide
- What Rust Is and Why It Keeps Coming Back
- Before You Start: A Few Smart Rust-Removal Rules
- 1. Scrub It Off With Sandpaper, Steel Wool, or a Wire Brush
- 2. Use a Baking Soda Paste for Light Surface Rust
- 3. Soak Rust Away With White Vinegar
- 4. Try Lemon Juice and Salt for Smaller Rust Stains
- 5. Use a Cream of Tartar Rust Paste
- 6. Reach for a Commercial Rust Remover
- 7. Use Electrolysis for Heavily Rusted Tools
- 8. Apply a Rust Converter When Removal Is Not Enough
- How to Choose the Right Rust Removal Method
- Common Rust Removal Mistakes to Avoid
- How to Keep Rust From Coming Back
- Practical Experiences and Real-World Lessons From Rust Removal
- Final Thoughts
- SEO Tags
Rust has a talent for showing up exactly where you do not want it: on garden tools, patio furniture, kitchen racks, car parts, bolts, hinges, and that one “perfectly good” metal item you swore you would fix someday. The good news is that rust does not always mean game over. In many cases, you can remove it, protect the surface, and give that metal a second chance at life. That is great news for your wallet, your toolbox, and your inner DIY hero.
If you are wondering how to remove rust from metal without turning your weekend into a chemistry experiment gone rogue, you are in the right place. Below are eight effective rust removal methods, when to use each one, and how to keep that annoying orange-brown fuzz from coming back for an encore.
What Rust Is and Why It Keeps Coming Back
Rust is a form of corrosion that develops when iron or iron-containing metals, such as steel, react with oxygen and moisture. Once that reaction starts, the metal gradually weakens, flakes, stains, and loses its smooth finish. A little surface rust may look harmless, but if you ignore it long enough, it can eat into the material and turn a solid tool or fixture into a crumbly disappointment.
That is why timing matters. Light rust is usually much easier to remove than heavy scaling or deep pitting. In plain English: if the metal looks like it just got a few freckles, you are in good shape. If it looks like it fought a swamp monster and lost, you may need a more aggressive approach.
Before You Start: A Few Smart Rust-Removal Rules
Before trying any rust removal method, clean off grease, dirt, and loose debris first. Dish soap and warm water are often enough for prep work. Dry the metal well so you can actually see what you are dealing with.
Also, choose your method based on the type of metal and the severity of the rust. Stainless steel, chrome, and delicate finishes usually need gentler treatment. Heavy-duty iron or steel can handle tougher methods. Always test in a small, hidden area first, especially if the item has paint, plating, or a decorative finish.
One more important point: wear gloves, protect your eyes, work in a well-ventilated space when using chemical products, and never mix cleaners together. Rust removal is satisfying, but chemical roulette is not.
1. Scrub It Off With Sandpaper, Steel Wool, or a Wire Brush
Best for: Light rust, flaky rust, tools, and painted metal with surface corrosion
Sometimes the simplest method is still one of the best. If the rust is light or patchy, manual abrasion can remove it quickly. Use a wire brush, steel wool, scouring pad, or sandpaper to scrub away loose rust and expose clean metal underneath. Start with a coarser grit to break through the rust, then move to a finer grit to smooth the surface.
This method works especially well on tools, bolts, outdoor hardware, and cast-iron pieces that have visible flaky rust. It is also a good first step before applying another treatment, because knocking off loose rust helps vinegar, baking soda, or a commercial remover work more effectively.
Just be careful with stainless steel and decorative finishes. Rough abrasives can scratch them. For those surfaces, use a gentler nonabrasive pad and scrub with the grain if the metal has one. Rust removal is the goal, not creating a brand-new scratch collection.
2. Use a Baking Soda Paste for Light Surface Rust
Best for: Knives, kitchen tools, thin metal, and small rust spots
Baking soda is the classic overachiever of the cleaning world. It is mild, easy to find, and helpful for light rust on smaller items. Mix baking soda with a little water until it forms a spreadable paste. Apply it to the rusted area, let it sit for about an hour, then scrub with a brush, sponge, or soft abrasive pad. Rinse and dry thoroughly.
This method is especially handy when you want something gentler than aggressive scraping. It is a good choice for lighter corrosion on household tools, metal utensils, or smaller fixtures that do not need industrial-strength intervention.
If you are working on stainless steel, baking soda is often one of the safer options. Use a soft cloth or nylon brush rather than steel wool. Stainless steel may be tough, but it still has feelings. Scratch its finish and it will remind you every time the light hits it.
3. Soak Rust Away With White Vinegar
Best for: Small tools, hardware, hand tools, and removable rusty parts
White vinegar is one of the most popular DIY rust removal methods for a reason: it is cheap, accessible, and surprisingly effective on light to moderate rust. For small metal items, soak them in undiluted white vinegar for at least 30 minutes and sometimes longer, depending on the amount of rust. Then scrub the loosened corrosion with a brush or pad, rinse with water, and dry completely.
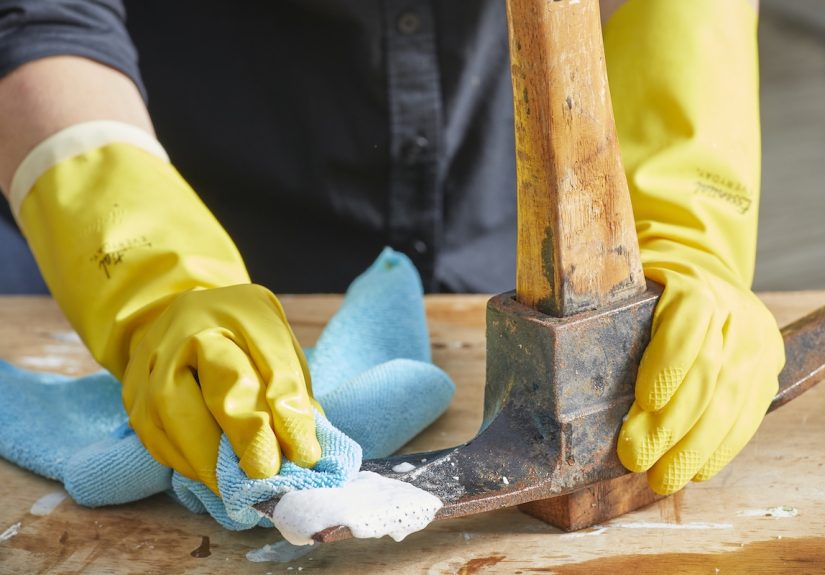
If the object is too large to soak, lay a vinegar-soaked cloth over the rusted area or spray the vinegar directly on the surface and let it sit before scrubbing.
The catch? Vinegar is acidic, so it is not ideal for every surface. Leaving metal in it too long can dull finishes or create new problems, especially on certain specialty tools or sensitive surfaces. It is a strong method, but not a “leave it for a week and hope for a miracle” method.
4. Try Lemon Juice and Salt for Smaller Rust Stains
Best for: Light rust, decorative metal, and quick spot treatment
Lemon juice and salt make a good rust-fighting team for minor spots and stained areas. The acidity helps loosen rust, while the salt adds mild abrasion. Sprinkle salt over the rust, squeeze lemon juice on top, let it sit for a while, and scrub gently.
This method is useful when you want a more natural-feeling option for light corrosion on smaller items. It is also handy when the rust is more annoying than severe. Think little stains on household metal rather than a lawn tool that looks like it has been excavated from an archaeological dig.
Because lemon juice is still acidic, rinse the surface thoroughly and dry it well afterward. Any moisture left behind can invite rust back to the party, and trust me, rust never brings snacks.
5. Use a Cream of Tartar Rust Paste
Best for: Spot cleaning, detailed metal pieces, and gentle household rust removal
Cream of tartar is not just for baking projects that require suspiciously tiny measurements. It can also help remove rust when mixed into a paste. Some DIYers combine it with baking soda and a little hydrogen peroxide, while others mix it with vinegar. The goal is the same: create a thick paste, apply it to the rust, let it sit, then scrub and rinse.
This is a practical option for smaller objects and detailed areas where you want more control than a soak provides. It is less messy than liquid-only methods and easier to keep exactly where you need it.
It is not usually the fastest method for heavy rust, but it can be a very useful middle ground when baking soda alone is too mild and chemical removers feel like overkill.
6. Reach for a Commercial Rust Remover
Best for: Moderate to heavy rust, hard-to-reach areas, and larger metal items
When household methods are not cutting it, store-bought rust removers can save time and effort. These products come in sprays, liquids, gels, and soak solutions. Some dissolve rust chemically, while others loosen it so it can be wiped or scrubbed away more easily.
Commercial products are often the best choice for stubborn rust on outdoor furniture, automotive parts, tool heads, and larger objects that need more than pantry ingredients. They also tend to work better on uneven surfaces, seams, and crevices.
Read the label carefully and use the product only on compatible metals. Some formulas are great for iron and steel but not appropriate for stainless steel or galvanized metal. Use gloves, eye protection, and ventilation, then rinse or wipe as directed. Strong products can be incredibly effective, but they are not the place for guesswork.
7. Use Electrolysis for Heavily Rusted Tools
Best for: Intricate steel or iron tools with heavy rust
Electrolysis is the advanced-shop option for badly rusted metal, especially old tools with awkward shapes or lots of detail. It uses an electrical setup in a solution to help separate rust from the metal. Done correctly, it can clean up heavily rusted iron and steel without grinding away the base metal as aggressively as sanding can.
This method is especially appealing when you want to preserve an older tool or piece of hardware instead of just blasting it with abrasives. It can reach into grooves, joints, and textured surfaces where brushes struggle.
That said, this is not the beginner method for someone who gets nervous plugging in a phone charger. Follow equipment instructions carefully, use proper safety practices, and reserve electrolysis for projects that genuinely need it. For many everyday rust spots, a simpler method will do the job just fine.
8. Apply a Rust Converter When Removal Is Not Enough
Best for: Heavily rusted iron or steel that will be primed and painted
Sometimes rust is so deep or widespread that removing every speck down to shiny bare metal is unrealistic. That is where a rust converter comes in. Instead of fully stripping the corrosion away, it reacts with the rust and turns it into a more stable surface that can usually be primed and painted.
This is a smart option for fences, railings, lawn equipment, structural metal, and other iron or steel items that are too rough for perfection but still worth saving. Usually, you scrape off loose rust first, then apply the converter and allow it to cure according to the product directions.
A rust converter is not magic polish in a bottle. It is a practical rescue method for metal that needs stabilization and repainting, not a beauty treatment for chrome decor or stainless kitchen appliances.
How to Choose the Right Rust Removal Method
- Light rust on small items: Baking soda, lemon and salt, or cream of tartar paste
- Light to moderate rust on tools and hardware: Sandpaper, steel wool, wire brush, or vinegar soak
- Moderate to heavy rust: Commercial rust remover
- Heavy rust on detailed steel or iron tools: Electrolysis
- Deep rust on paintable iron or steel: Rust converter
- Stainless steel or delicate finishes: Use gentler methods and avoid aggressive abrasives
Common Rust Removal Mistakes to Avoid
One of the biggest mistakes is removing the rust successfully and then forgetting to protect the metal afterward. Freshly cleaned metal can start rusting again fast, sometimes within hours in humid conditions. If the item is paintable, apply a corrosion-resistant primer and paint promptly. If it is a tool or another unpainted metal item, dry it fully and add a light protective coating such as mineral oil, tool oil, or wax where appropriate.
Another common mistake is using the wrong abrasive on the wrong surface. Steel wool may be fine for some rugged tools, but it can scratch stainless steel or leave tiny particles behind that create new rust issues. Likewise, over-soaking in acidic solutions can do more harm than good.
And of course, there is the all-time classic mistake: putting a damp metal item away and saying, “I’ll deal with it later.” Rust loves those words almost as much as it loves humidity.
How to Keep Rust From Coming Back
Once your metal is clean, prevention is the real victory lap. Keep metal items dry, especially after washing or using them outdoors. Store tools in a cool, dry space. Wipe down kitchen knives, shears, and garden tools instead of letting them air-dry forever like they are enjoying a spa retreat.
For outdoor furniture and exposed hardware, maintain paint and protective coatings before they fail. For tools, a light coat of oil on clean metal goes a long way. If you live in a humid climate, moisture control matters just as much as cleaning. Rust is patient. You have to be more persistent.
Practical Experiences and Real-World Lessons From Rust Removal
In real-life DIY projects, the biggest lesson is that the “best” rust removal method depends less on internet hype and more on the item in front of you. A rusty pruning shear, a patio chair, and a decorative steel bracket may all have rust, but they do not need the same treatment. The people who get the best results usually spend a minute assessing the metal before they start scrubbing like they are trying to erase a bad decision from 2019.
For example, old hand tools often respond better to a combination approach than a single miracle method. A quick cleaning with soap and water removes oil and grime, a wire brush knocks off loose rust, and then a vinegar soak or commercial remover handles what is left. After that, a light oil coating makes the tool look respectable again. This kind of layered approach tends to work better than expecting one ingredient to do everything.
Outdoor furniture teaches a different lesson: surface area changes everything. On a rusty metal chair or table, small household methods may work, but they can become slow, messy, and inefficient. In those cases, sanding or brushing first, then using a rust remover or rust converter, is often the more realistic route. Once the rust is under control, primer and paint matter just as much as the cleaning step. Skip the protective finish, and all your hard work may unravel after the next rainy week.
Kitchen metal offers another useful reminder: gentleness matters. When people attack stainless steel with the same enthusiasm they use on a shovel, they often end up with scratches, dull patches, or damage to the finish. A mild paste, a soft cloth, and patience usually beat brute force. It is not as exciting as blasting away with a coarse wire brush, but it is a lot less heartbreaking.
Then there is the emotional side of rust removal, which is rarely discussed but very real. Rusty items often sit around because people assume they are beyond saving. Once they finally start cleaning them, they realize many pieces are still useful. A neglected hammer becomes a working hammer again. A crusty pair of garden shears cuts cleanly. A rusty hinge stops looking like it belongs in a haunted barn. Rust removal is oddly satisfying because it delivers visible progress fast. Few things in life are as rewarding as wiping away orange grime and seeing solid metal underneath.
Another experience many DIYers share is learning that drying is not optional. The rust may be gone, but if moisture lingers in seams, screws, or textured surfaces, the comeback tour begins almost immediately. The people who get lasting results are usually the ones who dry the item completely, then protect it right away with oil, wax, primer, paint, or a specialty coating depending on the item’s use.
In other words, the real secret is not just knowing how to remove rust from metal. It is knowing when to scrub, when to soak, when to switch to a stronger method, and when to stop cleaning and start protecting. Once you learn that rhythm, rust becomes less of a disaster and more of a fixable nuisance. An annoying nuisance, yes. But a beatable one.
Final Thoughts
If you want to remove rust from metal effectively, start with the gentlest method that makes sense for the item and scale up only as needed. Light rust may come off with baking soda or a little elbow grease. Stubborn rust may need vinegar, a commercial remover, or even electrolysis. And deeply corroded iron or steel may be better stabilized with a rust converter and paint.
The important thing is to act early, work safely, and protect the metal after cleaning. Rust may be persistent, but it is not unbeatable. With the right method, a little patience, and perhaps a soundtrack that makes scrubbing feel heroic, you can save a surprising amount of metal from the orange menace.


