Table of Contents >> Show >> Hide
- What “Cracked Screen” Really Means (and Why the Details Matter)
- Quick Triage: DIY, Pro Repair, or Replace the Phone?
- Before You Touch the Screen: Safety and Data Protection
- DIY Tricks That Actually Help (Temporary Fixes)
- DIY “Fixes” That Usually Make Things Worse
- The Real DIY Repair: Replacing the Screen at Home
- Professional Repairs: Manufacturer vs Third-Party Pros
- How Much Does Screen Repair Cost?
- Warranty and Insurance: “Will a Repair Void My Warranty?”
- Prevention: Make Today’s Repair the Last One
- Conclusion
- of Experience: Lessons From the Cracked-Screen Club
A cracked phone screen is like showing up to a big meeting with spinach in your teeth: you can technically keep going, but everything feels
slightly cursed. The good news? You’ve got optionsfrom “hold it together until payday” DIY tricks to full-on professional repairs that make your phone
look like the accident never happened.
This guide breaks down what actually works, what’s a myth wrapped in a TikTok whisper, and how to choose the right fix based on your damage level,
budget, and how much you enjoy tiny screws attempting to escape into the carpet.
What “Cracked Screen” Really Means (and Why the Details Matter)
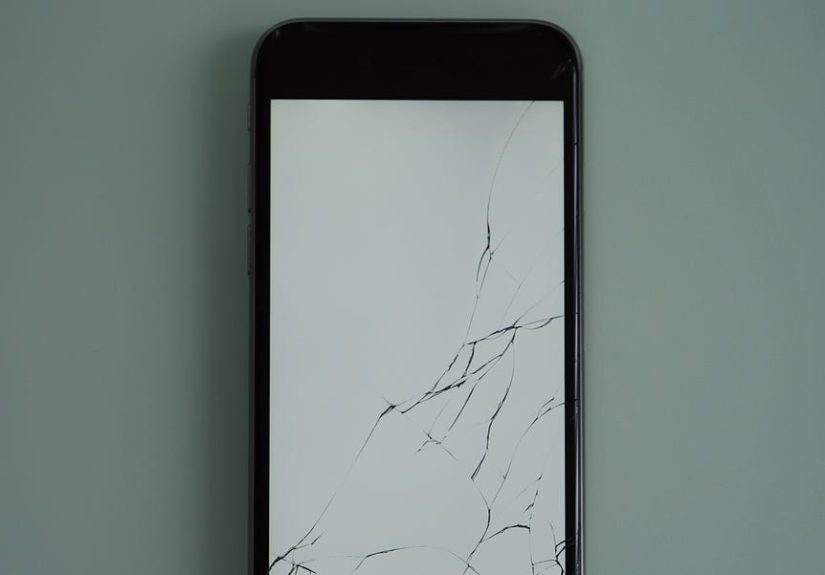
Not all cracks are created equally. “Cracked screen” could mean a hairline fracture in the outer glass, or a full display failure where the image bleeds
like a watercolor painting you didn’t ask for. Understanding which layer is damaged helps you pick the right approach:
- Outer glass crack (image and touch still work): You may be able to stabilize it temporarily, but a real fix usually means replacing the display assembly.
- Touch issues (dead zones, ghost touches): That’s often the digitizer layer or its connectiontime to stop “DIYing” and start “backing up.”
- Display problems (black spots, lines, flicker): The OLED/LCD panel is damaged. A screen protector won’t negotiate with dead pixels.
- Shards or lifting glass: Safety first. If glass is flaking, treat it like a tiny guillotine.
Quick Triage: DIY, Pro Repair, or Replace the Phone?
Before you buy tools (or panic-buy a new phone), do a 60-second triage. Here’s a practical decision guide that won’t judge you for dropping your phone
while Googling “how not to drop phone.”
DIY makes sense when…
- The crack is small and the touch + display are fully functional.
- You’re okay with a temporary solution for a week or two.
- The phone is older, inexpensive, or you’re comfortable with some risk.
- You can follow detailed instructions and have the patience of a saint (or at least a person who can pause a project and resume it later).
Professional repair is the smart move when…
- Touch is unreliable, there’s flickering, green lines, black blotches, or the screen goes dark.
- The frame is bent, the screen is lifting, or the phone took a “corner-first” fall.
- You rely on water resistance (or you just enjoy having a phone that survives rain).
- The phone is a foldable or has tricky components near the display (under-screen sensors, advanced face recognition hardware).
Replacing the phone may be better when…
- Repair costs approach the value of the device.
- The phone already has battery issues, camera problems, or charging trouble.
- You can get a solid trade-in/refurbished deal that beats repair pricing.
Before You Touch the Screen: Safety and Data Protection
Step zero is boringbut it’s also the step that prevents you from turning “cracked screen” into “new phone, who dis.”
Do these first
- Back up your phone (cloud + a local backup if possible).
- Power it off before any physical work. Yes, even if you’re “just checking.”
- Protect your hands and eyes if there are shards (thin gloves + basic eye protection).
- Remove the case and clean loose debris with a soft brush or microfiber cloth.
Damage check: the “hidden problems” list
- Swollen battery (screen lifting without obvious impact can be a red flag). If you suspect this, stop and go pro.
- Liquid exposure after cracking. Even “a little rain” can creep into fractures.
- Heat + pressure sensitivity (screen flickers when you press). That’s not a confidence builder.
DIY Tricks That Actually Help (Temporary Fixes)
Let’s be honest: many “DIY fixes” are really “DIY coping strategies.” They won’t restore the screen to factory perfectionbut they can make the phone safer
and usable while you plan a real repair.
1) Stabilize the glass so it doesn’t bite you
- Clear packing tape or screen film: Great for preventing cuts and keeping shards in place. Apply gently, avoid bubbles, and don’t yank it off later like a wax strip.
- Tempered glass screen protector: Can make a hairline crack feel smoother and reduce further spreading. It won’t fix the crack, but it can make the phone easier to use.
2) Use a case like it’s a cast
A snug case (especially one with raised edges) helps prevent the crack from spreading with every face-down set on a countertop. Think of it as a helmet
for your phone’s ego.
3) Reduce stress on the cracked area
- Don’t press hard near the crack (pressure can worsen internal damage).
- Avoid temperature extremes (hot cars and cracked screens are a chaotic duo).
DIY “Fixes” That Usually Make Things Worse
Some hacks survive because they sound clever, not because they work.
- Toothpaste: Might buff tiny scratches on some plastics, but it won’t repair cracked glass. It can also push grit into the crack.
- “Liquid glass” over an existing crack: It may seep into openings and create new problems, especially if it reaches internal components.
- Super glue, nail polish, random resin: You’re more likely to ruin touch sensitivity and create a sticky, cloudy mess than “seal” anything safely.
The Real DIY Repair: Replacing the Screen at Home
If you want an actual fixnot a bandagethe DIY path is typically one thing: screen replacement. On many modern phones, the glass, digitizer,
and display panel are fused. That means you’re usually replacing the entire display assembly, not just the outer glass.
What you’ll need (general list)
- Correct replacement screen (match your exact model; OLED vs LCD matters)
- Precision screwdrivers (often tiny specialty bits)
- Suction cup or screen lifting tool
- Plastic picks/spudger (avoid metal prying tools when possible)
- Heat source (heat pad or controlled heat gungentle and even)
- Adhesive strips or gasket adhesive for reassembly
- Isopropyl alcohol (for cleaning old adhesive)
- Tweezers and a magnetic mat/tray (because screws love freedom)
A careful, generic step-by-step workflow
- Backup + power down. Remove SIM tray if your model requires it.
- Soften adhesive. Warm the perimeter evenly. The goal is “soft,” not “phone barbecue.”
- Create a small gap. Use a suction tool and a thin plastic pick to start separating the screen from the frame.
- Open slowly. Don’t yankscreens are often tethered by a ribbon cable.
- Disconnect the battery first. This reduces the risk of shorting components.
- Disconnect the screen cable(s). Use a spudger, lift connectors gently, and avoid bending pins.
- Transfer components if required. Some phones require moving speaker meshes, brackets, sensors, or camera assemblies to the new screen.
- Test before sealing. Reconnect the screen and battery temporarily, boot up, test touch, brightness, camera, and sensors.
- Clean + re-adhere. Remove old adhesive, apply new adhesive evenly, then close the phone and press/clamp gently as recommended.
- Final check. Test again. Confirm charging, speakers, mic, cameras, biometrics, and touch across the entire display.
DIY pitfalls (and how to avoid them)
- Overheating: Too much heat can damage the display or soften internal components. Use steady, controlled warmth.
- Forgetting the battery disconnect: This is how small mistakes become expensive ones.
- Ripping a flex cable: Open slowly and assume a cable is hiding near the hinge point.
- Skipping the “test fit” boot: Sealing a phone and then discovering dead touch is a special kind of heartbreak.
The water-resistance reality check
Many phones rely on adhesives and seals for water resistance. Once you open the device, you’re working against factory-level sealing and pressure testing.
Even with fresh adhesive, water resistance may not be the same as before. If water resistance matters to you, professional repair is usually the safer bet.
Professional Repairs: Manufacturer vs Third-Party Pros
If DIY feels riskyor you tried and your phone now has “new and exciting problems”professional repair is often faster and more reliable than people assume.
Manufacturer and authorized repair
- Convenience: Walk-in, mail-in, or scheduled service depending on brand and location.
- Parts and calibration: Genuine parts and brand-approved processes reduce feature-loss issues (like display calibration quirks).
- Coverage: If you have an accident protection plan, the out-of-pocket cost can drop dramatically.
Some brands also offer DIY-friendly official programs (tool rentals, manuals, and parts) for people who want to repair at home without gambling on mystery components.
Third-party repair shops (the “sweet spot” for many people)
A reputable third-party shop can be an excellent middle ground: faster than mail-in, often less expensive than premium brand service, and sometimes authorized
for specific manufacturers.
Questions to ask before you hand over your phone
- Are you using OEM/genuine parts or aftermarket?
- What’s the warranty on the repair?
- Will features like brightness auto-adjust, fingerprint/face unlock, and True Tone-style color calibration work normally?
- Do you replace sealing adhesive, and do you do any water-resistance testing?
How Much Does Screen Repair Cost?
Pricing varies wildly by phone model, part type (OLED costs more than LCD), and whether the repair includes frame components. In general:
- DIY kits: Often the lowest upfront cost, but quality variesand the “cost” includes your time and risk.
- Professional third-party repair: Mid-range pricing, often same-day service for common models.
- Manufacturer/authorized repair: Frequently the most expensive out-of-warranty, but it tends to be the most consistent for quality and feature retention.
If you have coverage (accident protection, extended warranty plan, carrier insurance), your cost may be a service fee or deductible rather than full retail repair pricing.
Always compare: out-of-pocket repair vs trade-in value vs refurbished replacement.
Warranty and Insurance: “Will a Repair Void My Warranty?”
Here’s the practical truth: in the U.S., companies generally can’t declare your warranty void just because you used third-party parts or service.
However, they can refuse warranty coverage for damage that’s actually caused by an unauthorized repair or part. So if a bad screen install fries your motherboard,
don’t expect a happy ending at the service counter.
Insurance claims: worth it or not?
If you have phone insurance (often through a carrier or a protection plan), cracked screens may qualify for repair with a deductible/service fee. The math is simple:
compare your fee to the repair quote. If the deductible is close to the repair cost, you might skip the claim and keep your claim history clean.
Prevention: Make Today’s Repair the Last One
- Use a case with raised edges and a decent drop rating.
- Add a tempered glass protector before the next drop does it for you.
- Change your habits: Don’t balance your phone on your lap getting out of a car. (Phones love that move. It’s their favorite.)
- Use a grip or strap if you’re a chronic one-handed texter.
Conclusion
If your phone’s cracked screen is minor and fully functional, temporary DIY tricks can keep you safe and comfortable while you plan a real fix. But if touch
is acting weird, the display is glitching, or the glass is shedding shards like a villain’s glitter, professional repair is the smarter (and often cheaper-in-the-long-run)
solution.
The best repair choice isn’t “DIY vs pro” in the abstractit’s what fits your phone, your budget, and your tolerance for risk.
Either way, back up your data first. Future-you will send a thank-you note. Probably from a phone with an uncrackled screen.
of Experience: Lessons From the Cracked-Screen Club
Most cracked-screen stories start the same way: “It was a short fall.” Gravity, however, is a drama queen. One person drops a phone from a kitchen counter
and walks away with a tiny hairline crack. Another drops it from the same height and ends up with a screen that looks like it lost a fight with a spiderweb.
The difference is usually angle, impact point, and whether the phone had a case and protector. Corner impacts are especially brutal because they concentrate
force into a small area, and once the frame is slightly tweaked, even a perfect replacement screen can be harder to seat and seal.
A common “experience-based” lesson: the crack you see isn’t always the full story. People often keep using a phone with a cracked outer glass because the
image looks fineuntil one day touch becomes unreliable. That’s because micro-fractures can spread with everyday flexing (pocket pressure, car cup holders,
sitting down, the classic “I fell asleep on my phone” move). The phone may work perfectly on day one, then start ghost-tapping or missing touches weeks later.
If you depend on your phone for work, navigation, or two-factor authentication, it’s worth treating a crack like a time-sensitive problem, not a permanent
personality trait.
DIY replacement stories tend to split into two categories: “I felt like a genius” and “I have learned humility.” The happiest DIY outcomes usually involve:
(1) a clear guide tailored to the exact model, (2) a clean workspace with good lighting, (3) patience with adhesive, and (4) a willingness to stop if something
doesn’t feel right. The rough outcomes happen when someone rushes the opening step, overheats the edges, or pulls the screen up like a Band-Aid and tears a
ribbon cable. The sneakiest DIY mistake? Sealing the phone before testing. People get everything closed, proudly peel off the protective film, boot up… and
discover touch doesn’t work on the top third. Congratulations, you’ve invented “screen replacement, part two.”
Pro-repair experiences teach a different lesson: ask questions upfront. A good shop will explain part quality, warranty length, and what to expect after the
repair (especially around water resistance). Many people assume a repaired phone is automatically as water resistant as it was from the factory. In reality,
water resistance depends on meticulous sealing and sometimes specialized equipment. If you live in a rainy area, work outdoors, or are simply the type of
person whose phone regularly “accidentally” ends up near sinks, it’s worth choosing a repair path that takes sealing seriously.
Finally, the most universal cracked-screen lesson is oddly optimistic: prevention is cheaper than regret. The best time to buy a screen protector is before
the first drop, not after. The second-best time is nowbecause if you’ve cracked a screen once, you’re already in the club, and membership renews itself
whenever you try to carry groceries, open a door, and text at the same time.