
Table of Contents >> Show >> Hide
- Before You Replace Brother Toner
- How to Replace Brother Toner: 10 Steps
- Step 1: Leave the Printer On and Let It Cool
- Step 2: Open the Front Cover
- Step 3: Pull Out the Drum and Toner Assembly
- Step 4: Release the Old Toner Cartridge
- Step 5: Unpack the New Brother Toner Cartridge
- Step 6: Gently Rock the New Toner Side to Side
- Step 7: Remove the Protective Cover
- Step 8: Insert the New Toner Into the Drum Unit
- Step 9: Clean the Corona Wire If Your Model Has One
- Step 10: Reinstall the Assembly and Close the Cover
- What to Do If the Brother Printer Still Says “Replace Toner”
- Common Mistakes to Avoid When Replacing Brother Toner
- How to Choose the Right Brother Toner
- How to Dispose of or Recycle Old Brother Toner
- Print Quality Problems After Replacing Toner
- Experience-Based Tips for Replacing Brother Toner
- Conclusion
Replacing toner in a Brother laser printer sounds like one of those tiny office chores that should take 30 secondsuntil the printer starts blinking, the cartridge refuses to budge, and someone asks, “Did we just break it?” Good news: you probably did not. Brother printers are designed so the toner cartridge and drum unit work together, and once you understand that little partnership, the whole process becomes much less mysterious.
This guide explains how to replace Brother toner in 10 simple steps, how to avoid the most common mistakes, and what to do if your printer still says “Toner Low,” “Replace Toner,” or “Toner Ended” after installation. The instructions below apply broadly to many Brother laser printers, including popular HL, DCP, and MFC models, though exact cover locations and cartridge numbers vary by model. Think of this as your friendly, slightly ink-smudged roadmap.
Before You Replace Brother Toner
Before opening the printer, confirm that you are replacing the toner cartridgenot the drum unit. Many Brother laser printers use two separate consumables: the toner cartridge, which holds the powder used to print text and images, and the drum unit, which transfers that toner onto the paper. The two pieces often come out together as one assembly, which is why people sometimes confuse them.
If your printer shows “Toner Low” or “Prepare New Toner Cartridge,” you may still be able to print for a while if the print quality looks acceptable. If the display shows “Replace Toner,” “Toner Ended,” or the pages are pale, streaky, or incomplete, it is time to install a new Brother toner cartridge. The printer has spoken. Dramatically, perhapsbut correctly.
What You’ll Need
- A new toner cartridge compatible with your Brother printer model
- A clean, flat surface
- A sheet of disposable paper or cloth to catch loose toner
- A trash bag or recycling box for the old cartridge
- Optional gloves if you prefer not to meet toner powder personally
Check your printer model number before buying toner. Brother cartridges often have names like TN730, TN760, TN660, TN850, or similar model-specific codes. Using the correct cartridge matters because even cartridges that look alike may not fit or reset properly.
How to Replace Brother Toner: 10 Steps
Step 1: Leave the Printer On and Let It Cool
For many Brother models, the replacement process starts with the printer turned on. This helps the machine recognize the new toner when the installation is complete. If the printer has just finished a large print job, give it a few minutes to cool. Laser printers can get warm inside, and toner replacement should not feel like reaching into a toaster.
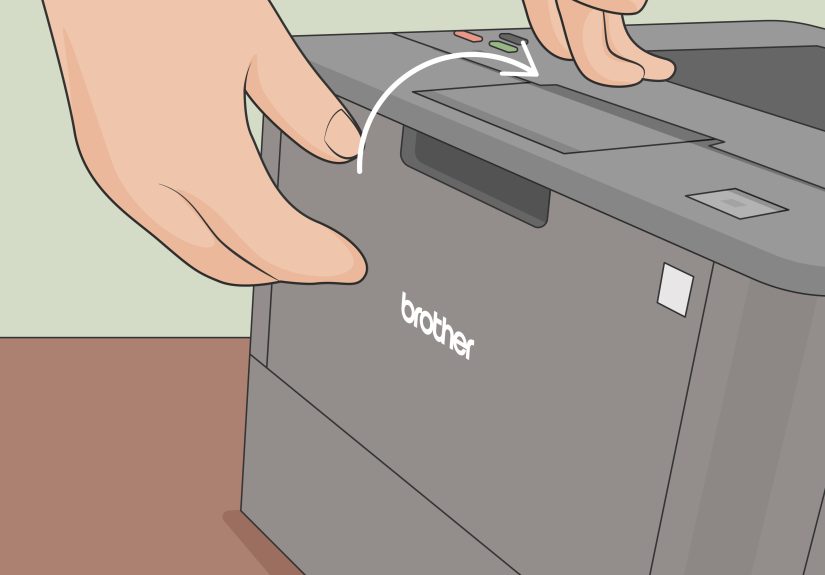
Step 2: Open the Front Cover
Open the printer’s front cover. On most Brother monochrome laser printers, the toner and drum assembly sits directly behind this panel. On some color laser models, you may open a top cover instead. Do not force anything. If the cover resists, check your model’s panel release button or latch.
Once the cover is open, the printer may pause and wait. That is normal. It is not judging you. It is simply ready for the cartridge swap.
Step 3: Pull Out the Drum and Toner Assembly
Grasp the handle on the drum and toner assembly and pull it straight out. This assembly contains both the toner cartridge and the drum unit. Place it on a clean, flat surface with disposable paper underneath in case loose toner scatters. Toner powder is fine and can be messy, so do not shake the used cartridge like a maraca unless you enjoy cleaning black dust from places dust should never be.
Step 4: Release the Old Toner Cartridge
Find the green lock lever on the drum unit. Press it down to release the old toner cartridge, then lift the toner out of the drum. The lever may be on the left or right side depending on the model. This small green part is your friend; Brother often uses green pieces to show where users should touch, slide, or press.
Handle the old cartridge carefully. If toner gets on your hands or clothing, wipe it off gently and wash with cold water. Hot water can set toner into fabric, which is a fun fact only if it happens to someone else.
Step 5: Unpack the New Brother Toner Cartridge
Remove the new toner cartridge from its packaging. Keep the protective materials nearby until you understand what needs to come off. New toner cartridges usually include a protective cover, seal, or orange plastic guard. These pieces protect the cartridge during shipping but must be removed before installation.
Do not open the toner packaging too early if you are not ready to install it. Toner cartridges are best kept sealed until use and stored away from direct sunlight, heat, and humidity.
Step 6: Gently Rock the New Toner Side to Side
Hold the new cartridge level and gently rock it from side to side several times. This helps distribute the toner powder evenly inside the cartridge. The key word is “gently.” You are not mixing pancake batter. You are simply encouraging the toner to settle evenly so your first printed pages do not look like they were produced during a printer’s emotional crisis.
Step 7: Remove the Protective Cover
Remove the protective cover or seal from the new cartridge according to the cartridge design. Avoid touching the roller or sensitive internal parts. Oils from your fingers can affect print quality, and the printer will not appreciate a fingerprint souvenir.
If a pull tab or seal is present, pull it smoothly and completely. If packaging material remains attached, the cartridge may not print properly or may trigger an error.
Step 8: Insert the New Toner Into the Drum Unit
Slide the new toner cartridge firmly into the drum unit until it clicks into place. The click matters. If the cartridge is not seated correctly, it may separate from the drum unit, fail to reset the toner message, or cause print problems.
Check that the cartridge sits evenly and securely. On color Brother printers, make sure each toner color goes into the matching color slot. Black belongs with black, cyan with cyan, magenta with magenta, and yellow with yellow. This is not the moment for creative color theory.
Step 9: Clean the Corona Wire If Your Model Has One
Many Brother drum units have a green tab used to clean the corona wire. Slide the green tab from side to side several times, then return it to its home position. This step can help prevent streaks, lines, or print-quality issues after toner replacement.
Not every model has the same corona-wire design, so follow your printer’s markings. If you see a green tab, it is usually there for a reason. If you forget to return the tab to its starting position, your pages may show a vertical stripe. That is the printer’s way of saying, “Nice try, please finish the job.”
Step 10: Reinstall the Assembly and Close the Cover
Slide the drum and toner assembly back into the printer. Push it in firmly but gently until it is fully seated. Close the front cover or top cover. The printer should detect the new cartridge and clear the toner warning after a short moment.
Print a test page to confirm that everything looks clean, sharp, and properly aligned. If the page is crisp, congratulations: you have successfully replaced Brother toner and avoided an unnecessary office meltdown.
What to Do If the Brother Printer Still Says “Replace Toner”
Sometimes a Brother printer continues to display a toner warning after a new cartridge is installed. Do not panic. Start with the simple checks first.
Check That the Cartridge Is New and Compatible
Brother printers often rely on a reset mechanism in the toner cartridge. A used, refilled, damaged, or incompatible cartridge may not reset the toner message correctly. Confirm that the cartridge is the correct model for your printer and that it was newly installed.
Remove and Reinstall the Toner
Open the cover, remove the drum and toner assembly, release the toner cartridge, gently rock it side to side, and reinstall it until it clicks. Then put the assembly back into the printer and close the cover. Many toner errors are caused by a cartridge that is almostbut not quiteseated correctly.
Inspect for Forgotten Packaging
Look for any protective covers, tabs, seals, or tape that might still be attached. New cartridges can be surprisingly well-armored. Leaving one small protective piece in place can stop toner from flowing or prevent the printer from detecting the cartridge.
Restart the Printer
If everything appears correct, power the printer off, wait briefly, and turn it back on. Some models may need a moment to update the toner status. If the warning remains, consult the exact Brother support page for your printer model because reset procedures can vary.
Common Mistakes to Avoid When Replacing Brother Toner
Mistake 1: Replacing the Drum Instead of the Toner
The toner cartridge and drum unit are separate parts on many Brother laser printers. If the printer says “Replace Toner,” changing the drum will not solve the problem. If it says “Replace Drum,” a toner cartridge alone will not fix it. Read the message carefully before buying supplies.
Mistake 2: Touching Sensitive Printer Parts
Avoid touching rollers, electrical contacts, or exposed drum surfaces. These parts can affect print quality. When in doubt, touch only the handles, green levers, and cartridge body.
Mistake 3: Using the Wrong Cartridge Number
Brother toner cartridges are model-specific. A cartridge that fits one Brother printer may not fit another. Always match the toner number to your printer’s manual, supply page, or label inside the printer.
Mistake 4: Skipping the Test Print
After replacement, print a test page. It is easier to catch a faint page, streak, or remaining toner warning immediately than after you have promised someone that the printer is “definitely fixed.” Famous last words.
How to Choose the Right Brother Toner
When shopping for toner, you may see standard-yield, high-yield, and sometimes super-high-yield cartridge options. Standard-yield cartridges cost less upfront and are fine for light printing. High-yield cartridges usually cost more but print more pages, which can lower the cost per page for busy homes or offices.
If you print shipping labels, contracts, invoices, school packets, or anything else by the stack, high-yield toner may save time and reduce the number of replacements. If your printer mostly handles the occasional form or return label, standard-yield toner may be enough.
Brother Genuine toner is designed to work with Brother printers as a complete printing system. Some users choose compatible or remanufactured cartridges, but quality and reset behavior can vary. If reliability is the top priorityespecially in a business settingusing the cartridge type recommended for your exact model is the safest route.
How to Dispose of or Recycle Old Brother Toner
Do not throw toner cartridges into the trash if you have a practical recycling option. Brother offers a toner and ink cartridge recycling program for genuine Brother supplies, and many office supply stores also provide cartridge recycling options. Keep the box from the new cartridge and use it to store the empty one for return or recycling.
Place the old cartridge in a plastic bag or the packaging from the new cartridge to prevent toner leaks. If your office prints often, set up a small “used toner” box near the printer. This keeps empties organized and prevents the classic supply closet avalanche, where one old cartridge falls and somehow brings down three reams of paper and a box of binder clips.
Print Quality Problems After Replacing Toner
Light or Faded Printing
If the first page looks faded, remove the cartridge and gently rock it side to side again. Make sure all protective seals were removed and that the toner is seated correctly in the drum unit.
Vertical Lines or Streaks
Clean the corona wire if your model includes a green sliding tab. Return the tab to its starting position. Also check whether the drum unit is near the end of its life, especially if lines continue after toner replacement.
Spots or Smudges
Spots can come from loose toner, a dirty drum, poor paper storage, or a worn consumable. Print several pages to see whether the issue clears. If it continues, inspect the drum and consult the model-specific cleaning instructions.
Experience-Based Tips for Replacing Brother Toner
After you have replaced Brother toner a few times, the job becomes less like “technical maintenance” and more like changing batteries in a remote controlexcept bigger, dustier, and somehow always needed five minutes before a meeting. The best experience-based advice is to slow down for the first replacement and build a simple routine. Most toner problems happen because someone rushes, forgets a protective tab, or shoves the assembly back in before the cartridge clicks.
One practical habit is to keep the printer model and cartridge number written on a small label near the printer. Offices often have multiple Brother printers that look similar but use different toner. A label that says “Uses TN760” or “Uses TN850” can save a surprising amount of confusion. It also prevents the classic supply-ordering disaster: buying three cartridges that fit absolutely nothing in the building.
Another useful tip is to replace toner when you have good lighting and a clear surface. A dim corner, a crowded desk, and a half-open toner box are how small plastic covers disappear forever. Put a sheet of paper under the drum and toner assembly before you separate the parts. If a little toner spills, fold the paper and toss it. That tiny step makes cleanup much easier.
It also helps to print a test page before announcing victory. Many people close the cover, see the warning disappear, and assume the printer is ready. A test page confirms that the cartridge is seated, the toner is flowing, and the print quality is acceptable. If the page has a pale band or vertical streak, you can fix it immediately by reseating the cartridge or cleaning the corona wire.
For home users, the biggest lesson is not to replace toner too early. “Toner Low” usually means the cartridge is approaching the end of its expected life, not that it has instantly become useless. If pages still look good, you may be able to keep printing until quality drops or the printer displays “Replace Toner.” For business users, the opposite strategy may be better: keep one spare cartridge on hand so printing does not stop during payroll, client proposals, shipping, or tax-season chaos.
Finally, treat the old cartridge like something that can still make a mess, because it can. Put it straight into the recycling bag, return box, or original packaging. Do not leave it loose on a shelf where it can roll, leak, or become the office mystery object everyone avoids touching. A clean toner replacement is not about being fancy; it is about being prepared, patient, and just suspicious enough of tiny plastic tabs.
Conclusion
Replacing Brother toner is simple once you understand the basic pattern: open the printer, remove the drum and toner assembly, release the old cartridge, prepare the new one, lock it into the drum, clean the corona wire if needed, and reinstall everything securely. The process usually takes only a few minutes, but doing it carefully helps prevent toner warnings, print streaks, faded pages, and unnecessary frustration.
The most important details are also the easiest to overlook: buy the correct cartridge, remove all protective packaging, wait for the click when installing the toner into the drum, and print a test page when finished. Whether you manage one home printer or an entire office fleet, mastering this small maintenance task keeps your Brother laser printer running smoothlyand keeps everyone from blaming the printer for things that are definitely human error.


