Table of Contents >> Show >> Hide
- Start with a Safety-First Plan
- Prep Your Power: GFCI, Cords, and Protection
- Step-by-Step: How to Safely Hang Outdoor Christmas Lights
- Electrical and Fire Safety Essentials
- Safe Take-Down and Storage After the Holidays
- Bring the Glow HomeSafely
- Real-Life Experiences and Lessons from Hanging Outdoor Christmas Lights
There’s nothing quite like pulling into your driveway on a December evening and seeing your home glowing like a gingerbread house in a holiday movie. There’s also nothing quite like realizing you’re three steps up a wobbly ladder, in the dark, holding a tangled ball of lights that may or may not be older than your first email address.
If you’d like to skip the drama and keep both the magic and the safety, this guide walks you through how to safely hang outdoor Christmas lights, inspired by the practical, no-nonsense approach you’d expect from a This Old House–style project. We’ll talk ladders, GFCI outlets, clips (not staples!), and real-world tips so you can decorate confidently and avoid turning your front yard into an accidental hazard zone.
Start with a Safety-First Plan
Before you unbox a single light strand, take a few minutes to plan. A bit of prep prevents electrical overloads, broken bulbs, and surprise trips to urgent care.
1. Decide Where the Lights Will Go
Walk around your house and decide which features you want to highlight: roofline, gutters, porch railings, door frame, columns, trees, shrubs, or pathways. Snap a few photos on your phone and sketch a quick layout. This will help you estimate how many feet of lights and how many clips or hooks you’ll need.
- Classic look: C7 or C9 bulbs tracing the roofline and gables.
- Wintry look: Icicle lights hanging from gutters and porch eaves.
- Whimsical look: Net lights on shrubs, mini lights on railings and trees.
Knowing what you want to light up keeps you from overbuyingand overloading your circuits.
2. Choose the Right Lights for Outdoors
Not all light strings are built to survive winter weather. Always check the packaging and the tiny tag on the cord. You want lights rated for outdoor use. Indoor-only strings aren’t designed to handle moisture, temperature swings, or UV exposure and are more likely to short out or fail early.
Look for:
- Outdoor-rated and weather-resistant on the package.
- LED bulbs for lower power draw, cooler operation, and longer life.
- UL-listed or similarly recognized safety marks.
- Tags that specify indoor/outdoor use (many manufacturers color-code this).
LED lights aren’t just energy-efficientthey’re safer. They run much cooler than older incandescent bulbs, reducing the risk of singed foliage, melted plastic, or burned fingers when you take them down.
3. Respect Your Circuit Limits
Every circuit in your home has a maximum load. Older incandescent strings might only allow three sets end-to-end. Modern LED sets often allow many more, but the limit is still printed on the label or packaging. Follow it.
- Avoid plugging everything into one outlet “just because it’s close.”
- Distribute the load across separate outdoor outlets if possible.
- Skip the “octopus” of stacked power strips and adaptersnever daisy-chain multiple power strips or extension cords.
When in doubt, keep it simple. A slightly smaller display is better than tripping breakers or overheating cords.
Prep Your Power: GFCI, Cords, and Protection
Outdoors, electricity and moisture are guaranteed to meet. That’s why the National Electrical Code requires GFCI (Ground-Fault Circuit Interrupter) protection for outdoor receptacles. A GFCI can cut power in a fraction of a second if it senses unsafe current leakageexactly what you want when it’s raining on your extension cords.
4. Use GFCI-Protected Outlets
Look for outlets with a “Test” and “Reset” button built in, or an upstream GFCI breaker in your panel. If your home is older and your exterior outlets aren’t GFCI-protected, this is a good time to have a licensed electrician update them. Don’t try to bypass GFCI to avoid nuisance trippingthat’s trading convenience for real risk.
5. Choose the Right Extension Cords
When you use extension cords outdoors, they need to be rated for the job. Grab cords labeled for outdoor use (often with thicker insulation and heavier gauge wire).
- Never use thin, indoor “office-style” cords outside.
- Use cords long enough to reach without stretching, but not so long that you leave coils piled in a corner.
- Do not run cords under rugs, through closed windows, or pinched in doorsthose can damage the insulation and cause shorts.
6. Protect Plugs and Connections from Moisture
Water and plugs are not a power couple. Use in-use (bubble) covers on outdoor outlets and keep plug connections off the ground. Simple options include:
- Mounting the connection under the eaves.
- Using weatherproof plug covers or gaskets designed for holiday lights.
- Elevating connections with a stake or brick instead of leaving them in puddles or snow.
If you notice repeated GFCI trips when it rains, unplug the display and inspect cords and connections for damage or exposed conductors, and replace anything suspect.
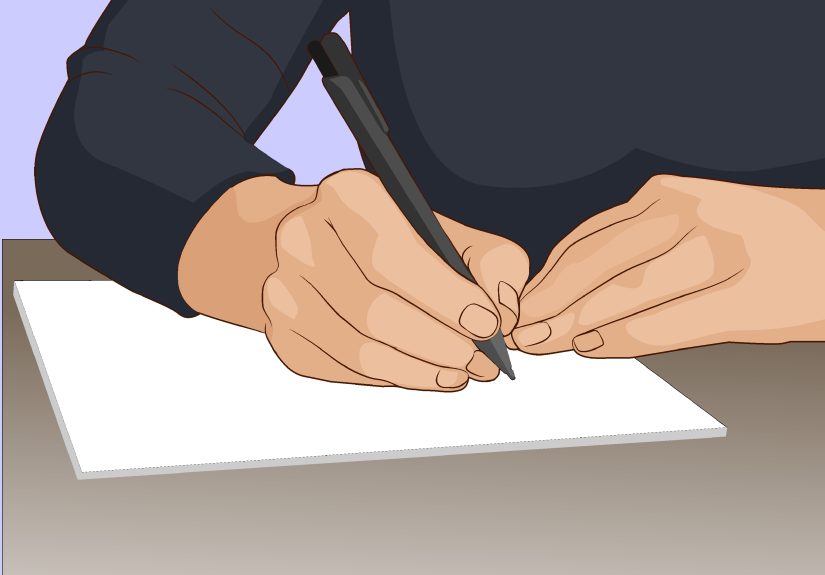
Step-by-Step: How to Safely Hang Outdoor Christmas Lights
Once your plan and power are set, it’s time for the fun parthanging the lights. Here’s a methodical, safety-focused workflow.
Step 1: Inspect and Test Every Light String
Before you climb anything or attach any clips, plug each strand in indoors and look it over carefully.
- Check for frayed insulation, cracked sockets, loose bulbs, or discolored sections.
- Replace missing or broken bulbs according to the manufacturer’s directions.
- Retire any set that looks questionableholiday lights are cheap compared to an electrical fire.
Label each string with masking tape (e.g., “Roofline left,” “Porch railing”) so reinstalling next year is easier.
Step 2: Measure and Pre-Clip on the Ground
Measure the sections you plan to light: your front roofline, each gable, and porch railings. Add a little extra length for corners and plug reach. Then, while safely on the ground, attach plastic light clips to the light strings.
Use clips designed for your style of light and surface:
- Shingle or gutter clips for C7/C9 bulbs and icicle lights along the roofline.
- Universal clips for fascia boards, gutters, and drip edges.
- Adhesive hooks or clips for brick or vinyl where you don’t want anything tucked under shingles.
Skip nails, screws, and metal staples. They can pierce the wire insulation, increase shock risk, and damage your roof or trim.
Step 3: Set Up Your Ladder Safely
If you need a ladder, treat it like a power tooluse it with intention.
- Inspect it for cracks, bent rungs, or loose hardware.
- Set it on a flat, solid surface clear of ice, snow, and clutter.
- Use the “4-to-1” rule for extension ladders: for every 4 feet of height, place the base 1 foot away from the wall.
- Keep three points of contact (two feet and one hand, or two hands and one foot) when climbing.
- Don’t climb in high winds, rain, or when the roof is icy.
If your roof is steep or particularly high, consider hiring a professional holiday lighting service rather than turning yourself into a DIY rooftop daredevil.
Step 4: Hang Lights Along the Roofline and Gutters
With the clips already attached to your light string, climb to your starting point with only a manageable section of lights at a time. Work methodically along the roofline:
- Hook each clip onto the gutter lip, shingle edge, or fascia, depending on the clip style.
- Keep bulbs facing the same direction for a clean, professional look.
- Avoid stretching the string; leave a little slack so the wire isn’t under constant tension.
It’s usually easier (and safer) if one person climbs while another stands below to feed up more of the light string and help watch for hazards.
Step 5: Secure Railings, Columns, and Trees
For porch railings and columns, use clips, reusable zip ties, or Velcro straps. For trees, gently wrap lights around trunks and branches without cinching them too tightly. Avoid stapling into living wood, which can damage the tree and harm the lights.
Make sure cords across walkways are either rerouted or covered with heavy-duty cord covers so nobody trips.
Step 6: Plug In, Time It, and Enjoy
When everything is in place:
- Plug the lights into a GFCI-protected outlet.
- Use a timer or smart plug to turn lights on at dusk and off at a set timeno more midnight pajama runs to the outlet.
- Step back after dark and walk your property to check for dark spots, dangling cords, or anything that needs adjusting.
Turn the lights off when you go to bed or leave for extended periods. Timers make this effortless and reduce both fire risk and your electric bill.
Electrical and Fire Safety Essentials
Holiday decorations are beautiful, but they do add temporary electrical load and potential heat sources around your home. A few extra precautions go a long way.
- Don’t mix old and new strands with very different power ratings on one run.
- Keep cords and lights away from standing water, gutters that overflow, and heavily salted walkways.
- Don’t bury cords under rugs or piles of leaves, where they can overheat unnoticed.
- Use weather-resistant (WR) outdoor receptacles and covers where required, and replace cracked or deteriorated outlets.
- Store lights properly after the seasoncoiled loosely, in a dry bin, with labelsso wires don’t kink and crack over time.
If a breaker trips or a GFCI shuts off your display repeatedly, don’t just reset and forget. Unplug the lights and inspect everything. If you can’t find the cause, consult a licensed electrician.
Safe Take-Down and Storage After the Holidays
Taking lights down safely is just as important as putting them up.
- Wait for clear, dry weatherno icy roofs or slick steps.
- Use the same ladder safety rules you followed when installing.
- Remove clips and lights gently instead of yanking them down (your gutters will thank you).
- Check each strand again as you coil it. If you see damage, retire that set.
Wrap each strand around a piece of cardboard or a plastic reel, then label it by location. Future-you, standing in the garage next November, will be delighted.
Bring the Glow HomeSafely
Hanging outdoor Christmas lights doesn’t have to feel like a stunt from an old holiday comedy. With a solid plan, outdoor-rated LED lights, GFCI-protected power, the right clips, and smart ladder habits, you can create a dazzling display that neighbors admireand electricians approve of.
Focus on safety first, then style. Start small if this is your first year, learn what works for your house, and build from there. The goal is a warm, welcoming glownot a blown circuit breaker or a trip to the emergency room.
Real-Life Experiences and Lessons from Hanging Outdoor Christmas Lights
Advice is helpful, but experience is where the real learning happens. Here are some practical lessons drawn from years of decorating and the kinds of stories homeowners trade with each otherand with pros who do this every season.
The Year of the Staple Gun Regret
One homeowner thought using a staple gun would be faster than fussing with plastic clips. It was fasterright up until a staple nicked a wire. The result? A section of lights that kept flickering, a GFCI outlet that tripped during every heavy rain, and a weekend spent troubleshooting instead of relaxing.
The takeaway: staples and nails seem convenient, but they can puncture insulation, expose conductors, and even start fires. After that season, that same homeowner switched to universal plastic clips and never looked back. Installation took a bit longer the first time, but the lights lasted for years without drama.
Learning to Respect the Ladder
Another family used to balance a step ladder on a slightly sloped driveway to reach a high gable, with one person “steadying” the base. It felt fineuntil one windy evening when the ladder shifted just enough to make the climber grab the gutter for dear life.
No one was hurt, but the scare changed their approach. The next year, they invested in an extension ladder tall enough to reach safely from a level spot, checked the ladder every season, and refused to climb in bad weather. They also decided any sections higher than the second story were a “call the pros” zone, not a DIY adventure.
When Moisture Meets Plug Connections
A very enthusiastic decorator once ran multiple plug connections along the ground behind a row of shrubs. It looked tidyuntil wet snow melted and pooled right over those connections. The GFCI did its job and tripped, but tracking down the problem in cold, slushy conditions wasn’t fun.
The fix was simple: keep all plug connections off the ground and sheltered. Now, that same homeowner mounts connections under the eaves when possible or elevates them on stakes. In particularly wet areas, they use weatherproof cord covers designed for outdoor plugs. The lights stay on, and the GFCI doesn’t have to “save the day” quite so often.
Discovering the Magic of Timers and Smart Plugs
Many people start out manually plugging lights in each evening and unplugging them at night. It works, but sooner or later someone forgets and the lights either stay off for a night or burn all night long.
One couple finally added smart plugs on their outdoor outlets and set a schedule: on at dusk, off at 11 p.m. The lights came on automatically, even when they weren’t home, and turned off before they went to sleep. Their electric bill dropped slightly, and they never had to wander around in the cold trying to remember which side of the house they hadn’t unplugged yet.
Accepting That Not Every Roof Needs Lights
There’s always one neighbor whose house looks like a professionally lit resortand it’s easy to feel pressure to match that. But another family discovered that focusing on reachable areas (porch, railings, bushes, and a modest roofline) created a cozy, charming look without anyone ever needing to navigate a steep, icy roof.
They added interest with lit wreaths, a few staked decorations, and warm path lights. The display still made drivers slow down to admire it, and nobody had to conquer their fear of heights. The big lesson: a safe, well-planned design that works for your house beats a risky “go big or go home” approach every time.
Put all these experiences together, and a clear pattern emerges: safe holiday lighting is about planning, respecting your limits, and choosing gear that’s meant for outdoor use. Once you’ve got those foundations in place, you can tweak the color schemes, light patterns, and layout every yearwithout relearning the hard lessons.