Table of Contents >> Show >> Hide
- What Does “Cut Out Part of an Image” Mean in Illustrator?
- Best Method: Use a Clipping Mask
- Step 1: Place and Select Your Image
- Step 2: Draw the Shape Around the Area You Want to Keep
- Step 3: Select Both Objects and Make the Clipping Mask
- Step 4: Refine, Export, or Release the Cutout
- Alternative Ways to Cut Out Part of an Image in Illustrator
- Common Mistakes and How to Fix Them
- When Should You Use Illustrator Instead of Photoshop?
- Practical Example: Cut a Portrait Into a Circle
- Practical Example: Cut Out a Product Shape
- SEO-Friendly Workflow Summary
- Extra Experience Notes: What I Have Learned From Cutting Images in Illustrator
- Conclusion
- SEO Tags
Cutting out part of an image in Adobe Illustrator sounds like it should involve scissors, dramatic music, and maybe a tiny digital craft table. Thankfully, it is much cleaner than that. Whether you want to crop a photo into a circle, isolate a product for a flyer, hide a messy background, or place a portrait inside bold typography, Illustrator gives you several smart ways to select and cut out image areas without destroying your original file.
The key is understanding what “cut out” means in Illustrator. Unlike Photoshop, Illustrator is primarily a vector design program. It does not edit pixels as naturally as a photo editor. Instead, Illustrator often hides unwanted parts of an image using a clipping mask, trims placed images with the Crop Image feature, or converts artwork into editable paths when you need true vector cutting. In plain English: Illustrator can absolutely help you cut out part of an image, but you need to choose the right method before you start swinging the digital axe.
This guide explains how to select and cut out part of an image in Illustrator in four practical steps. We will focus on the most reliable workflow for beginners and working designers: placing the image, drawing a cutting shape, making a clipping mask, and refining the result. Along the way, you will also learn when to use Crop Image, Image Trace, Pathfinder, opacity masks, and why the Pen Tool is both your best friend and that one friend who insists on being “precise.”
What Does “Cut Out Part of an Image” Mean in Illustrator?
Before jumping into the steps, let’s clear up a common misunderstanding. In Illustrator, cutting out an image can mean one of three things:
1. Hiding part of an image with a clipping mask
This is the most flexible method. A clipping mask uses a vector shape to decide which part of an image stays visible. Everything outside the shape is hidden, not deleted. This is ideal for layout work, posters, thumbnails, product mockups, social media graphics, and any project where you may want to adjust the crop later.
2. Cropping a raster image
The Crop Image option trims the placed image itself. It is fast and useful for rectangular crops, but it is less flexible than a clipping mask. If the image is linked, Illustrator may embed it when cropping. That matters because embedded images can increase your file size.
3. Cutting vector artwork into separate shapes
If you are working with vector shapes, not a regular photo, you can use tools like Pathfinder, Shape Builder, compound paths, and scissors. These tools can actually divide or remove vector areas. For a photo, though, Pathfinder will not magically carve out pixels like a cookie cutter. Illustrator is talented, but it is not a pastry chef.
Best Method: Use a Clipping Mask
For most people searching for how to select and cut out part of an image in Illustrator, the clipping mask method is the best place to start. It works with photos, scanned artwork, textures, patterns, screenshots, and imported images. It is also non-destructive, which means you can revise the crop, move the photo around inside the mask, or release the mask later if your design changes.
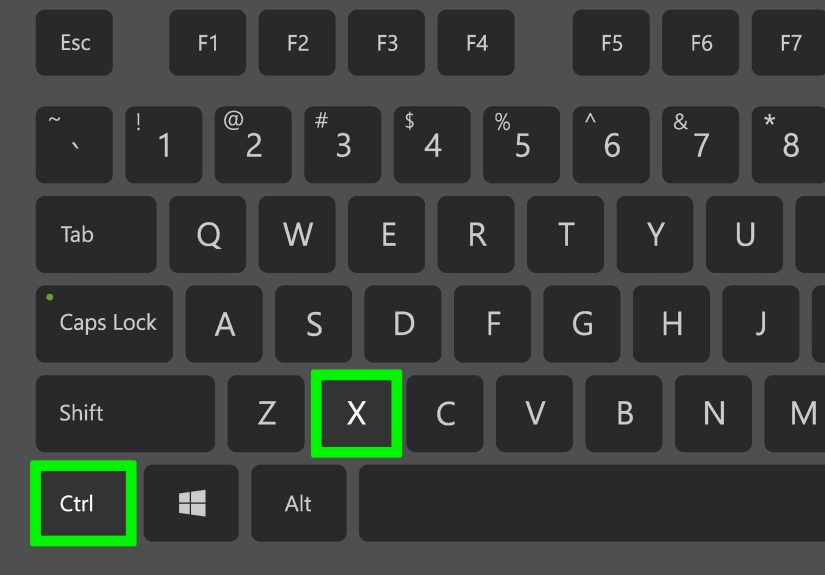
Here is the basic idea: place your image, draw a shape over the part you want to keep, put that shape on top, select both objects, and choose Object > Clipping Mask > Make. The shortcut is Ctrl + 7 on Windows or Command + 7 on Mac.
Step 1: Place and Select Your Image
Open Adobe Illustrator and create a new document, or open the file you are already working on. Then bring in your image by going to File > Place. Choose your image file, click Place, and click or drag on the artboard to position it.
Once the image is on your artboard, select it using the Selection Tool, also known as the black arrow tool. You can press V on your keyboard to activate it quickly. When selected, the image should show a bounding box around it.
Linked vs. embedded images
When you place an image in Illustrator, it may be linked instead of embedded. A linked image remains connected to the original file on your computer. An embedded image becomes part of the Illustrator file itself. Linking keeps file size smaller, while embedding makes the document more portable.
If you plan to use a clipping mask, either linked or embedded images can work. If you plan to use Illustrator’s Crop Image feature, be aware that linked images may become embedded during the crop process. That is not bad, but it is something to know before your file size starts eating snacks after midnight.
Resize before cutting
Use the corner handles to scale the image. Hold Shift while resizing if your version of Illustrator requires it to preserve proportions. Modern Illustrator versions usually keep proportions by default, but checking your image visually is always wise. A stretched portrait or squished product photo is the graphic design equivalent of wearing shoes on the wrong feet: technically possible, but emotionally upsetting.
Step 2: Draw the Shape Around the Area You Want to Keep
Now decide which part of the image should remain visible. This shape will become your clipping path. In Illustrator, the clipping path is the object that controls the visible area of the image.
You can use several tools depending on the shape you need:
Use the Rectangle Tool for clean crops
Select the Rectangle Tool by pressing M. Draw a rectangle over the area you want to keep. This is perfect for banners, thumbnails, website graphics, and simple layout crops.
Use the Ellipse Tool for circles and ovals
Select the Ellipse Tool from the toolbar. Hold Shift while dragging to create a perfect circle. This is useful for profile images, badge designs, circular product highlights, and modern editorial layouts.
Use the Pen Tool for custom cutouts
For irregular objects, choose the Pen Tool by pressing P. Click around the subject to create anchor points. For curved edges, click and drag to create handles. Continue around the subject until your path closes.
The Pen Tool is the best option for selecting a specific object, such as a person, shoe, plant, coffee mug, or anything with a unique outline. It takes patience, but it gives you the most control. If your first path looks like it was drawn during an earthquake, do not panic. Use the Direct Selection Tool by pressing A to adjust anchor points and handles.
Make sure the shape is on top
This is the rule that saves everyone from confusion: the clipping shape must be above the image. If it is behind the image, Illustrator will not use it correctly as the mask. To move the shape to the front, select it and go to Object > Arrange > Bring to Front. The shortcut is Shift + Ctrl + ] on Windows or Shift + Command + ] on Mac.
Step 3: Select Both Objects and Make the Clipping Mask
Once your cutting shape is in position and sitting on top of the image, select both the image and the shape. You can drag around both objects with the Selection Tool, or click one object, hold Shift, and click the other.
Then create the clipping mask using one of these methods:
- Go to Object > Clipping Mask > Make.
- Right-click the selected objects and choose Make Clipping Mask.
- Use the shortcut Ctrl + 7 on Windows or Command + 7 on Mac.
Illustrator will instantly hide everything outside the shape. Congratulations. You have cut out part of an image without harming the original pixels. Somewhere, a non-destructive editing angel just earned its wings.
What actually happened?
The shape did not delete the rest of the photo. It simply acts like a window. The part inside the window is visible; the part outside is hidden. This makes clipping masks excellent for professional workflows because you can still edit the crop later.
How to edit the masked image
To adjust the image inside the mask, double-click the clipped object to enter Isolation Mode. You can then move, scale, or rotate the image without moving the mask itself. Double-click outside the artwork or press Esc to exit Isolation Mode.
You can also open the Layers panel to select the image or clipping path separately. This is helpful when the masked object is part of a complex layout with many layers, groups, and mysterious rectangles named “Layer 47 copy final FINAL.”
Step 4: Refine, Export, or Release the Cutout
After making the clipping mask, refine the result. Zoom in and check the edges. If you used the Pen Tool, look for awkward bumps, sharp corners, or areas where the subject is accidentally clipped. Use the Direct Selection Tool to adjust anchor points on the clipping path.
To change the visible area
Select the clipping path and edit its shape. You can move anchor points, adjust curves, or resize the mask. The image will remain hidden outside the updated shape.
To reposition the image inside the mask
Double-click the masked object, select the image inside, and move it until the crop looks right. This is especially useful for portrait crops, product closeups, and social media graphics where alignment matters.
To release the clipping mask
If you want to undo the mask later, select the clipped object and go to Object > Clipping Mask > Release. The hidden image area will return, and the clipping path will become a regular shape again.
To export the final image
When you are happy with the cutout, export your design by going to File > Export > Export As or File > Export > Export for Screens. Choose PNG if you need transparency, JPG for standard web images, SVG for scalable vector-based layouts, or PDF for print and sharing.
Alternative Ways to Cut Out Part of an Image in Illustrator
The clipping mask method is usually best, but it is not the only option. Different projects need different tools, and Illustrator has a few more tricks tucked into its very stylish digital jacket.
Use Crop Image for simple rectangular crops
If you only need to crop a rectangular section of a photo, select the image and click Crop Image in the Properties or Control panel. Adjust the crop handles, then apply the crop. This is quick, direct, and easy. However, it is not as flexible as a clipping mask, and it is mainly designed for rectangular cropping.
Use an opacity mask for soft fades
An opacity mask is useful when you want an image to fade gradually instead of ending at a hard edge. For example, you might fade a photo into a background color or blend a texture softly into a poster. Opacity masks are more advanced than clipping masks, but they are powerful when you need smooth transparency.
Use Image Trace for vector cutouts
If you want to convert a raster image into editable vector shapes, select the image and use Image Trace. After tracing, click Expand to turn the result into editable paths. Then you can use vector tools to select, delete, recolor, and reshape areas.
This method works best for logos, icons, sketches, black-and-white artwork, and high-contrast images. It is not ideal for detailed photography unless you want a stylized poster effect. A full-color photo traced into vectors can become heavy, complicated, and about as relaxing as untangling holiday lights.
Use Pathfinder for vector shapes
Pathfinder is excellent when you are cutting vector objects, not photos. You can use options like Minus Front, Intersect, Divide, and Crop to combine or remove vector areas. If your artwork is already made of paths, Pathfinder can create clean, permanent cuts.
For placed photos, however, Pathfinder will not remove background pixels the way Photoshop does. Use a clipping mask instead unless the image has been traced and expanded into vector shapes.
Common Mistakes and How to Fix Them
The clipping mask is not working
Check the stacking order. The shape must be on top of the image. Select the shape and choose Object > Arrange > Bring to Front, then try making the clipping mask again.
The wrong part of the image disappeared
Your mask shape may be positioned incorrectly, or you may have selected the wrong object. Release the mask, reposition the shape, and make the mask again.
The image moved but the mask did not
You may be editing the image inside the clipping group. That can be useful, but if you want to move the whole cutout, select the entire clipping group with the Selection Tool.
The edges look rough
If you used the Pen Tool, refine the anchor points with the Direct Selection Tool. Use fewer points for smoother curves. Too many anchor points can create lumpy edges, and nobody wants a lumpy product cutout unless the product is literally a potato.
The file became too large
Large embedded images can increase Illustrator file size. Resize images before placing them, avoid unnecessary high-resolution files, and consider linking images when appropriate. For final web graphics, export optimized versions instead of uploading huge design files.
When Should You Use Illustrator Instead of Photoshop?
Use Illustrator when your cutout is part of a vector-based layout, such as a logo presentation, packaging design, poster, infographic, brochure, icon system, or typography treatment. Illustrator is excellent for combining images with shapes, text, paths, and scalable artwork.
Use Photoshop when you need detailed pixel-level selection, hair masking, background removal, skin retouching, object cleanup, or advanced photo compositing. Photoshop is better for complex photo edits, while Illustrator is better for layout, vector control, and clean design systems.
In many professional workflows, designers use both. They remove or clean up a background in Photoshop, save the image as a PNG or PSD, then place it into Illustrator for layout and typography. That combination is like peanut butter and jelly, except with more anchor points and fewer crumbs.
Practical Example: Cut a Portrait Into a Circle
Let’s say you are designing a team profile card and want a headshot inside a perfect circle. Place the photo in Illustrator, select the Ellipse Tool, hold Shift, and draw a circle over the face. Move the circle until the face is centered. Bring the circle to the front if needed. Select both the circle and the photo, then press Command + 7 on Mac or Ctrl + 7 on Windows.
If the face is not centered after masking, double-click the circle image group and move the photo inside the mask. You can scale the photo slightly larger or smaller until it feels balanced. Then exit Isolation Mode and continue designing the card.
Practical Example: Cut Out a Product Shape
Suppose you have a photo of a coffee bag and want to isolate the bag shape for a promotional flyer. Place the photo, select the Pen Tool, and carefully draw around the outer edge of the bag. Close the path. Put the path on top of the image. Select both objects and make a clipping mask.
This method hides the background, but remember that it does not truly delete it from the original photo. For clean commercial product images, you may want to remove the background in Photoshop first, especially if the product has shadows, transparent packaging, hair-like fibers, or soft edges. Then place the cleaned image into Illustrator for final layout.
SEO-Friendly Workflow Summary
If you want the simplest answer to how to select and cut out part of an image in Illustrator, use this workflow:
- Place the image using File > Place and select it with the Selection Tool.
- Draw a shape over the part you want to keep using the Rectangle, Ellipse, or Pen Tool.
- Put the shape on top, select both the image and shape, and choose Object > Clipping Mask > Make.
- Refine the result by editing the mask, moving the image inside it, or exporting the finished design.
That is the core process. Once you master it, you can create image-filled text, custom photo frames, product cutouts, social media graphics, editorial layouts, website banners, and polished marketing materials without flattening or permanently damaging your original image.
Extra Experience Notes: What I Have Learned From Cutting Images in Illustrator
The biggest lesson from working with image cutouts in Illustrator is that clean results start before the mask is made. Beginners often rush straight to the Pen Tool, click wildly around the subject, and then wonder why the final edge looks nervous. A better approach is to pause and study the image first. Ask yourself: Is the subject simple or complex? Are the edges sharp or soft? Is the background high contrast or busy? Is this cutout for a tiny web graphic or a large print design? These questions determine whether Illustrator is the right tool and how precise your mask needs to be.
For simple design crops, I almost always choose clipping masks. They are fast, reversible, and easy to adjust when a client says, “Can we move the image just a little to the left?” Of course, “a little” may mean three pixels or a full redesign, but at least the clipping mask keeps the file flexible. I also like using clipping masks for image-filled text, especially in bold headlines. The trick is to convert text to outlines only when necessary. If you can keep text editable longer, do it. Future you will appreciate not having to recreate a headline because someone changed “Sale” to “Spring Sale.”
For product images, I pay close attention to the edge quality. A hard-edged box, book, bottle, or device can usually be masked nicely with the Pen Tool. But objects with hair, smoke, glass, fur, leaves, fabric threads, or transparent shadows are much harder in Illustrator. In those cases, I prefer using Photoshop for the detailed selection, then bringing the cleaned image into Illustrator. That workflow saves time and produces a more professional result.
Another practical habit is naming layers. It may sound boring, but when a file contains multiple masks, images, text blocks, icons, and background shapes, the Layers panel can become a jungle. Naming a clipping group “Hero image mask” or “Product cutout” can prevent confusion later. It also makes collaboration easier when another designer opens the file and does not have to decode your personal system of “Group 12” and “Rectangle 12 copy 3.”
I also recommend saving an editable AI file before exporting final assets. Exported PNGs and JPGs are great for websites, social posts, and presentations, but they do not preserve the same editing flexibility. Keep the original Illustrator file with live masks intact. That way, if you need a square version, vertical version, or slightly different crop next week, you can adjust the mask instead of rebuilding the entire design from scratch.
Finally, remember that cutting out part of an image is not only a technical task; it is a design decision. The crop controls focus, mood, balance, and storytelling. A tight crop can make a portrait feel bold and personal. A wide crop can give a layout breathing room. A circular mask can feel friendly and modern, while a sharp geometric cutout can feel energetic and editorial. The tool matters, but the eye matters more. Illustrator gives you the scissors; you still decide where to cut.
Conclusion
Learning how to select and cut out part of an image in Illustrator is mostly about choosing the right method for the job. For most projects, a clipping mask is the safest and most flexible option because it hides unwanted image areas without deleting them. Use Crop Image for quick rectangular trims, Image Trace when you need editable vector paths, Pathfinder for vector shapes, and Photoshop when pixel-level background removal is required.
Once you understand the difference between hiding, cropping, and permanently cutting artwork, Illustrator becomes much easier to control. Start with a clean image, draw a smart shape, keep your mask on top, use the shortcut, and refine carefully. Do that, and your cutouts will look polished instead of panicked.
SEO Tags
Note: This article is based on current Adobe Illustrator workflows and practical design usage. Menu names and interface locations may vary slightly depending on your Illustrator version and workspace settings.