
Table of Contents >> Show >> Hide
- The Importance of Softened Butter
- Methods for Softening Butter: Which One Should You Choose?
- How to Tell When Butter Is Softened Enough
- What Happens When You Use Butter That’s Too Cold or Too Soft?
- Common Baking Mistakes to Avoid
- Experience Matters: Tips from Professional Bakers
- Conclusion: The Secret to Professional-Level Baked Goods
- Additional Experiences: A Baker's Guide to Perfect Butter
When it comes to baking, achieving that perfectly smooth texture and tender crumb in your cakes, cookies, and pastries often depends on a seemingly small but crucial ingredient: butter. But here’s the catchusing butter straight from the fridge can ruin your batter’s texture, leading to dense, flat, or uneven results. So, if you’re looking to create baked goods that look and taste as though they came from a professional bakery, learning how to soften butter the right way is key. Let’s dive into the best techniques for softening butter, ensuring your bakes come out flawless every time!
The Importance of Softened Butter
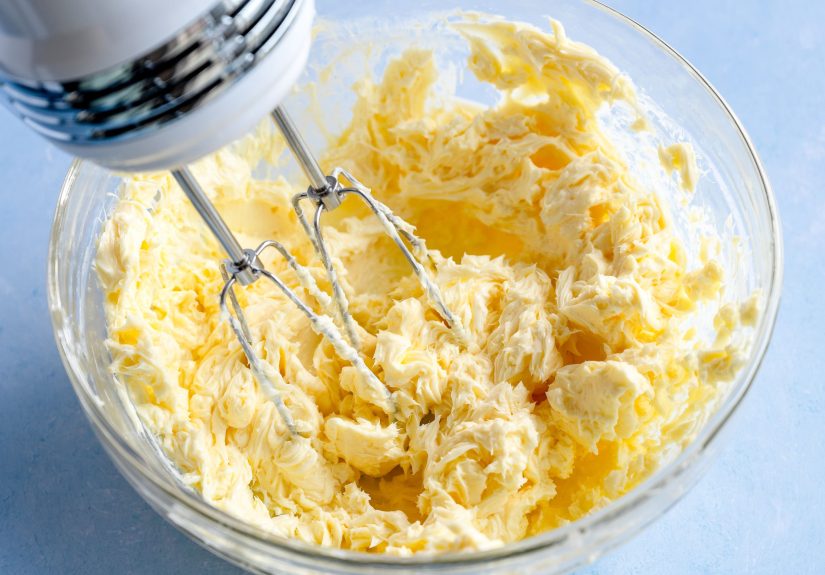
First, let’s address why softened butter is so important in baking. Softened butter (not melted or cold) allows for the best incorporation of air into your batter or dough, creating a light, airy structure that produces soft, delicate bakes. When you mix softened butter with sugar, the two ingredients form tiny air pockets, which expand during baking, resulting in a lighter texture. This is why the right temperature and technique for softening butter can make a world of difference in the final outcome of your baked goods.
Methods for Softening Butter: Which One Should You Choose?
1. Let It Sit at Room Temperature
The simplest and most traditional method is to leave your butter at room temperature. This is an easy option, as you just need to pull your butter out of the fridge and let it sit for about 30 to 60 minutes. The exact time depends on the ambient temperature in your kitchen, but the goal is to let the butter become soft enough to easily press your finger into it without leaving a greasy residue. This method is great if you’re planning ahead and can give your butter enough time to soften naturally.
2. Microwave Method (Quick and Easy)
If you’re in a hurry, the microwave is your best friend. However, it’s crucial to do this carefully to avoid melting your butter. Cut your stick of butter into smaller pieces to ensure even softening. Place it on a microwave-safe plate, and heat on the lowest setting (around 10-20% power) for 10-second intervals, checking after each interval. Be patientthis method works best when done gradually. You want the butter soft but not liquid, so stop as soon as you notice it’s soft enough to press with a finger.
3. Grating Butter for Instant Softening
If you forgot to take your butter out early, don’t panic! A quick hack is to grate your cold butter using a box grater. This method increases the surface area, allowing it to soften much faster. Once grated, the butter should be soft enough to use in just a few minutes. This technique works particularly well for baking cookies, where you’ll be creaming butter and sugar together.
4. Hot Water Bowl Method
Another quick fix involves using the heat from a bowl of hot water. Place a heatproof bowl filled with hot (but not boiling) water over your counter. Let it sit for about 3-5 minutes to warm up. Then, pour out the water and place your stick of butter in the warm bowl, covered by a cloth. The residual heat will gradually soften the butter without it becoming too warm. This is an excellent method for when you have just a few minutes to spare but want to avoid the microwave.
How to Tell When Butter Is Softened Enough
There’s a fine line between softened butter and melted butter. You want your butter to be soft but still solid. It should yield to slight pressure but retain its shape. If the butter has started to melt or if it’s too soft, you may run into issues with the texture of your batter, which could lead to your baked goods being too greasy or spreading out too much in the oven.
What Happens When You Use Butter That’s Too Cold or Too Soft?
Using cold butter straight from the fridge in recipes that require softened butter will lead to poor results. Cold butter doesn’t incorporate air into the batter as effectively, which will result in dense, tough baked goods. On the flip side, overly soft or melted butter can cause your batter to become too runny, which will affect how your cookies or cakes bake. The butter should be soft, but not so soft that it becomes liquid.
Common Baking Mistakes to Avoid
Now that you know the right ways to soften butter, let’s go over some common mistakes to avoid in your baking journey:
- Over-softening Butter: If your butter becomes too soft or melted, you might end up with greasy, dense baked goods. Always check to ensure the butter is soft, but not liquid.
- Microwaving Butter Too Quickly: Don’t microwave your butter on high heat, as it could melt unevenly. Low and slow is key to ensuring the butter is softened without becoming liquid.
- Using Cold Butter in Creaming: When baking cookies or cakes that require creaming butter and sugar, using cold butter will make the mixing process more difficult and yield poor results.
Experience Matters: Tips from Professional Bakers
According to professional bakers, one of the best tips for achieving a flawless texture in your baked goods is paying attention to the softness of your butter. In fact, they recommend using room temperature butter that’s been softened for at least 30 minutes before beginning to bake. Bakers also suggest using unsalted butter whenever possible, as it gives you more control over the flavor of your dough or batter. In addition, some pastry chefs like to mix softened butter with other fats, such as vegetable oil or shortening, to get the perfect balance of tenderness and structure.
What Other Techniques Can Enhance the Texture of Your Bakes?
In addition to softening butter properly, many other factors influence the texture of your baked goods. For instance, the type of flour you use can make a huge difference in the final product. Cake flour, with its lower protein content, will create a softer texture, while all-purpose flour provides more structure. Additionally, the way you handle your dough or batterwhether you overmix or undermine the ingredientscan also determine whether your bakes turn out tender or tough.
Conclusion: The Secret to Professional-Level Baked Goods
Softening butter properly is an essential step in creating professional-looking and delicious baked goods. Whether you prefer the classic room temperature method or need a quicker fix with the microwave, ensuring that your butter is the right consistency will set your baking up for success. By understanding the importance of softened butter and learning how to achieve it perfectly every time, you’ll be able to bake like a pro and wow your friends, family, and customers with your creations.
sapo: Achieving perfectly softened butter is crucial for smooth, tender baked goods. Whether you’re using room temperature butter, the microwave, or a grating technique, knowing the best method for softening butter will ensure your cakes, cookies, and pastries come out perfectly every time. Follow these expert tips for bakery-quality results!
Additional Experiences: A Baker’s Guide to Perfect Butter
When I first started baking, I struggled to get the perfect texture for my cookies and cakes. I often ended up with dough that was too runny or batter that refused to fluff up. After experimenting with several techniques, I found that the microwave method worked wonders when I was in a rush. However, I now prefer to take my time and let the butter soften naturally at room temperature. This gives me more control over the consistency of the dough and results in a much more uniform texture. I’ve also learned that if the butter is too soft, the dough tends to spread too much, so it’s a balancing act!
Another tip I’ve learned over the years is to measure butter carefully. Butter sticks are often marked with measurements, but the exact weight of a stick can vary slightly depending on where it was purchased. Using a kitchen scale to measure your butter ensures that you’re getting the right amount every time, which is essential for perfect results.
Lastly, I’ve found that experimenting with different fats, such as a mix of butter and oil, can elevate your baked goods to a whole new level of softness. This technique is especially useful for recipes that require a more moist texture, like cakes and quick breads. It’s all about finding that perfect balance between fats to get the best texture, flavor, and structure in your final product.


